Build a Call Overflow System with Twilio Studio and Serverless
Time to read:
March 31, 2021
Written by
Reviewed by

Photo via Canva One Design Use License Agreement
Right now telephony systems for healthcare provider offices are overloaded with calls due to vaccine appointment scheduling. As widespread rollout increases globally, it’s important for healthcare systems to anticipate this volume increase. In this article you will learn how to build a cloud-based interactive voice response (IVR) system with Twilio Studio and Twilio Serverless. This system will handle incoming calls so that no patient’s call will be lost; it will store the patient’s request in a database that can be used by a healthcare professional to review and follow up.
You might be wondering where exactly you would store the patient’s request. This will likely go in the patient’s Electronic Health Record (EHR). According to cms.gov, an EHR is an electronic version of a patient’s medical history, that is maintained by the provider over time, and may include all of the key administrative clinical data relevant to that persons care under a particular provider. Some examples of EHRs include Epic and Cerner, and they can be accessed in a variety of secure ways, like using middleware such as Redox Engine or ELLKAY.
For building this prototype, we will use Airtable (a cloud spreadsheet-like database) to simulate the EHR that you use to safely store patient data. If you’re not familiar with Airtable, you will learn how to set up a base step-by-step.
Please note that Airtable should not be used in production and is only meant to be used for this tutorial.
First you will set up the Twilio Studio flow to handle incoming calls. Then you will configure the Airtable base in Twilio Serverless. Finally, you will add node.js code that will take the data sent from Twilio Studio and write it to the Airtable base.
Prerequisites
- A Twilio account. If you sign up for a new account through this link, you’ll get an extra $10 in credit when you upgrade.
- A Twilio phone number. Instructions on how to get one are here.
- An Airtable account.
Set up the Twilio Studio IVR flow
First, you will build a system to handle incoming calls with Twilio Studio, a stateful visual workflow builder. Twilio Studio is hosted by Twilio, so you don’t need to set up your own server or deploy anything separately. It uses Twilio Programmable Voice to gather the data via keypress or voicemail.
To make a new Twilio Studio flow, log in to your Twilio account and go to the Studio Dashboard. Then, click the blue plus sign and give your flow the name “Call Overflow Handler.” Click next in the setup modal, scroll down and choose “Import from JSON” from the provided templates.
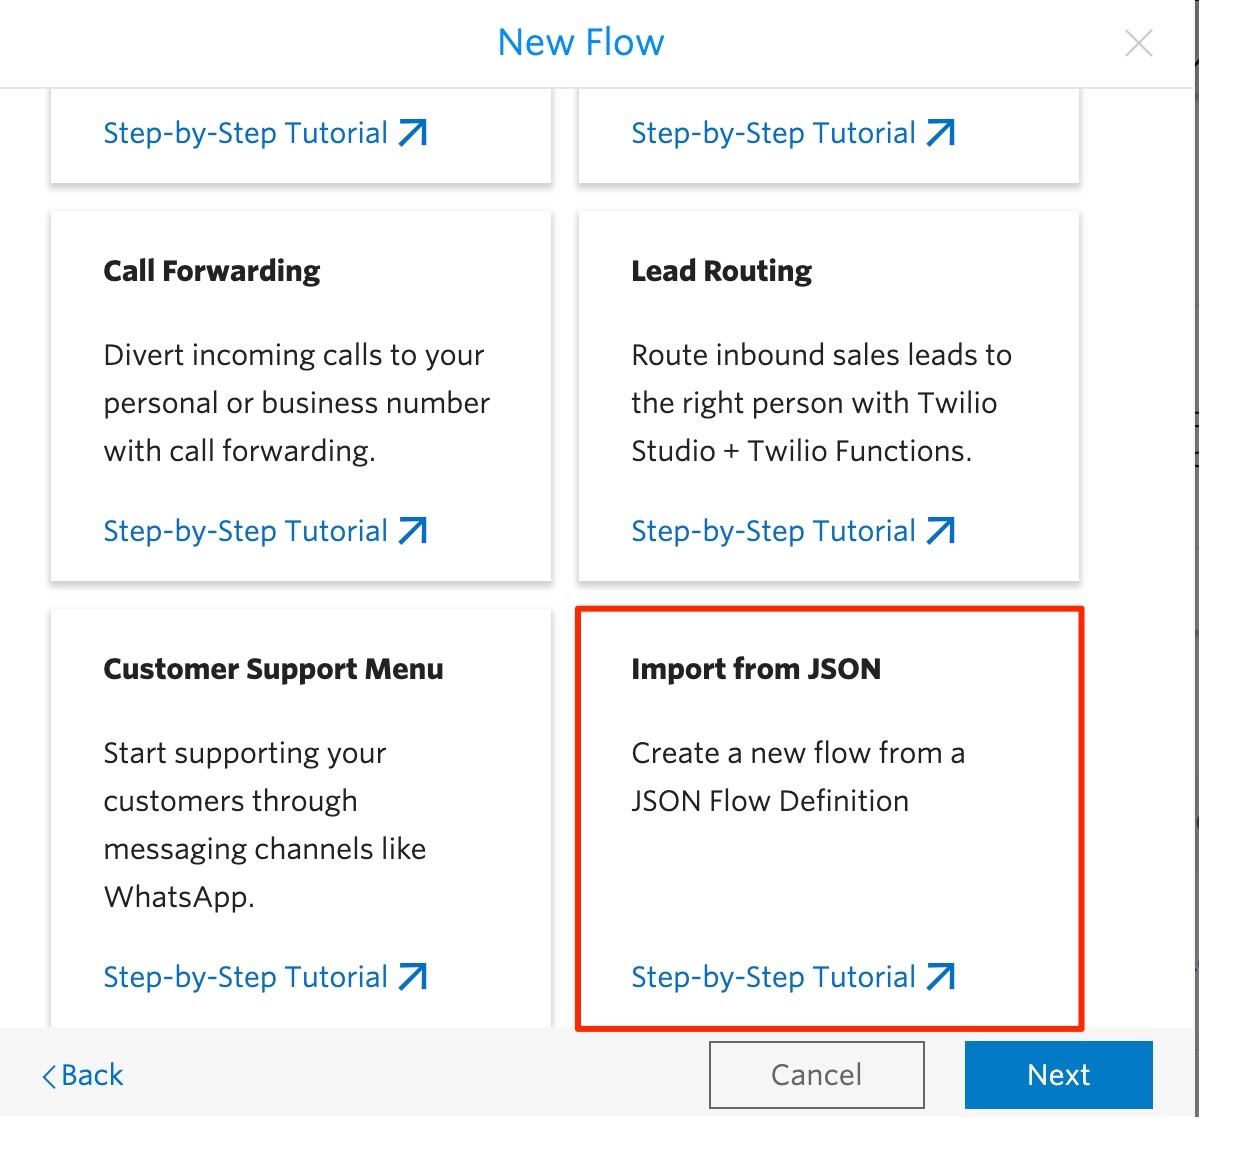
Open up this gist and copy the JSON to the clipboard. Back in the Twilio Studio setup window, delete the empty placeholder brackets, and paste in the JSON copied from the gist. Once you finish the setup, you should see a flowchart like the one below. Hit the Publish button at the top of the flow.
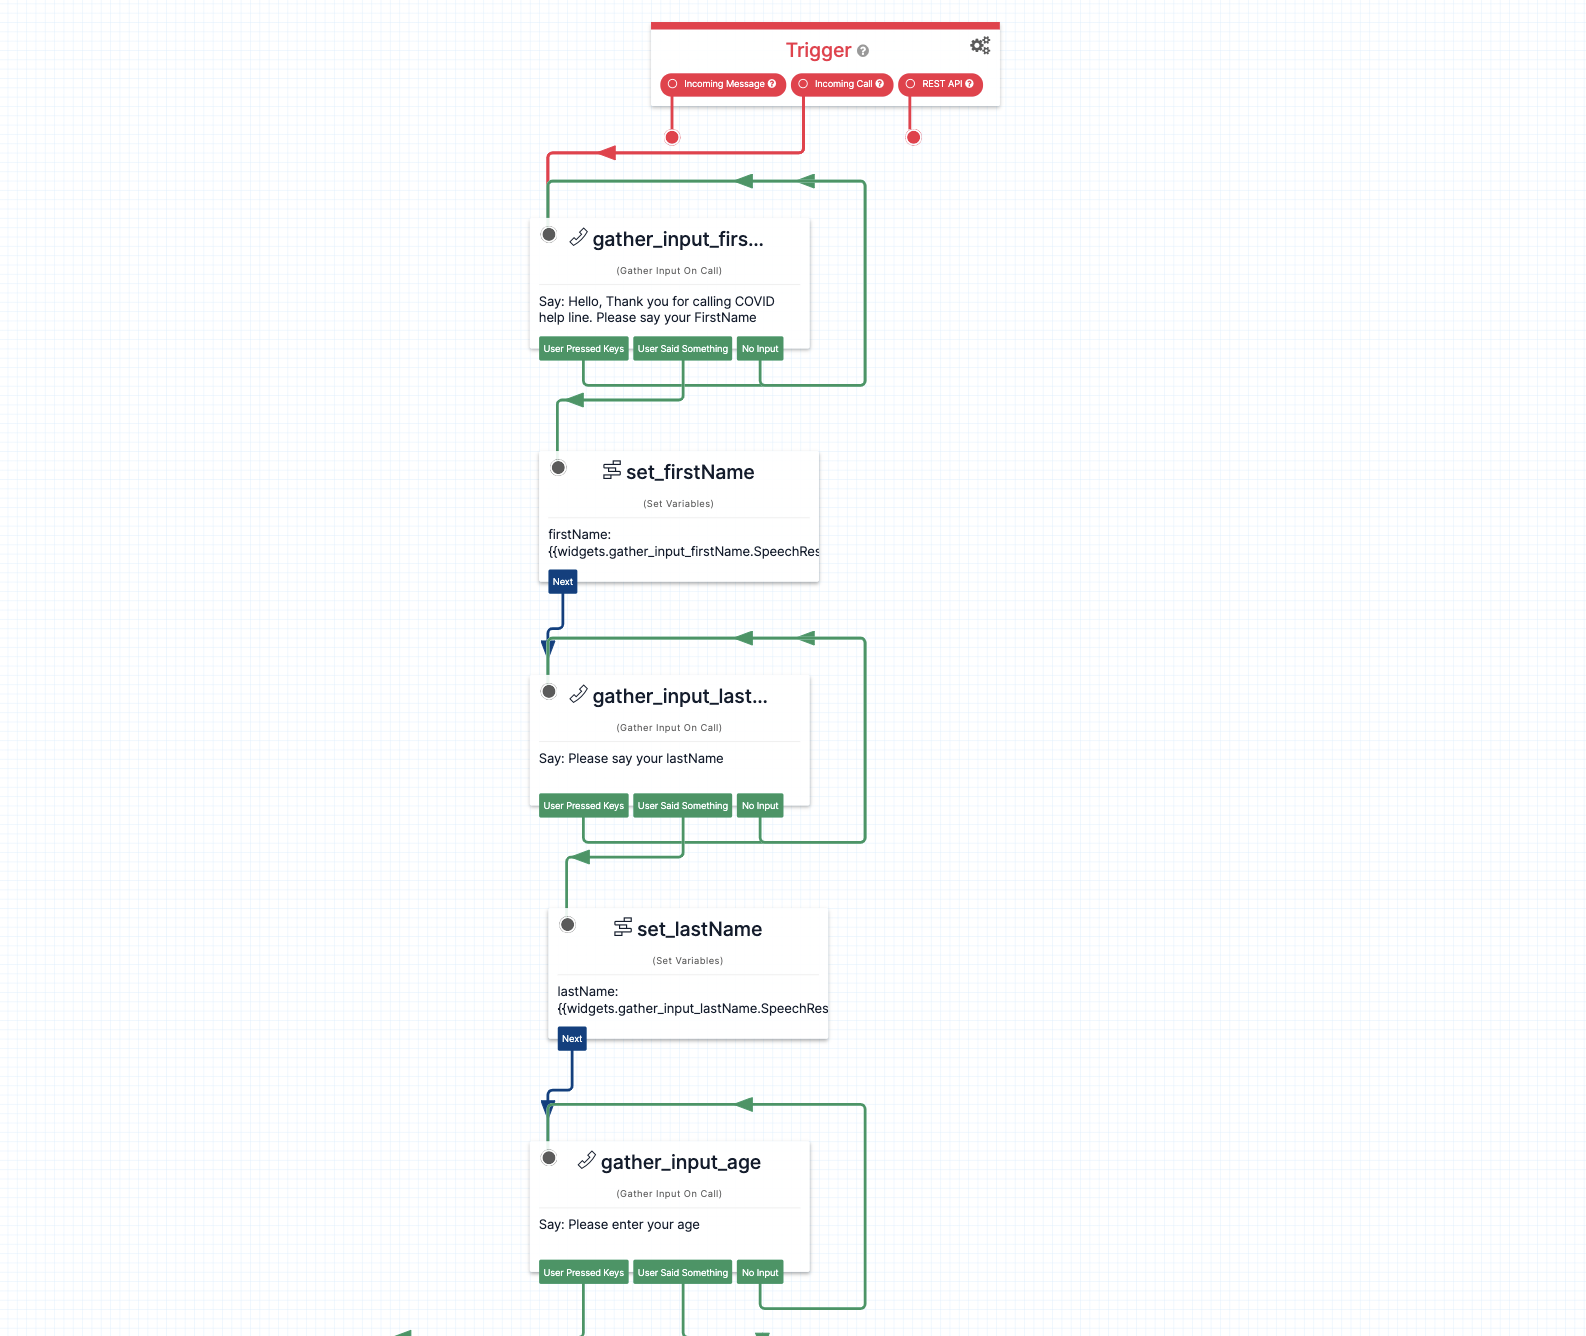
The system prompts the patient for the information much like an interactive survey. In the next step, you will connect this flow to a Twilio programmable phone number, so that when someone dials the number, this flow will kick off from the trigger widget. The flow will ask the caller for their first name, last name, age, and zip code. After each time they respond, the response is stored in the global context of the flow execution (you may read the Twilio Studio documentation for a better understanding of how variables are stored in Studio flows).
After questions like first name, the system will gather the response based on what a user says, using speech-to-text. For questions like age and zip code, the system will gather the response from keys pressed. After every question has been answered, the data will be sent to Airtable base (your mock EHR) via a Twilio Serverless function. If the data is sent successfully, the caller receives a goodbye message and the call ends. However, if there is an error in the process you may let them know something went wrong and transfer them to a live agent/scheduler.
Connect your phone number to the flow to test the IVR
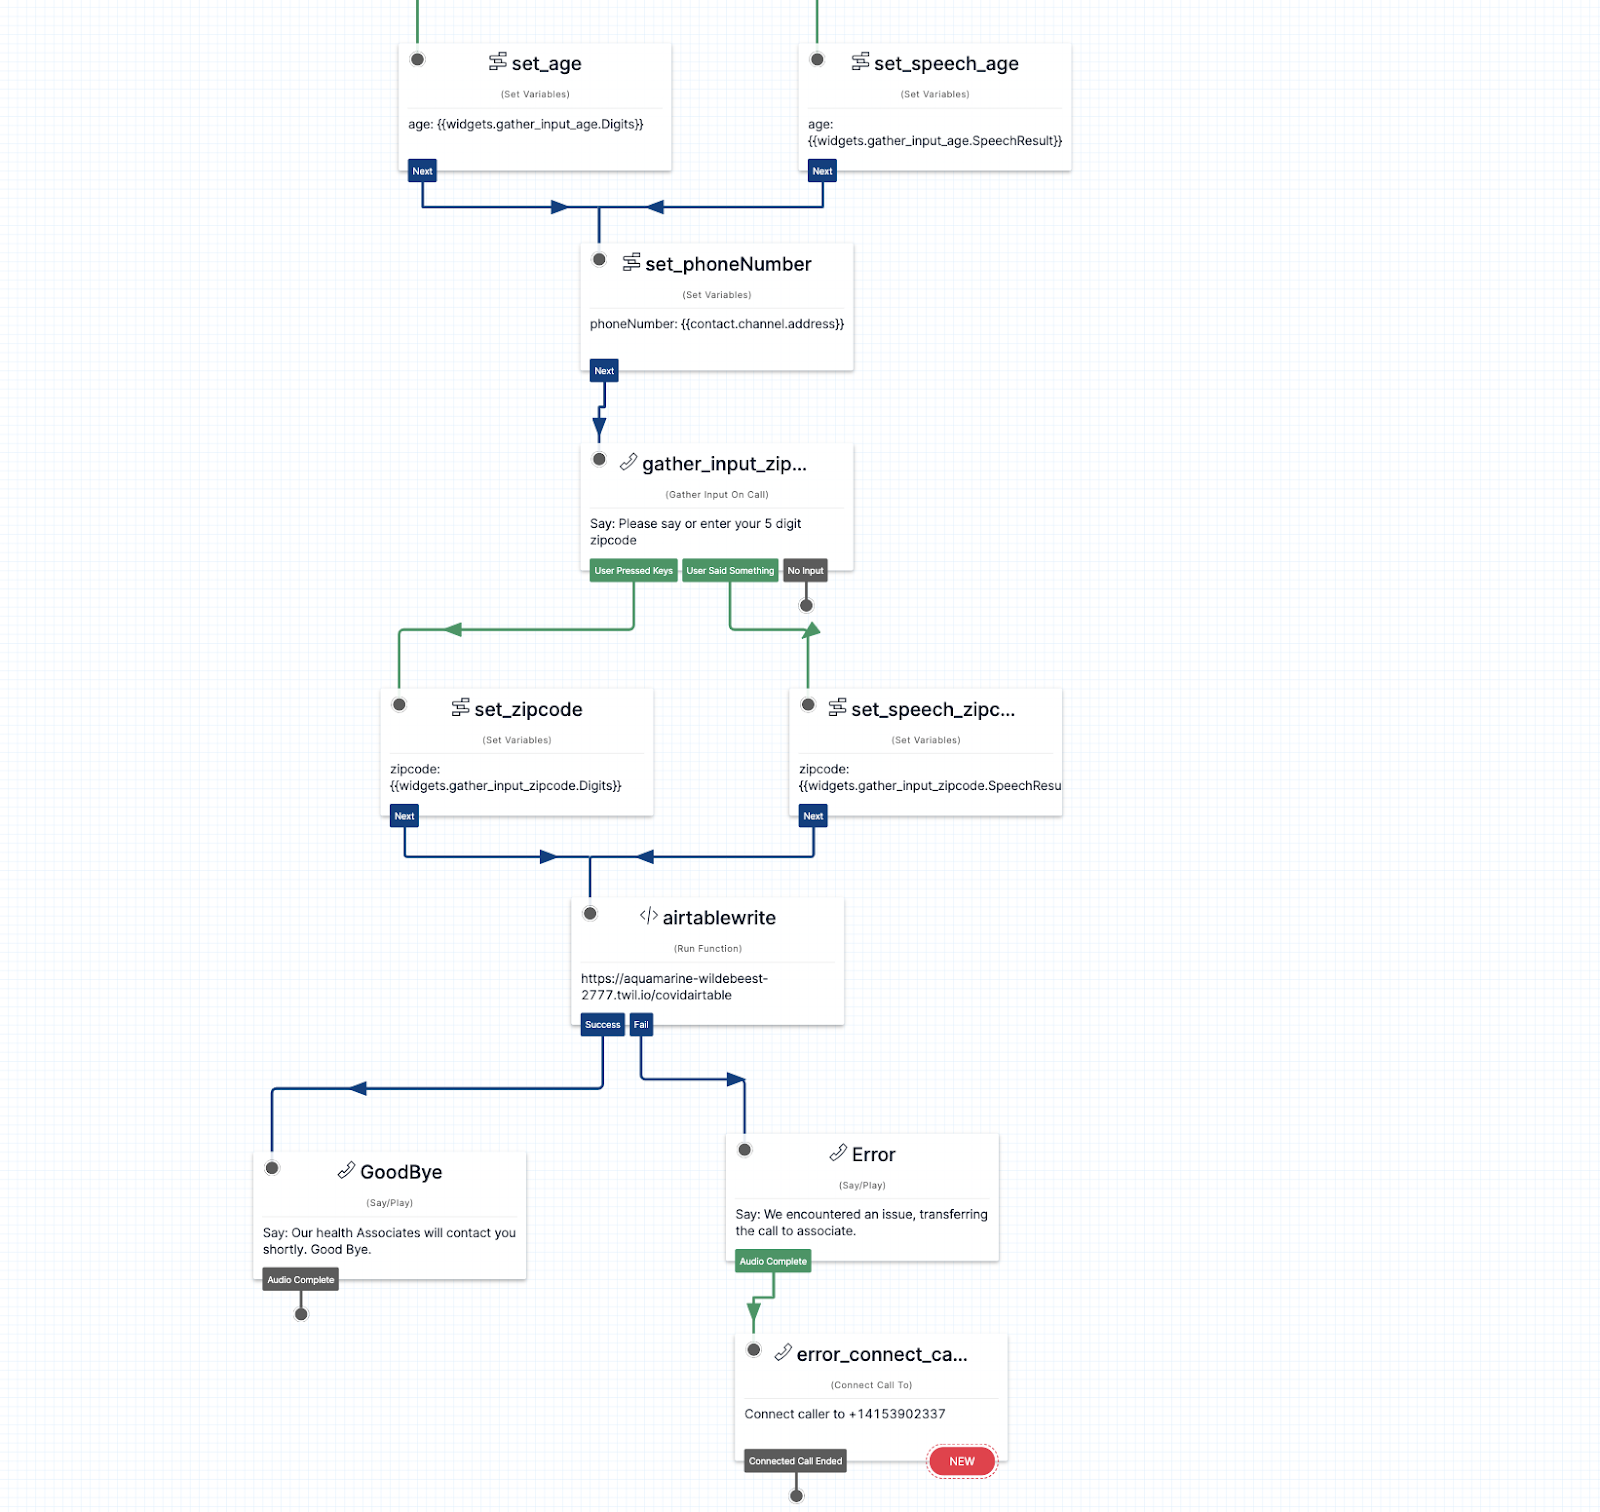
Next, navigate to the phone numbers console and click on the phone number you purchased for this prototype. Scroll down to “when a call comes in” and from the dropdowns choose “Studio Flow” and the flow that you just created. Hit the “Save” button.
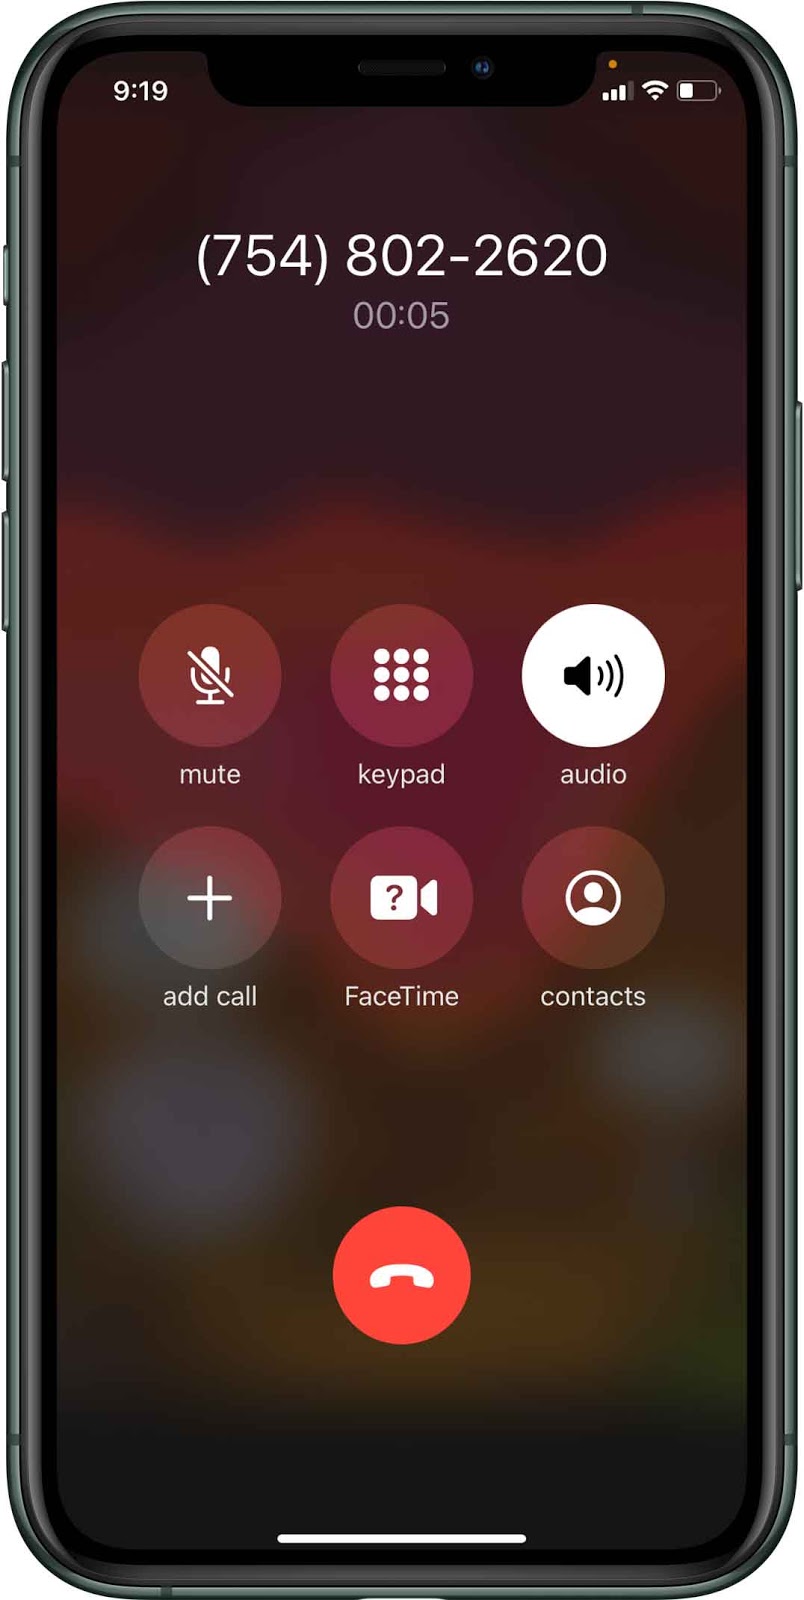
Now you may try calling in to your Twilio phone number and you will be able to go through the IVR.
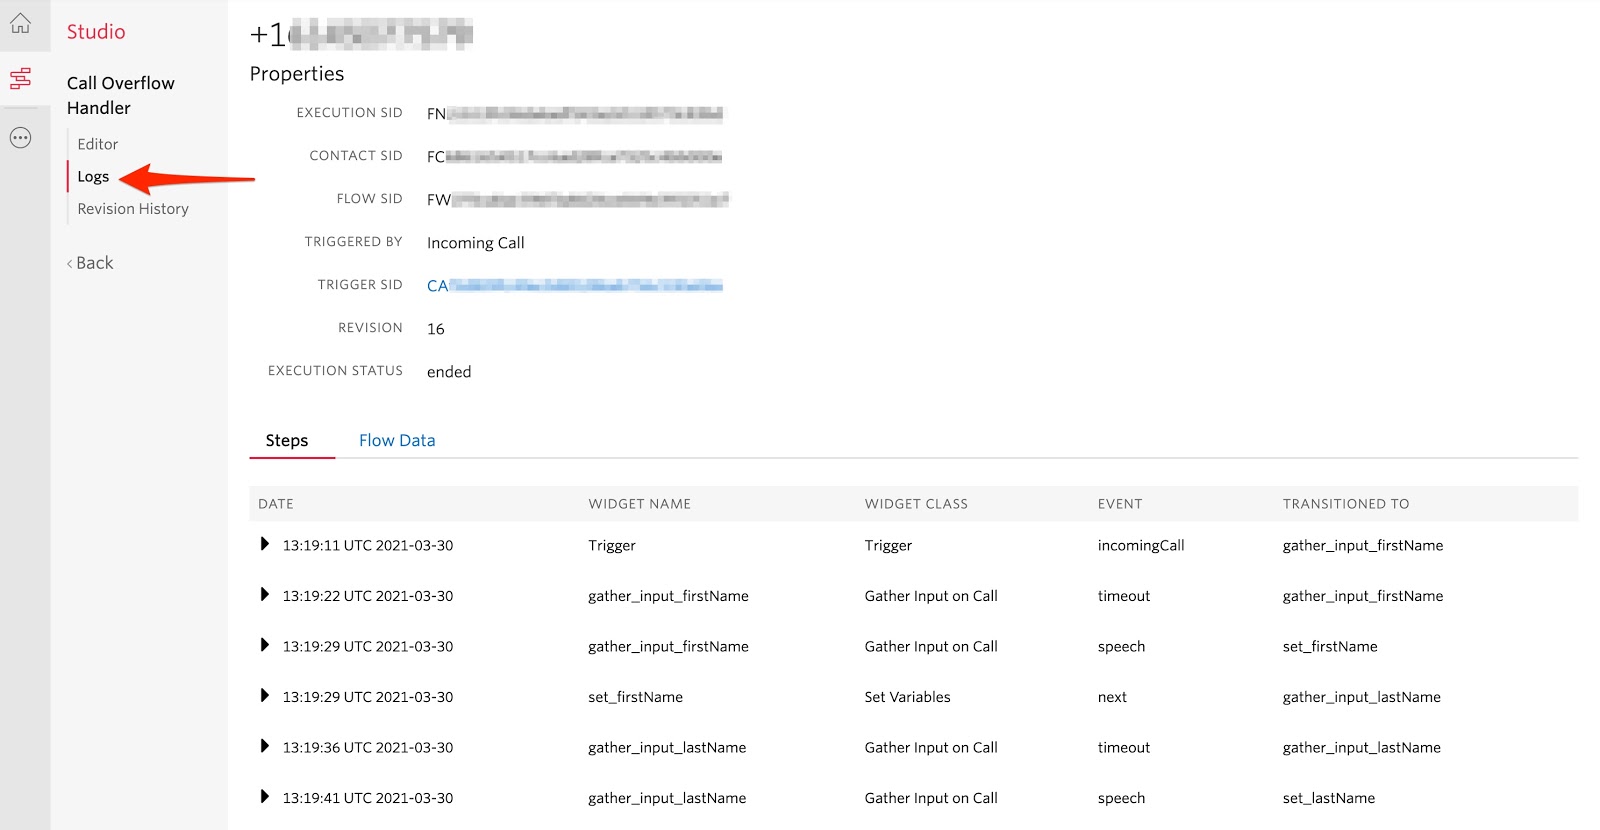
Because you have not yet set up the function or the Airtable, no data will be sent. However, if you would like to see that the variables are being stored properly in the Studio context, you can check the Studio logs. Navigate back to your Studio flow editor, and from the side menu, below “Editor” choose “Logs.”
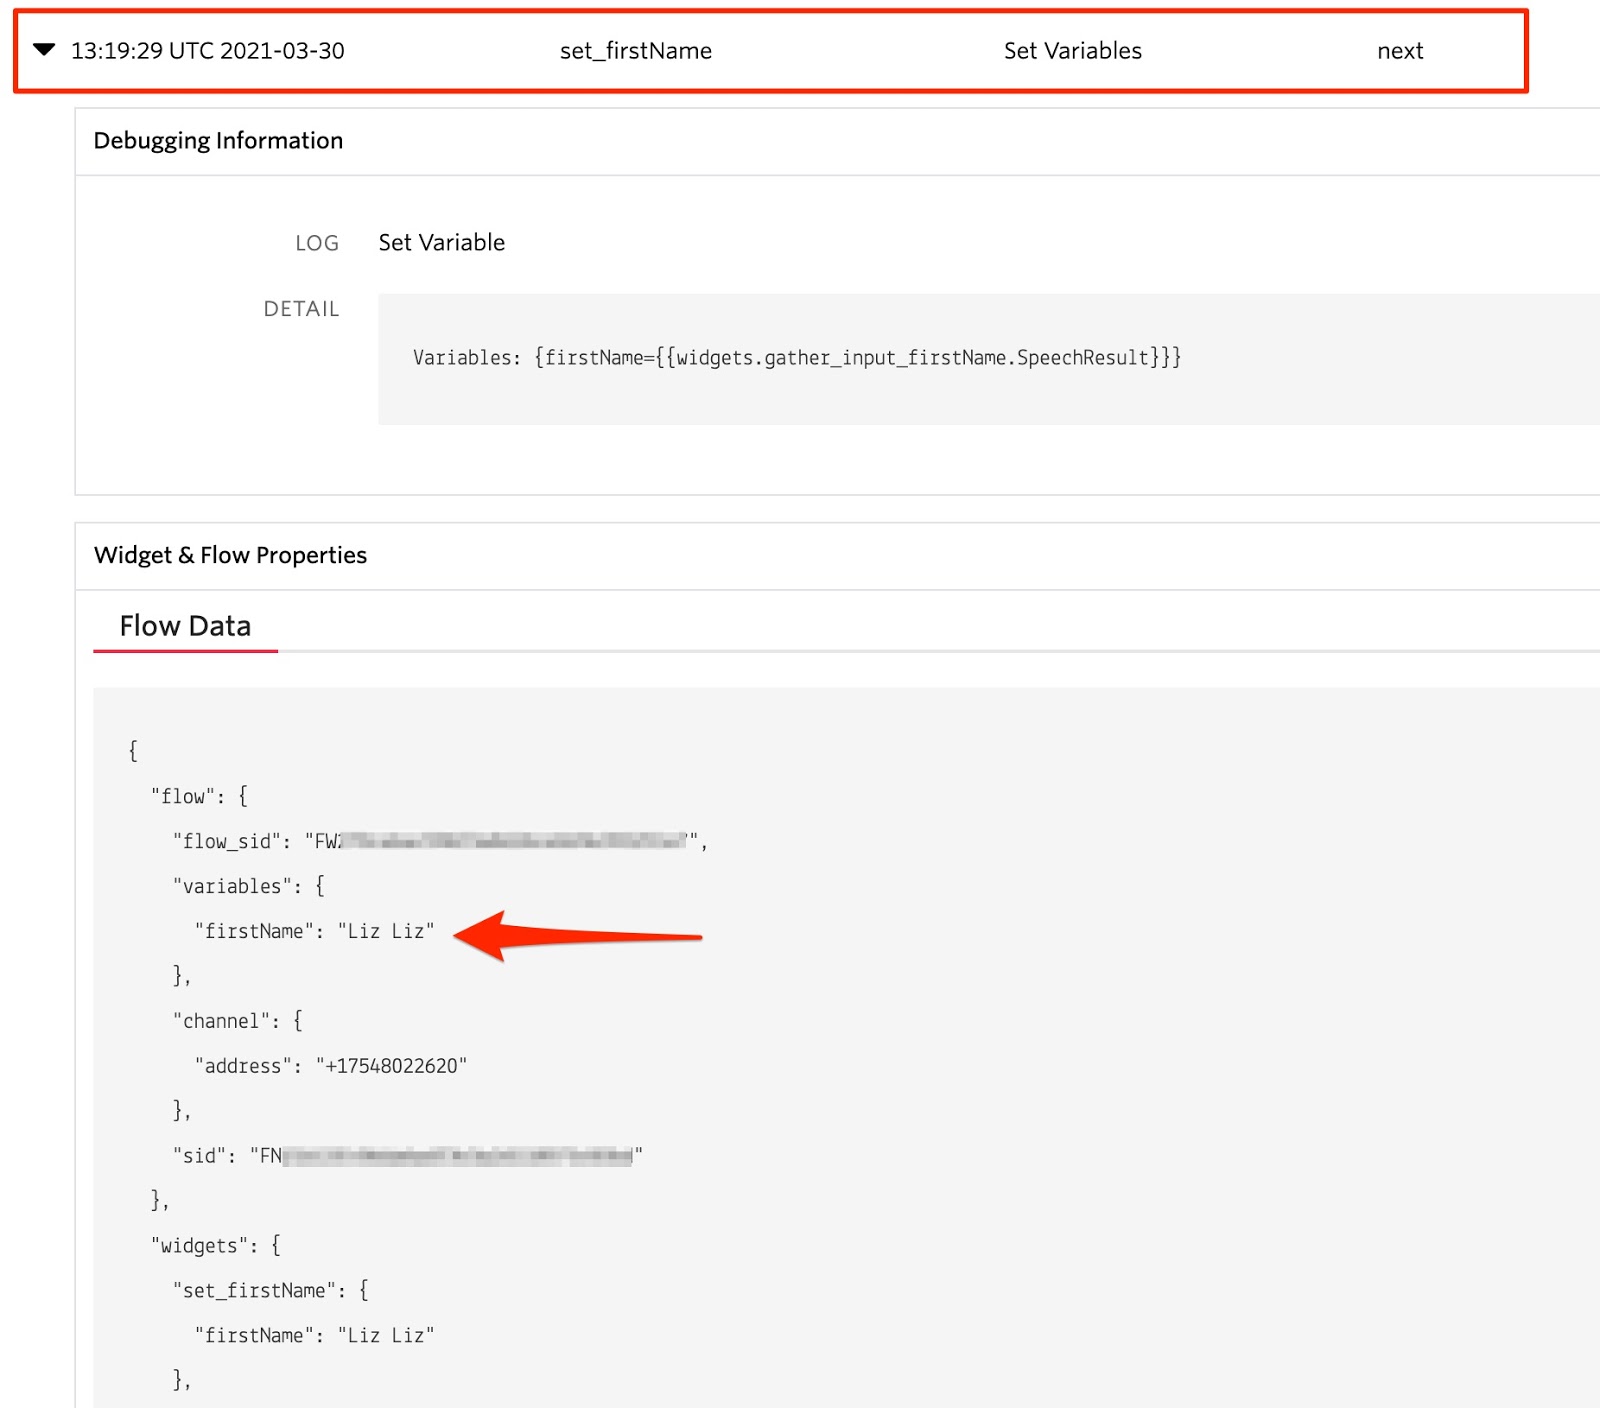
Then, you can click the disclosure triangle widget next to each timestamped action. If you click on one prepended with “set_” you should see the variable that is set. For example, if you click “set_firstName” you should see the name that you gave when you went through the flow.
The Twilio Studio logs can be very helpful for debugging, or better understanding your flow execution. And if your flow ever gets stuck, you can choose to terminate active executions to start over.
Next, you’ll set up the Airtable.
Set up Airtable
Copy this Airtable base by hitting “Copy Base” in the upper right hand corner. Name your base “Call Overflows” and your table “Patients”.
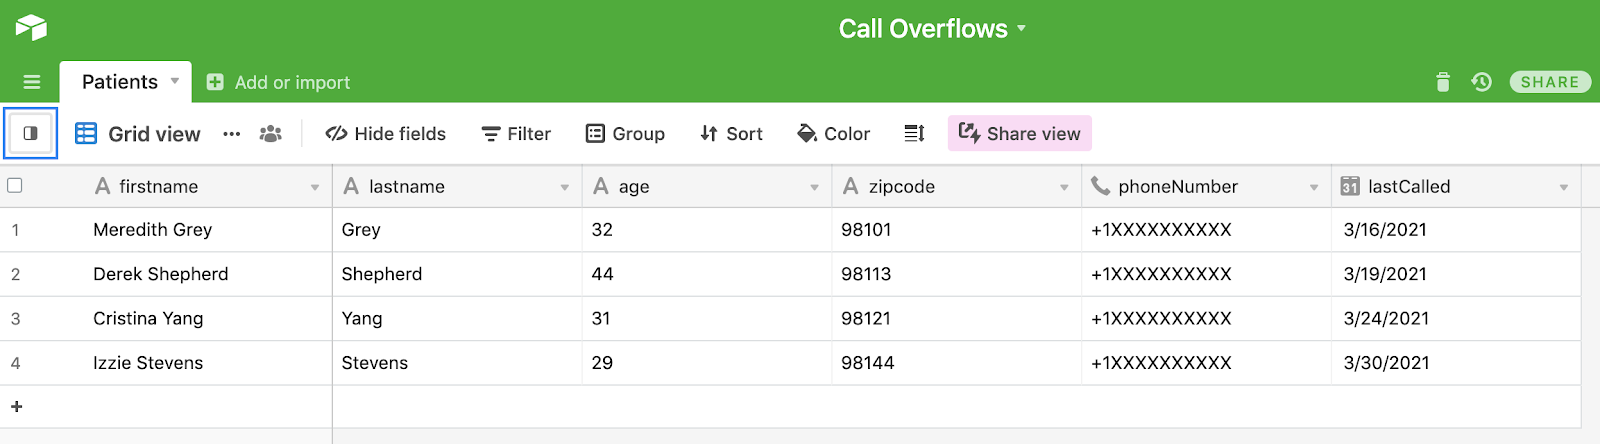
Here is a screenshot of sample data in the “appointments” table under “patients” base. The grid view of your base should look similar to this:
You need the Airtable API key and a base ID for the next step in building the prototype. Generate an Airtable API key on your account page. Get the base ID from the auto-generated API documentation when you click on the appointments base. You can pull it from the URL, or the introduction section; it’s prepended with “app”.
Add Serverless code to access Airtable appointment data
Next, you’ll write some code to read and update appointment data from Airtable using Twilio Functions. Open the Services dashboard and click “Create Service”. Give your new service the name “call-overflow”.
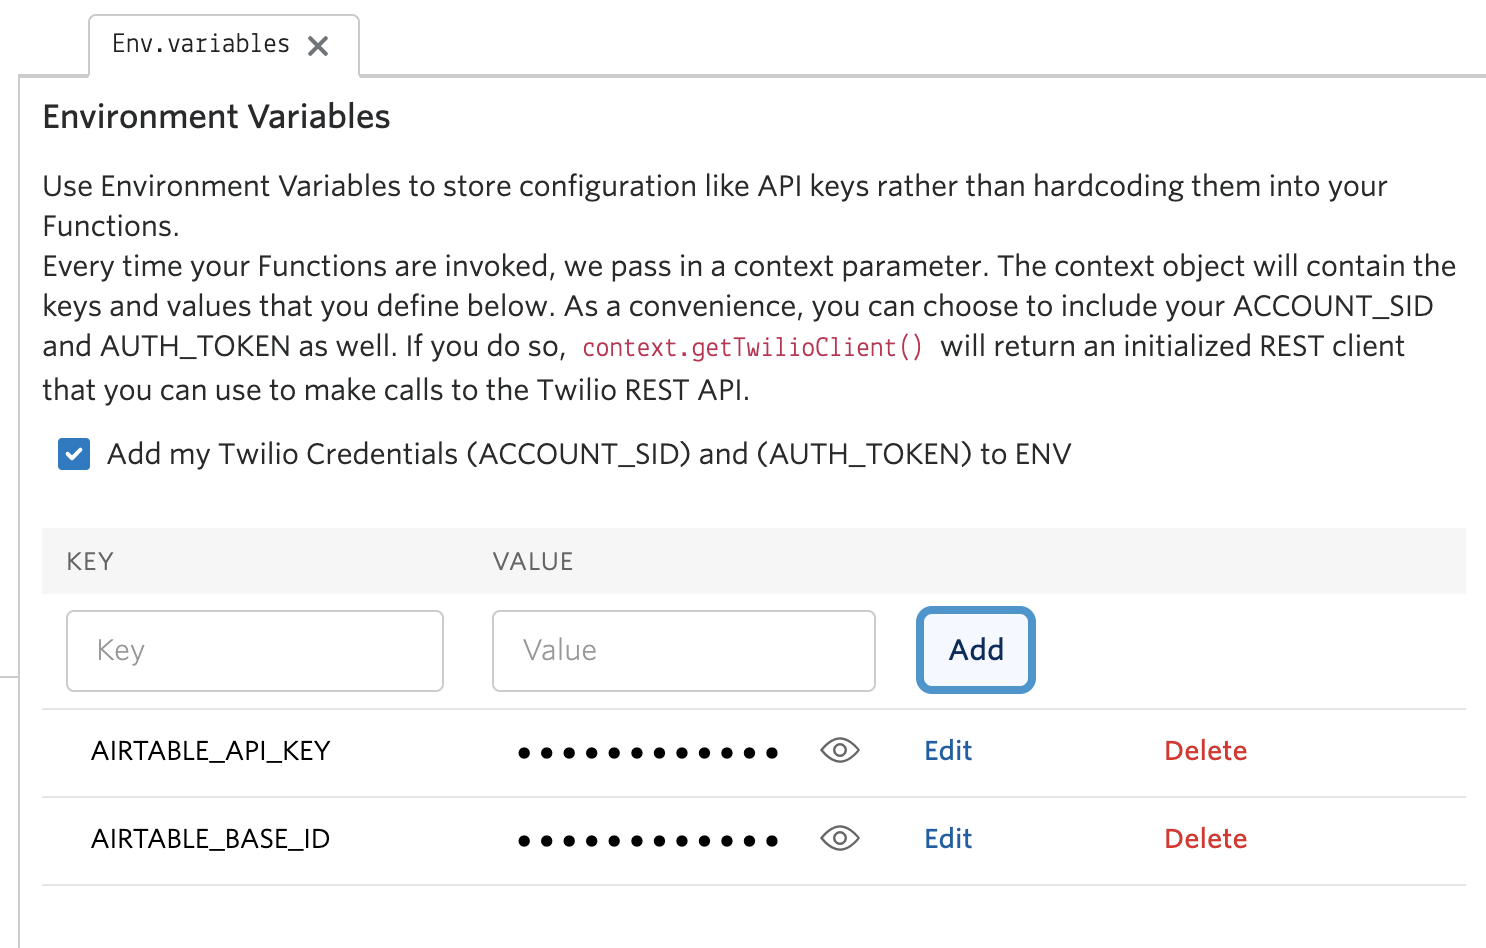
Under settings click on Environment Variables and add your Airtable credentials as AIRTABLE_API_KEY and AIRTABLE_BASE_ID. Be careful not to commit your Airtable API key anywhere, as it can give someone full access to your Airtable account.
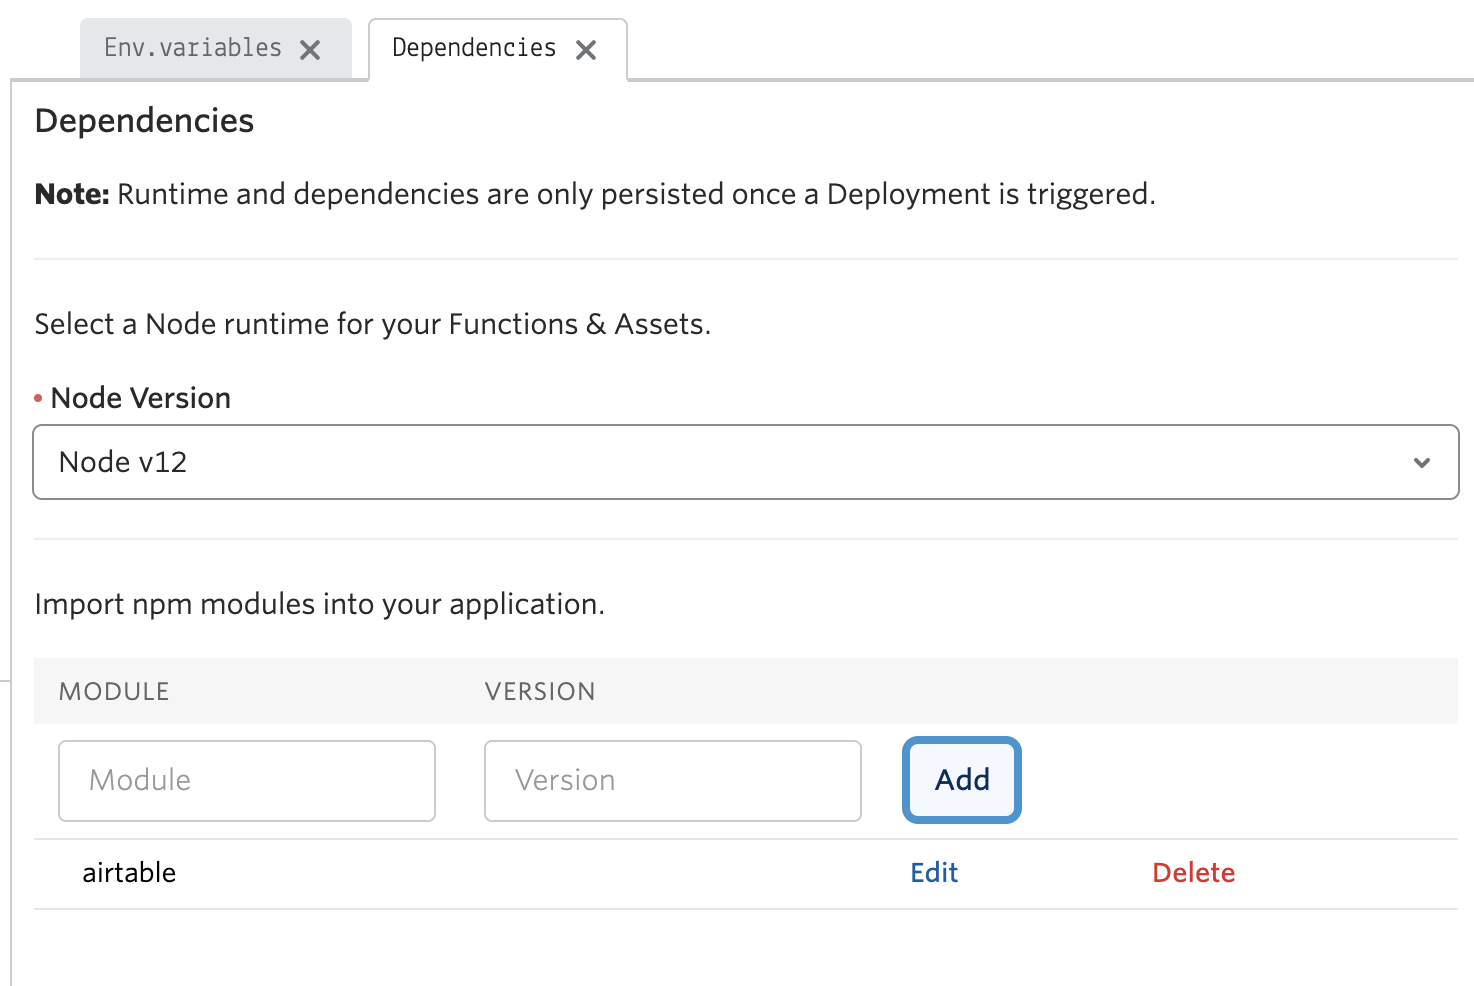
In settings under Dependencies, add the airtable helper library -- no need to supply a version number
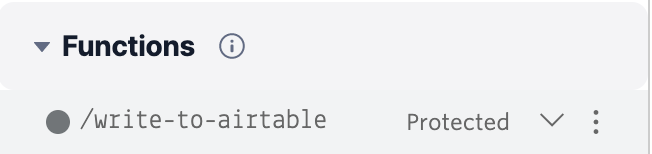
Now you will create a new Function. Click on the blue Add button and name your function /write-to-airtable (keep the leading slash). Delete the placeholder code.
The code below will write the data the caller submitted via the IVR into the Airtable. It will also generate the current date to populate the lastCalled column. Copy and paste this into your write-to-airtable code.
One thing to note is that Airtable is case-sensitive so you must match the capitalization of the column names. If you get an error, it means something is wrong with your environment variables, and you likely have not configured your Airtable credentials correctly.
Next you must set the /write-to-airtable function to Protected using the dropdown on the right so the endpoint is accessible for us to configure in the Studio flow.
Hit deploy all, and then we will connect the function to the Studio flow.
Update the “Run Function” widget in your Studio flow
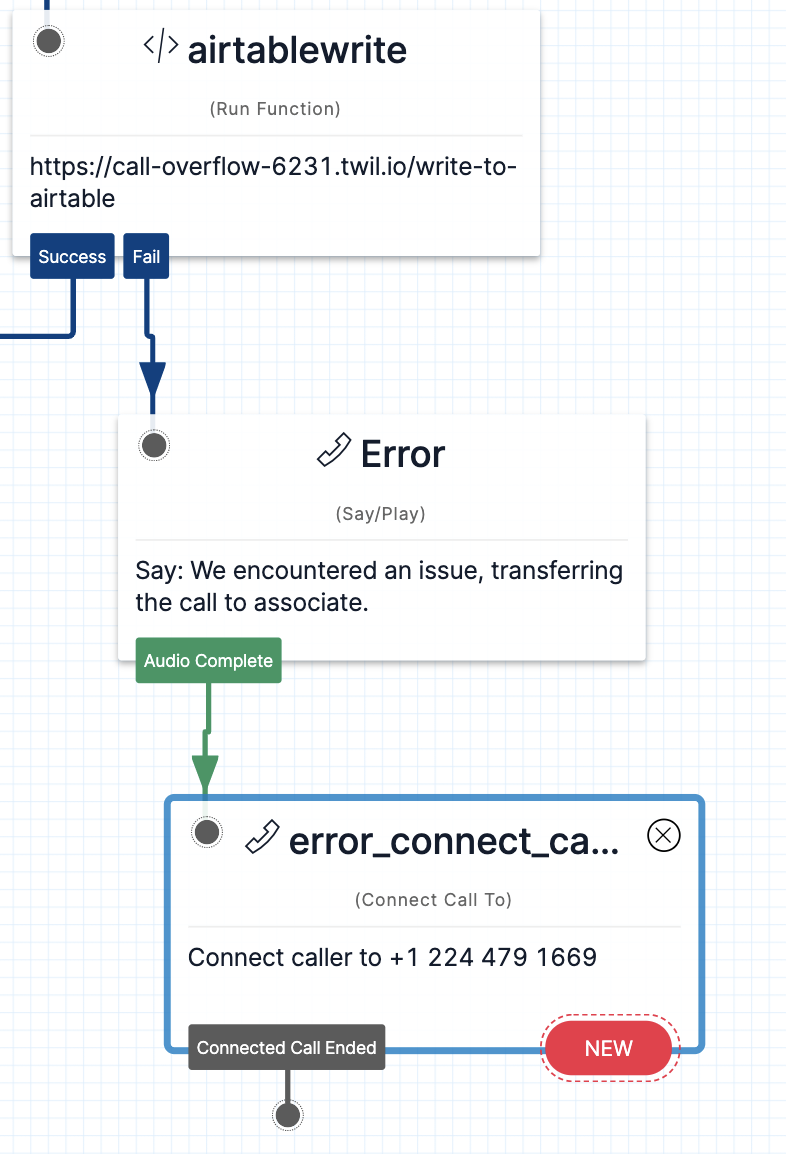
Go back to your Studio flow and click anywhere inside of the airtablewrite widget. On the widget menu to the right, you will need to choose the service and function that you just wrote from the dropdown. If you are using the same naming from this post, then it should look something like the image below.

All of the function parameters are configured to pull from the widgets, so no need for you to change anything there, unless you happened to rename the widgets.
Now you can call back in to your number and go through the flow once more. Keep an eye on your Airtable base — you should see the data appear in the table if the call is successful!

Note that in the current flow, if the function call fails, we let the caller know that an error occurred, and we transfer them to a live scheduler/agent. In the prototype, there is a placeholder number with an automated message, but if you would like to use this system you will need to replace it.
Conclusion: Use a call overflow system for better patient engagement
If you work for a healthcare system who has struggled with call overflows in the past few months, hopefully you now feel empowered to build a solution to the problem. This prototype is a great starting point, and there are additional features you might want to add, like voicemail or integration into another system.
If you would like to share what you are building, please send me an email at gkuppuswamy [at] twilio [dot] com.
Gopal Kuppuswamy is a Principal Solutions Engineer at Twilio with a primary focus in the Healthcare industry improving patient digital engagement and experience.
Liz Moy is a Developer Evangelist learning a great deal about the healthcare space from the Twilio healthcare team. You can find her at lmoy [at] twilio.com or on Twitter @ecmoy.

Related Resources
Twilio Docs
From APIs to SDKs to sample apps
API reference documentation, SDKs, helper libraries, quickstarts, and tutorials for your language and platform.
Resource Center
The latest ebooks, industry reports, and webinars
Learn from customer engagement experts to improve your own communication.
Ahoy
Twilio's developer community hub
Best practices, code samples, and inspiration to build communications and digital engagement experiences.