Co-browse a Shared Notepad in Real Time with Twilio Sync and Programmable Video
Time to read:
June 25, 2021
Written by
Reviewed by

If you've checked out Marcus Battle's tutorial about building a real-time note collaboration tool with Twilio Sync, perhaps you have wondered to yourself, "Wouldn't this tool be great if I added video?"
Well, you've come to the right place, because this tutorial will show you how to enhance your note collaboration tool by adding Twilio Programmable Video. In the last tutorial, you learned how to use Twilio Sync to build a notepad you can edit together in real time with another person. Adding video allows you to see and chat with your collaborator face-to-face while you edit the document together. You can discuss your thoughts aloud and come away with a text you created with your peers. Sounds pretty exciting — let's get started building!
Prerequisites
You will need:
- A free Twilio account. (If you register here, you'll receive $10 in Twilio credit when you upgrade to a paid account!)
- Node.js (version 14.16.1 or higher) and npm installed on your machine.
- The code from the previous tutorial. (See the following step for details.)
Get and run the starter code
If you have just completed the previous tutorial, you should have the code you need. If not, you can find the code here on the start branch of the video-note-collab GitHub repository.
To get the code, choose a location on your machine where you would like to set up the project. Then, open up a terminal window and run the following command to clone the start branch of the repository:
Then, change into the root directory of the project and install the needed dependencies by running the following commands:
Set up a .env file for your environment variables by running the following command in your terminal:
Then, open the .env file in your code editor and replace the placeholder values with your own credentials for the following variables:
TWILIO_ACCOUNT_SIDTWILIO_SYNC_SERVICE_SIDTWILIO_API_KEY_SIDTWILIO_API_KEY_SECRET
You can find your credentials in the Twilio Console, the Twilio Sync Service page, and the Twilio API Keys page. For the Sync service, you can use the default SID.
Now that you have entered your credentials, start the Express server by running the following command in your terminal window:
If you navigate to http://localhost:3000/ in your browser, you should now see the notepad:

Test out the application by typing a few words in the notepad. Typing a space, the enter key, or punctuation will trigger the sync to fire. If you open a second browser window to http://localhost:3000/ and look at them at the same time, you should see the text you type in one window appear in the other as well:

How is this happening? This application is using Twilio Sync to synchronize state and data across browsers and devices in real time.
Here you have a Sync document called notepad. When the page loads, a new access token is generated and passed to the Sync client. If there is an existing document, its content is loaded into the <textarea>. The application listens for updates to the document, updating the cursor position and the notepad's content. If you open your browser's developer tools, you can see the changes in the content being logged to the console as well.
The idea here is similar to other note collaboration tools, like Google Docs or Notion. With this type of application, you can co-browse the same notepad with another person and type a document together in real-time.
Once you have the application running, you are ready to move to the next step.
Update the application's layout
The first thing you'll want to do is update your application's layout a bit. If you open up public/index.html in your code editor right now, you can see that Tailwind CSS and Twilio Sync are included in the file already. Update the <head> element here to also include the Twilio Video library, as shown in the code below:
Then, update the <body> element. First, add a <form> element where a user can enter their name and click a button to join the room.
Then, replace the <textarea> element for the notepad. For this project, you'll disable interaction with the notepad and set its background color to gray when the application first loads.
Next, just below the <textarea>, add a <div> element to hold the participants' video feeds:
Now that you have a place in the UI for participants' videos to appear, it's time to add the code that will actually make that happen.
Update access token generation
If you take a look at index.js in your code editor, you'll see that you already have code in there to grant an access token, and that these access tokens will have a SyncGrant added to them. To be able to use video, you'll need a VideoGrant as well.
Below your constant for SyncGrant, include a constant for VideoGrant too. While you are here, make sure your application can parse the JSON from a request body by having it use the express.json() middleware function:
Then, update your token route to be an async route and to retrieve the user's identity and the name of the video room from a POST request. This is also where you'll add the VideoGrant to the access token.
Great! Now your token will grant users of your application access to both Sync and Video.
Now that you have updated the server side of the application, it's time to head back to the client side and get videos to show up in the browser window.
Connect and display participants' video feeds
Return to public/index.html in your code editor. Look at the code in the last <script> tag, toward the end of the file. You will see that when the application loads in the browser, this code fetches an access token from your token endpoint, then connects the Sync client and updates the notepad. To add video to this project, you'll change this code to make the application fetch the token after a user enters their name and clicks the Join Video Call button in your UI. This token will then be used to connect the user to the synced notepad and the video call.
Just below your variable referring to the notepad, add a few more variables to make it easier to refer to the other elements in your UI:
Now you will be able to refer to the different parts of the video chat as well as track whether the local user is connected to a video room. You will also be able to track whether there is a synced document open for the user to interact with.
To show the local user a preview of their video feed, add a function called addLocalVideo just below the list of variables you updated above:
Call this function at the end of the file, just before the closing <script> tag:
Next, create a new function called connectOrDisconnect that will handle the event when a user clicks the Join Video Call button. If a user is not already connected to a video room, this function will connect them. If the user is already connected, this function will disconnect them from the video room. Add the following code just below the addLocalVideo function:
Just before the closing <script> tag, add another event listener, this time to the login form. This listener will call connectOrDisconnect whenever a user submits the form:
Next, replace the fetch('/token') block with the following connect function, which will take the identity passed into the form input, fetch a token for this user from the server, load and enable the notepad, and connect this local user to the video chat:
Once the local participant is connected to the video room, this video room will be assigned to the global variable for room. The local user's video feed will be displayed in the UI, and event listeners will listen for when other participants join or leave the video call. The Join Video Call button will also change to say Leave Video Call instead, and the input for entering your name will be hidden.
Now that you have added a connect function, add the disconnect function just below that:
This disconnect function will handle disconnecting a participant from the video room when they click the Leave Video Call button. It will also loop through the other participants in the video call and remove their video feeds from the UI for the disconnected participant. The state of connected is set back to false, the username input field appears again, and the Leave Video Call button is changed back to say Join Video Call. Additionally, the notepad will be cleared and disabled for the local participant — once someone has disconnected from the video call, they will also be disconnected from the shared notepad.
Next, you will want to handle what happens when remote participants connect to or disconnect from the video room. Start by adding a participantConnected function that will create a new <div> for a connected participant, showing the participant's username as their identity and attaching their video and audio tracks to the <div> if the local participant is subscribed to them.
This function will also create event handlers to manage subscription activity related to participants' audio and video tracks. If a remote participant turns off their audio or video feed, you want to be able to respond to this event and attach or detach these tracks as needed.
Add the following participantConnected function just below your disconnect function in public/index.html:
Next, it's time to add the participantDisconnected function for when a remote participant leaves the video call. This is a function that finds the participant by their sid (unique identifier) and removes their div from the DOM.
Add the following participantDisconnected function just below your participantConnected function:
Next, it's time to add code for when the local participant subscribes to or unsubscribes from a remote participant's audio or video tracks. Add the following trackSubscribed and trackUnsubscribed functions to public/index.html just below your code for participantDisconnected:
You now have all the code you need for this project! It's time to test out your video-enabled notepad tool.
Testing your application
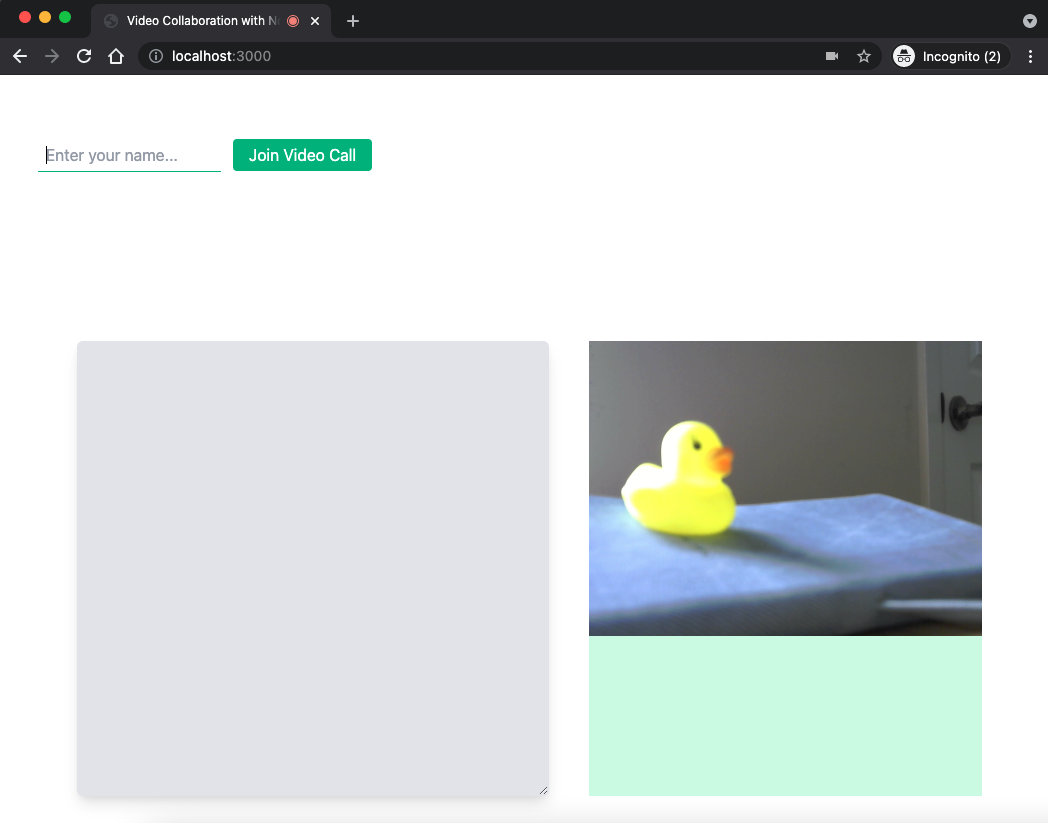
Navigate to http://localhost:3000/. You should see a layout like the one pictured below, with the notepad on the left side and a green box with the local participant's video feed on the right:
Enter your name in the input field and click Join Video Call. You will see your name appear under the video. If you want, you can try typing into the notepad.
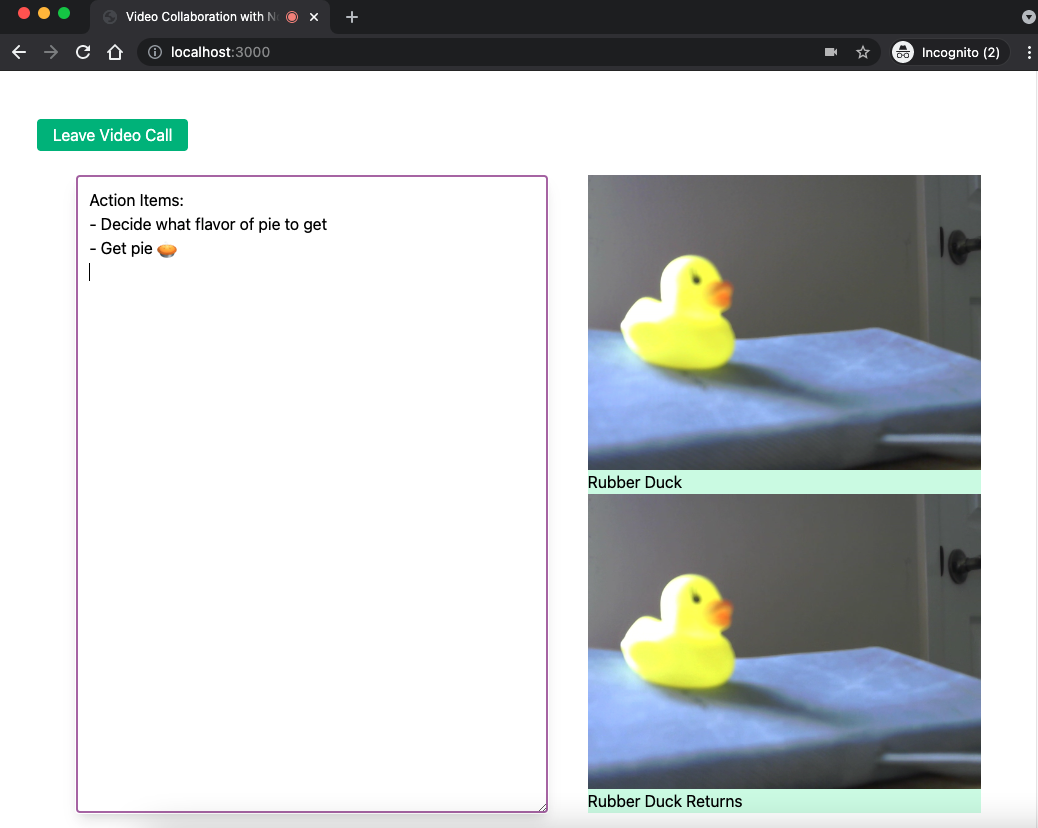
Open up another browser tab to http://localhost:3000/ and join the video chat here with a different name. Once you have done this, you will see two images of yourself that can chat with one another and share the notepad:
If you type into the notepad in one tab then switch to the other, you will see that the text is synced between them. Pretty cool, right?
What's next for your note collaboration tool?
You've just learned how to build an exciting collaboration tool that includes a notepad you can share with a collaborator while you video chat. There are so many applications for this kind of tool, from working together on a written project to taking notes together while in a video meeting.
To view the code in its entirety, check it out on the main branch of this GitHub repository.
If you want to learn more about how you can use the Twilio Sync API, take a look at the documentation here. Or perhaps you would like to enhance this application even further by adding a feature to show who is online in your application. Maybe you even want to take the video side further by adding a cool overlay to your video. What will you do next? I can't wait to see what you build!
Mia Adjei is a Software Developer on the Developer Voices team. They love to help developers build out new project ideas and discover aha moments. Mia can be reached at madjei [at] twilio.com.
Related Posts


Related Resources
Twilio Docs
From APIs to SDKs to sample apps
API reference documentation, SDKs, helper libraries, quickstarts, and tutorials for your language and platform.
Resource Center
The latest ebooks, industry reports, and webinars
Learn from customer engagement experts to improve your own communication.
Ahoy
Twilio's developer community hub
Best practices, code samples, and inspiration to build communications and digital engagement experiences.