Email Verification with Twilio Verify and Twilio Sendgrid with Node.js
Time to read:

As web developers, we end up creating a ton of login systems, and part of the “create user” flow for the socially responsible developer is verifying that the email address entered by the user is real, and owned by that person.
Luckily for us, Twilio Verify now supports email verification! We can send email verification requests complete with an auto-generated token with a single API call to Twilio. Once our user has clicked the link, we can validate the token is correct with another API call. This leaves us free to solve our specific business problems and not spend our energy reinventing the wheel.
Prerequisites:
Before we begin, make sure you have the following setup:
- A Twilio Account
- A Sendgrid Account (Free tier works)
- A Sendgrid API Key
Create an Email Template
Let’s start by creating an email template to hold the email verification code. Navigate to the Sendgrid Dashboard and create a new Dynamic Template. You will have the choice of building your template with the graphical editor or with code. For this tutorial, we’ll be using HTML. Here’s some sample html to get you started.
Paste the HTML into the code editor. You may notice the variable `twilio_code included in our HTML. The Verify API will populate this value.
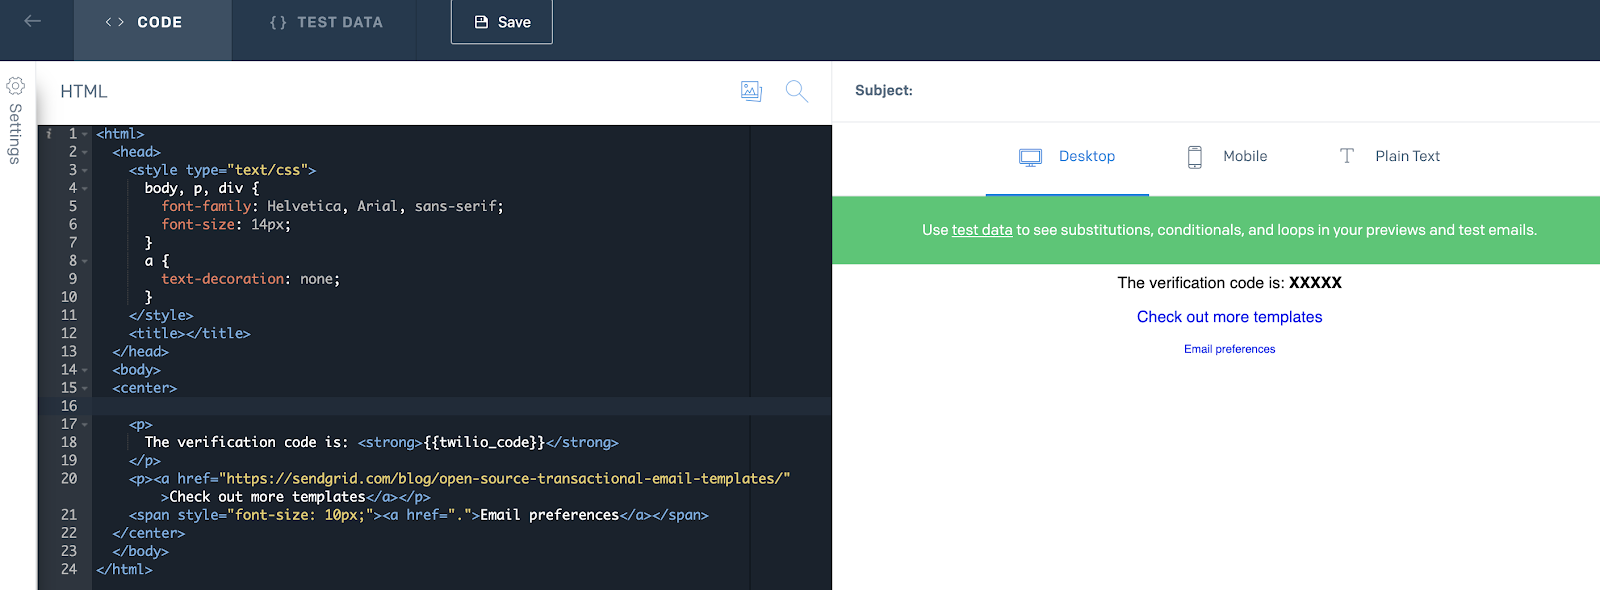
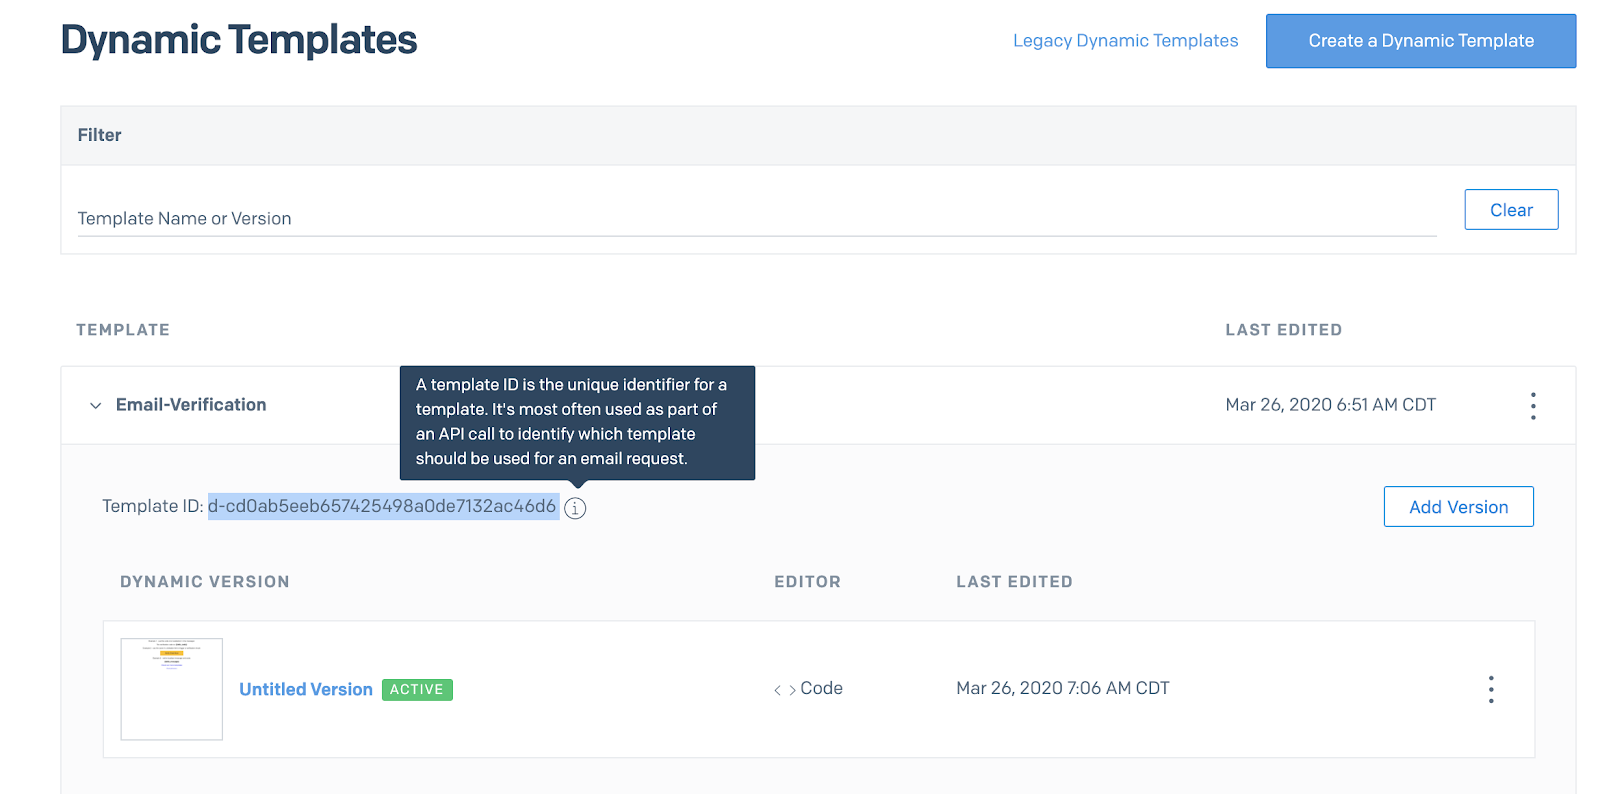
Click on "Settings" on the left to add a subject to your template. Save the template and click the arrow in the top left to take you back to the Dashboard. Take note of the Email Template ID, as we’ll be using it in the next step.
Create a Twilio Verify service & email integration
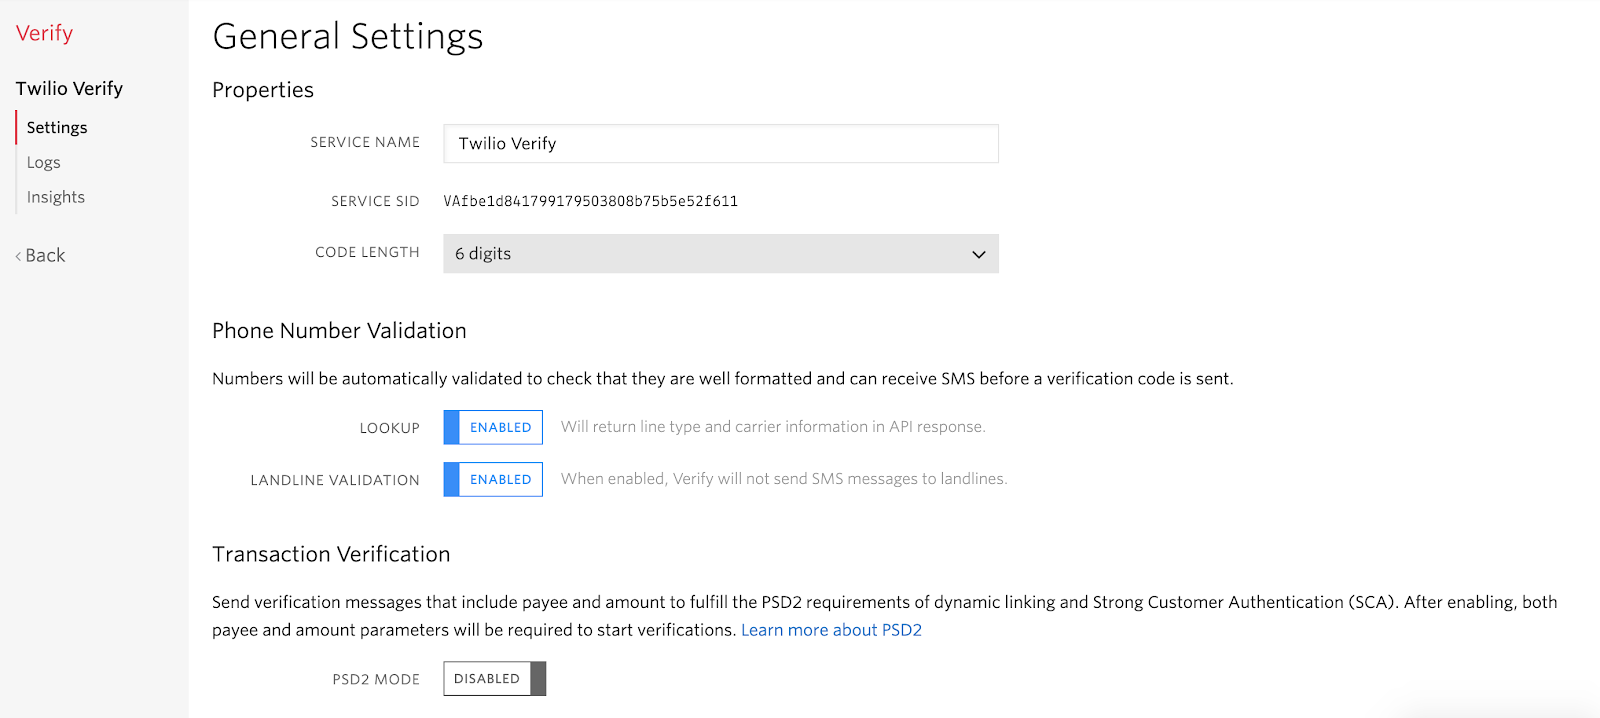
Next we need to create a Twilio Verify Service. This service can be used over a couple of channels such as SMS messages or phone calls. Head over to the Twilio Verify Console and create a new service. Make note of the Verification Service SID; we’ll be using it again later.
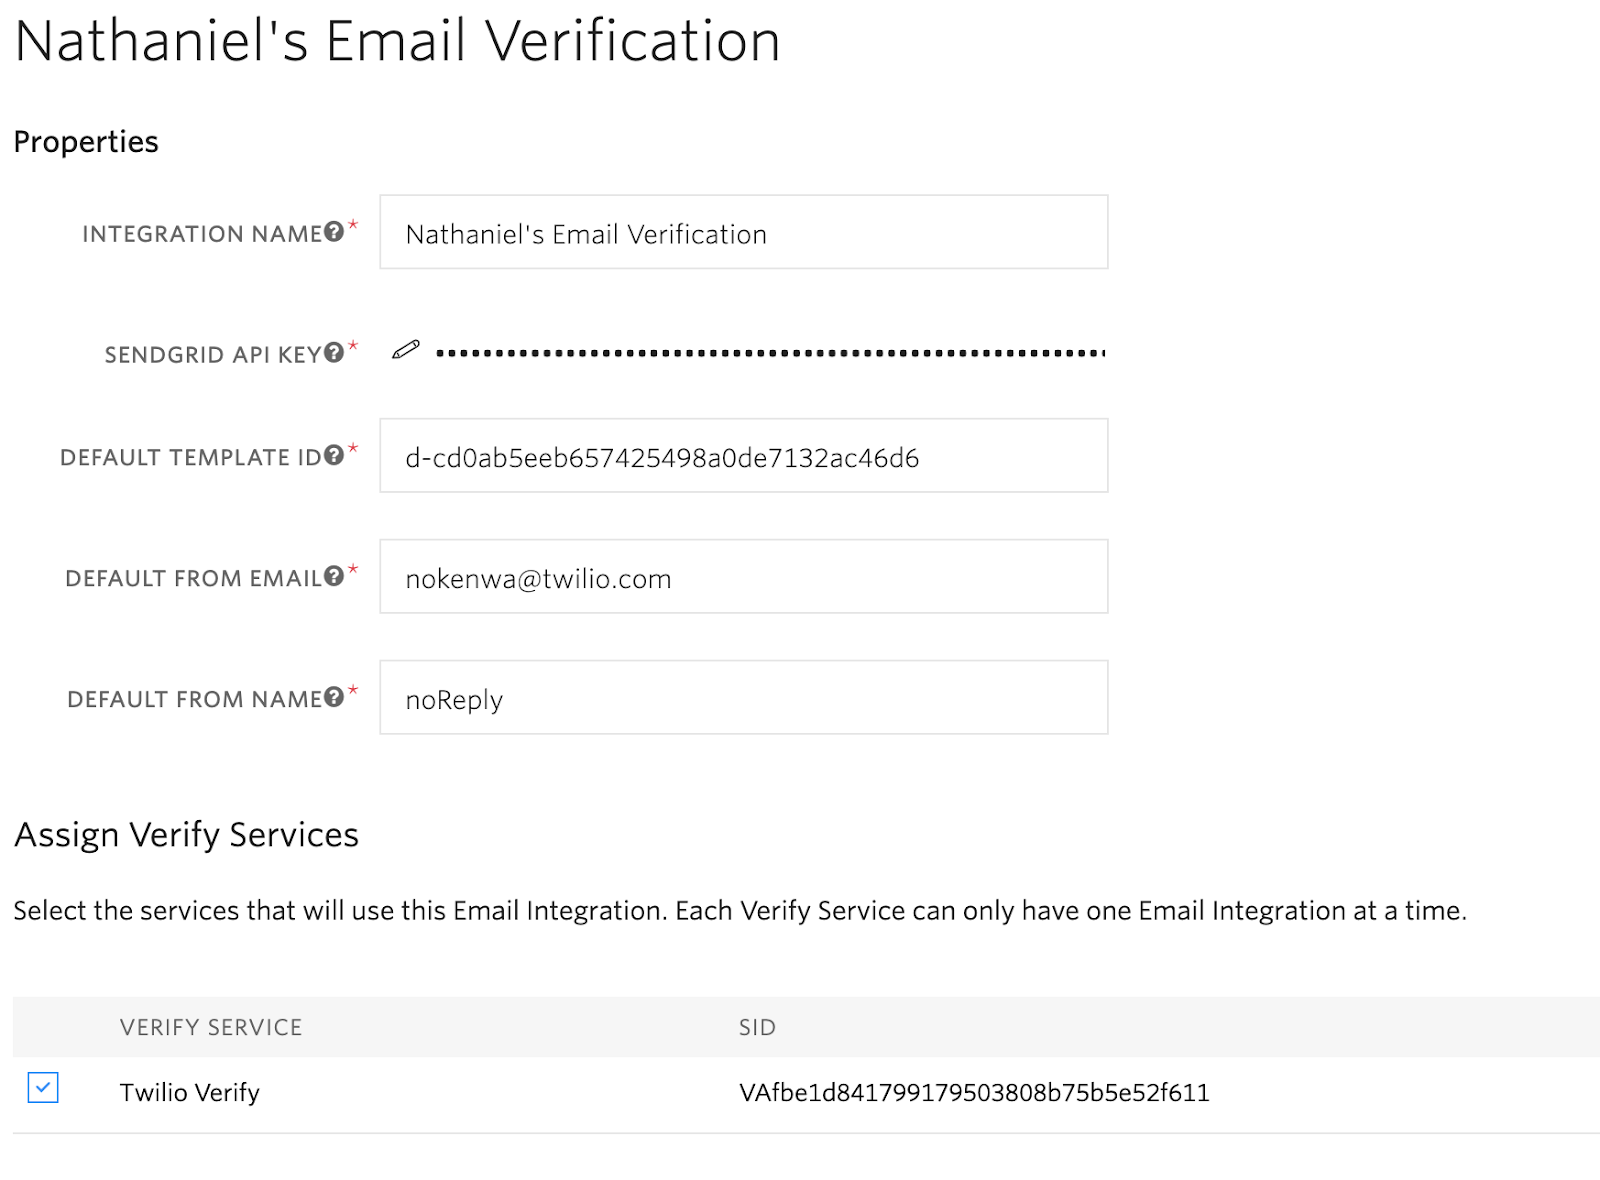
Now we can create a Twilio Verify Email Integration. Head to the Email Integration section of the Twilio Verify console and click the red button to create a new integration.
You will need:
- Your SendGrid API Key (Create a new one if you haven’t already)
- Your Template ID from the dynamic template we created earlier
- A Default From Email
- A Default From Name
Assign the Email Integration to the Verify service that you want to associate it with by checking the checkbox at the bottom of the page.
Time to test!
Create a node project and install the twilio helper library. You can do this by navigating to a new folder in your command line and running the commands below.
Now inside our index.js file we will authenticate the Twilio Client with our Account Sid and Auth Token. Note: In production do not hard code these in. Use environment variables. Here’s a guide written by my colleague, Dominik, on how to do that.
Let’s run this code. Back in the terminal, run the following commands:
You should see a verification SID if it all worked. Now let’s head over to our email inbox. You should see an email just like the one we created over in SendGrid.

Let’s check this verification code
The next thing we need to do is to check that the verification code the user provides matches the code we sent to the user's email. Let’s verify the code. Comment out the lines from above where we created the verification, and add the following code to your index file.
First, try it with an incorrect code. Use the email address where you received the verification code. You should see a status in the console of pending. Until the correct code is used the verification will remain pending. Next, replace the incorrect code with the code you received. Now, when you run the code you should see a status in the console of approved.
Let’s put this into practice
Let’s implement Twilio Verify into a user sign up experience. I have created a sample application on GitHub that you can use as a starting point for your project. If you have git installed you can run the following commands from your command line to set it up on your computer.
Before we begin, create a .env file and include your Twilio Account Sid, Auth Token and Verification Sid. Run the following command, to start your web Server.
Navigate in your web browser, to localhost:3000 and you should see a sign up page like this.
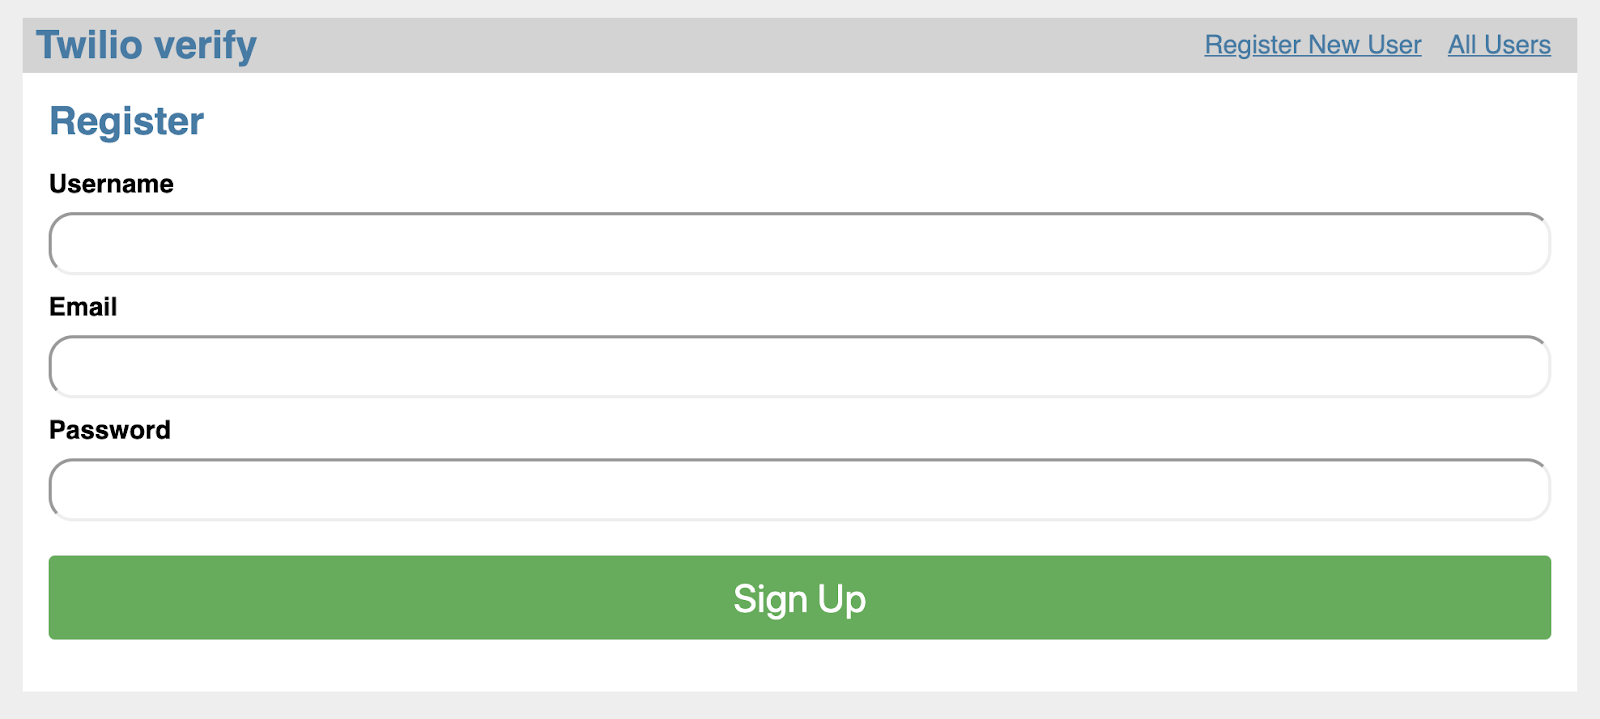
We have it set up with a mock database in storage. In index.js, find the part of the code in the post / route. You’ll notice that it is almost identical to the code we used earlier to send an email with a verification code. Also, when the verification email is sent we will redirect the user to a verify page where we can collect their verification code. We pass the user’s email as a query param in url, you could use session variables to store this information too.
Now, whenever a new user is created, a verification email is sent and the user is redirected to /verify where we can collect their verification code.
Next let’s take a look at the /verify POST route. It uses the Twilio library to check their email and code combination. If their code is approved we will modify the user’s database entry to show that they have been approved and redirect to show all the users; however, if their code is incorrect we will display a message to say that the verification has failed.
Head back to your browser and start a new sign up process. Now after onboarding a new user you should see this screen.

Go to your email and check for the code you received. When you put it into the text box and hit Verify you should be able to see the list of users with your brand new verified user!

Wrapping Up
Any tools that can help me to stop repeatedly solving the same problems are fantastic in my book. We can use the Verify API to send and handle verification emails, and we could use a similar system to send password change request emails. SendGrid dynamic templates are also handy for sending any other automated emails our application might need. What’s even more amazing about the Verify API is that by simply changing the channel you can have verification of phone numbers instead.
Let me know how you get on using Twilio Verify to verify email addresses in your applications here in the comments or on Twitter. I can’t wait to see what you build!
- Twitter: @ChatterboxCoder
- Instagram: @ChatterboxCoder
- Email: nokenwa@twilio.com
Related Posts
Related Resources
Twilio Docs
From APIs to SDKs to sample apps
API reference documentation, SDKs, helper libraries, quickstarts, and tutorials for your language and platform.
Resource Center
The latest ebooks, industry reports, and webinars
Learn from customer engagement experts to improve your own communication.
Ahoy
Twilio's developer community hub
Best practices, code samples, and inspiration to build communications and digital engagement experiences.


