How to Run Ngrok Using Java
Time to read:
September 16, 2021
Written by
Reviewed by

Java programmers can benefit from using servlets because they provide an opportunity to understand low-level concepts in Java. Servlets are also great for building interactive web applications and dynamic web pages because they extend apps hosted by web servers. They handle HTTP requests between a browser and any client, database, or application on the HTTP server.
However, building a local servlet is just the first step. Taking the servlet a step further to communicate with a temporary public domain can allow developers to use webhooks, share a working demo of the project, and more.
In this article, you will learn how to build and run a servlet to host your Java application and expose it publicly to the web.
Prerequisites
Install ngrok
Ngrok is a great tool because it allows you to create a temporary public domain that redirects HTTP requests to our local port 4567 or anything else such as 8080.
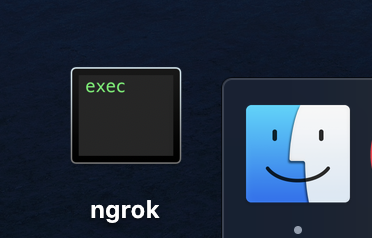
Visit the ngrok website and log into your account. Download the ngrok zip file and follow the instructions on the site for your appropriate operating system. If you downloaded ngrok straight to your desktop, then you will see the executable file icon as seen here near the desktop toolbar.
Depending on where your file is located, you might need to type ./ngrok instead of ngrok into your terminal. Go ahead and test out ngrok then kill the process to move forward in the tutorial.
Start a new Java project with Gradle
Gradle is a handy tool that will allow you to build any software on different platforms with high performance meaning only necessary tasks are executed especially if inputs or outputs are changed. If you use Homebrew, enter the following command in your terminal to install Gradle:
Otherwise, install the tool manually by following Gradle’s official installation guide.
Navigate to a directory where you want the project to live.
Run the following command to create a basic project directory for the Java servlet app. When prompted to select a build script Domain-Specific Language (DSL) and test framework, press the Enter key to choose the default. This should happen about 4 times and you can view the prompts in advance below:
Once the build succeeds, create a series of sub-folders and navigate to the WEB-INF subfolder, using the commands below:
This directory structure is important because it contains the information required to deploy the web application. These folders will prevent the resources of your project from being accessed publicly from a web browser. This security is especially important if there is sensitive data and authentication involved.
Configure information about the servlet
Create a file called web.xml inside the WEB-INF folder with the following content in extensible markup language, also known as XML:
XML is used to interpret data. When used with a servlet, XML can store and transport data for the web application which is necessary for dynamic websites.
The servlet is named "helloWorld" and needs to be mapped to an associated set of URLs. That means every character between the url-pattern tag will be interpreted and matched up when interpreting the URL path on the web browser. For this project, the url-pattern is a forward slash, which is also the default match for mapping if not defined.
Configure Gradle
Gradle needs to import the relevant libraries and plugins. Navigate back up to the root folder of the project directory with the following command:
Create a new file named build.gradle and add the following text:
These lines allow you to apply the War plugin to assemble Web Application Resource (WAR) files for the web app. You will also use the Gretty plugin so that the Java application can be deployed by Gradle. The Gretty object will be defined later in this file.
Add the following repository and dependencies list to the file:
Repositories are declared so that the Java project can leverage public open source dependencies. For this project, mavenCentral() is declared because it is popular for Java projects, but you can also use Ivy or other open source repositories if you prefer.
The dependencies are defined for production and testing purposes. Since a servlet is used, the javax.servlet-api is implemented in order to utilize the classes and interfaces required at runtime for the defined servlet container. In addition, a simple logging facade for Java (SLF4J) is implemented to log various frameworks during deployment.
Complete the build.gradle file by adding the gretty object to the bottom of the file:
These lines provide the context root of the Jetty instance, also known as a Java web server. You can customize more aspects of the Gretty plugin and look for different properties to use for the project.
Save and close the file.
Create the servlet file
Navigate into the src/main folder of the project directory with the command cd src/main/. Make a folder named "java" and a subfolder inside it named "guide". You can use the following commands:
Create a new file named HelloWorldServlet.java and paste the following code:
Notice that the newly created class HelloWorldServlet inherits the attributes and methods from the HTTPServlet class so that the Java application can use HTTP specific implementations.
The class is initialized with a variable that will be used and displayed later on the web page.
A doGet() function is called to allow the servlet to handle GET requests. This one is overridden to support an HTTP HEAD request. The doGet() service takes in an HttpServletRequest object parameter to provide request information for the HTTP servlet. Additionally, the service uses the HttpServletResponse object to access HTTP headers and cookies when sending a response.
Within the overridden function, setContentType is used to specify the response sent to the client in text and HTML format.
The function ends with two println statements to display the string messages to the web application. This is made possible by declaring a PrintWriter object named out to send character text to the client in default ISO-8859-1 value.
Start the HTTP servlet
Head back up to the project root directory with this command:
Run gradle build.
Once the build is successful, use the following command to run the application.
You should see a similar output to the one shown below:
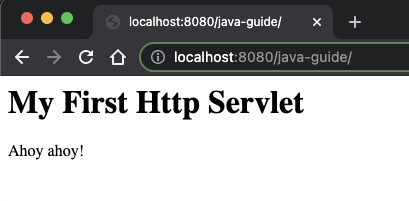
Let the application run in the background and go to http://localhost:8080/java-guide in your web browser.
During this time, you are able to make changes to the HelloWorldServlet.java file and see the changes reflected on the localhost page.
Expose the servlet publicly on the web
Open a new terminal window. Start ngrok with the following command to enable the Java servlet publicly over the Internet:
Your terminal output should now look like this:
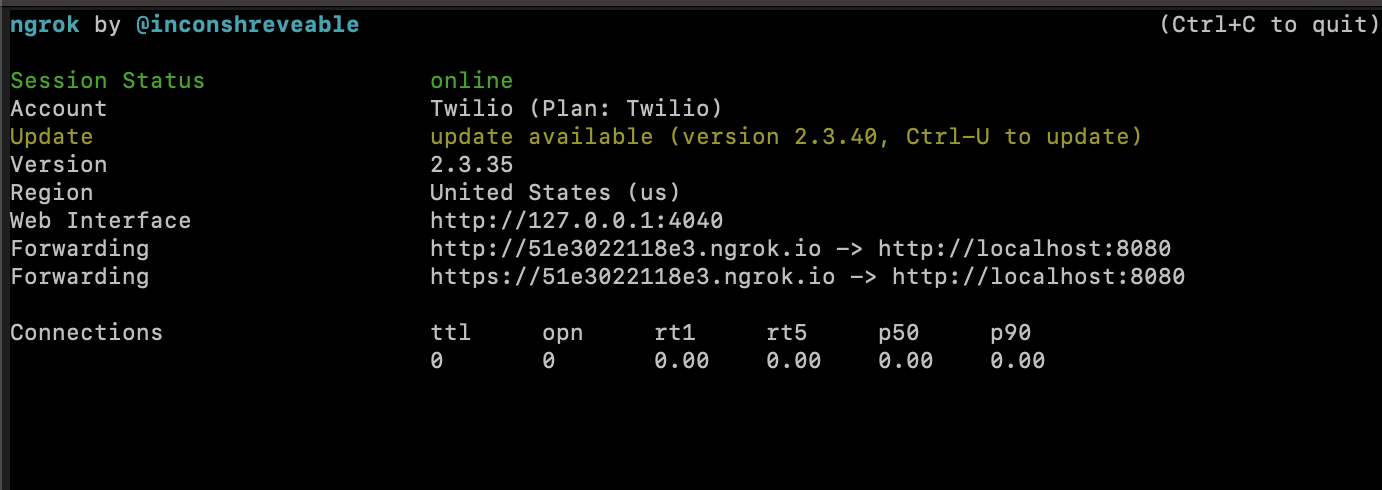
Your ngrok terminal will now look like the picture above. As you can see, there are URLs in the “Forwarding” section. These are public URLs that ngrok uses to redirect requests into our Java servlet.
Let the application run in the background and copy-paste the forwarding HTTPS URL in your web browser. The URL from ngrok in my example is “https://ad7e4814affe.ngrok.io/java-guide” but again, yours will be different. Keep in mind that this URL is no longer active and only presented here for demonstration purposes.
You should be able to see the same view as if you were on localhost:8080. This ngrok URL is handy because you can now share the URL with others so they can access or use this endpoint as a webhook that handles incoming requests.
The possibilities are endless when developing with an ngrok URL when you want to expand the project to use Twilio's services or other APIs.
What's next for using HTTP Servlets for a Java project?
Congratulations on building your first HTTP servlet and exposing it to the Internet! But don't stop here. Dive on in and explore some other neat Java projects that you can build with Twilio:
- Make a button that sends a WhatsApp message using Java.
- Learn how to set up and start a Spark project.
- Create a standalone voicemail using Java and Twilio.
- Allow the button to trigger a voice call with Java and Twilio.
- Explore projects with Twilio Verify and servlets.
Let me know about the projects you're building with Java and Twilio by reaching out to me over email!
Diane Phan is a software developer on the Developer Voices team. She loves to help programmers tackle difficult challenges that might prevent them from bringing their projects to life. She can be reached at dphan [at] twilio.com or LinkedIn.

Related Resources
Twilio Docs
From APIs to SDKs to sample apps
API reference documentation, SDKs, helper libraries, quickstarts, and tutorials for your language and platform.
Resource Center
The latest ebooks, industry reports, and webinars
Learn from customer engagement experts to improve your own communication.
Ahoy
Twilio's developer community hub
Best practices, code samples, and inspiration to build communications and digital engagement experiences.