Intervention Image. An In-depth Guide.
Time to read:
June 30, 2023
Written by
Reviewed by
The world of web development is constantly evolving, and finding efficient ways to handle imaging is crucial to enable better, less memory-consuming image handling and storage. Laravel — the most popular PHP framework — integrates a robust library called Intervention Image that simplifies image manipulation tasks.
In this tutorial, you will explore the library's features, along with a step-by-step guide to setting it up in a Laravel project. We will also build a simple meme generator to demonstrate how Intervention Image can be used in building Laravel applications.
Table of contents
- What is Intervention Image?
- how to use Intervention Image
- Setting up in Laravel
- Functions
- Resizing images
- Image compression
- Drawing
- Other functions
Prerequisites
What is Intervention Image?
Intervention Image is a PHP image manipulation library that was created by Fabien Potencier, the same developer who created Symfony. It has support for both the GD library and Imagick and provides a modern and object-oriented API that is built on top of them.
Intervention provides a wide range of features for manipulating images, including:
- Applying filters
- Cropping
- Drawing text and shapes
- Flipping
- Resizing
- Rotating
- Translating
- Watermarking
How to install and use Intervention Image in Laravel
For the installation, we’ll be using Composer, but before we start, let’s create a Laravel project. Run the command below to generate a new Laravel project.
Now, move into the folder and start the application by running the commands below.
If you did everything well, you should have a live application running at http://localhost:8000 serving the Laravel template page.
Now let’s add Intervention Image to our project by running the command below in a new terminal session or tab:
Once the package is installed, we’ll need to update the config/app.php file with a few snippets to use Intervention properly. First, we’ll add the snippet below at the end of the $providers array.
We’ll also update the $aliases array in the same file with the snippet below:
This will make the Intervention facade available in the application. That’s all we need to do to have Intervention fully working in our application.
In the section below we’ll explore the different functions in Intervention and then later on in the article, we’ll demonstrate the power of Intervention by building a real-world application.
Key Intervention functions
Intervention provides a wide range of functions for manipulating images. Some of the most common functions include:
1. Resizing Images
The resize() method can be used to resize images to a specific width and height. The width and height can be specified either in pixels or as a percentage of the original image size.
For example, the following code resizes an image to 100x100 pixels:
The resize() method also supports a third argument, which is the quality of the resized image. The quality is a number between 0 and 100, where 0 is the lowest quality and 100 is the highest quality. The default quality is 90.
For example, the following code resizes an image to 100x100 pixels with a quality of 50:
2. Image Compression
The encode() method can be used to compress images into a variety of formats, including JPEG, PNG, GIF, and SVG. The format of the compressed image is specified as the first argument to the encode() method. The quality of the compressed image is specified as the second argument.
For example, the following code encodes an image into a JPEG file with a quality of 90:
The encode method also supports a third argument, which is the output buffer. This is a string or a stream that will be used to store the compressed image. For example, the following code compresses an image to a JPEG file and stores the compressed image in the variable $compressedImage.
3. Drawing
The draw() method can be used to draw lines, shapes, and text on images. The draw() method takes a closure as its argument. The closure receives an instance of the ImageDraw class, which can be used to draw on the image. For example, the following code draws a red line across the middle of an image:
The ImageDraw class supports a variety of drawing options, such as the color, thickness, and style of the lines and shapes that are drawn.
For example, the following code draws a blue rectangle with a dashed border:
Other Intervention functions
In addition to the functions mentioned above, Intervention also provides a number of other functions for manipulating images. These functions include:
- GaussBlur: This function applies a Gaussian blur to an image
- Sharpen: This function sharpens an image
- Brightness: This function adjusts the brightness of an image
- Contrast: This function adjusts the contrast of an image
- Saturation: This function adjusts the saturation of an image
Advanced usage of Intervention
Intervention can be used for a variety of advanced image manipulation tasks. For example, you can use it to:
- Create thumbnails
- Generate image sprites
- Optimize images for web use
- Create animated GIFs
- Apply custom image filters
Customise the test application
Now that we’ve gone through the important components of Intervention, let's build a simple meme generator. This application will basically take your input text and overlay it on your meme of choice.
To start, you will need a template. Create a new directory in public named images. Then, download the template and move it to public/images folder, renaming it to drizzy-template.png.
Now replace the code in resources/views/welcome.blade.php with the following.
In the code above, we used Tailwind CSS to style a form that will collect the text that we’ll write on top of our template. Next, we’ll write the code for our backend.
Add update route/api.php to match the following code.
In the code, an api/create route has been defined which will handle the template generation.
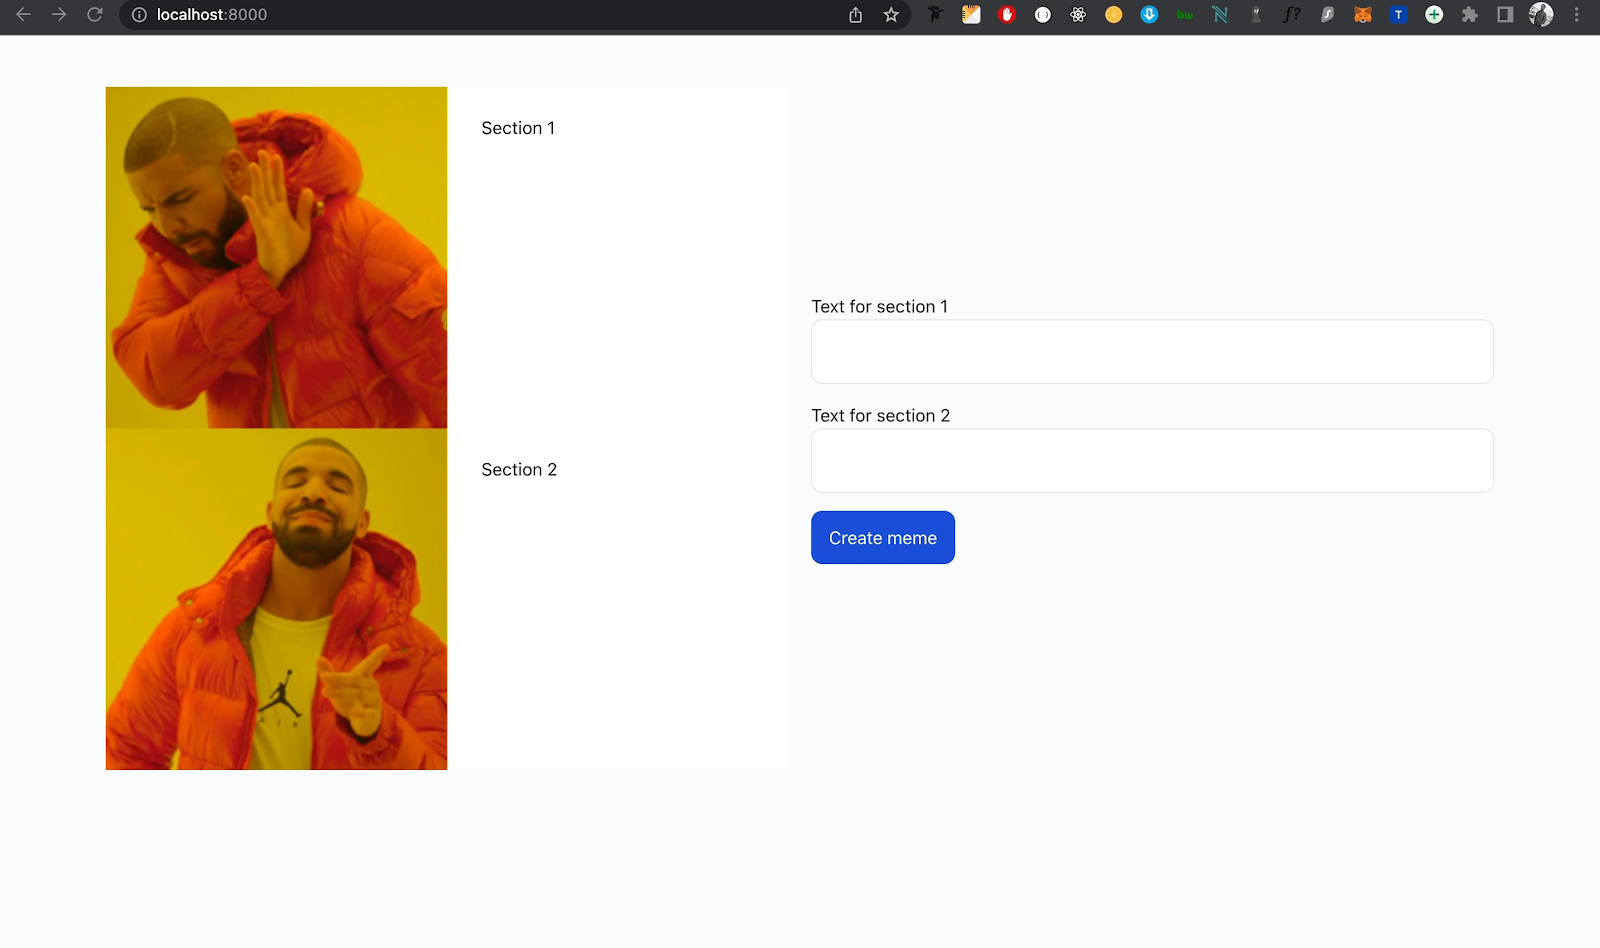
Now, navigate to http://localhost:8000 to view the working application, here is an example of what you can expect to see.
Next, add your custom text(s) to the available inputs and click on Create meme. This will encode your custom text into the image as the example below shows.
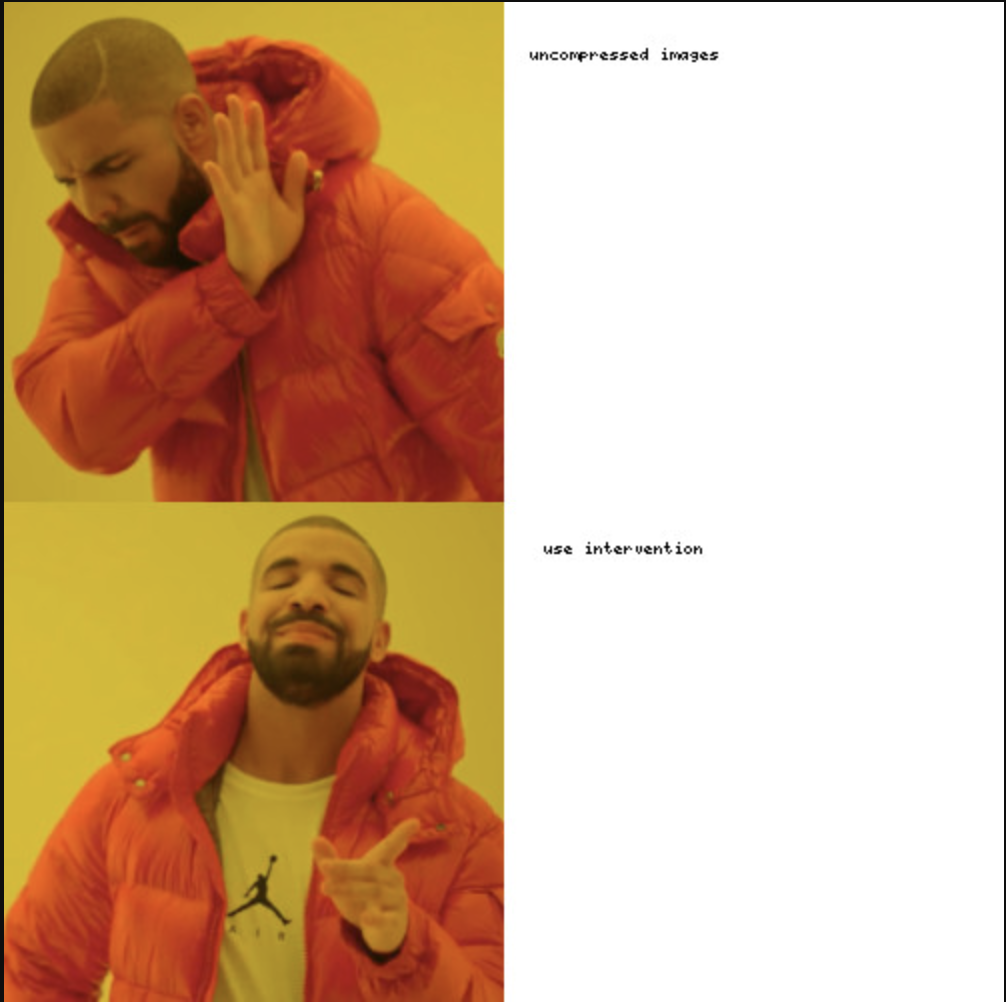
Going back to your file, you will notice it has been updated to the most recent changes. Drake style
Intervention best practices
When using Intervention, there are a few best practices that you should follow:
- Always use the
make()method to create a new image object. This will ensure that the image is properly configured and ready for manipulation. - Use the
save()method to save the image to disk. This will ensure that the image is saved in the correct format and with the correct quality settings. - Use the
getClientOriginalName()method to get the image's original name. This will help you to keep track of the original image and avoid overwriting it. - Use the
getImageType()method to get the type of the image. This will help you to choose the correct image manipulation functions. - Use the
getImageData()method to get the raw image data. This can be useful for advanced image manipulation tasks.
Conclusion
Intervention is a powerful and versatile PHP image manipulation library that can be used for a variety of tasks. It is easy to use and integrates seamlessly with Laravel. If you need to manipulate images in your Laravel application, Intervention is a great option.
Kenneth Ekandem is a full-stack developer from Nigeria currently in the blockchain space, but interested in learning everything computer science has to offer. He'd love to go to space one day and own his own vlogging channel to teach the next generation of programmers. You can reach out to him on Twitter, LinkedIn, and GitHub.


Related Resources
Twilio Docs
From APIs to SDKs to sample apps
API reference documentation, SDKs, helper libraries, quickstarts, and tutorials for your language and platform.
Resource Center
The latest ebooks, industry reports, and webinars
Learn from customer engagement experts to improve your own communication.
Ahoy
Twilio's developer community hub
Best practices, code samples, and inspiration to build communications and digital engagement experiences.