Quit talking over each other! Muting and Unmuting in your Twilio Programmable Video App with React.js
Time to read:
January 29, 2021
Written by
Reviewed by
.png")
An important part of any video calling app is the participants' ability to mute and unmute themselves. In this article, you will learn how to add this functionality to a React video chat app powered by Twilio Programmable Video.
Prerequisites
To make the most of this tutorial, you’ll need to have the following tools, technologies, and accounts:
- A free Twilio account (if you sign up with this link, you’ll get $10 in Twilio credit).
- The Twilio CLI in addition to the Twilio Serverless Toolkit Plugin
- Node.js v10+
Project installation and configuration
Clone the repository
This tutorial is an extension of the Build a Custom Video Chat App with React article. If you followed that post, you can use the code you wrote for that project (but there is updated CSS in the GitHub repo). Otherwise, you’ll want to clone the starter project from GitHub:
Inside this project directory, you’ll find two more folders: frontend and backend.
The frontend folder contains the React code you’ll be extending as you complete this tutorial.
The backend folder contains the code needed to generate an Access Token. An Access Token grants authorization to users of your video chat app. This backend uses Twilio Functions which will need to run alongside your frontend in order to test the app.
Configure the backend
In order to run the backend, you’ll need to make sure you have both the Twilio CLI and a CLI plugin, the Twilio Serverless Toolkit, installed. To install these and change your working directory into the backend folder, run the following commands:
Inside the backend folder is a file named .env.example. Change the name of this file to .env (without the .example extension).
You can do this manually, or with the following command:
Open this file and you’ll find three environment variables with placeholder values. You’ll need to replace these placeholder values with your actual values. To find your Account SID, head to your Twilio Console. Next, visit the API Keys section of the Console to generate an API key and collect the values for the API Key SID and API Secret.
Once you’ve updated your .env file, you can start a local server for your backend by running the following command from the backend folder:
You’ll see a response from the CLI that contains details about the Functions service you’re now running locally, including the endpoint you’ll fetch from in the React app. This endpoint will look like http://localhost:3000/token.
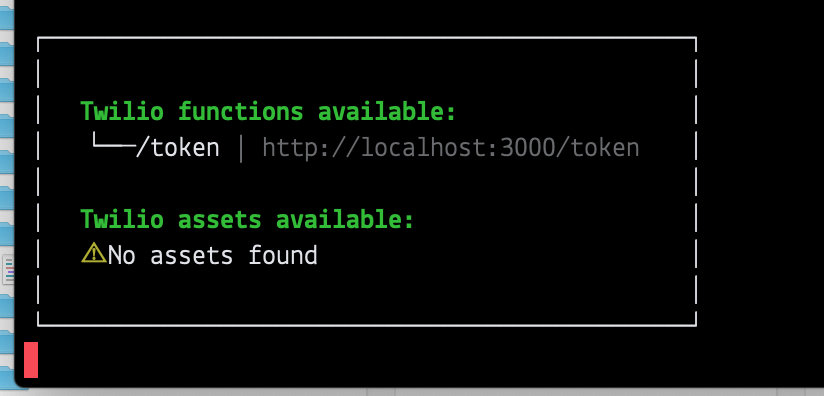
If you’re running your local server on a port other than 3000, your endpoint will look slightly different.
Hang onto the URL for this endpoint. You’ll need it in the next step.
Configure the frontend
With your backend fully configured and running, it’s time to switch gears to the frontend, where the rest of your work will take place.
From the frontend directory in your command prompt or terminal, run the following command to install the dependencies you need for the app:
Your next step is to update the React app so that it’s fetching from the endpoint you gathered in the previous step.
Inside the frontend/src folder there is a file called App.js.
On line 26 of this file, at the beginning of a method called joinRoom(), you should see some code that looks like this:
Change this line so that it’s fetching from your endpoint. If you’re running the backend locally on PORT 3000, then your updated line will be:
Get to know the frontend
Before moving ahead, you might want to explore the codebase a little bit.
The App component controls what the user sees when they open your app. This component is also responsible for enabling the user to enter and leave the video call room. It has one child component: Room.
The Room component is the container for all the unique participants in the video room. It also listens for new remote participants coming or existing remote participants leaving. It can have one or more child Participant components.
The Participant component manages the given participant’s audio and video tracks. Each of these tracks are represented via the child Track components.
The Track component is responsible for attaching and rendering the track it receives as props.
To see how it all works together, start the app by running the following command from the frontend directory (make sure your backend is still running in another terminal tab):
If your backend is on PORT 3000, you’ll be prompted to run your React app on a different port. Press the y key on your keyboard to confirm. When you’re done exploring the app you can stop your server by pressing CTRL + C, but keep your backend server running.
Mute and unmute audio and video tracks
Each participant has an audio and video track that streams from their local media devices, in this case their microphone and camera.
These tracks, after they are attached to the DOM, can be disabled and enabled again. Typically, this happens in response to a user action, like a user clicking a button or icon on their UI.
That’s how it will work in this example, so your first step is to add these icons to the UI. You’ll be using the FontAwesome library to source your icons.
Create the AVControl component with FontAwesome
Navigate to the frontend directory in your terminal or command prompt and install the following three FontAwesome npm packages:
Next, you’ll create a new component called AVControl. This component will manage the different icons that the local participant will interact with to turn their microphone and webcam on and off.
Create a new file inside your frontend/src folder called AVControl.js. Open the file in your text editor and add the following imports to the top of the file:
This code imports the App.scss file, the FontAwesomeIcon component from the FontAwesome React library, and then it imports the four icons you’ll be using:
faMicrophone: an SVG icon of a microphonefaMicrophoneSlash: an SVG icon of the same microphone with a diagonal slash through itfaVideo: an SVG icon of a video camerafaVideoSlash: an SVG icon of the same video camera with a diagonal slash through it
Beneath your newly added imports, copy and paste the following code to scaffold and export your new function component AVControl:
You’ll notice that AVControl receives props as a parameter. Eventually you’ll render this component inside the Track component where you’ll pass several pieces of data as props:
- A
toggleTrack()method that will be called when the icon is clicked - A boolean that tells the
AVControlcomponent whether its parent track is currently on or off - A string indicating whether the parent track is an audio or video track
You’ll utilize these props as you build out the AVControl component.
Inside the AVControl() function, add the following code:
This code creates a new variable called icon. Then, the correct icon (of the four you imported) is chosen and assigned to this new variable based on whether the parent track is currently on or off, and whether it’s an audio or video track.
For example, if the parent track is an audio track and it’s currently on, then the icon rendered by the AVControl component will be the faMicrophone. The icon will always represent the current on/off state of the corresponding track.
For the final piece of the AVControl component, add the following return statement at the end of the AVControl() function, before the closing curly brace:
This return statement will render a <div> element with the class name avControl. Inside this <div> will be the correct FontAwesome icon, with a click event on it that calls the toggleTrack() method that the component received as props.
You can save and close this file now, you won’t need it again. Great work!
Add the AVControl component to the Track component
Go ahead and open the file called Track.js inside the frontend/src folder. This file contains all the code for the Track component.
At the top of Track.js, add the import for the AVControl component you just created:
Inside the Track component’s constructor method, you’ll need to add the piece of state that keeps track of whether the track is enabled or disabled.
To do this, update the constructor method to reflect the highlighted lines:
The default value of the new trackOff state is false, meaning that when this component renders, the track is on.
Next, you’ll create the toggleTrack() method that gets passed to the AVControl component.
In between the componentDidMount() and render() methods of the Track component, add the following code:
The method is where the magic of muting and unmuting happens. If the Track component state indicates that the track is currently off, then this code turns it back on with the enable() method provided by Twilio Programmable Video. The enable() method will restart a paused audio or video stream.
Conversely, if the track is currently on, then this code turns it off with the Twilio provided disable() method. The disable() method will pause an existing audio or video stream.
These two methods are the core of muting and unmuting both audio and video tracks.
In the toggleTrack() method, after enabling or disabling the track, the trackOff state is also toggled to reflect the track’s new state.
Before moving on, add the following line to the end of the constructor() method to bind the new toggleTrack() method to the JavaScript keyword this:
The last task in this component is to update its render() method to include the AVControl component:
Notice that with this code, the AVControl component is only rendered if the value of this.props.local is truthy. This is because we only want to render the AVControl component if the parent Participant component is representing the local participant.
In other words - you don’t want each user to see the mute/unmute icons on every single other user. That wouldn’t make sense - participants shouldn’t be able to mute/unmute other participants! This ensures that every participant can only see their own mute/unmute icons.
But right now, the Track component doesn’t receive props called local from its parent Participant component. You’ll fix that now.
Update the Participant component
Save and close the Track.js file and open the Participant.js file inside the same frontend/src folder.
At the very bottom of this file, inside the Participant component’s render() method, update the line that renders the Track component so it now passes the local props:
Test out muting and unmuting in your app
Save and close the Participant.js file.
Make sure your backend is still running on PORT 3000.
From the frontend folder in your terminal or command prompt, start your local React server by running the following command:
Open up your browser and head to localhost:3001, or whatever port your React server is running on. After entering your name, click the Join Room button.
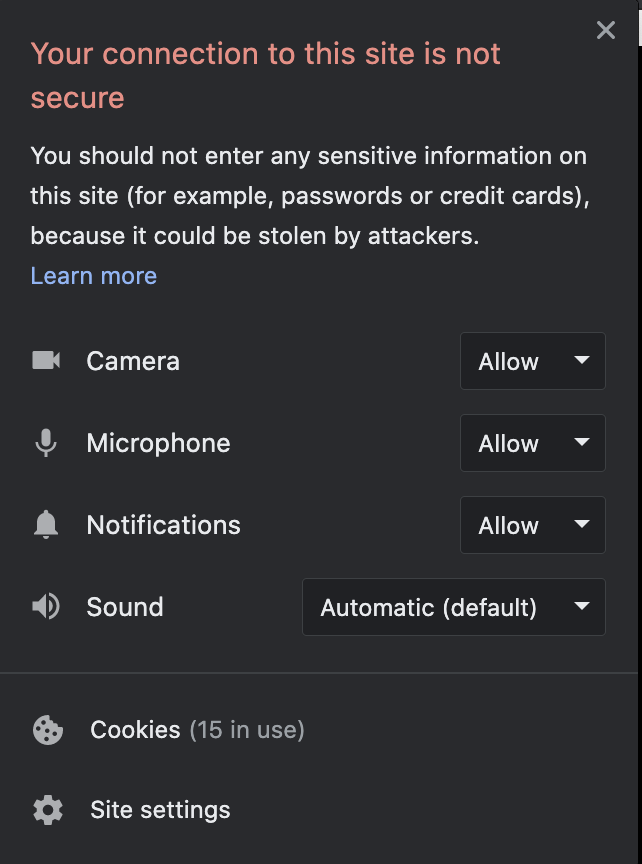
At this point, you might be prompted to enable permissions for your browser to access your camera and microphone.
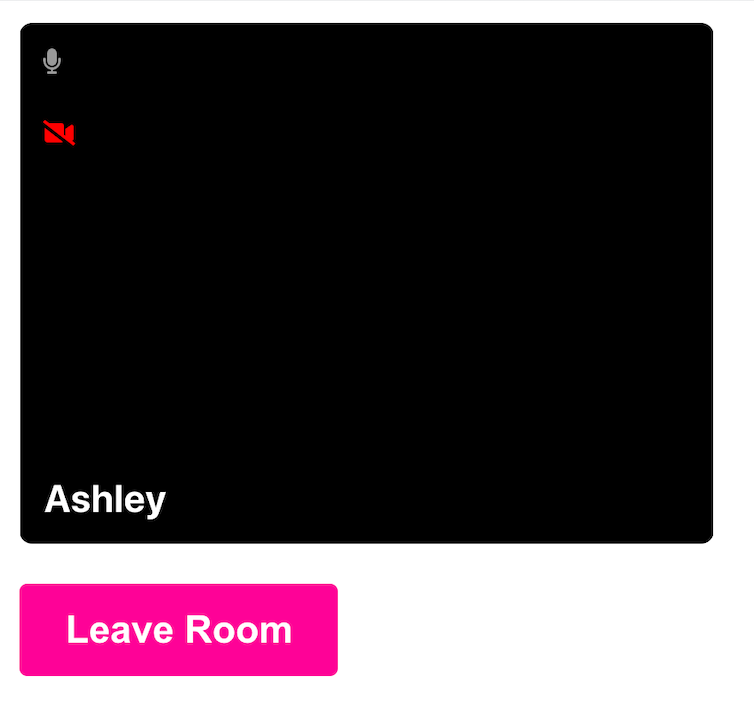
Once you’ve successfully entered the video room, you should see yourself with the microphone and video camera icon overlaying your video in the top left corner.
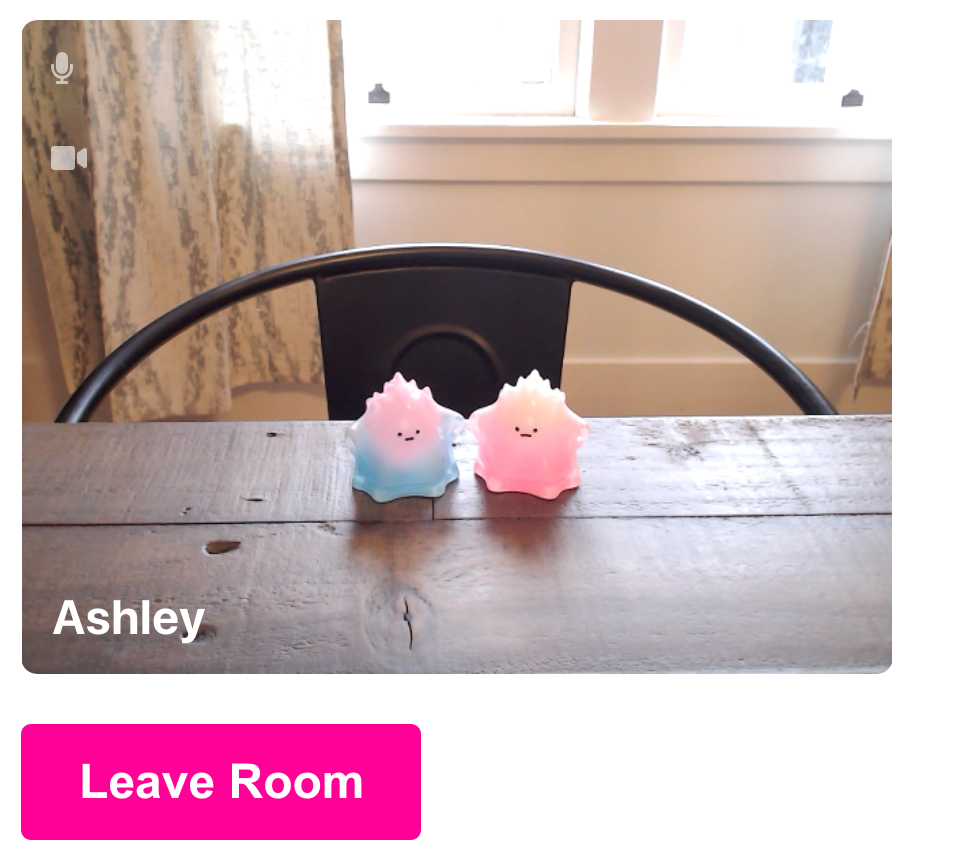
If you hover over either of the icons, their brightness will increase.
If you click on the microphone icon, your audio track will be muted, and you will see the microphone-slash icon, in red, in its place.
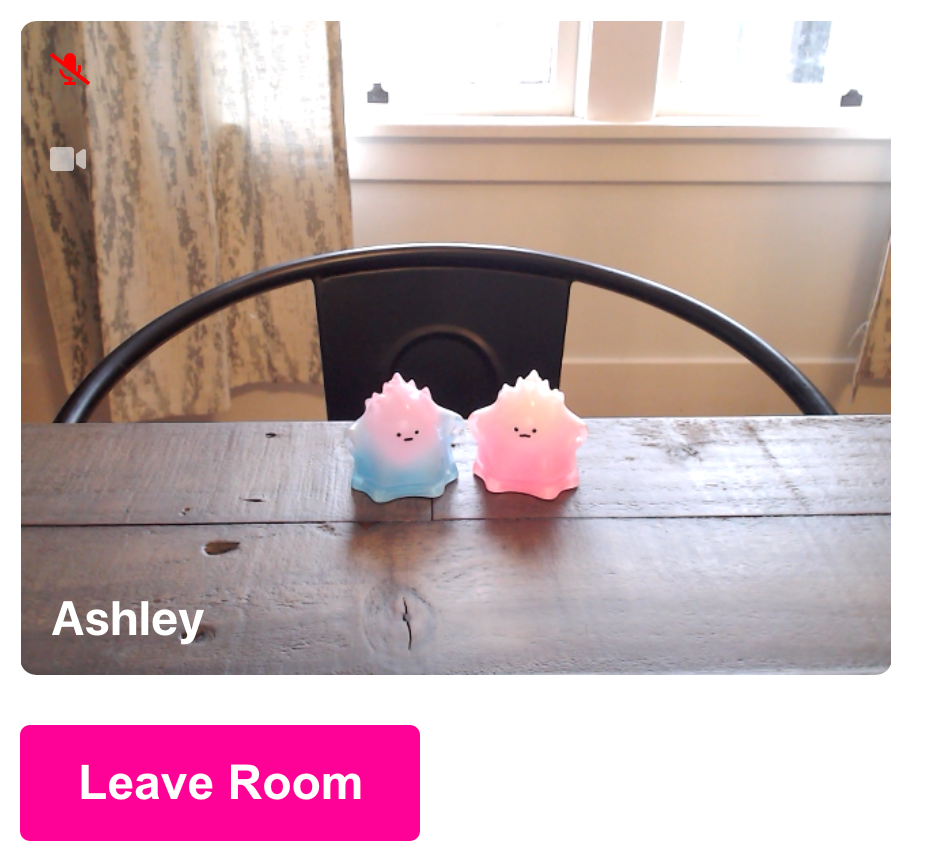
If you click on the video camera icon, this will turn off your video stream and your video space on the UI will be replaced with a black fill. Like the microphone icon, the video camera icon will be switched with the slash version as well.
Conclusion
Now that you’ve learned how to enable muting and unmuting in your React video chat app, check out some of the other cool things you can do with Twilio Programmable Video like adding custom video filters or emoji reacts.
Let me know on Twitter what you’re building!
Ashley is a JavaScript Editor for the Twilio blog. To work with her and bring your technical stories to Twilio, find her at @ahl389 on Twitter. If you can’t find her there, she’s probably on a patio somewhere having a cup of coffee (or glass of wine, depending on the time).

Related Resources
Twilio Docs
From APIs to SDKs to sample apps
API reference documentation, SDKs, helper libraries, quickstarts, and tutorials for your language and platform.
Resource Center
The latest ebooks, industry reports, and webinars
Learn from customer engagement experts to improve your own communication.
Ahoy
Twilio's developer community hub
Best practices, code samples, and inspiration to build communications and digital engagement experiences.