Verify a User via Phone with Twilio Functions and Twilio Verify
Time to read:
August 31, 2021
Written by

Many applications verify and authorize their users by sending a numeric code, called a One-Time Passcode (OTP), to the user’s phone number via either a voice call or a text message.
In this article you’ll learn how to perform user verification via a phone call through Twilio Verify. You’ll build a pared down frontend using JavaScript and HTML and you’ll build a Node.js backend, all hosted with Twilio Functions, which will be scaffolded using the Twilio Serverless Toolkit, a plugin for the Twilio CLI.
Prerequisites
To get started with this tutorial, you’ll need the following:
- Node.js installed on your machine, along with a package manager like
npmoryarn - A free Twilio account (sign up with this link and get $10 in free credit when you upgrade your account)
- A phone where you can receive phone calls
- The Twilio CLI with the Twilio Serverless Toolkit installed (make sure you’re logged in to the Twilio CLI)
Set up Twilio Functions
In your terminal or command prompt window, run the following command, from your main projects or development folder, to create a new Functions service.
This will create a new directory on your machine called verify-demo that will contain some boilerplate folders and files for a Twilio Functions service.
Your frontend code files will go inside the verify-demo/assets folder, and the backend code files will go inside the verify-demo/functions folder.
You’ll also notice a .env file inside the verify-demo folder. This file is automatically pre-filled with your Twilio Account SID and Auth Token. Check to make sure these values are correct (you can find them on your main dashboard in the Twilio Console). Then, on a new line below them, add the following text:
The XXXX represents a placeholder value that you will replace shortly, so leave this file open for now.
Twilio configuration
In order to use Twilio Verify, you first need to set up a new Twilio Verify service. A service is a set of configurations you can use to manage verifications on your app or website.
Creating a new Verify service
Navigate to the Verify section of the Twilio Console and select Services from the left-hand menu. Click the blue plus sign (+) to create a new service. A modal dialog will pop up where you can enter a name for your service. Call it node-demo, or any other short, descriptive name of your choosing.
After creating your service, you’ll be taken to a general settings page for your new service.
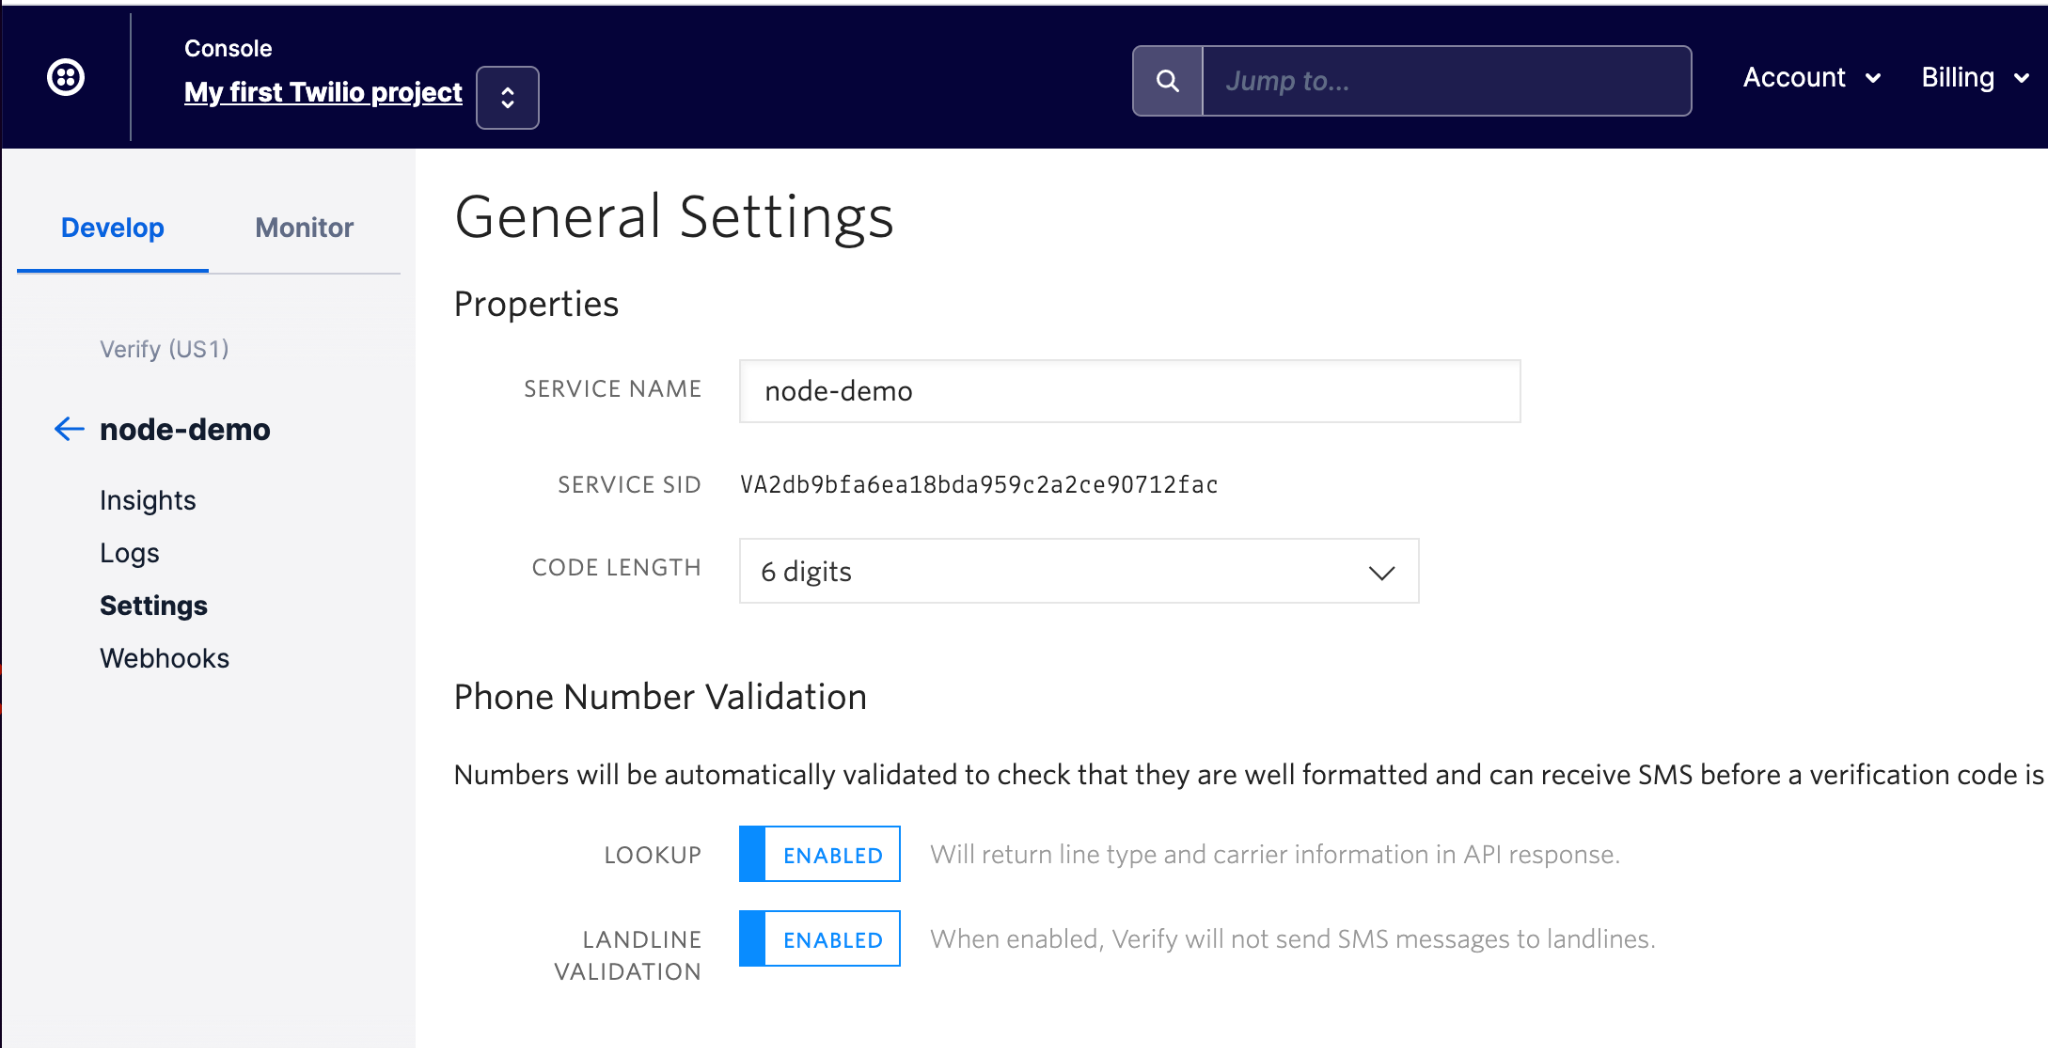
Below your service name, you will see your SERVICE SID. Copy this value and paste it into your .env file, replacing the XXXX placeholder for the VERIFY_SERVICE_SID variable.
Save and close your .env file.
Back in your browser, keep scrolling down the Verify Service Settings page to the bottom to find the Delivery Channels section. Since you are only going to use a voice call in this example, it is a good idea to disable the other two channels.
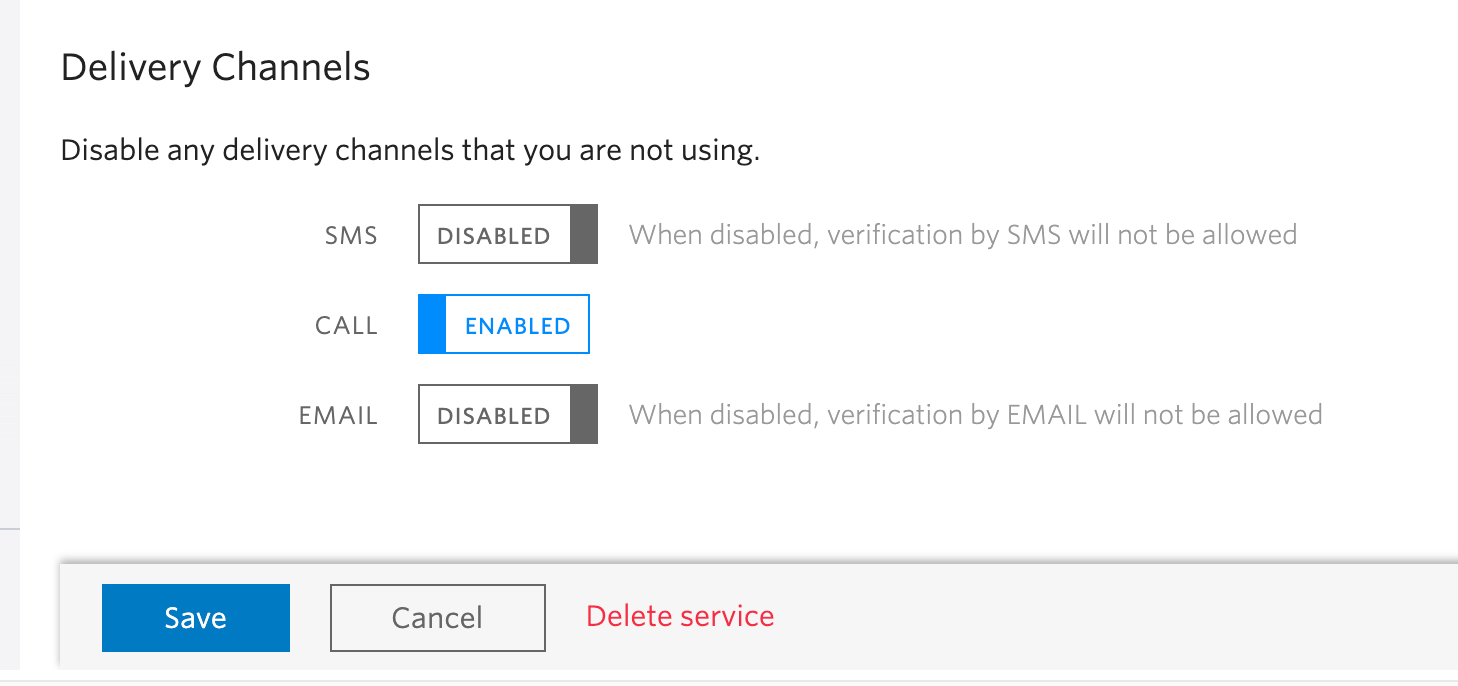
Click the Save button to record your changes. Congratulations, your voice verification service is now fully configured and you are ready to start coding the application!
Build the frontend
In this section you are going to set up your app’s frontend.
Create a new file called index.html inside the verify-demo/assets folder. Open this file in your favorite text editor and add the following HTML:
This HTML creates two forms: one for the user to enter their phone number, and one for the user to enter the verification code they will receive via a voice call after submitting their phone number. It also creates an empty <div></div> element that will eventually display a success or failure message to the user.
You don’t want both of these forms visible at the same time, so add the following CSS in the <head></head> tags, below the <title> element, to hide the #verify-form (and the empty <div></div>) when the page loads:
Write the code to handle form submissions
Create another file in the verify-demo/assets folder called script.js. This is where you will write the code to process the form submissions and connect with the Twilio API.
At the top of script.js, paste in the following code:
This code declares a few variables you’ll use through the script.
Beneath the variable declarations, add the following code to process any submissions to your #phone-form:
This code listens for a submit event on the #phone-form. Whenever this submit event occurs, a callback function is run that handles the following tasks:
- Prevents normal submission of the form
- Captures the value of the phone number that the user entered in the
#phone-number-inputfield - Makes a
POSTrequest to the app’s backend endpoint, /send-notification, as highlighted in the code above, with the phone number value - Switches the visible form upon a successful response from the request
Below all the existing code, add the following code to process the #verify-form submissions:
This code works similarly to the code you added in the previous step, but it is used during the verification phase. The primary difference is that this code sends the value of both the phone number and the user-submitted OTP to the app’s backend endpoint, /verify-otp.
When it receives a response from the POST request, it displays the verification status to the user via the #response-text element.
Save and close your script.js file. It’s time to build the backend!
Build the backend
In the code above, you made POST requests to two backend endpoints: /send-notification and /verify-otp. You’ll create these endpoints now.
Send the verification code to the user
The /send-notification endpoint receives the user’s phone number, and using the Twilio Verify API, makes a voice call to the phone number, where the OTP will be read using text to speech software to the recipient. This initiates the verification process.
Inside the verify-demo/functions folder, create a file called send-notification.js. Copy the following code and paste it into your new send-notification.js file:
The verification is initiated on the highlighted line in the code above. In the object passed to the create() method, you can add other properties to further customize the verification.
For example, if you wanted the call to be delivered in another language (Twilio supports over 30 languages for SMS and voice verification), you could add add the locale property:
Or, if you need to have the verification call be delivered to a phone number extension, you can include the extension digits in the sendDigits property:
Verify the OTP submitted by the user
The /verify-otp endpoint receives both the user’s phone number, and the OTP that the user submitted. Using the Twilio Verify API, this endpoint checks to confirm that the submitted OTP is correct, and returns a response containing data about this verification check, including a status.
There are three statuses that a verification check can have: pending, approved, or canceled.
- Pending verification checks refer to any verifications that have been initiated but that have not been approved, canceled, or expired.
- Approved verification checks refer to verifications where the OTP has been confirmed to be a match.
- Canceled verification checks are either canceled, or if it’s been 10 minutes or longer since the verification code was sent to the user, expired.
Create a new file in the verify-demo/functions folder called verify-otp.js. Add the following code this file:
This code performs the verification check with the phone number and the OTP submitted by the user. It then creates a new Response object, and returns the verification check data as the body of the response.
Test out your app
It's time to test out the app! In your command line, navigate to the verify-demo directory if you’re not already there. Run the following command to start your local development server:
This will start a local server on port 3000.
In your browser, navigate to http://localhost:3000/index to see your app.
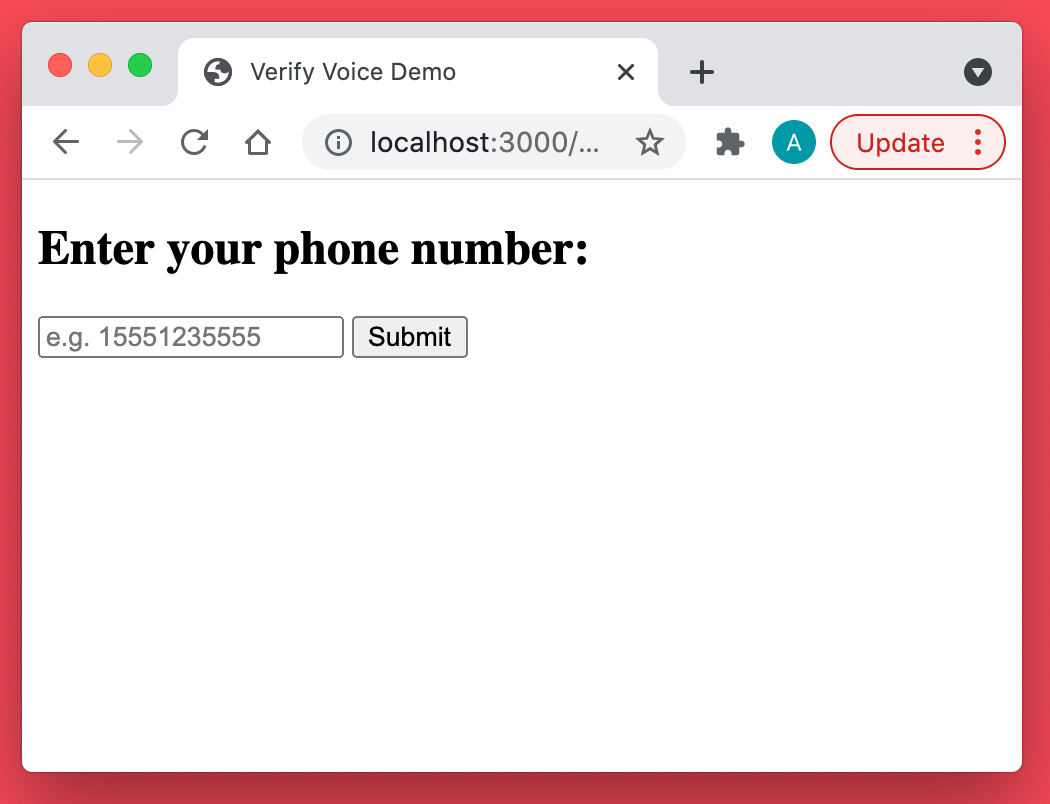
Enter your phone number in the field, starting with the country code, and then click the button that says Submit.
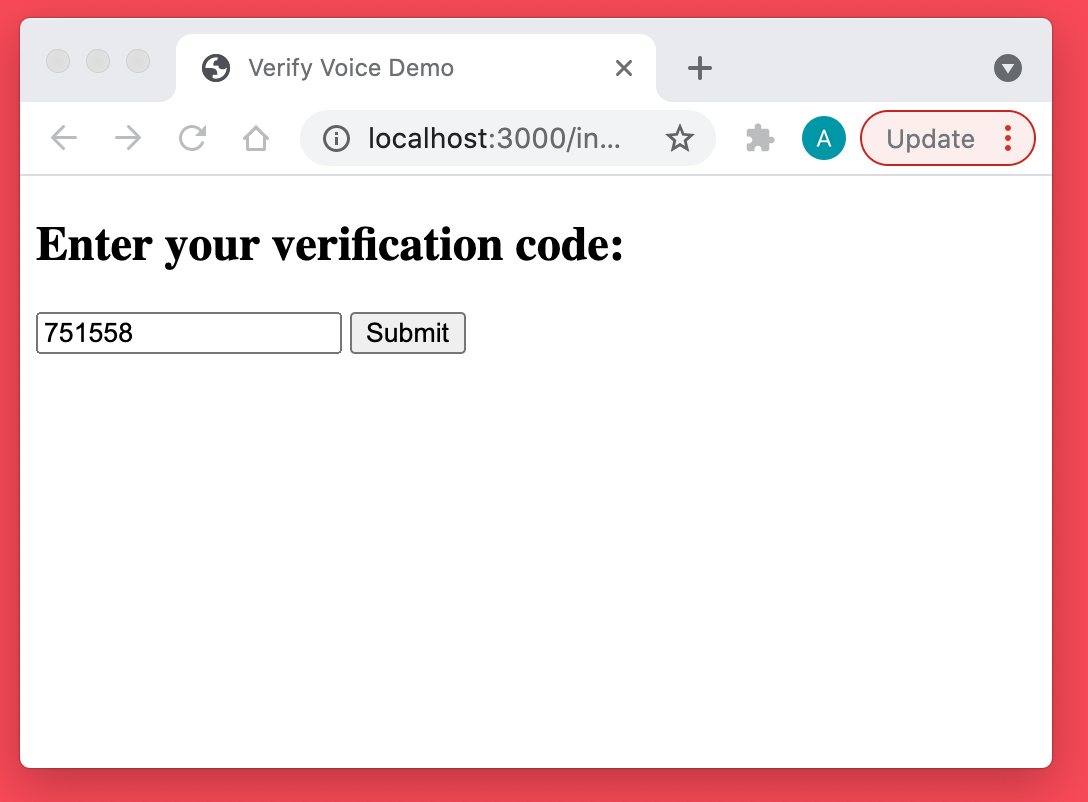
Once you click the Submit button, the phone number form will be replaced with the verification code form. A few moments later, you’ll receive an OTP via a voice call. When you answer the call, a robot voice will greet you and ask you to press 1 to hear your verification code.
Back in your browser, submit the verification code read to you on the voice call in the verification form:
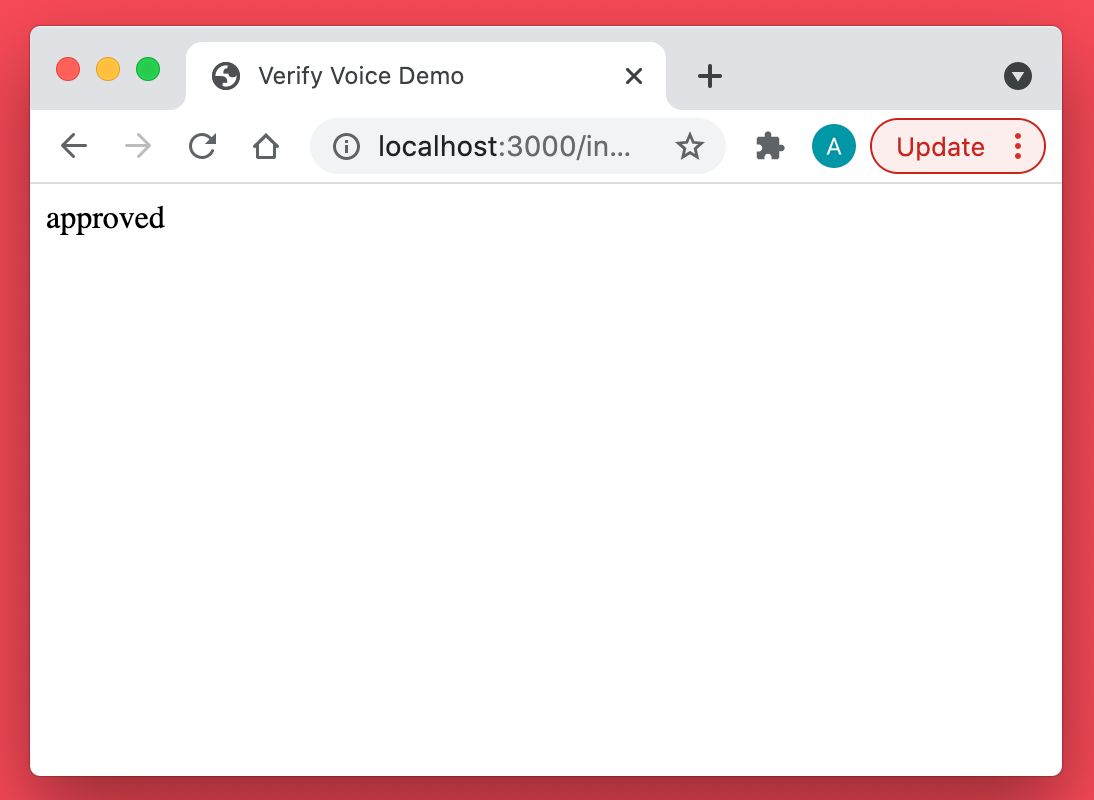
When you click the Submit button, the /verify-otp endpoint you created will be called. If you entered the correct code in the form, once the frontend of your app receives a response from the backend, you will see the “approved” status message:
If you entered the wrong code, the message would say “pending” instead. In a production app, you would likely give the user an opportunity to enter the code again by showing the verify form a second time instead of the “pending” message.
Deploying your Twilio functions
So far, your app has only been running locally on your computer. If you’d like to deploy a locally served app built with Twilio Functions, then from the root directory of your project folder (in this case, node-demo), you can run the following command:
This will deploy each function of your app to a publicly accessible URL. If you deploy your code for this demo app, be sure to change your fetch() URLs in script.js to your new URL for each endpoint.
What’s next for authenticating users with Twilio Verify?
Congratulations on implementing safe practices and incorporating security measures into your project!
Twilio Verify supports several channels through which the user can be verified other than voice, including SMS and email. Consult the documentation to learn about these and other verification methods.
Let me know if you used Twilio Verify API to protect your users in your project by reaching out to me on Twitter!
Ashley is a JavaScript Editor for the Twilio blog. To work with her and bring your technical stories to Twilio, find her at @ahl389 on Twitter. If you can’t find her there, she’s probably on a patio somewhere having a cup of coffee (or glass of wine, depending on the time).

Related Resources
Twilio Docs
From APIs to SDKs to sample apps
API reference documentation, SDKs, helper libraries, quickstarts, and tutorials for your language and platform.
Resource Center
The latest ebooks, industry reports, and webinars
Learn from customer engagement experts to improve your own communication.
Ahoy
Twilio's developer community hub
Best practices, code samples, and inspiration to build communications and digital engagement experiences.