Build a WhatsApp Weather Bot with Python, OpenWeather and Twilio
Time to read:
September 28, 2020
Written by

WhatsApp has become the defacto messaging application that most people use to keep in touch. Wouldn’t it be convenient to build a WhatsApp bot that receives your location and responds with an instant weather update?
Using the Twilio WhatsApp API, OpenWeather One Call API and Django, we will build our very own weather bot, which will provide current weather information and the forecast for the next week.
See a sample interaction below:

Prerequisites
- Python 3.6 or higher. If you don’t have it installed, get it here
- Twilio account: If you are new to Twilio, sign up for an account here.
- OpenWeather account: If you are new to OpenWeather, sign up for an account here.
- ngrok: a tool that allows us to expose local servers to the public internet. We will use it to create a public URL that Twilio can use to securely communicate with our web server. You can get it here.
- A personal WhatsApp account and a phone with WhatsApp installed.
Enable the Twilio WhatsApp sandbox
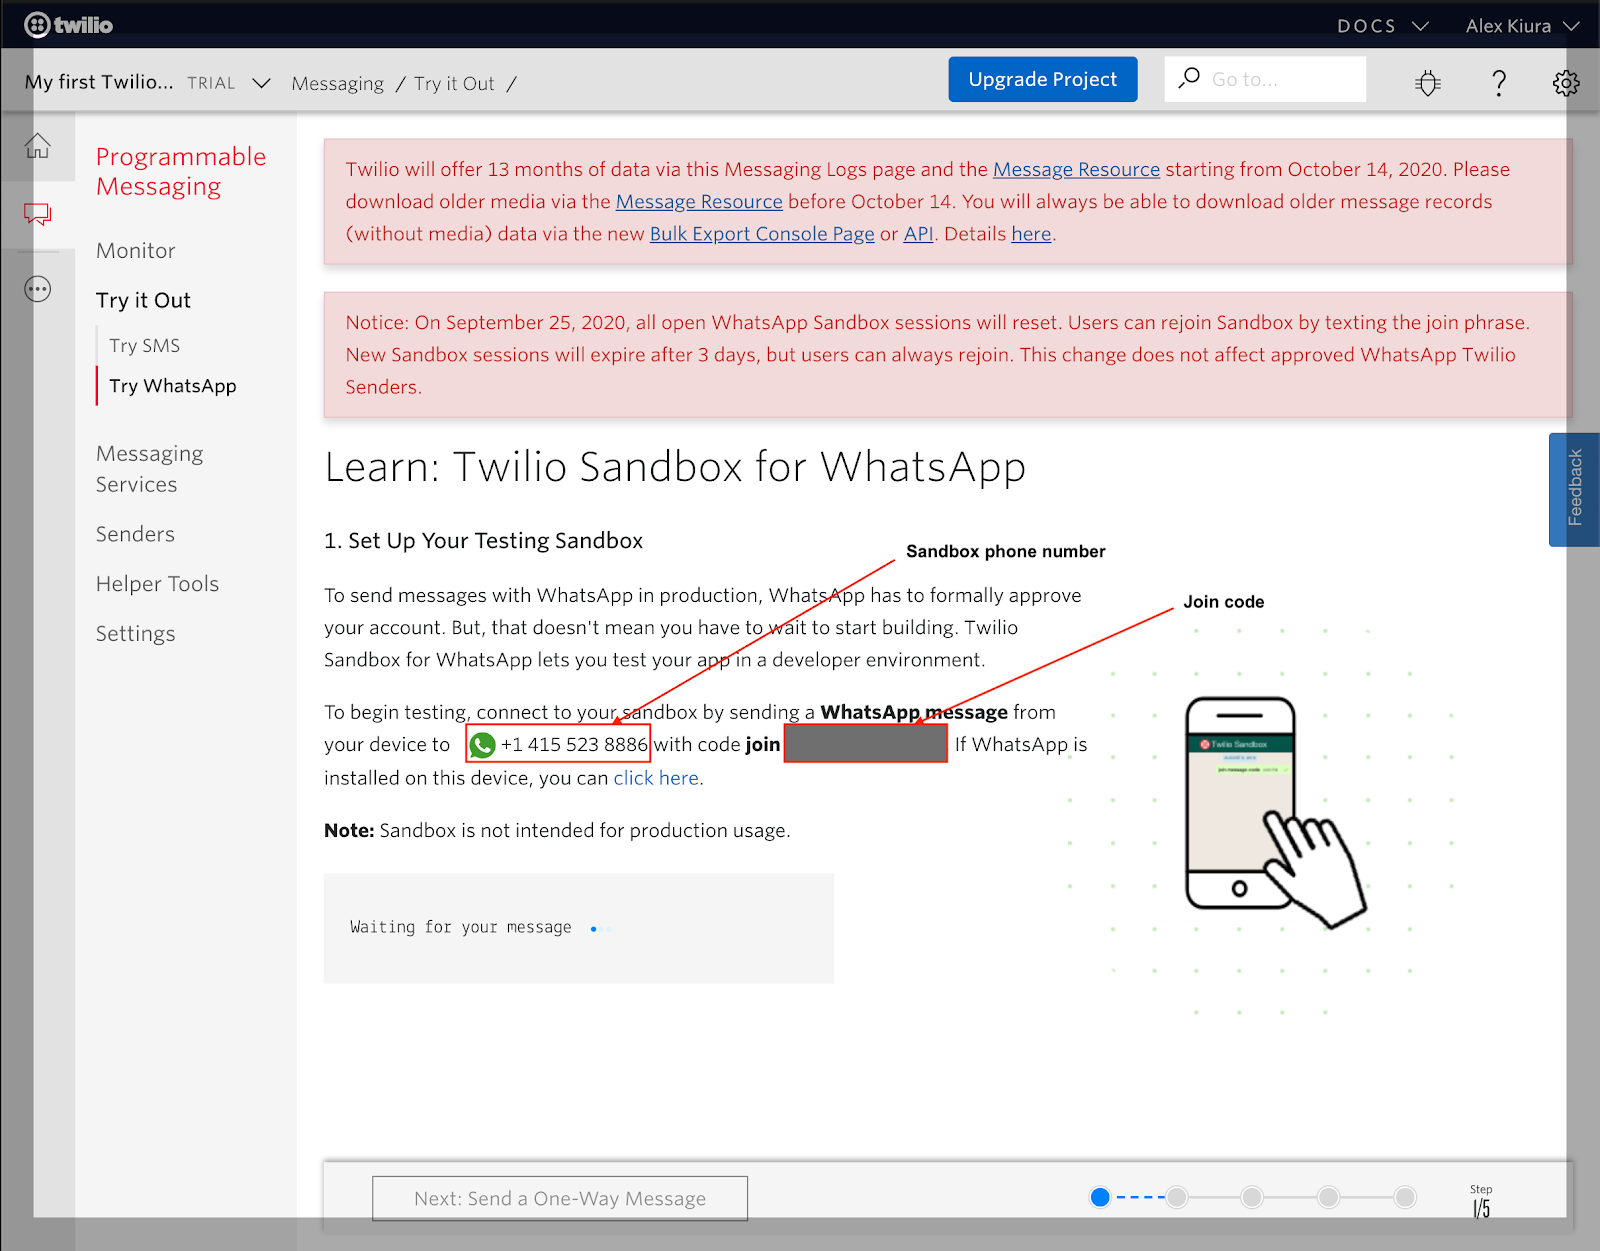
Now that we have a Twilio account, we will need to activate the WhatsApp sandbox which gives us access to a shared WhatsApp number that we can use to receive and send WhatsApp messages. Login to Twilio and head over to the console. From the console, select “All Products & Services”, then “Programmable Messaging”. Select “Try it Out” and then “Try WhatsApp”.
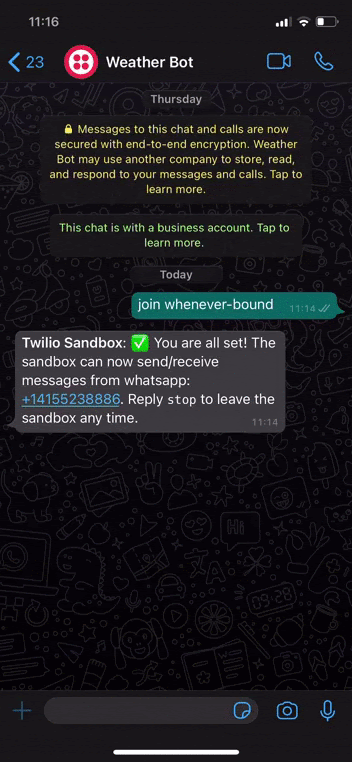
To join the sandbox, send a message beginning with the word join followed by the randomly generated two word code shown on the sandbox from your phone to the WhatsApp sandbox number. Repeat this for any other number you may want to add to the sandbox.
Create and setup a Python Virtual Environment
We will install several Python packages for our project. Since virtualenvs make it easier to manage several packages, let’s go ahead and create one.
Create a directory called weather_bot and navigate to it.
Create a virtualenv:
To activate the virtualenv on Mac Os or Linux:
To activate the virtualenv on Windows:
We will need the following packages:
- Django to create a web server to receive and respond to messages
- The Twilio Python Helper Library to help us interact with the the Twilio API
- Requests for sending HTTP requests
Let’s install the above dependencies:
Create a Django service
We will now create a django project inside the weather_bot directory:
The directory should have a structure similar to the one below:
Run the initial database migrations and then start the server:
The ngrok output will show the temporary public URL that was assigned to your application in the “Forwarding” lines. In this tutorial we will use the https:// address.
If you try accessing the web server using this URL, you will get a DisallowedHost error. This is because Django is not aware of the ngrok URL, so it prevents it from connecting. Open the file weather_bot/settings.py in your text editor or IDE and locate the line that reads:
Edit this line to look as follows:
This tells Django that any URLs that end in .ngrok.io are allowed as hosts for the application. Ngrok URLs are randomly generated and expire in 8 hours when you use the free version, so to avoid having to edit the configuration every time a new instance of ngrok is started we leave the randomly generated part of the URL out.
Now you should be able to access your Django application by entering the ngrok URL in your web browser.
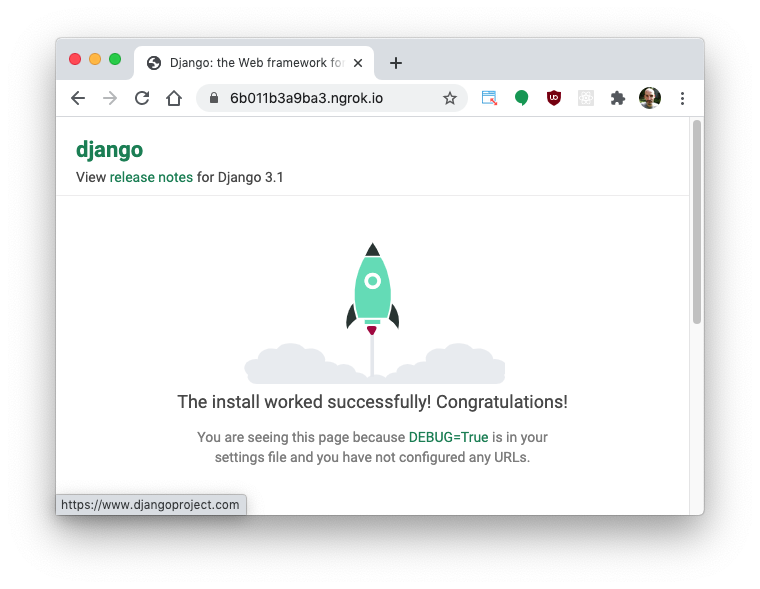
Congratulations, now your web server is exposed publicly!
Webhook
Our web server will have one endpoint /bot, which will be responsible for receiving requests from Twilio and performing an appropriate action. When a message is sent to the Twilio WhatsApp sandbox, Twilio will call this endpoint with the message sent by the user.
We will now write a simple view that handles these calls from Twilio. In our Django project, we will create a Django application called bot that will hold the logic for our bot.
This will create a new directory called bot with a structure that looks like this:
The new directory structure for the project should look as follows:
Now it is time to write our first view. To confirm that we can receive WhatsApp messages, we will print out the message received, and respond on WhatsApp with the same message.
Copy the code below to bot/views.py:
Since the requests will be coming from Twilio, the default Django configuration will raise CSRF errors because these requests will not include a CSRF token. To silence the errors, we will decorate the view with csrf_exempt which marks a view function as being exempt from the CSRF view protection.
The MessagingResponse class is a helper class from Twilio that creates a response using the TwiML language. In this first version of the endpoint we use this response to return the message from the user back.
Update the list of installed apps
We need to make Django aware of the just created bot application. Visit the Django documentation to learn more about Django apps.
Inside weather_bot/settings.py, add 'bot.apps.BotConfig' to the list of INSTALLED_APPS so that it looks like so:
Configure URL routing
In the bot directory, create a file called urls.py so that the bot directory now looks like:
In the bot/urls.py file, add the following code:
Next we will need to point the root URLconf in file weather_bot/urls.py to the bot.urls module like so:
Receive messages from a user
Our web service now exposes an endpoint /bot with which Twilio can communicate.
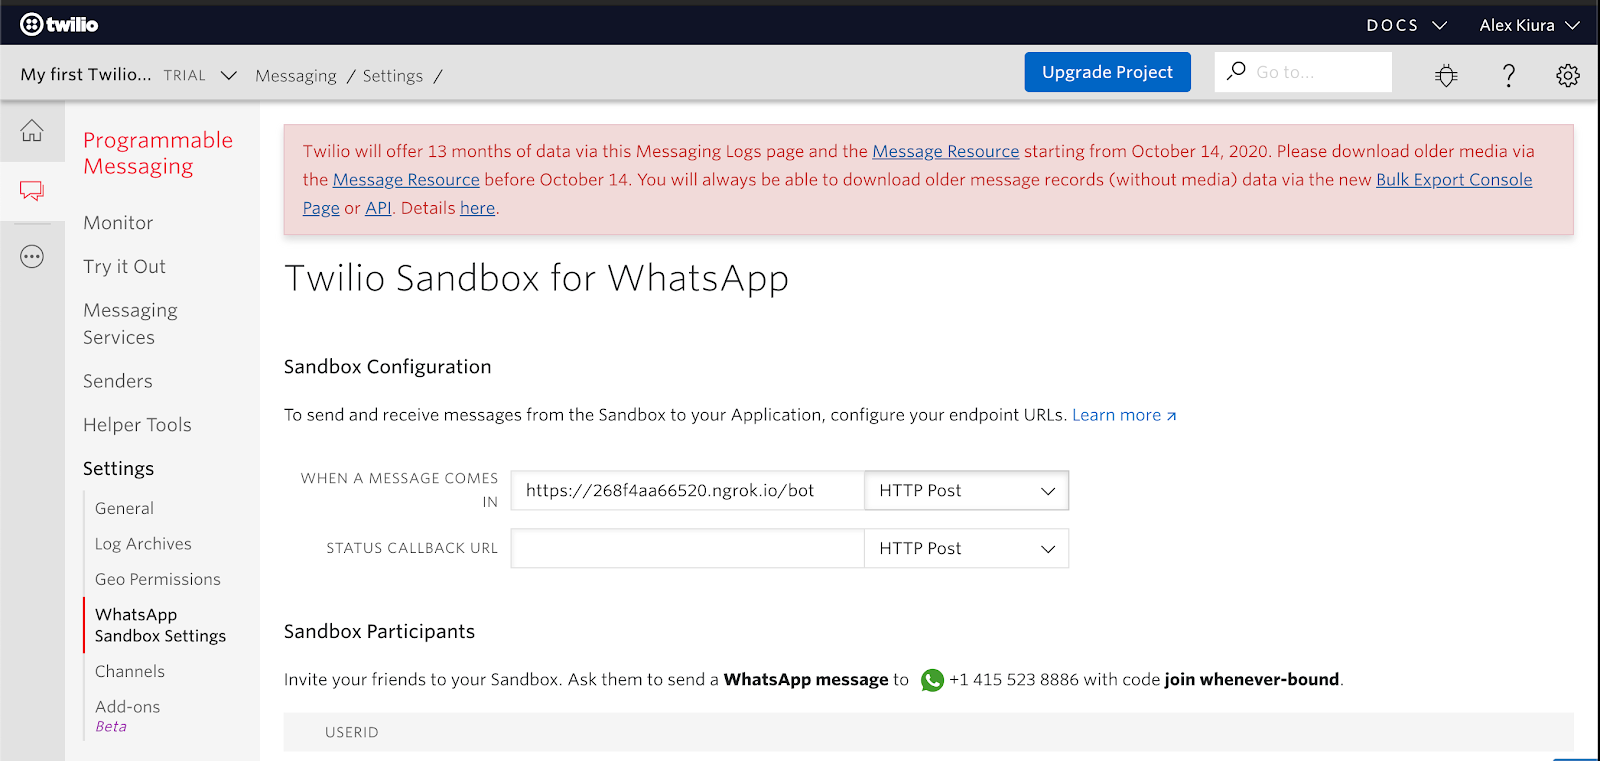
Next we need to configure the URL for our endpoint so that Twilio knows it. Go to the Twilio sandbox configuration page and enter the ngrok URL followed by /bot in the “When a message comes in” field. The URL should have the format https://<random-code>.ngrok.io/bot.
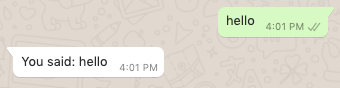
Now, every time a message is sent to the Twilio sandbox number, the message will be printed on the terminal where the Django application is running, and a response with the same text will be sent to WhatsApp:
Using the OpenWeather One Call API
Let us create a query_weather function that will fetch current and forecast weather data for a particular location. The OpenWeather API allows you to specify units of measurement you would prefer. The options are standard, metric and imperial. For this tutorial, we will use metric units.
Inside the bot directory, create a file called query_weather.py and let’s define a function called get_weather:
The get_weather function accepts the latitude and longitude of the desired location, and an OpenWeather API key. It queries the OpenWeather API with the location coordinates to get the current weather and forecast weather data for a particular location. To keep the response light, we exclude the hourly weather data.
To obtain your OpenWeather API key, visit the API keys section. Once you have a key, go to the terminal where the Django application is running, stop it with Ctrl-C, and then define an environment variable with your key as follows:
For Windows, replace theexport command with set.
Once the variable is set, restart the application:
Then add the API key definition in weather_bot/settings.py:
Receive WhatsApp location messages
A user can send their current location to the bot directly from WhatsApp:
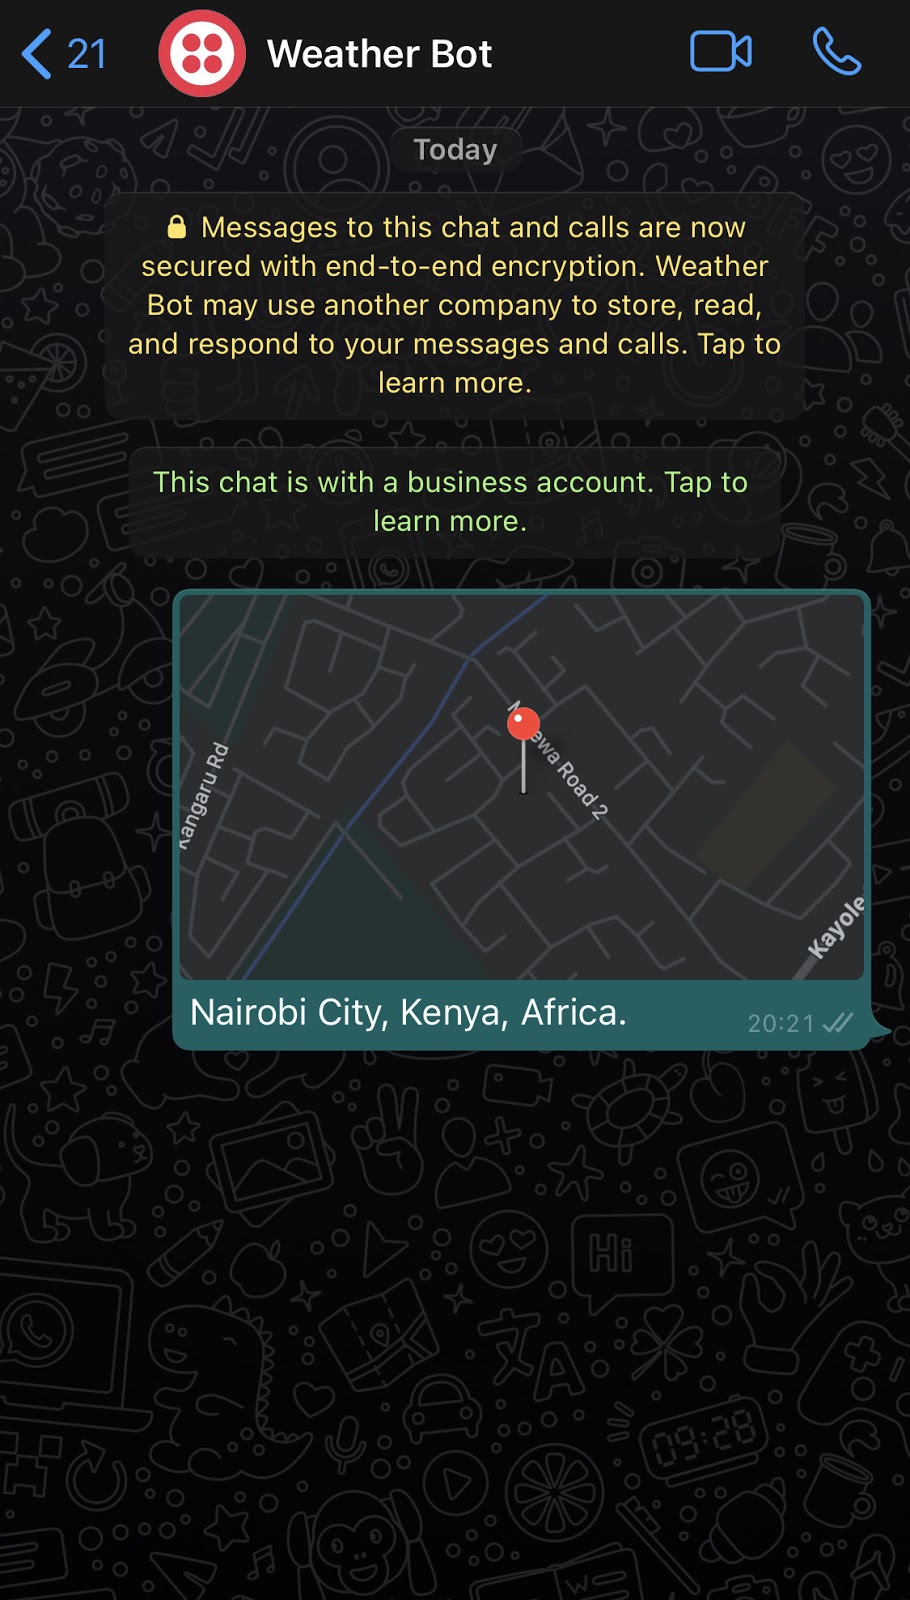
For messages that include location information, Twilio includes the longitude and latitude in the POST request it makes to our webhook.
Let’s modify our view in bot/views.py to extract location information from incoming requests.
Send formatted weather data to the user
Now we have the weather information for the location sent by the user. Next, we will send a nicely formatted reply to the user.
The message will look like below:
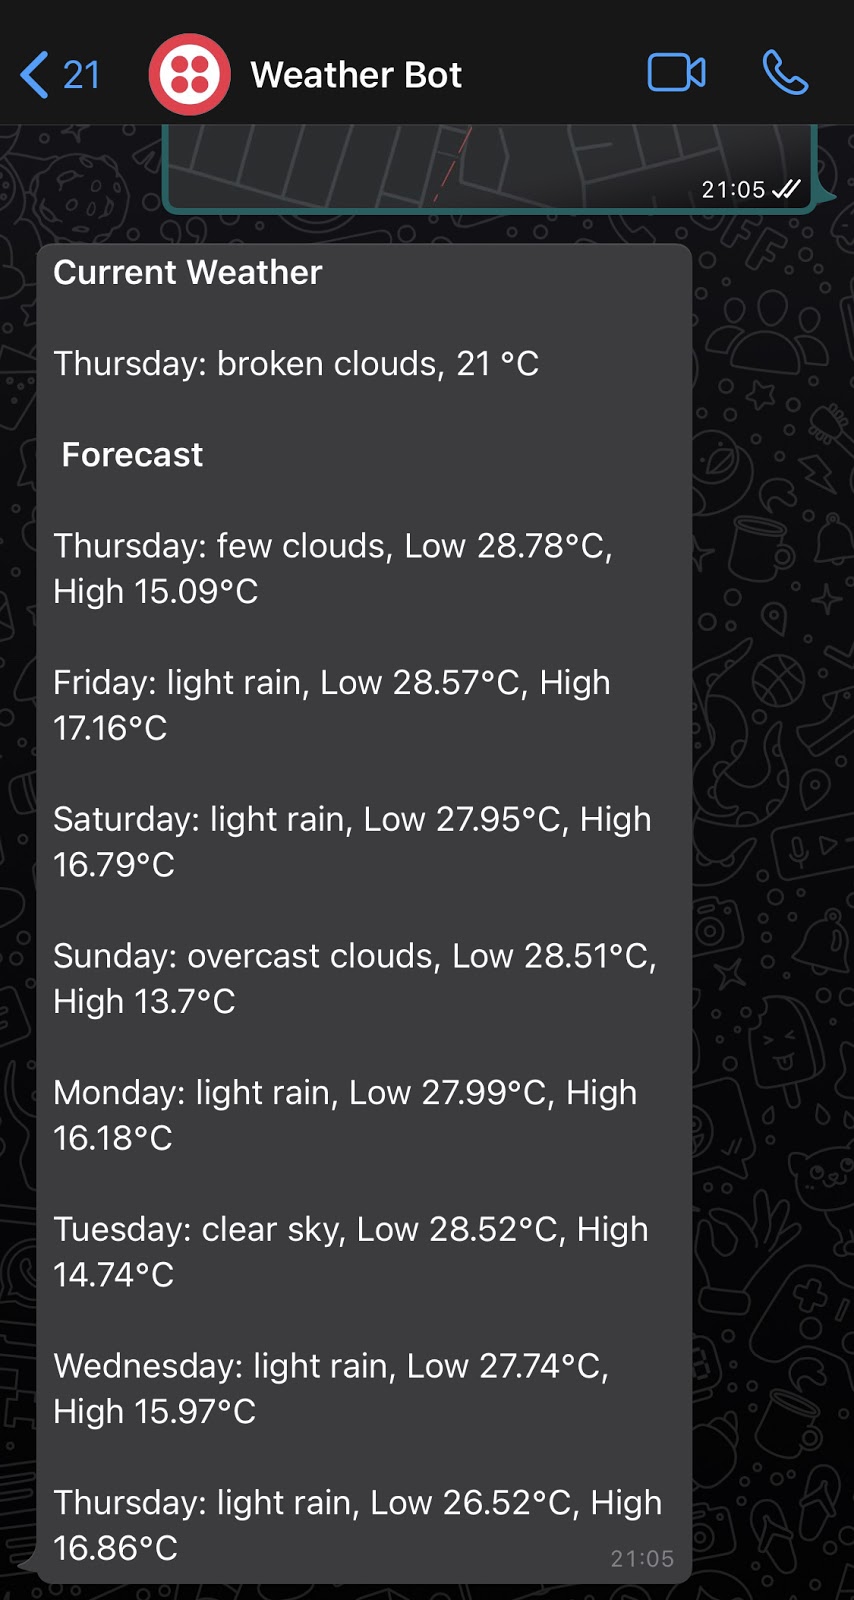
WhatsApp allows messages to be formatted as Bold, Italic, Strike-through and Pre-formatted. Learn more about the formatting here.
Update bot/query_weather.py to look as follows:
Finally, we modify bot/views.py to call the generate_weather_message function to create a nicely formatted message reply and send it to the user.
Testing the weather bot
If you have followed all the steps so far, the web service should be ready to receive location messages and respond with a weather update.
See the bot in action below:
Conclusion
Congratulations on building a WhatsApp weather bot. Now you know how to build a simple WhatsApp bot. The bot could be further improved by adding weather icons or emoji based on a particular weather condition.
People and businesses are increasingly depending on WhatsApp, and there are many problems that can be solved by building a bot. Below are some solutions that can quickly get you started in building intelligent bots that leverage machine learning:
- Twilio Autopilot to build and train intelligent conversational bots that work across web and mobile chat, SMS, voice and WhatsApp.
- OpenAI API, a general purpose text based AI system that can be applied on many language tasks.
Alex is a developer and technical writer. He enjoys building web APIs and backend systems.

Related Resources
Twilio Docs
From APIs to SDKs to sample apps
API reference documentation, SDKs, helper libraries, quickstarts, and tutorials for your language and platform.
Resource Center
The latest ebooks, industry reports, and webinars
Learn from customer engagement experts to improve your own communication.
Ahoy
Twilio's developer community hub
Best practices, code samples, and inspiration to build communications and digital engagement experiences.