Build an SMS Dashboard with Python, Flask and Twilio
Time to read:
July 10, 2020
Written by

In this tutorial we will build a dashboard for receiving Twilio SMS messages on your computer. What we will build here can be a foundation for a custom dashboard project. By the end of the tutorial you will have a web application running on your computer which you can use to check SMS messages on your Twilio phone number.
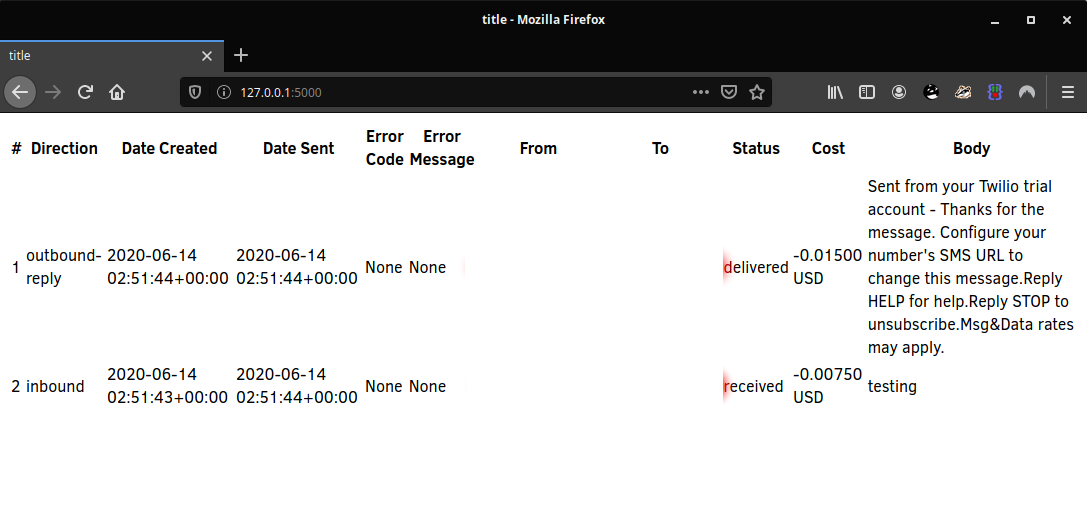
The dashboard we build will allow us to view all incoming and outgoing messages. Here is how it looks:
Getting set up for this tutorial
There are a few prerequisite steps we need to follow before we begin working through the code.
- Install Python version >= 3.6 on your computer
- Set up your Twilio Account
- Set up your Python virtual environment
We assume that you already have Python installed. We will now walk through setting up your Twilio account and preparing the virtual environment.
Setting up your Twilio Account
If you do not already have a trial account please follow these sections from the official Twilio guide. We only need to complete these three sections for this tutorial:
- Sign up for your free Twilio trial
- Verify your personal phone number
- Get your first Twilio phone number
Once you have completed those steps navigate to the main page of your Twilio dashboard and familiarize yourself with where you can find your “Account SID” and “Auth Token”:
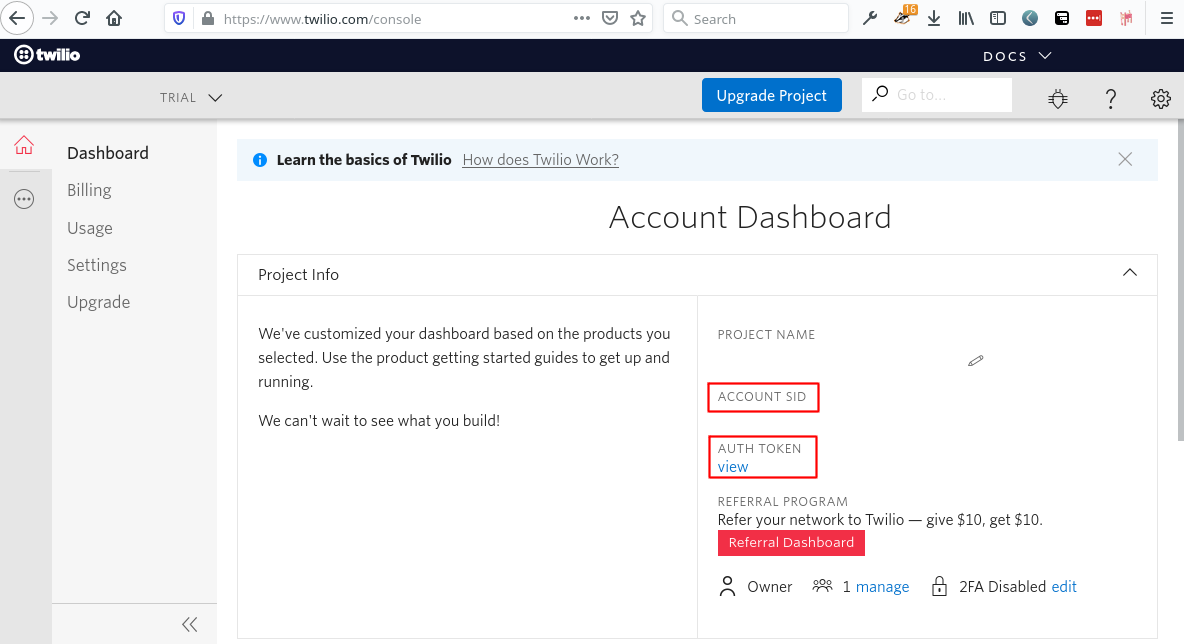
After this we are ready to proceed and set up our Python environment.
Setting up the Python virtual environment
The next thing we need to do is get our Python environment set up and running. This setup will be used throughout the tutorial, so let’s make sure we get this right.
Following Python best practices, we are going to make a new directory for our project, and inside it we are going to create a virtual environment. We then are going to install the Python packages that we need within the virtual environment.
If you are using a Unix or Mac OS system, open a terminal and enter the following commands to do the tasks described above:
For those of you following the tutorial on Windows, enter the following commands in a command prompt window:
The last command uses pip, the Python package installer, to install the two packages that we are going to use in this project, which are:
- Flask is a microframework for web applications.
- Python-dotenv for managing configuration values.
- The twilio python API client. This library is developed by Twilio and will be used to interact with the Twilio SMS messaging API via Python.
Gathering SMS messages
In this section we will write the code that will pull the SMS messages using the Twilio API client. We will create a function and run it in the Python shell to test it. Later in the tutorial we will use this function when we create our HTML template.
Using Python to get SMS in your terminal
Fire up that code editor and let’s create a new file called utils.py within the project directory we created earlier. After creating the file let’s open it up and we are going to create a function called fetch_sms. This function will make a call to Twilio’s messages API using the Twilio Python client library. Key in the code that follows when you are ready:
Within the same project directory let’s create a new file called .env (note the leading dot). This file will contain our Twilio account SID and the auth token. As with all secret values, make sure that this does not get committed in a source control repository or otherwise shared. Let’s type in the following to this file:
Please note that you will need to substitute the exact values for your account SID and auth token after the equal signs.
Now let’s go back to the terminal and navigate into your project folder if you are not already there. Make sure that you have activated your Python virtualenv from earlier. We will be testing out the function we wrote for fetching SMS from Twilio:
Why would you get a StopIteration error here? Well that’s because our Twilio number has absolutely zero SMS message history. If you are using a Twilio Account that does have some SMS history, you will not have received this error, and instead the x variable would have the first message.
The messages.stream() method that we call from the Twilio API client makes use of a generator. This is an efficient way of dealing with potentially long lists of data items in Python. It only ever loads one object into memory at a time.
Also take note of the call to the load_dotenv function that ships with the python-dotenv library. This function is responsible for loading the .env file we created earlier. It reads in all the values from that file and makes them available to our Python code via the os.environ dictionary.
From your own phone, send an SMS message to the Twilio phone number we acquired in the previous steps. Then re-run the fetch_sms function in the same terminal session and notice how this time no exception is raised. If you didn’t receive an exception in the first place, follow along with the code below:
What you can see is exactly what we expected to happen. So far we have iterated through two messages. One message was the auto-reply that comes from Twilio’s default phone numbers in trial accounts. The other contains the SMS body you sent to the Twilio number.
The example above also shows a taste of how to work with generators in Python. With that in mind let’s actually iterate through these messages using a more convenient for-loop. Later on we will build off of the iteration here, when we are generating the HTML that provides our SMS dashboard.
One nice feature of generators in Python is that you can iterate through them using the concise syntax shown above. This is great, our code is easy to understand and it will also have a small memory footprint in our application.
Setting up the Flask application
Let’s fire up that text editor once more and create a file called app.py and lets add in the following code:
Let’s go back to the terminal window we opened up before or open up a new one in the project directory, activate the virtual environment and run the following:
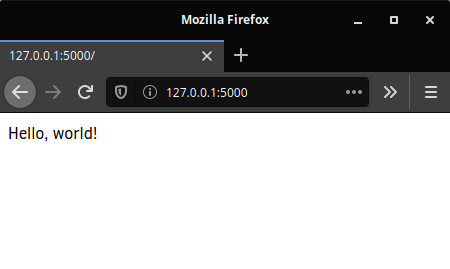
Navigate your web browser to http://127.0.0.1:5000 and you will see the following:
When you are done playing with this application, press Ctrl-C in the terminal window to stop it.
Now we are ready to move on to the next step which is setting up Jinja templates in our Flask application.
Rendering templates
Flask comes equipped with Jinja templating by default and can be set up in a few steps. The first step is to create a folder in our project called templates. Inside of that folder we will create a file called index.html. In the index.html we will add the following content:
We also need to make some slight modifications to app.py:
Start the application once again with the flask run command. Now when we navigate to the http://127.0.0.1:5000 you will see a bolded version of our “Hello, world!” message that comes directly from the HTML template we just created.
Generating an HTML table from Twilio API data
In this section we will adjust our Flask application to make use of the Jinja templating language. We are going to make some small adjustments to our Flask code. These adjustments are going to allow us to pass data that we get from the Twilio API to the HTML file for rendering.
Then we will polish up that rendering at the end of this section by putting the data into a standard HTML table. We are going to fill that table with a variety of useful information from the Twilio SMS data.
Passing data to Jinja templates
Now we are going to combine the code we wrote earlier for iterating through our SMS messages, with the Flask application code. Fire up your text editor and key in the following changes for app.py within the project directory:
Notice how we have expanded the render_template() call with a keyword argument named sms, set to the generator object returned by the Twilio API. This tells Flask to make this object available to Jinja at the time the template is being rendered. What that means is we can use that object to render the SMS messages in our template. With that explained, let’s make some changes in our template:
Now we need to reload our Flask application so that it picks up these changes we have made. Open up the same terminal that you were using before, and re-run the following:
When you navigate to http://127.0.0.1:5000 you should now see a page where each SMS message body is represented as a paragraph element in your HTML:

Rendering a table with SMS data
Now we will make some more adjustments to the Jinja template. Instead of looping through data and generating HTML paragraph elements, we will loop through and generate an HTML table. This is a slight improvement as it allows for better rendering of more information in the page. However what we will add here has no CSS which means it is going to look crude. We leave it as an exercise to the reader to spruce up the table with some CSS styling.
With that said let’s make the required changes to our index.html template:
Now we just need to reload the Flask application to pick up these changes. So you can stop the server you were running in the previous section with “Ctrl+C” and the re-run “flask run” in that terminal.
This time when you navigate to http://127.0.0.1:5000 you will see the following:

As you can see we are showing a fairly comprehensive amount of information about each SMS sent or received, all provided to us by Twilio. You can see timestamps as well as information about the cost of each SMS message (don’t worry, your trial account has a balance!). This is all in addition to displaying the body of the SMS message.
Going further
There are many possibilities for adding on to this dashboard. One example of a feature that would be nice to add is the ability to respond in-line to each message in the dashboard. You could add a column to each row in the table called “Reply URL”.
This URL would be something your Flask application could handle in a /reply/<message-sid> route. When your application receives a request at that URL, it will render a new HTML template. That template would render an HTML form in which you would be able to type your reply, and click a submit button.
When that happens you would process that request in the Flask application, and you would figure out:
- Which number do I have to send to in order to reply to <message-sid>? You could make use of the Twilio API to lookup the number that corresponds to a given message-sid.
- What’s the body of the reply? Which you could parse from an HTML form.
To send off the reply you could make use of the Twilio API.
Conclusion
With that we have wrapped up this tutorial! I hope you’ve enjoyed creating this basic building block for a Twilio dashboard and that you can begin imagining new ways to extend the functionality of it. One of the great things about Python is its ability to glue together a wide-range of tools. With a fairly minimal amount of code we can begin to see how to interact with APIs in Python.
Think of all the possibilities! We can interact with Zoom, Google and Twilio to name a few. How can you combine these APIs to make something useful? All the code in this tutorial can be found here under MIT license. Thanks for reading!
Kyle Lawlor-Bagcal (wgwz [at] protonmail [dot] com) is a software engineer and systems developer who is passionate about good code and constantly learning new things. https://wgwz.github.io


Related Resources
Twilio Docs
From APIs to SDKs to sample apps
API reference documentation, SDKs, helper libraries, quickstarts, and tutorials for your language and platform.
Resource Center
The latest ebooks, industry reports, and webinars
Learn from customer engagement experts to improve your own communication.
Ahoy
Twilio's developer community hub
Best practices, code samples, and inspiration to build communications and digital engagement experiences.