How To Implement Drag and Drop in Laravel With Livewire
Time to read:
March 13, 2024
Written by
Reviewed by
How To Implement Drag and Drop in Laravel With Livewire
HTML drag-and-drop capabilities allow web applications to leverage drag-and-drop functionality within web browsers.
To drag-and-drop items, users can pick up draggable elements using a mouse or trackpad, move them over to a designated droppable area, and place them by letting go of the mouse button or trackpad. A semi-transparent version of the draggable elements is displayed during the dragging process and follows the cursor.
It's possible to specify which elements are draggable, determine the kind of visual feedback these elements provide when dragged, and identify the areas where they can be dropped.
In this tutorial, we will explore how to implement drag-and-drop in Laravel using the Livewire sortable plugin, by creating a simple to-do list with drag-and-drop functionality. With that said, let's get started.
Prerequisites
The following technologies are required to follow along effectively
- PHP 8.3 or later
- Composer installed globally
- Node.js and npm
- Access to a MySQL or PostgreSQL database, whether locally or through a hosted service
- Prior experience with Laravel and Livewire would be helpful but is not essential
Set up a new Laravel application
The first step in building our to-do list is to create a fresh Laravel application. Create a fresh Laravel application and navigate into the project directory by opening a terminal and running the commands provided below.
After you create the project, the next thing to do is connect the application to your database. To do this, go to your .env file and change the variables below as shown.
Add Livewire to the application
Laravel does not come with Livewire installed out of the box. So we need to install Livewire manually. We do this by running the Composer command below, in the terminal.
The next step is to publish the Livewire configuration file and manually include Livewire frontend assets in the application. To do this, run the following command in the terminal.
The application needs a single entry point for the Livewire frontend assets. Let's create a layout file for this, starting with creating a class-based component using the command below.
The make:component command creates two files: layout.php and layout.blade.php. layout.blade.php can be found in the resources/views/components directory. At the same time, layout.php can be found in the app/View/Components directory. The layout.php file renders the view for layout.blade.php.
Open layout.blade.php and modify the contents to match the code below.
Seed the database
We need some data to test our application. So, let's seed our database with some test data. First, we need to create a migration, a model for a to-do list task, and a factory class for the task model. Create the model and database migration by running the command below in the terminal.
Two files will be created after the command runs: app/Models/Task.php and a file ending with _create_tasks_table.php in database/migrations. Open the database migration file and update the code content to match the code below.
The next thing to do is to create our TaskFactory for seeding the database. Run the command below in a terminal to create it.
Navigate to the newly created file, database/factories/TaskFactory.php, and replace the code with the code below.
Next, open the database\seeders\DatabaseSeeder.php file and replace the file's code with the following.
Now, run the migration and seed using the commands below.
Overview of drag and drop
By default, not all browser elements are draggable. To make an element draggable when creating a drag-and-drop system from scratch, you need to add draggable='true' to the HTML element you want to make draggable. Dragging elements in the browser listens for different events like drag, dragend, dragenter, dragleave, and drop. You can call functions to carry out different tasks if any of the events above are fires.
If you want to create a drag-and-drop system from scratch, here is a detailed video tutorial. You can also check out the Mozilla developer documentation. It contains a well-detailed tutorial on creating drag-and-drop from scratch.
Drag and drop with Livewire
For this tutorial, we will not be creating one from scratch. We will use the Livewire sortable plugin instead. Let's get started by adding the plugin to our application. Add the following before the closing body tag in resource\views\components\layout.blade.php, like so.
Create Livewire components
Let's create our Livewire component for the rest of the logic of our application, by running the following command in your terminal.
The command will generate two files app\Livewire\LivewireSortTable and resources\views\livewire\livewire-sort-table.blade.php.
Now, modify app\Livewire\LivewireSortTable.php replacing the existing code with the following.
Let's take a closer look at the methods in the class above.
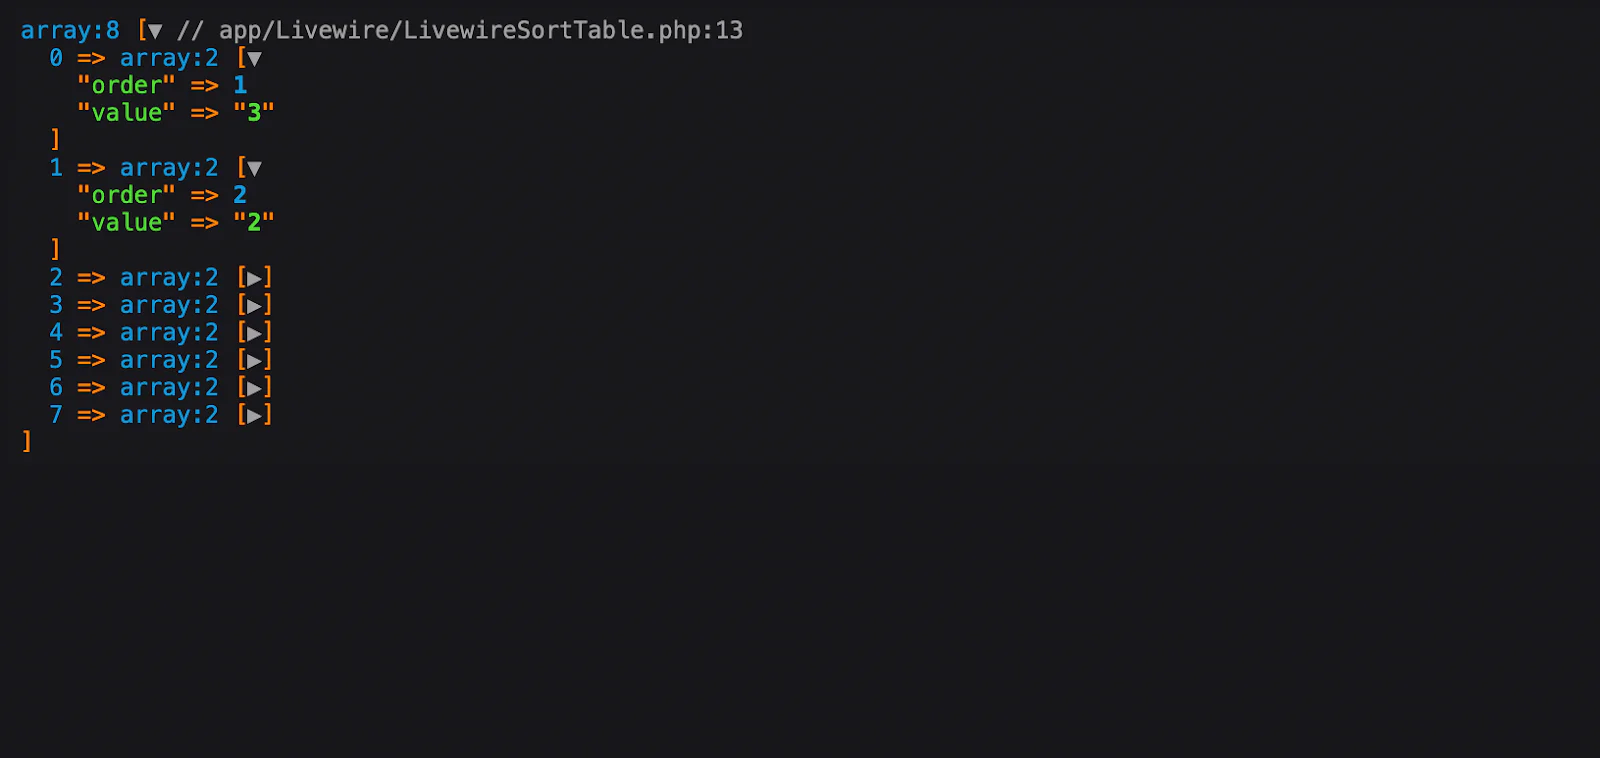
render(): This method returns the Livewire view file. We also fetched allTaskrecords and ordered them by theordercolumn in thetaskstable.removeTask(): This method deletes a particular task from the database. It accepts a parameter of$id, used to fetch the particular task before deleting it.updateTaskOrder(): When an item in a list is sorted, the Livewire sortable plugin returns an array of arrays. Each element in the array represents the item in the list; and contains two elements:order, andvalue.valueis the current position of the element in the list.orderis the position we dragged it to. TheupdateTaskOrder()method fires when the dragged element is dropped. It saves an array of all the elements arranged in the new position. The$task['order']contains the position of each of the elements. It loops through all the tasks, swaps them according to their position, and saves. In the image below, I dumped the result of theupdateTaskOrder()method for a clearer explanation.
With that said, Open resources/views/livewire/livewire-sort-table.blade.php and add the following to build out our front end and sortable list.
Let's take a closer look at the front-end of our Livewire sortable list and how it works. From the code above, we have an ul element and a li element containing some Livewire methods:
wire:sortable="updateTaskOrder": This method fires when we drag an element to a given position. It calls theupdateTaskOrder()method in the Livewire controller. We talked about this method in the previous section.wire:sortable.item="{{ $task->id }}"andwire:key="task-{{ $task->id }}": Thewire:sortable.itemandwire:keyare entities needed for the sortable plugin to function correctly.wire:sortable.handle: This makes an element draggable. We added this to thespantag displaying the task name to make the task name draggable.wire:click="removeTask({{ $task->id }})": This fires theremoveTask()method that deletes a task from the database when it's completed.
Finally, update resources/views/welcome.blade.php with the following code.
Test the application
At this point, the application is ready. Let's test the application. Start your Laravel application using the command below.
This will start a development server available at http://127.0.0.1:8000 . Laravel will automatically switch ports if port 8000, the default, is not available or is currently in use by another application or service.
In a different terminal window (or tab), run this command to compile our node.js assets for the front end to work.
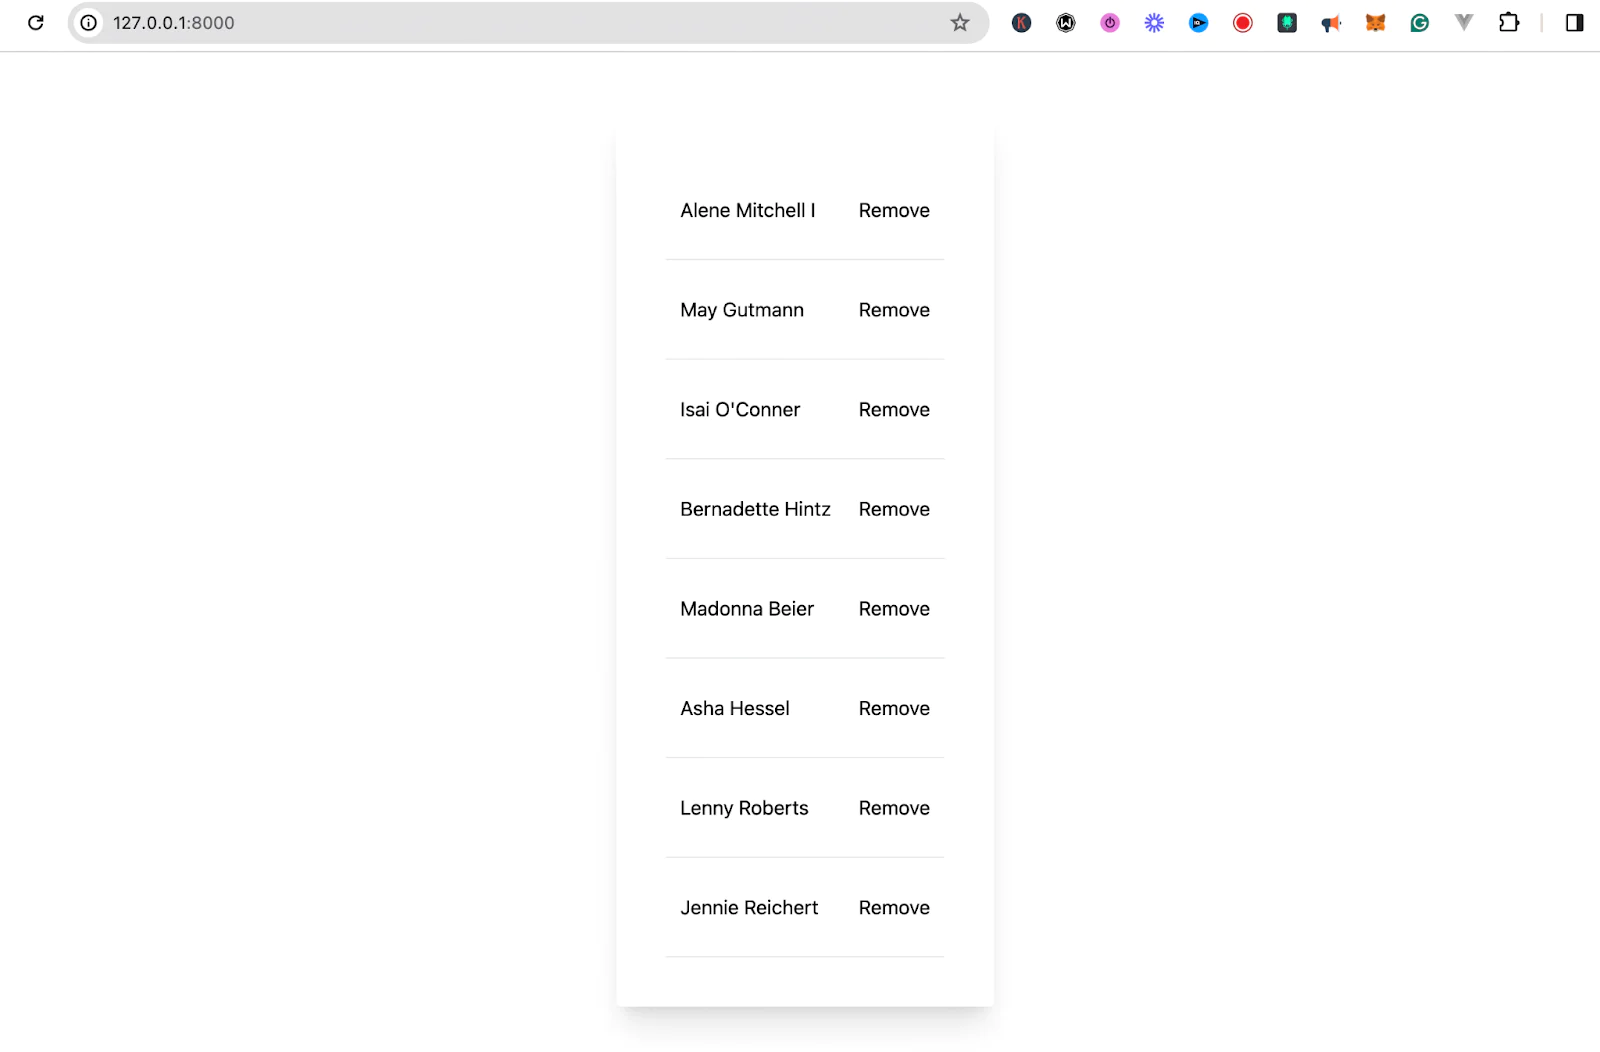
Once the command runs completely, open http://localhost:8000 your browser and enter the localhost URL generated by Laravel. Your screen should look like the image below.
To ensure that the application functions as intended, use your mouse or trackpad to interact with the to-do list. Simply click and hold on a task, then drag it above or below another task.
Release the click to place the task in its new position. To confirm the changes have been successfully applied, refresh the page and verify that the task maintains its rearranged position within the list.
To delete a task, click on the Remove link next to the task. The task should then be successfully removed from the list. If these operations can be performed without issue, it indicates that your application is functioning correctly.
That's the essentials of how to implement drag and drop in Laravel with Livewire
There you have it. How to implement a simple drag-and-drop system using Livewire sortable plugin. In this tutorial, we walked through the following:
- Creating a fresh Laravel application and installing Livewire
- Creating a layout file using Blade components
- Creating migrations and seeding the database with test data
- Implementing dragging, dropping, and deleting of elements in a list
Explore the Livewire sortable plugin. Then, build great stuff and share it with the community. You can find the complete code on GitHub.
Moses Anumadu is a software developer and online educator who loves to write clean, maintainable code. Offering content as a service. You can find him here.

Related Resources
Twilio Docs
From APIs to SDKs to sample apps
API reference documentation, SDKs, helper libraries, quickstarts, and tutorials for your language and platform.
Resource Center
The latest ebooks, industry reports, and webinars
Learn from customer engagement experts to improve your own communication.
Ahoy
Twilio's developer community hub
Best practices, code samples, and inspiration to build communications and digital engagement experiences.