How to Call an AI Friend using GPT-3 with Twilio Voice and Functions
Time to read: 8 minutes
July 18, 2022
Written by
Reviewed by

I always used to find myself getting into unwanted social situations that I could never get out of. As the engineer I am, I decided it’d be fun to build and publish a quick solution to this using my toolbelt here at Twilio: How to Escape Pesky Situations using Twilio Functions and TwiML Bins. This solution allowed me to text my “friend” Joanna – an Amazon Polly voice – a key phrase which would trigger Joanna to call me and respond as if there was an emergency using a human-like synthesized speech.
This solution then made me wonder what other fun ways Joanna could help me out. Since it’s also National Anti-Boredom Month (July), I started focusing on ways to tackle boredom and pass time.

Whether it’s walking home from the subway or waiting in line at the store I always find myself needing to kill time. I could call up a friend to pass time, but I wanted to experiment by talking to a robot like Joanna and observing if it can freely converse like a human. But how can I enable Joanna to freely chat like a human?
Luckily, with OpenAI’s GPT-3 engine I can provide a prompt and generate text that is indistinguishable from human text. I can even personalize it to make Joanna sound witty and comedic or even sound like my girlfriend🥲. Combining this with speech recognition from Twilio Programmable Voice, I’d be able to freely talk back and forth with Joanna; and to ensure our conversation sounds life-like, Joanna’s Neural voice will be used.
This blog will show how to leverage Twilio Voice with OpenAI’s GPT-3 engine to build a phone service to converse with an AI friend; the phone service will entirely be built on Twilio Functions.
Let’s get started!
Prerequisites
Here’s what you will need for this tutorial:
- A Twilio account - Sign up for free using this link and receive $10 in credit when you upgrade your account!
- A Twilio phone number - Click here to see how to get your first Twilio number with your trial account
- An OpenAI API key
Overview
Before you start building, let’s go over Twilio Functions, TwiML, and OpenAI’s GPT-3 engine and how they’ll be used to create your phone service.
Twilio Functions and TwiML
If you aren’t familiar with the service, Twilio Functions is a serverless Node.js environment that allows you to seamlessly create Twilio applications all through the Twilio Console; it's lightweight, scalable and secure. For this tutorial, you will be creating a Functions service that will handle incoming calls to your Twilio number.
Twilio's Markup Language (TwiML) is an XML based language that has a set of simple verbs and nouns that allows you tell Twilio what to do with incoming and outgoing calls, SMS and MMS messages. For this tutorial, you’ll be using and exploring TwiML’s <Say> and <Gather> verbs. The <Say> verb converts text to speech that is read back to the caller. It offers different attributes for voices, including different sets of languages, genders and also has support for Amazon Polly voices. The <Gather> verb transcribes the caller's speech during a voice call.
Handle responses with GPT-3
The core of the OpenAI API is the completions endpoint: you input some text as a prompt, and the model will generate a text completion based on the context or the pattern of the prompt.
For example, if you give the API the prompt, “As Descartes said, I think, therefore”, it will return the completion “I am”. To have a better understanding of the completion's endpoint, feel free to play around with OpenAI’s Playground or take a look at their examples.
To better tune Joanna for your needs, you’ll be using the Chat example provided by OpenAI. This preset will give you an AI with the nature of being helpful, creative, clever and very friendly.
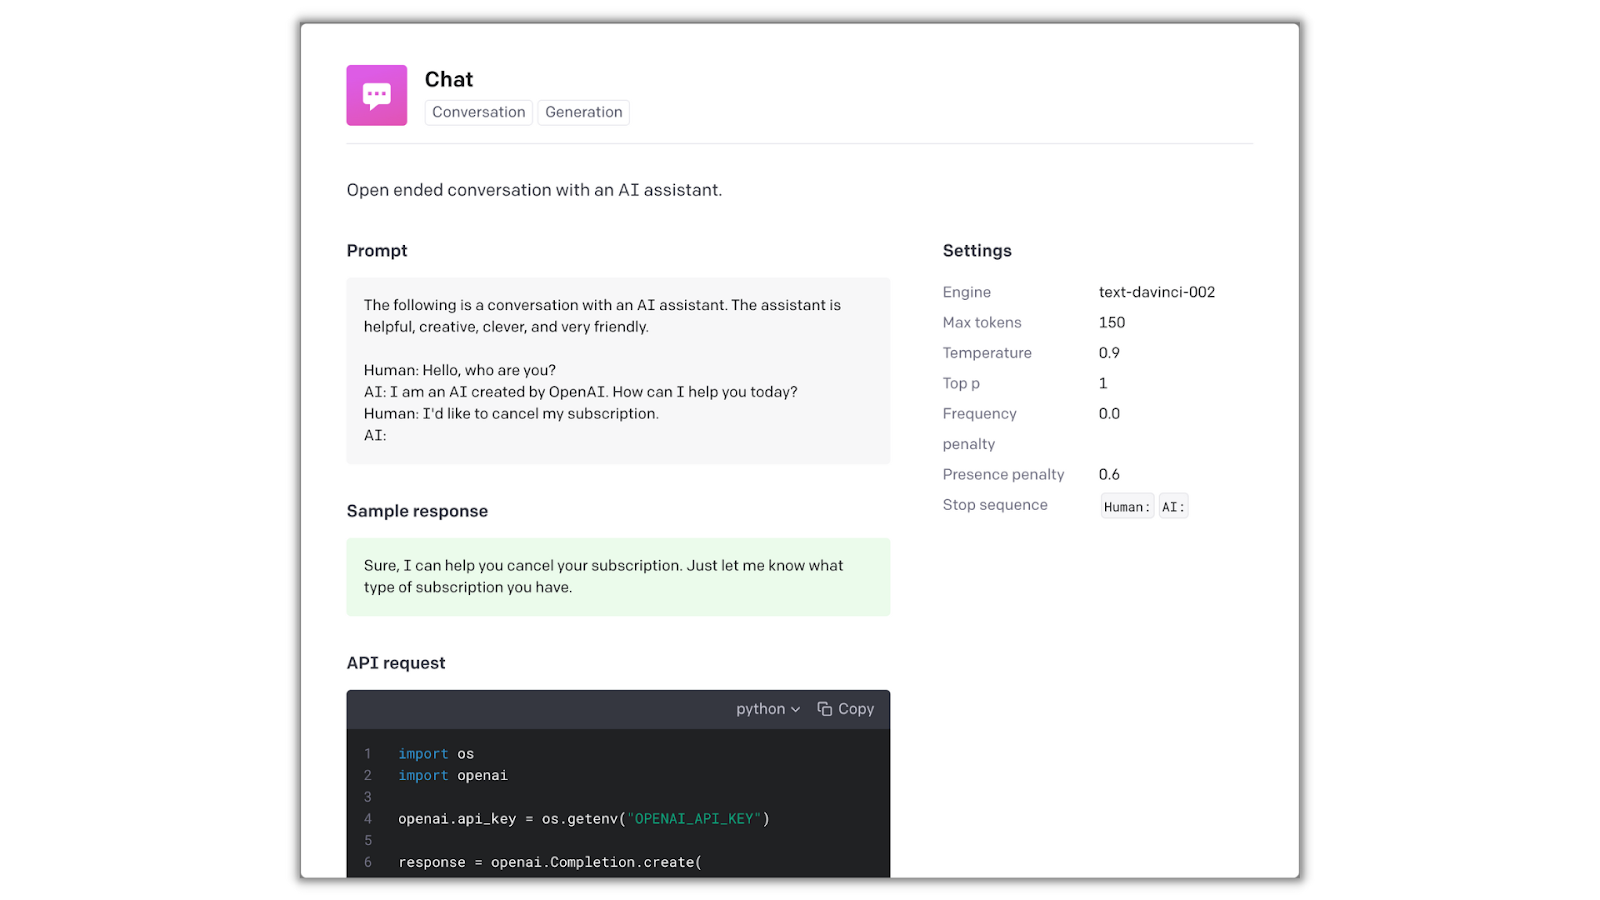
This example above provides you with a prompt along the necessary parameters in the settings for the intended output.
Functions architecture
You will need to configure two Functions for this tutorial:
- /transcribe - This function will be configured to your Twilio phone number and initiate the conversation with Joanna. It will use the
<Gather>verb to listen to and transcribe your response. This transcription will then be passed on to the /respond function. - /respond - This function will receive the transcription and use the OpenAI API to generate a text response with the GPT-3 engine and a given preset. This response will be converted from text to speech with the
<Say>verb. The call will then be redirected back to the /transcribe function.
The phone call will be passed back and forth between the two functions where one will be listening and transcribing the user’s voice response and the other will be generating and outputting a voice response.
To ensure you’ll have a proper conversation with Joanna, you’ll be caching both your and Joanna’s past responses and append them to a conversation log that will be used in the input prompt to the GPT-3 engine so Joanna can remember past responses and respond appropriately.
You’re probably wondering how the conversation will be cached since each Functions execution is ephemeral and stateless. The conversation will be passed back and forth between the two Functions through the query parameters of each Function call.
Now that you’ve gone over how the phone service will work, you can begin building it!
Create a Twilio Function Service
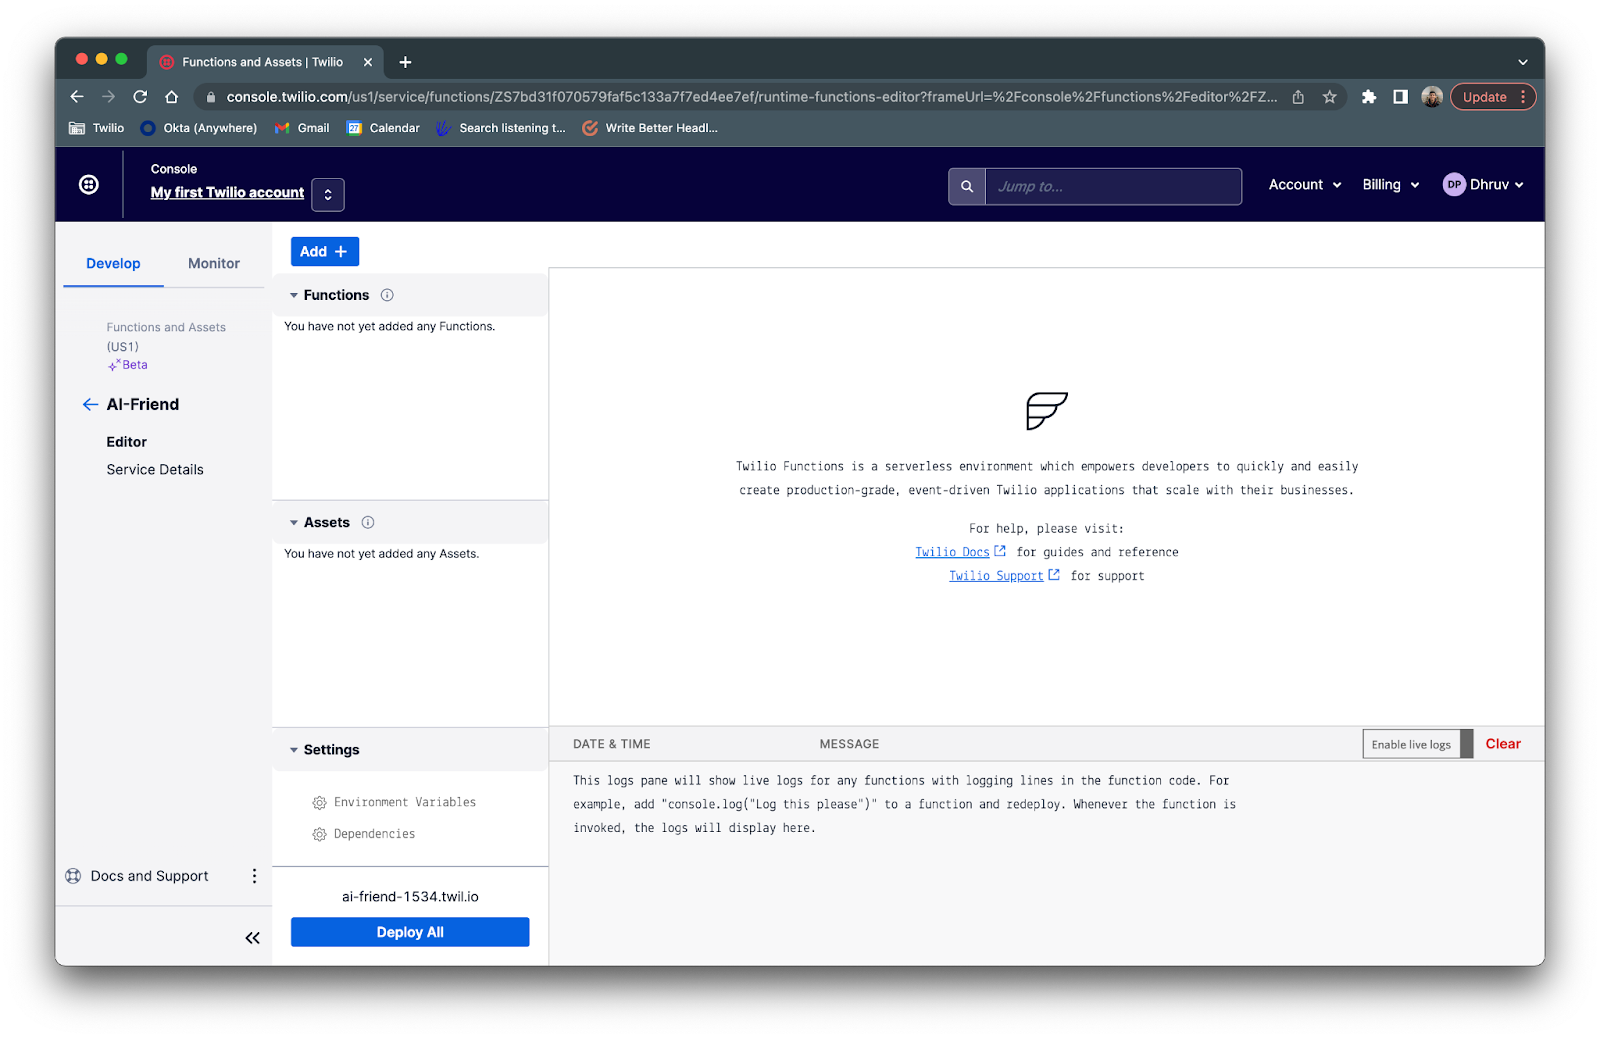
Log in to your Twilio Console and navigate to the Functions and Assets > Services tab on the left side (or click here). Click the blue Create Service button, enter AI-Friend as the name for your service, and click the blue Next button. You will then be directed to your newly created service.
Configure OpenAI API to the Functions service
In this section, you will be setting up the OpenAI API with your Functions service so it’s ready to be used when you write the code. You’ll first need to add your OpenAI API keys as an environment variable and then add the OpenAI Node.js library as a dependency.
Twilio Functions offers the ability to store environment variables like phone numbers, API keys, and URLs rather than hardcoding them into your Functions code. Using environment variables ensures that your code is portable and that simple configuration changes can be made instantly.
Click on Environment Variables under the Settings tab at the bottom of your new Twilio Functions page. Here is where you will store your Twilio phone number and your API keys.

If you don’t have your OpenAI API key yet, sign up for an account and generate a key from your OpenAI Developer Quickstart profile.
Head back to the Environment Variables section of your Twilio Functions service and type OPENAI_API_KEY for the key and paste in your API key as the value and click Add.
Now under the Settings tab, click Dependencies. Here is where you add the dependencies for your Functions. You will need to add the openai npm module to interact and call the OpenAI API.

In the Module textbox enter openai and in the Version textbox enter latest and click Add.
Add the Functions
As mentioned before you’ll need to add two Functions to your service: /transcribe which will listen and transcribe the speech from the user, and /respond which reads the transcription, feeds it into the GPT-3 engine, and speaks the output text to the caller.
/transcribe
Click on the blue Add + button, and then click Add Function from the dropdown to add a new Function and name it /transcribe. Replace the existing default code in the text editor with the following:
This function starts off by creating a new VoiceResponse object which will be used to instruct Twilio what to do with the call. The function then checks the incoming query parameters, which is found in the event object, and checks to see if a conversation has already been initiated by reading the convo variable.
If the /transcribe function is called for the first time in a call, there will be no convo variable and Joanna will respond with “Hey” using the <Say> verb and append “Hey” to the convo variable.
The <Gather> verb is then used to grab the user's speech input and transcribe it. The enhanced attribute is used to improve the accuracy of transcription. The speechTimeout attribute is set to auto and will stop transcribing the caller's speech when a pause is detected. The speechModel attribute is set to phone_call to improve the accuracy of results. The input attribute is set to speech and instructs the TwiML to listen for speech rather than a DTMF. Lastly, the action attribute is set to /respond?${params} which instructs the TwiML to make an HTTP request (with the transcription data) to the /respond Function once the speech timeout has been reached.
Once copied, your /transcribe Function should look like the following:
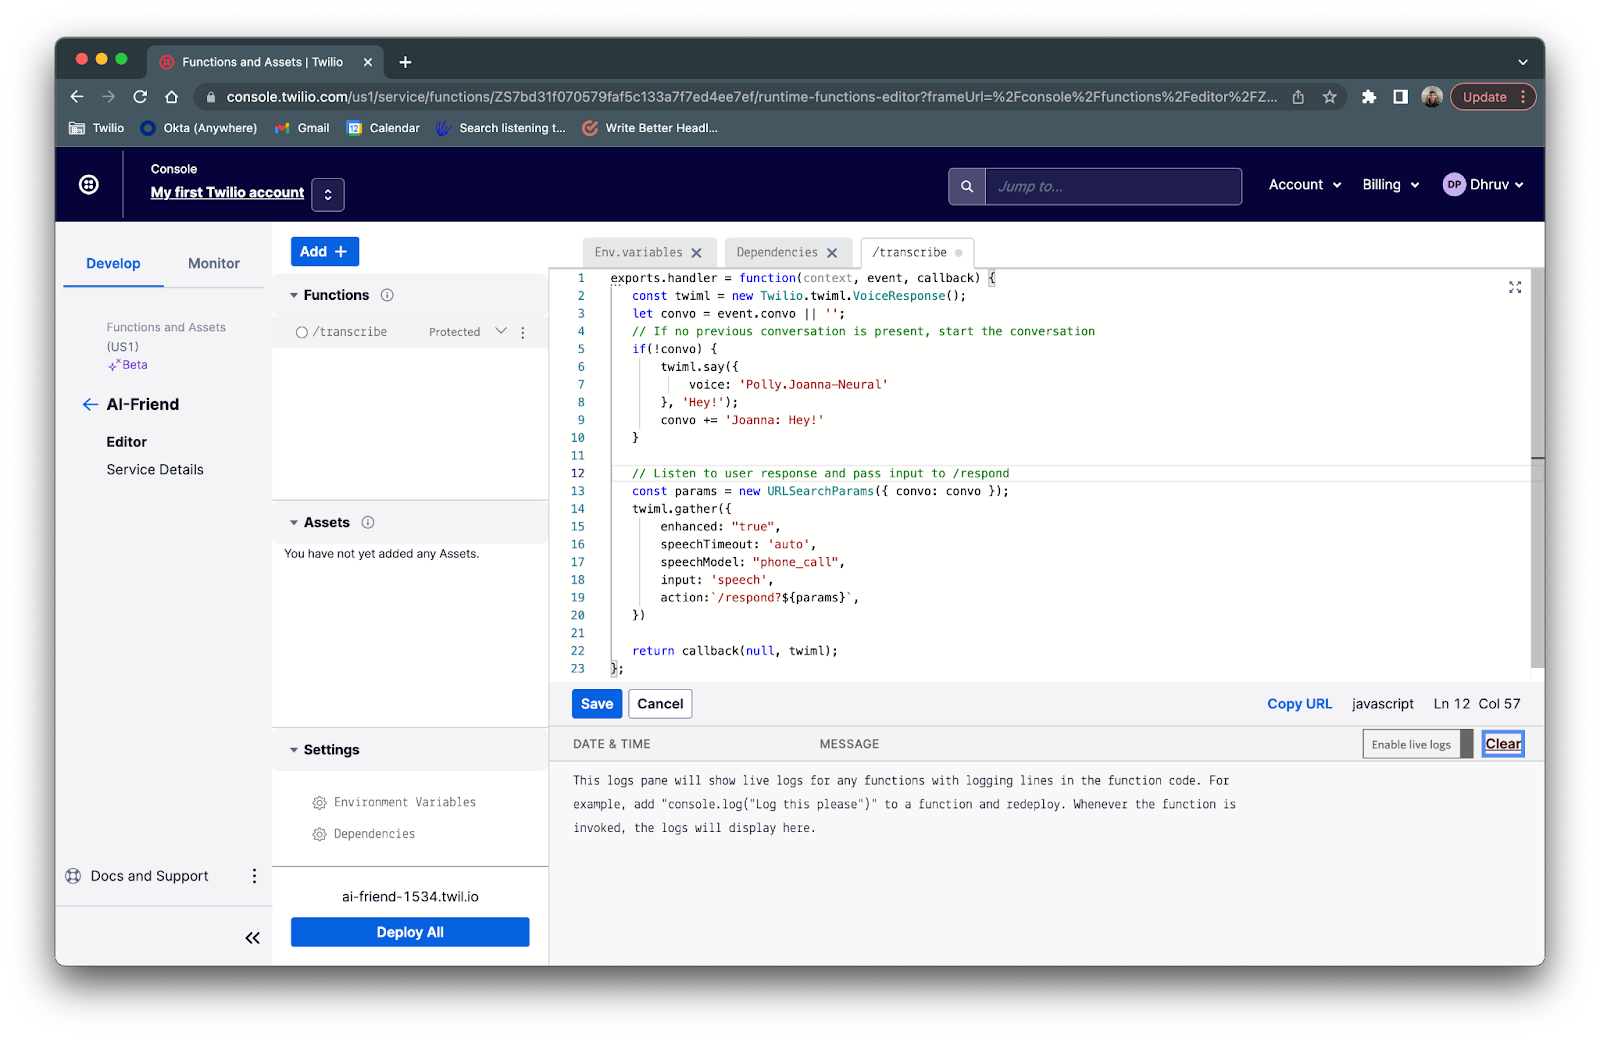
The params variable appended to the URL of the action attribute is constructed on line 13 and creates a query parameter with the convo variable. This allows you to pass the existing conversation to the /respond route.
Once your voice response has been set to the twiml object, it’ll be passed to the callback function to emit the response. Click the blue Save button below the text editor to finish configuring the /transcribe function.
/respond
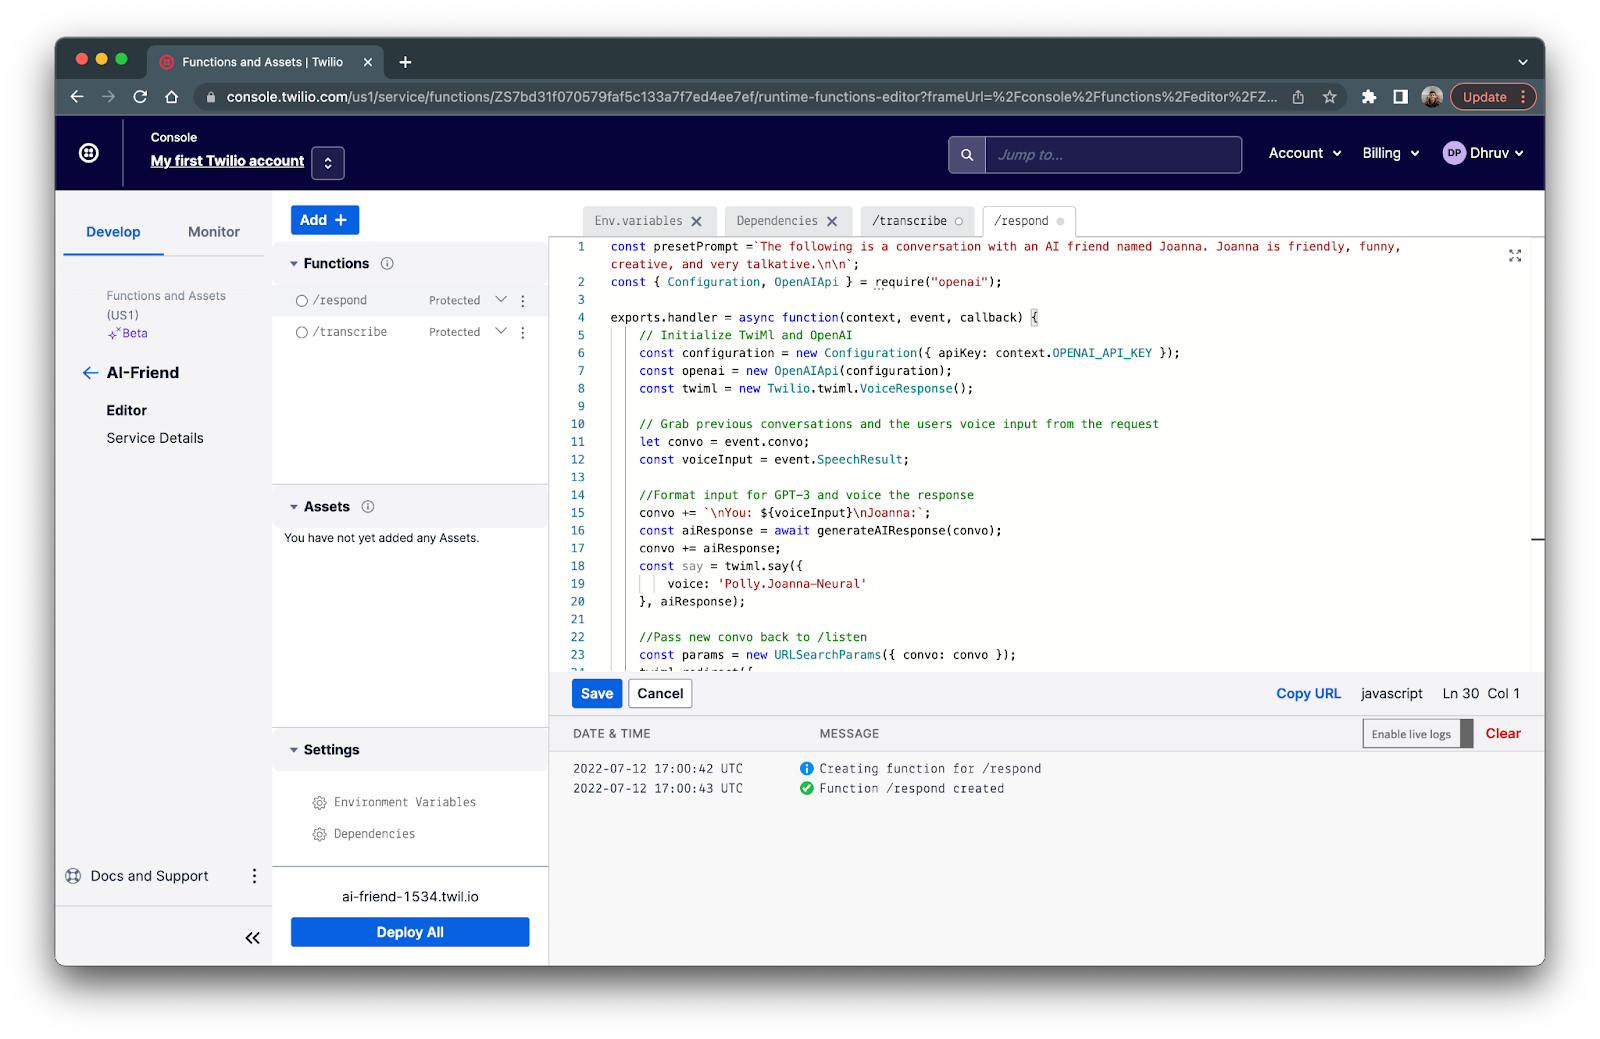
Click on the blue Add + button above the Functions list, and then click Add Function from the dropdown to add a new Function and name it /respond. Replace the existing default code in the text editor with the following:
The Function starts off by initializing the TwiML VoiceResponse object and the OpenAI package for generating the text response.
It then grabs the existing conversation data and the speech transcription sent from the /transcribe function and places them into the convo and voiceInput variables respectively. Lines 15 to 20 will then format both variables to be inserted as a prompt into the GPT-3 engine through the generateAIReponse() function. This prompt will be similar to the Chat preset mentioned in the overview section.
The generateAIReponse() helper function is placed at the bottom of the Function. The GPT-3 engine model that will be used is Curie; you’ll be using this engine over Davinci so that you get a faster response time and so that Joanna will sound more human-like without long delays. The presetPrompt variable (found on line 1) is used in the prompt parameter to better model Joanna for our needs. Feel free to take a look at the function to see what other parameters are used for the completion endpoint of the OpenAI API.
Once the aiResponse is returned from the function, the <Say> verb will convert the text to speech in Joanna’s Neural voice which will be sent to the caller. This response will then be appended to the convo variable and lines 23 to 26 will carry the call and convo back to the /transcribe Function using the <Redirect> verb, resulting in a back and forth conversation between the caller and Joanna.
Once copied, your /respond Function should look like the following:
Finally, click Save and then click the Deploy All button to deploy your completed Functions service.
Configure the Functions service to your Twilio number
Before you test out your function, you will need to hook up your Functions service with your Twilio number.
Head over to the Active Numbers section of the Twilio console and click on your Twilio number.
Scroll down to the Voice & Fax section and under A CALL COMES IN select Function. For SERVICE, select the Function service you just created which should be named Ai-Friend. Then choose ui for ENVIRONMENT and lastly choose /transcribe for the FUNCTION PATH since this is where your phone call should route to first.
Your messaging configuration should look like the following image below:
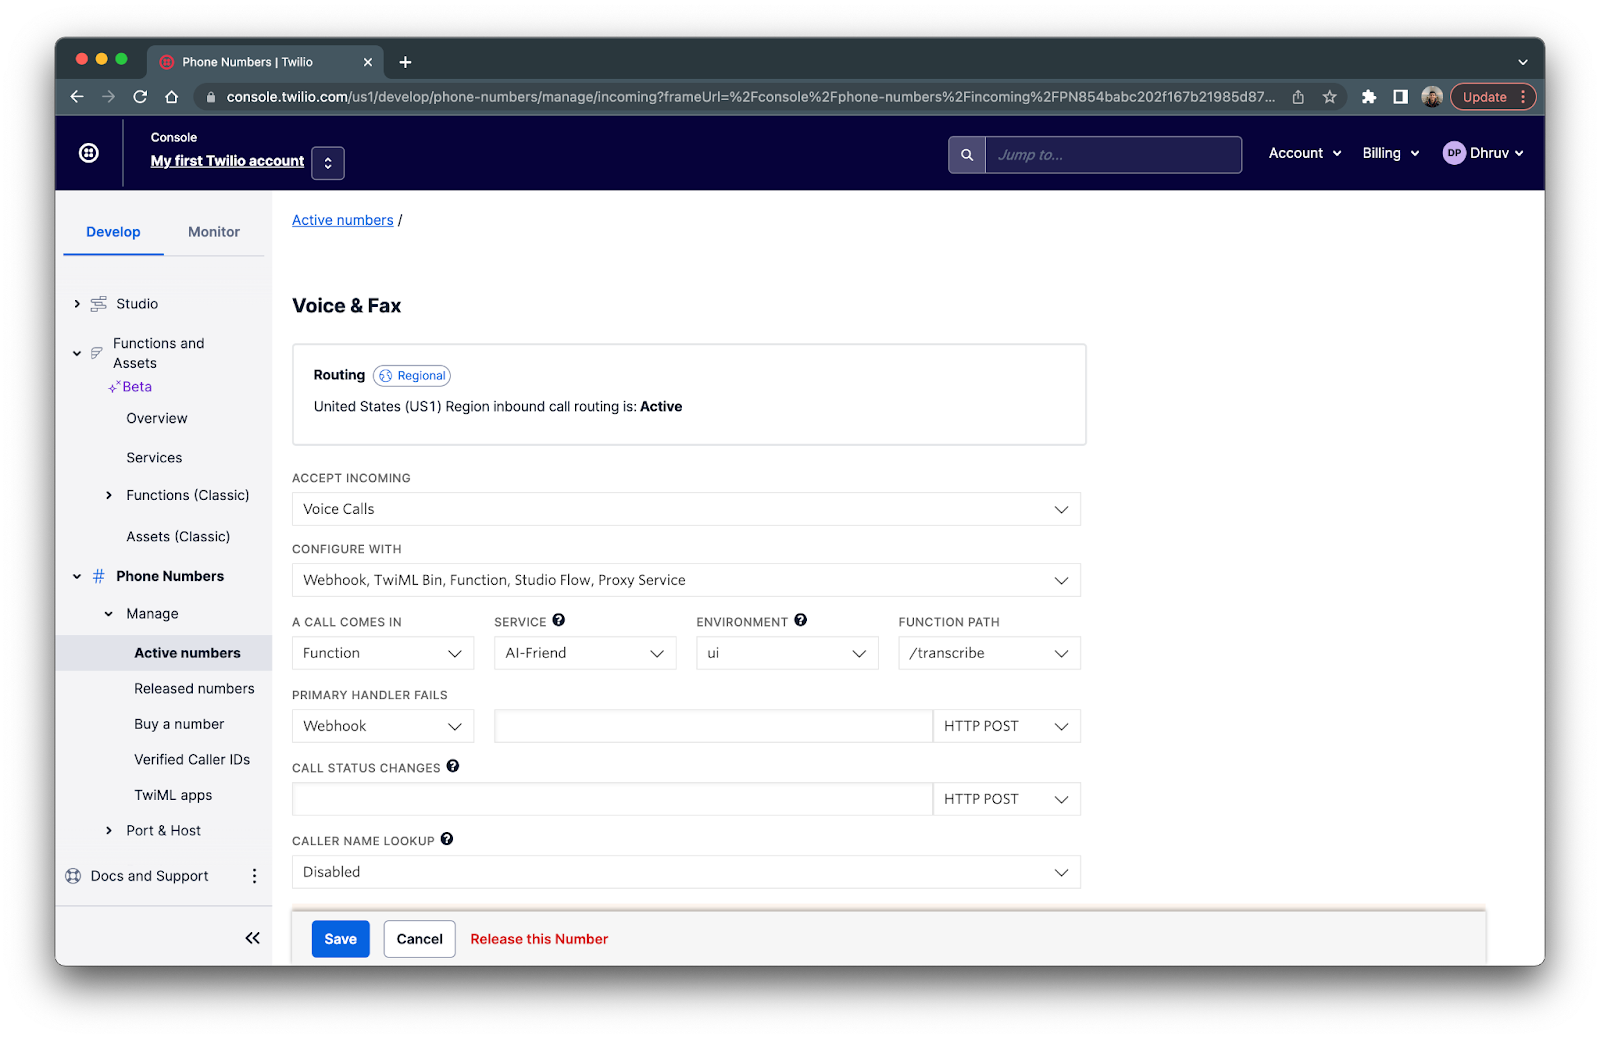
Now, click Save and Joanna should be ready to talk with you!
Call your Twilio num-... I mean call Joanna and have a chat to see how it works! Feel free to experiment with a different preset prompt or with different completion settings.
Conclusion
In this tutorial we walked through how to use Twilio Programmable Voice with Twilio Functions, TwiML, and the OpenAI API to create an AI friend that’s able to keep up a conversation with you. I hope you had some fun with this tutorial and learned a few things along the way!
If you’re looking to explore more interesting projects that use Twilio and OpenAI’s GPT-3 engine, take a look at these tutorials:
- Building a Chatbot with OpenAI's GPT-3 engine, Twilio SMS and Python
- Meet Your Personal Michelin Star Chef with OpenAI's GPT-3 Engine and Twilio WhatsApp API
- Generating Lyrics in the Style of your Favorite Artist with Python, OpenAI's GPT-3 and Twilio SMS
Happy Building!
Dhruv Patel is a Developer on Twilio’s Developer Voices team. You can find Dhruv working in a coffee shop with a glass of cold brew or he can either be reached at dhrpatel [at] twilio.com or LinkedIn.


Related Resources
Twilio Docs
From APIs to SDKs to sample apps
API reference documentation, SDKs, helper libraries, quickstarts, and tutorials for your language and platform.
Resource Center
The latest ebooks, industry reports, and webinars
Learn from customer engagement experts to improve your own communication.
Ahoy
Twilio's developer community hub
Best practices, code samples, and inspiration to build communications and digital engagement experiences.