How to Customize Email Verification and Password Resets in Laravel
Time to read:
January 27, 2022
Written by
Reviewed by
Email verification and password resetting are two integral authentication features of modern applications. In most web apps, users usually reset their lost passwords, however, they must also verify their email address before accessing the web app for the first time.
Laravel provides handy, built-in services for sending and verifying email verification requests, and securely resetting passwords. But in this tutorial, you will learn how to create custom email verification and reset passwords in Laravel.
Prerequisites
- Composer installed globally
- The Laravel installer
- A Gmail account
- A database supported by Laravel
- PHP 8.4
- Postman
Email verification and resetting passwords at a glance
A password reset option is required whenever you add login and signup functionality for user authentication. Doing so, whenever users forget their password they have the means to reset it. As part of this process, there will usually be a token in the reset link, and that token must be validated. You can see a simplistic example below.
Laravel offers a number of different authentication implementations for creating them, such as UI auth, Breeze Auth, and Jetstream, which include login, signup, email verification, and password reset functionality.
However, if you're going to build an app without these authentication packages, then you have to manually implement password reset and email verification functionality.
Custom email verification and reset password benefits
There may be a need to customize the password reset and email verification process when building APIs because default password reset and email verification from Laravel's default authentication scaffolding is primarily targeted at web applications.
In this tutorial, you’ll learn how to do this. You won't be sending tokens embedded in links, rather you’ll be sending 6-digit pins. These are suitable for both web apps and APIs — assuming you’re building them for mobile developers to consume.
Create the Laravel application
You can create a new Laravel application via Composer or install the Laravel Installer as a global Composer dependency. We'll be using the Laravel Installer in this tutorial. To create the application using it, run the following command in the terminal.
This will create a Laravel application in a new directory named custom_authentication. Next, change into the new application directory by running the following command:
Now, start the application by running the following command:
By default, the project is served on port 8000 on localhost, so you can now access the application by entering http://localhost:8000 in your browser. When you do, you should see a page similar to the image below confirming that your project is running.
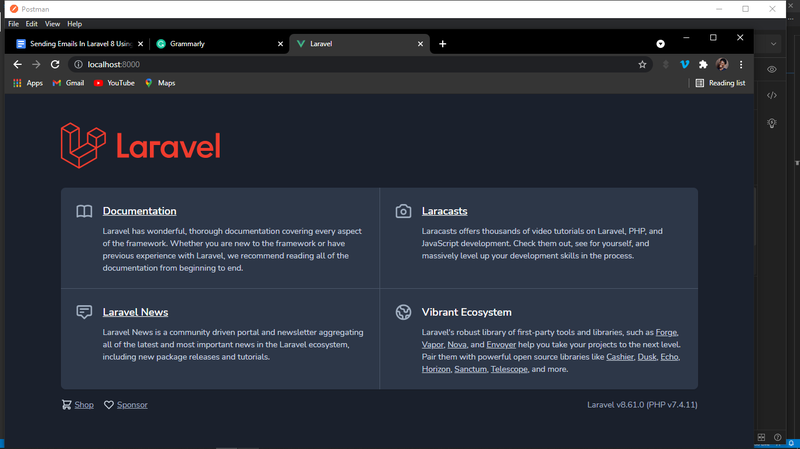
As the application is working, stop it by pressing Ctrl + C.
Set up the environment variables
To configure the application's database, in .env, update the database configuration settings, which you can see in the example below, to match the details for your database.
As you will be using Gmail's SMTP Server to email users the 6-digit PIN, you next need to update the mail environment variables to match the values below. Replace the two placeholders with your Gmail username and password respectively.
Be careful not to use quotes(“,',) or spaces. Also, you may need to clear Laravel's cache, although it's not compulsory. To do that, run the following command in the terminal:
You can find more information about sending mails using Gmail SMTP in this article.
Set up the model and migrations
Laravel comes with a default Model file called User.php, located in the app/Models directory, and a Migration file called 2014_10_12_000000_create_users_table.php in the database/migrations directory.
Update User.php by modifying the $fillable array, which indicates the fillable fields, to match the code example below.
Then, update the up() method of the migration file to match the example below.
Set up authentication
You’ll be using Laravel Sanctum in this tutorial, which is a featherweight authentication system for SPAs (Single Page Applications), mobile applications, and token-based APIs, to restrict access to several routes.
Install it using Composer, by running the command below.
Next, use the vendor:publish Artisan command below, to publish the new Sanctum configuration and migration files to your application's config directory.
Then, in app/Http/Kernel.php, add Sanctum's middleware to your api middleware group, by uncommenting the highlighted line in the example below.
Run the database migrations
With those changes made, next, run the following command to execute the database migrations and provision the database.
Add email verification support
After a successful registration, users are prompted to check their email (sent via a Mailable) for a 6-digit PIN. If the PIN is a match then their email is successfully verified and they’re redirected to the home page.
To create theMailable, app/Mail/VerifyEmail.php, and its corresponding view template, resources/views/emails/verify.blade.php, run the following Artisan command:
Then, open app/Mail/VerifyEmail.php and update the __construct() method to match the code below.
Then, add the member variable, below, to the top of the class.
$pin is set as a public member variable so that it can be passed from the RegistrationController (which will be created shortly) to VerifyEmail's constructor.
Next, update the class' build() function to match the code below.
And after that, update the email view template, resources/views/emails/verify.blade.php, to match the code below.
Set up the registration controller
Next up, you need to create a controller to register a user and to send them an email with the 6-digit PIN so that they can verify their email address. To create the controller, run the following command:
This will create a new file, RegisterController.php, in the app\Http\Controllers directory. Next, add the following use statements to the top of the file.
After that, define the register() method by adding the code below to the class.
The code starts by validating all the required registration fields before registering the user. The validation rules include:
- A valid email address that is unique.
- A password with a minimum of 8 characters.
- A password_confirmation field to retype your password.
If registration is successful, an email is sent with a 6-digit PIN to the registered email address for email verification, and a token is returned in the response. This token is used to make any, future, authorized requests.
Next, define the controller's verifyEmail() method by pasting the code below after the register() method.
This method verifies that the 6-digit PIN, retrieved from the request, is linked to an email address reset request for the current user. If it is, then the password reset request is deleted and the user's email is marked as being verified. After that, a successful response is returned.
If a token isn't provided, or the token isn't linked to a password request for the user, then the user is redirected back to the RegistrationController with an applicable error message.
Add resend pin functionality
If the 6-digit password reset PIN expires, the user may want to request another one. To do that, define the resendPin() method by adding the following code to the RegisterController after the verifyEmail() method.
The code starts off by checking that the submitted email address is valid. If it is and it's already linked to a password reset request, then the matching password reset request is deleted.
Following that, a new token is generated and, along with the email address, used to create a new password reset request. If the request is created successfully, then the token is emailed to the user. In addition, a JSON response informs the user that they will receive an email with the reset token.
Set up the Middleware
The next thing to do is to create a new middleware class that will prevent users from accessing other routes until their email address is verified. To create it, run the following command.
The command will create a new file, VerifyEmail.php, in app/Http/Middleware/. With the file created, add the following use statements to the top of the file.
Then, update the handle() method to match the following code:
Next, you need to link it to the application's route middleware, by adding the highlighted line below to the $routeMiddleware array in app\Http\Kernel.php.
Set up the Login Controller
Next up, you need to create a controller with login and logout functionality, by running the following command:
This will create a file named LoginController.php in the app\Http\Controllers directory. After it's created, add the following use statements to the top of the file.
Then, define the login() and logout() methods by copying the following code into the body of the class.
The login() method requires an email address and a password. The email address must be both valid and linked to the password before a user is successfully logged in. After a successful login, a new token is assigned to the user to make unauthorized requests.
The logout() method deletes the user's tokens so that they won't have authorized access until they log in again to obtain a new token.
Add password reset support
Before allowing a user to change their password — especially when they are not logged in — a means of ensuring that the user is valid and owns the account must be provided.
A good way to do this is to send a confirmation PIN to the registered email address using a Mailable. If the user submits the correct PIN they're then allowed to reset their password.
Create a reset password Mailable
Create theMailable, in app/Mail/ResetPassword.php, and its corresponding view template, in resources/views/emails/password.blade.php, by running the following command.
With the files created, open app/Mail/ResetPassword.php and update the __construct() method as follows:
Then, define the $pin class member variable at the top of the class.
Next up, update the build() method as follows:
Then, update the email view template in resources/views/emails/password.blade.php as follows:
Set up the forgot password controller
Next up, you need to create a controller to help users reset their password, emailing them a reset password PIN. To do so, run the following command:
It will create a new file called ForgotPasswordController.php in the app\Http\Controllers directory. With it created, add the necessary use statements to the top of the file.
Next, define the forgotPassword() method, by pasting the code below into the class.
The forgotPassword() method validates the email address sent in the request and checks if it is linked to an existing user, and if it is linked to a reset password request. If it is, then the current reset password request is replaced with another one. It then finishes up by mailing a reset password email to the user, which contains the reset password pin.
Next, add the verifyPin() method, below, after the forgotPassword method.
This method requires the user's email address and the 6-digit PIN sent to them, after the user requested to reset their password. If the pin hasn't expired and is linked to a reset password request with the users' email address, the user is allowed to reset their password. Otherwise an applicable error message is returned.
Set up the reset password controller
Next, you need to create a controller to reset a user's password. To create the controller, run the following command:
It will create a new file named ResetPasswordController.php in the app\Http\Controllers directory. With it created, add the following use statements to the top of the file.
Then, implement the resetPassword() method which allows the user to reset their password, by adding code below to the body of the class.
Set up the required routes
Laravel's routes are stored in routes/web.php for web apps and in routes/api.php for APIs. For this guide, you’ll be storing them in routes/api.php.
The logout route will be protected with the auth and verify.api middleware, because only logged in users can log out, and only verified users can have access to other endpoints. The verify email route will be protected with the auth middleware. The other routes don’t need users to be authenticated or verified, so don't need to be protected by any middleware.
To do this, add the route definitions below to the end of routes/api.php.
The verifyEmail and logout routes have been protected with the sanctum authentication guard, auth:sanctum. This ensures that only authenticated users can access them.
Testing the Application
With the API created, it's time to test it and confirm that it is functioning properly. There are various ways to do so, such as using Postman or cURL, but we'll be using Postman.
Before we can do that, however, start the application by running the command below.
Test the register functionality
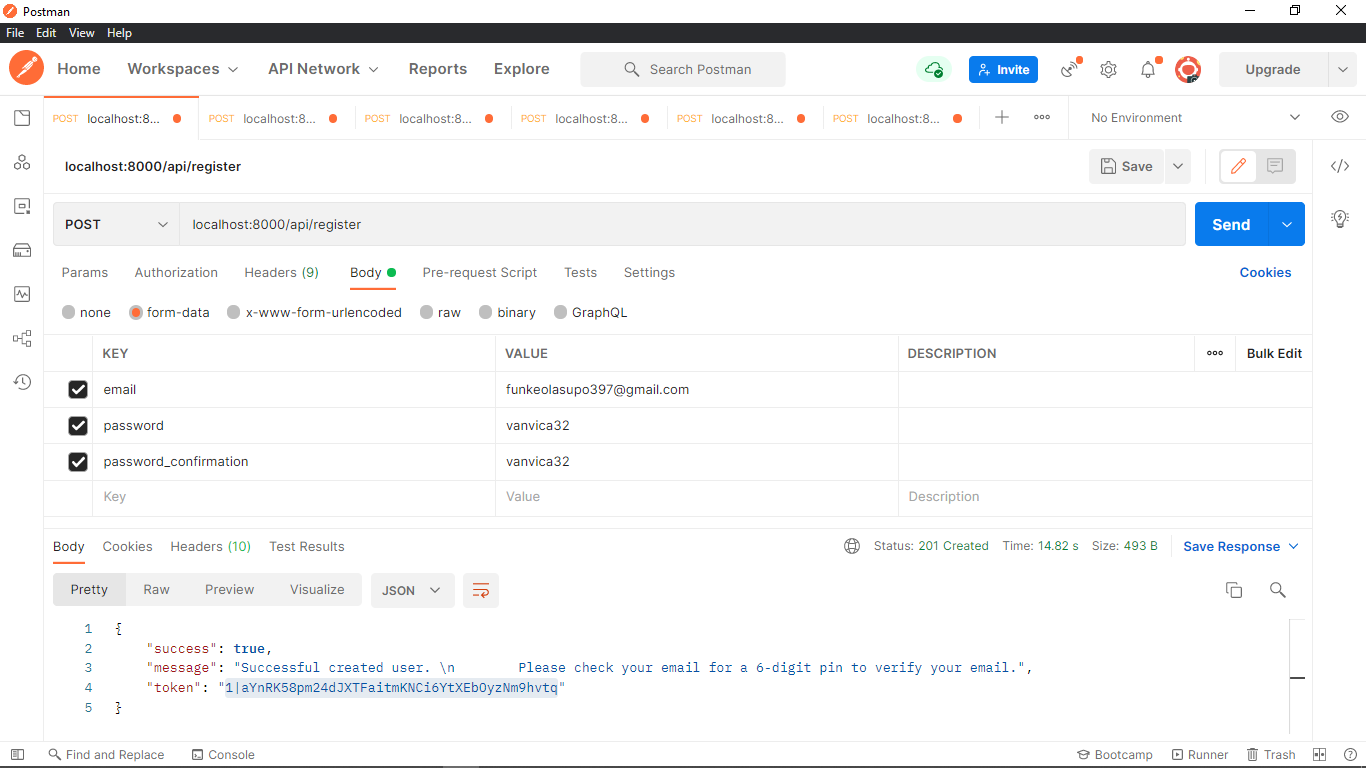
The first thing to do is to test the register and login functionality. To do that, create a new POST request in Postman using the URL http://localhost:8000/api/register. Then, under the Body tab:
- Choose the "form-data" encoding type
- Add a request variable,
email, and set this to your email address. - Add a second request variable,
password, and set this to your password. Its complexity isn't important, but it must be at least 8 characters long. - Add a third request variable,
password_confirmation, and set it to the same value as you entered forpassword.
With the request configured, send it by clicking Send. You should see a JSON response similar to the one below in the response body in Postman.
Test the verify email functionality
To do this, you need three things:
- The email address which you registered with.
- The 6-digit PIN which was emailed to you.
- The authentication token. You'll find this in the
tokenfield in the response to the login request which you just completed. This is required, since the verify email endpoint is protected.

Create a new POST request in Postman using the URL http://localhost:8000/api/email/verify.
Then, under the Body tab:
- Choose the "form-data" encoding type
- Add a request variable,
email, and set its value to the email address you registered with. - Add another request variable,
tokenand set its value to the 6-digit PIN that was emailed to you.
Then, under the Authorization tab (it's named Auth in newer versions of Postman)::
- Change the "Type" dropdown list to "Bearer Token"
- Set the value of the "Token" field to be the token which was returned in the
tokenfield of the response to the login request.
Then, submit the request by clicking Send. If successful, you should see a response body similar to the example below.
Test the login functionality
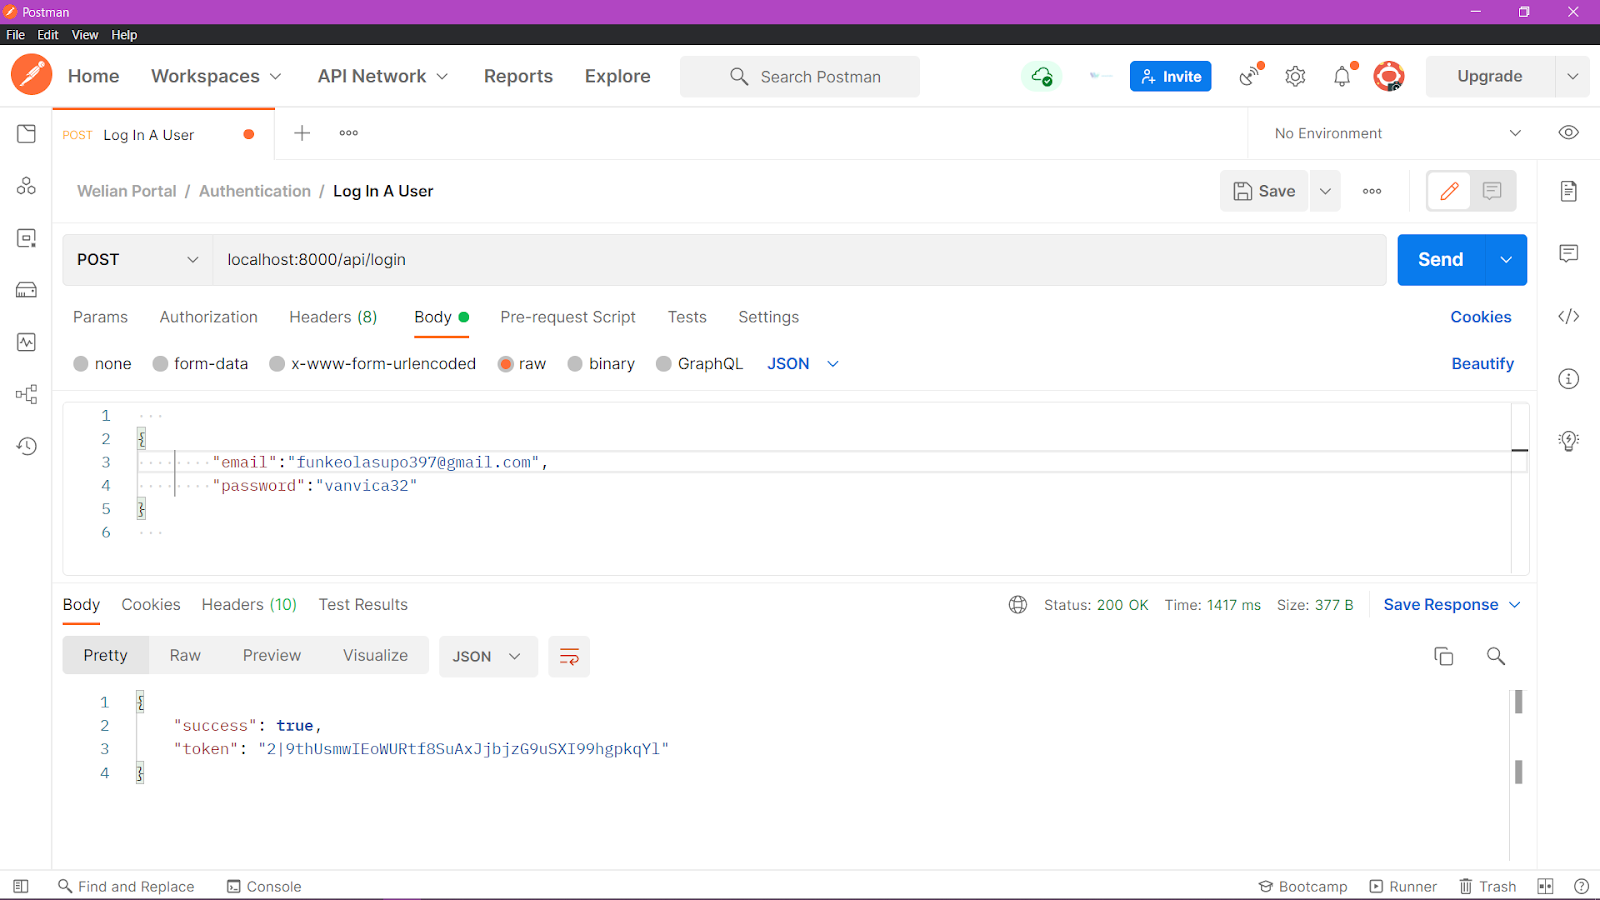
Next, let's test logging in. To do that, create a new POST request in Postman using the URL http://localhost:8000/api/login. Then, under the Body tab:
- Choose the "raw" encoding type
- Next to the encoding type dropdown, change "TEXT" to "JSON"
- Replace the placeholders in the JSON below with your email address and password and paste it as the request's body
Then, submit the request by clicking Send. If successful, you should see a response body similar to in the screenshot below.
Test the logout functionality
To do this, create a new POST request in Postman, using the URL http://localhost:8000/api/logout.
Then, under the Authorization tab:
- Change the "Type" dropdown list to "Bearer Token"
- Set the value of the "Token" field to be the token which was returned in the
tokenfield of the response to the login request.
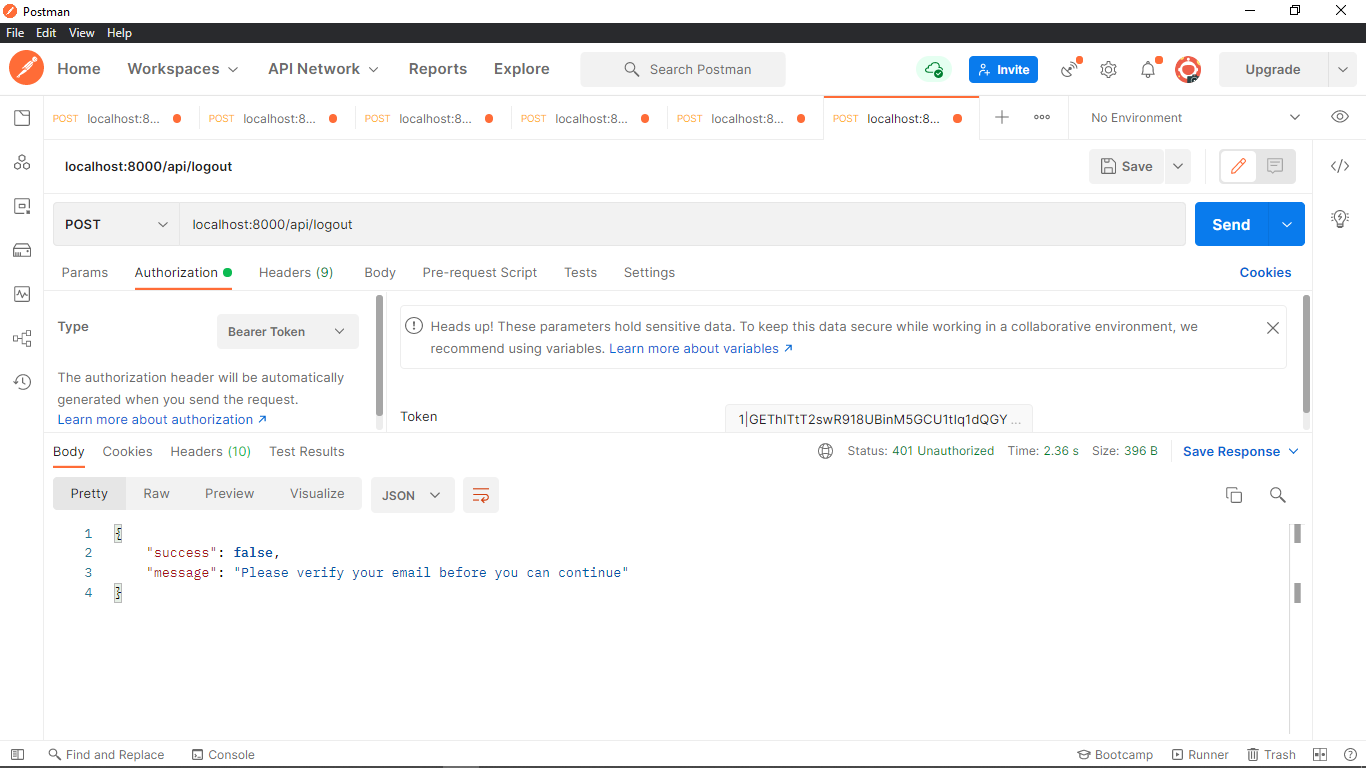
Then, submit the request by clicking Send. If successful, you should see a response body similar to the example below.
Test the password reset functionality
Moving on to testing password reset, first you need to request the 6-digit PIN, then you can reset the password. The only required field is email.
To do this, create a new POST request in Postman, using the URL http://localhost:8000/api/reset-password. Then, under the Body tab:
- Choose the "form-data" encoding type
- Add a request variable,
email, and set its value to the email address you registered with
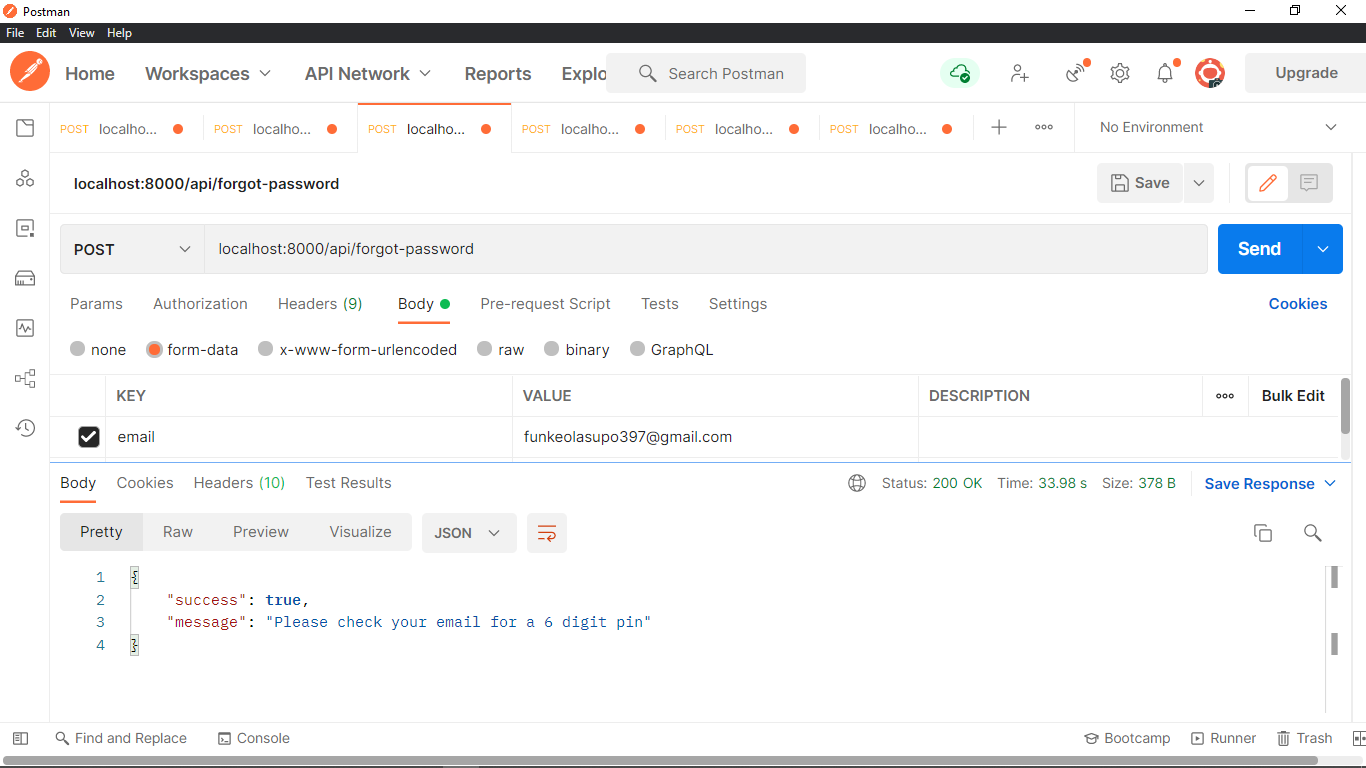
Then, submit the request by clicking Send. If successful, you should see a response body similar to the example below.
Next, submit the PIN you were emailed for verification. To do this, create a new POST request in Postman, using the URL http://localhost:8000/api/verify/pin. Then, under the Body tab:
- Choose the "form-data" encoding type
- Add a request variable,
email, and set its value to the email address you registered with - Add another request variable,
tokenand set its value to the 6-digit PIN that was just emailed to you, in the Reset Password email.
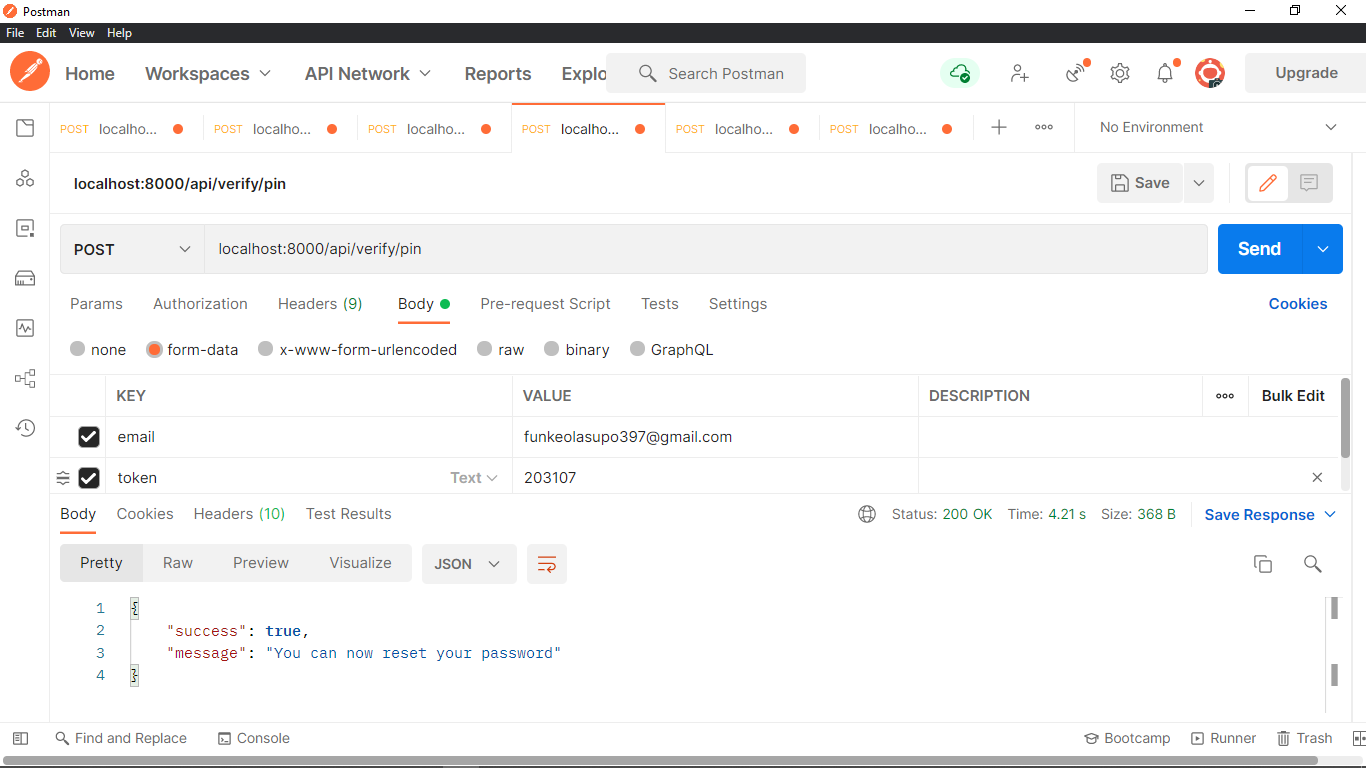
Then, submit the request by clicking Send. If successful, you should see a response body similar to the example below.
As the PIN was verified, you can now reset your password. To do this, create a new POST request in Postman, using the URL http://localhost:8000/api/reset-password. Then, under the Body tab:
- Choose the "form-data" encoding type
- Add a request variable,
email, and set its value to the email address you registered with. - Add a second request variable,
password, and set its value to your new password. - Add a third request variable,
password_confirmation, and set its value to your new password as well.
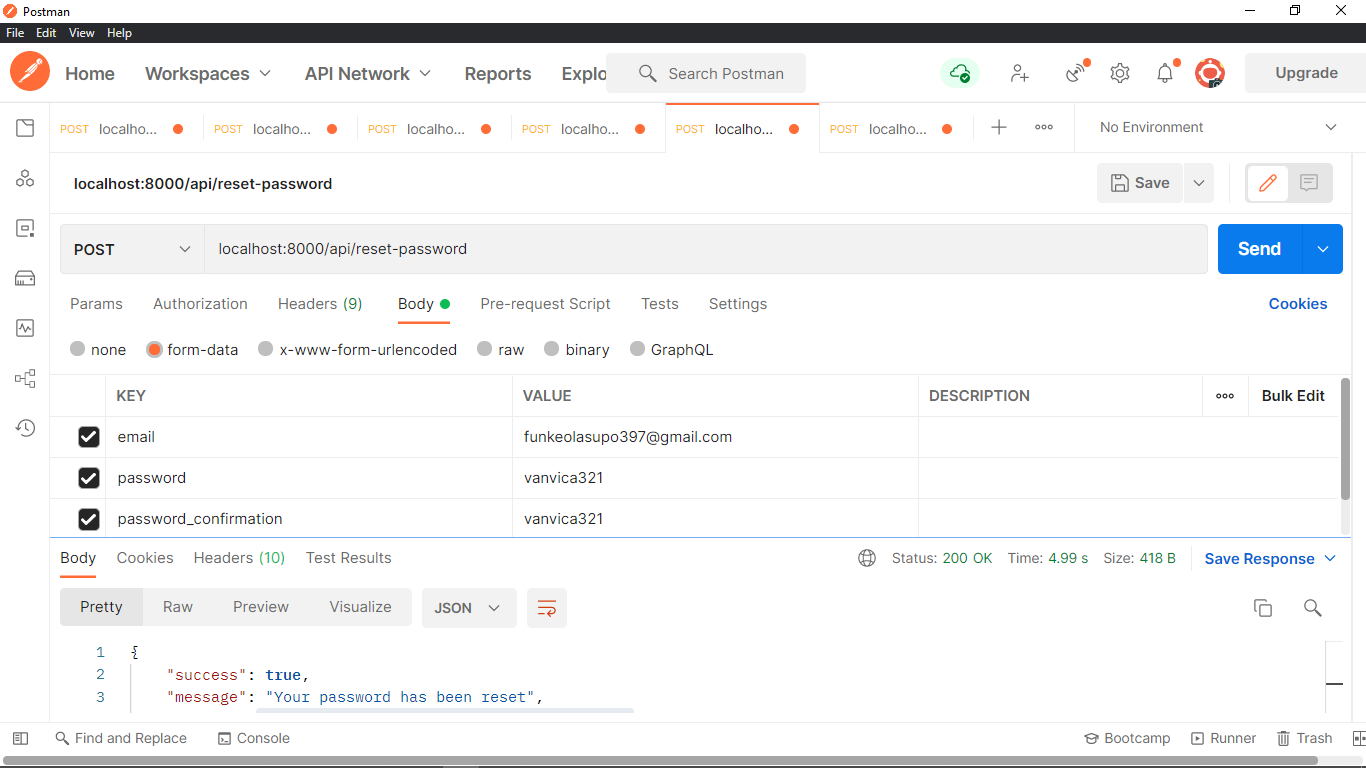
Then, submit the request by clicking Send. If successful, you should see a response body similar to the example below.
Conclusion
In this tutorial, you learned how to create custom Forgot Password and Email Verification functionality in Laravel. Check the official documentation to know more about Laravel's default email verification and reset password. The code for this project is open-source and available on GitHub.
Funke is a tech lover with a keen interest in building and promoting sustainable tech communities especially among teenagers and young adults. She is a backend developer, who is passionate about communal growth and has published articles on many blogs including her personal blog.
When she is not writing codes or creating technical content she is rendering humanity service to her local community solving societal issues. You can reach out to her on Twitter and Github.


Related Resources
Twilio Docs
From APIs to SDKs to sample apps
API reference documentation, SDKs, helper libraries, quickstarts, and tutorials for your language and platform.
Resource Center
The latest ebooks, industry reports, and webinars
Learn from customer engagement experts to improve your own communication.
Ahoy
Twilio's developer community hub
Best practices, code samples, and inspiration to build communications and digital engagement experiences.