Send Welcome Emails After New Signups with SendGrid and Auth0 Actions
Time to read:
July 22, 2022
Written by
Reviewed by

Welcome emails are one of your first opportunities to make a good impression on new customers and it’s the one broadcast every user will see. It’ll also set the foundation of a good relationship from the start. Twilio SendGrid enables you to deliver emails to your customers without using engineering resources to do it yourself.
If you aren’t familiar with Auth0, it is an Identity Access Management (IAM) platform that helps manage authentication and authorization in applications securely. Auth0 has recently launched Actions which lets developers customize the behavior of Auth0 applications at certain trigger points through functions written in Node.js.
In this post, you’ll learn how to send a welcome email after a new user signs up to your Auth0 application using the SendGrid Mail Send API and Auth0 Actions.
Prerequisites
- A free Twilio SendGrid Account – Sign up here.
- A free Auth0 Account – Sign up here.
- An application in your Auth0 account. If you don't have one, you can use one of the Auth0 Quickstarts with a sample application.
Configure SendGrid
Before you can send emails, SendGrid requires you to verify your Sender Identity and generate your API key. Verifying the Sender Identity confirms that you own the email address you're sending from.
The Sender Identity is the 'from' email address users see when they receive your emails. The API key protects sensitive areas of your SendGrid account from unauthorized access.
Verify your Sender Identity with SendGrid
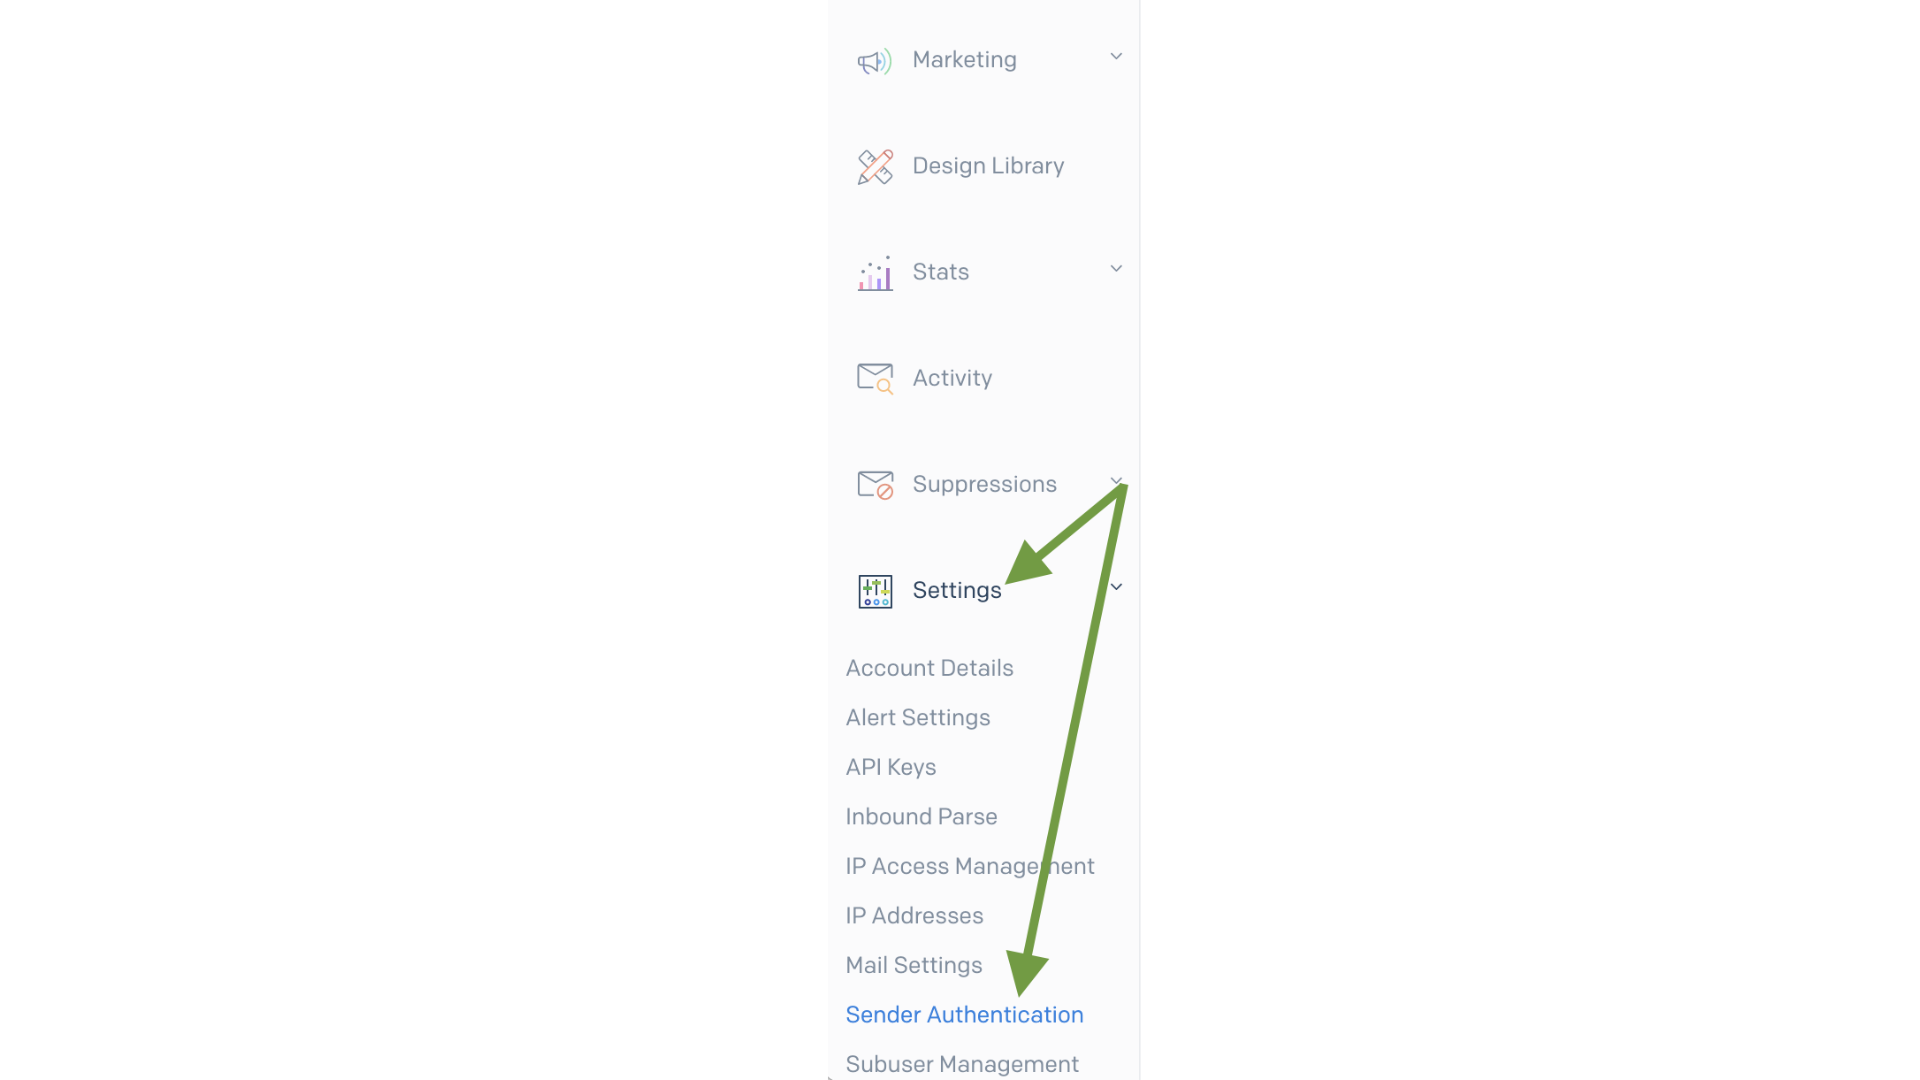
Log in to SendGrid, scroll down on the left-hand side menu, and click Settings > Sender Authentication.
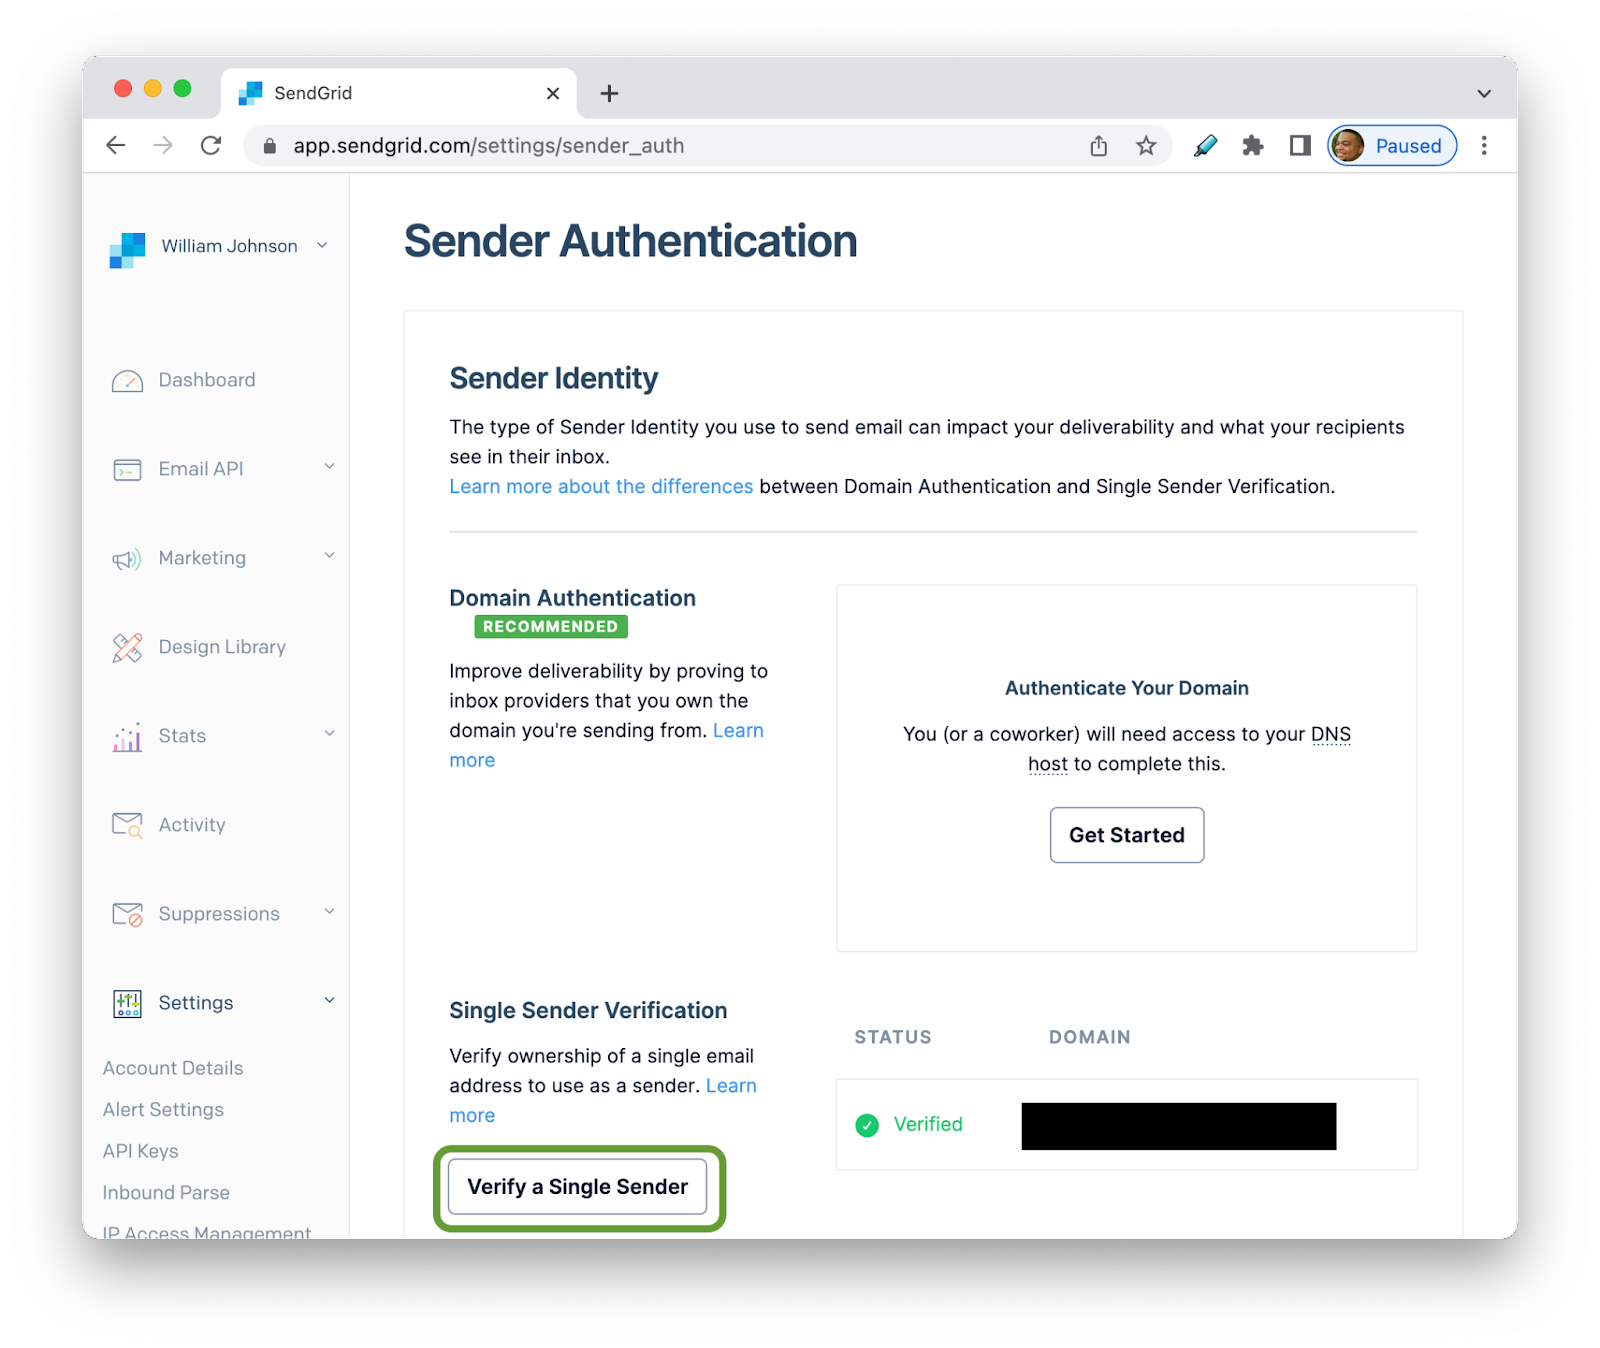
You'll have two options on the Sender Authentication page: Domain Authentication and Single Sender Verification. Single Sender Verification is a quick way to start sending emails during development.
On the Sender Authentication page, click the Verify a Single Sender button.
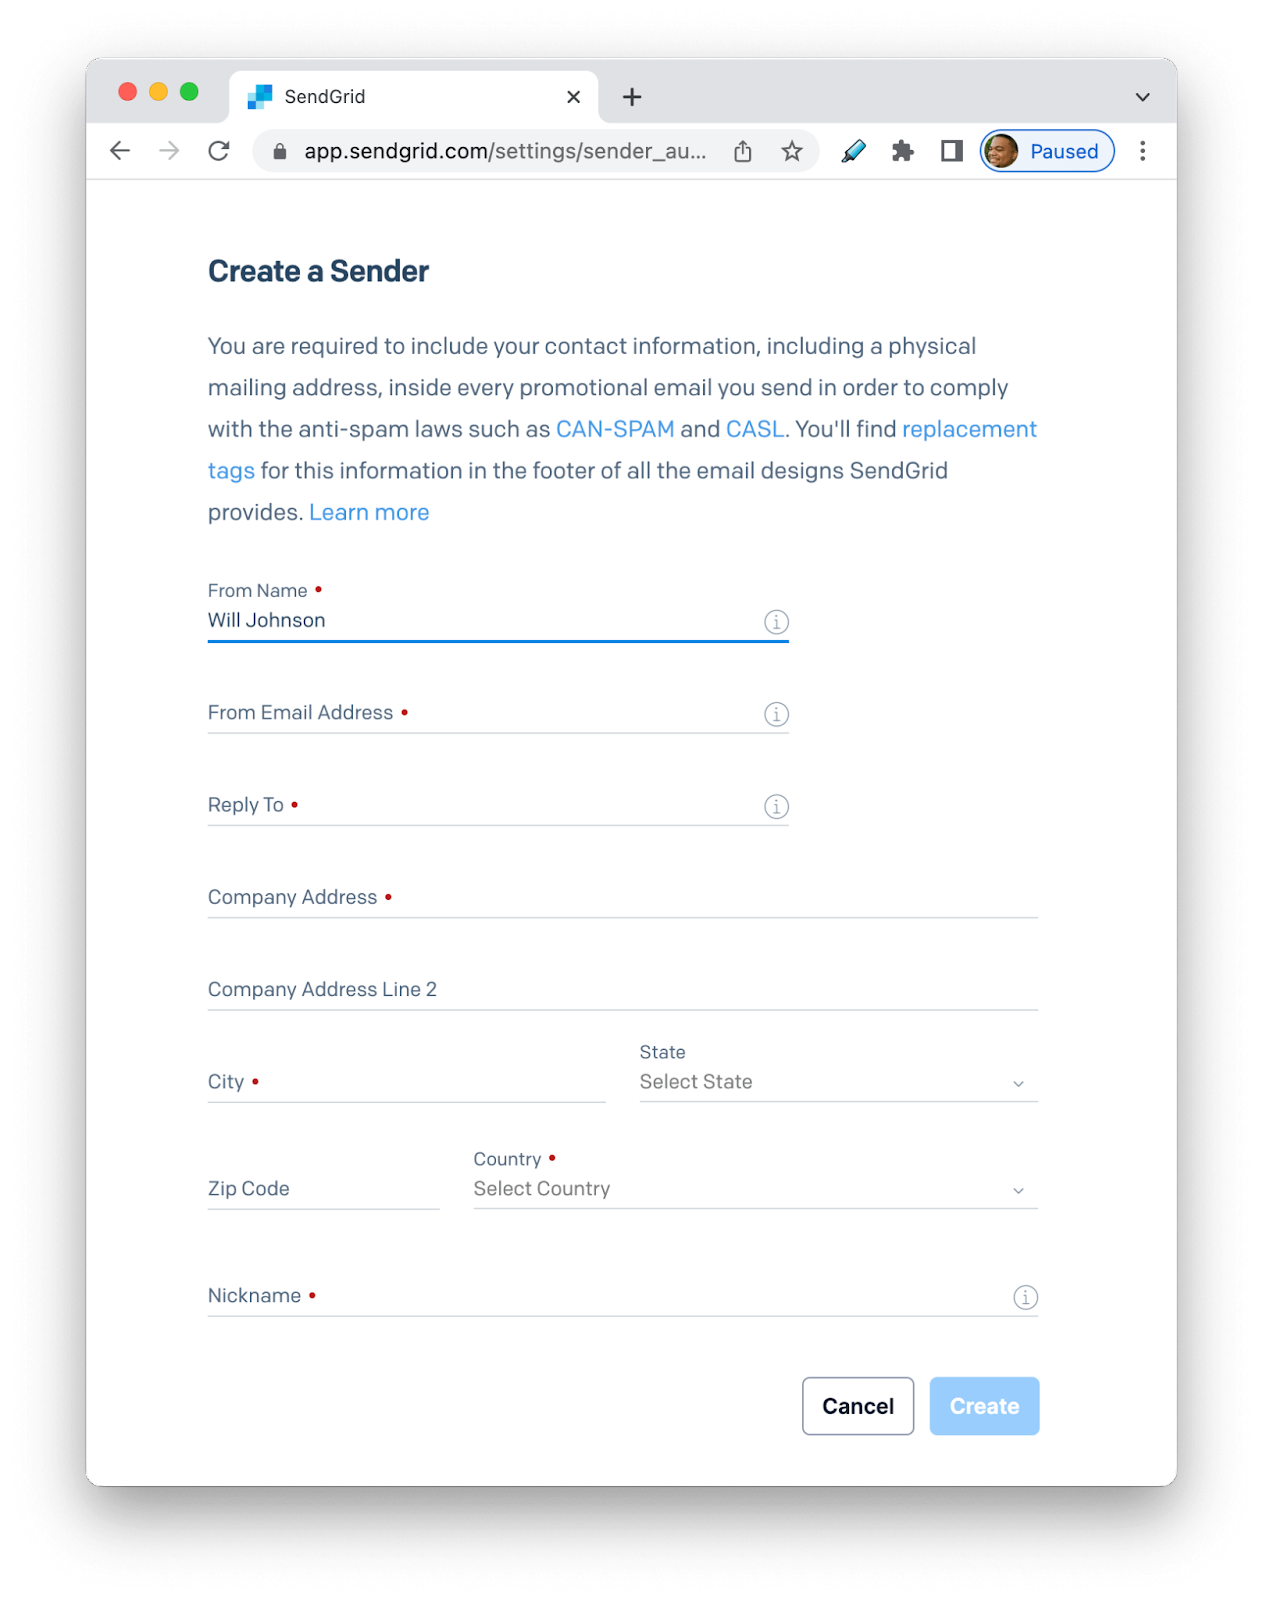
Fill out the Create a Sender form that appears on the right side of the page. Fill out the required fields, then click Create. SendGrid will send an email to the “from” email address that was provided to verify that email address. This email should have the subject line Please Verify Your Single Sender. After opening the message, click Verify Single Sender. You'll be redirected back to SendGrid and able to use that email address to send messages from Auth0.
The next step is to create an API key that you’ll store as a secret with Auth0.
Generate SendGrid API Key
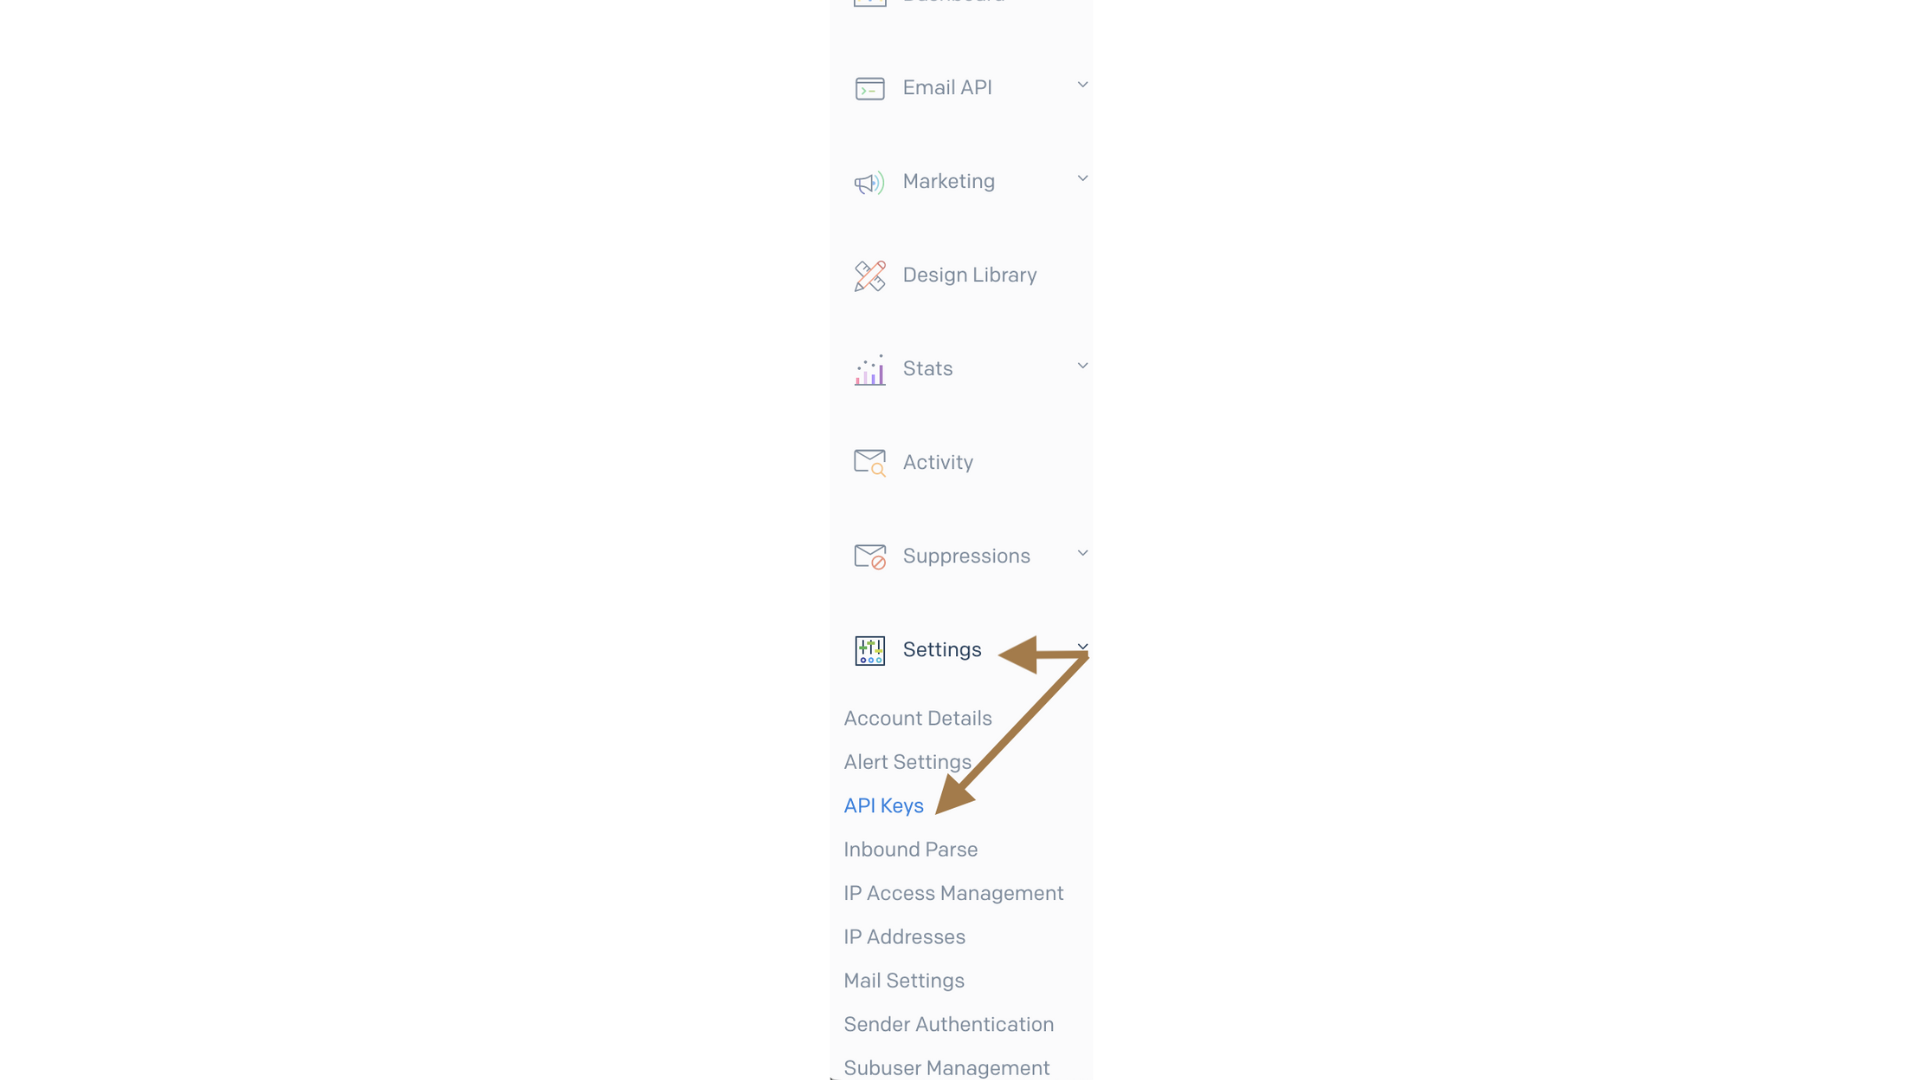
Create your API key by going to the left side menu and clicking Settings > API Keys.
On the API Key page, click Create API Key in the upper right corner on the API Key page. Type in a name for your API key on the Create API Key form, select Full Access under API Key Permissions, then click Create & View. This page displays your API key. We recommend you copy the API key and save it in a secure location. Lastly, click Done.
SendGrid is now configured to send emails.
Next, you’ll head over to Auth0 to create an Auth0 Action that uses SendGrid to send a welcome email to new users.
What are Auth0 Actions?
Auth0 Actions are serverless functions written in Node.js. The code is written in Auth0's in-browser code editor. The code is stored and runs on an infrastructure owned and maintained by Auth0. There is also an Auth0 Actions marketplace where you can add custom integrations without writing any code.
Within the code editor, you have access to the following features:
- Add npm packages
- Store secrets
- Test Actions before deploying them
Once deployed, you can add the Action to run after various trigger points within the authorization flow.
Today you'll learn Actions with the Post User Registration flow, which runs after a user is created in the database.
Create An Auth0 Action
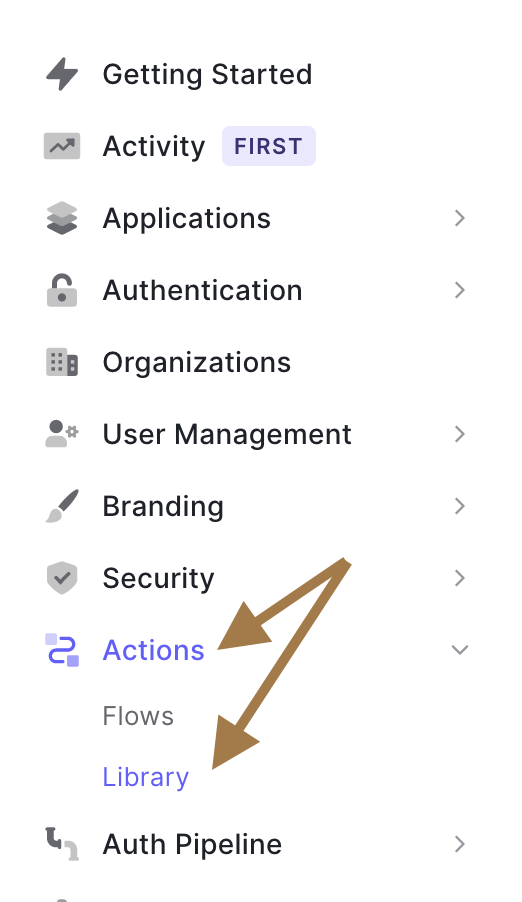
To create an Action, log in to Auth0. On the left side dashboard menu, click Actions > Library. You're on the Library page, which shows your Actions.
The Library page has two tabs. The first tab, Installed, is for any third-party Actions installed from the Actions marketplace. The second tab, Custom, is for any Actions you created. To create your first Action, click the Build Custom button near the upper right corner of the page.

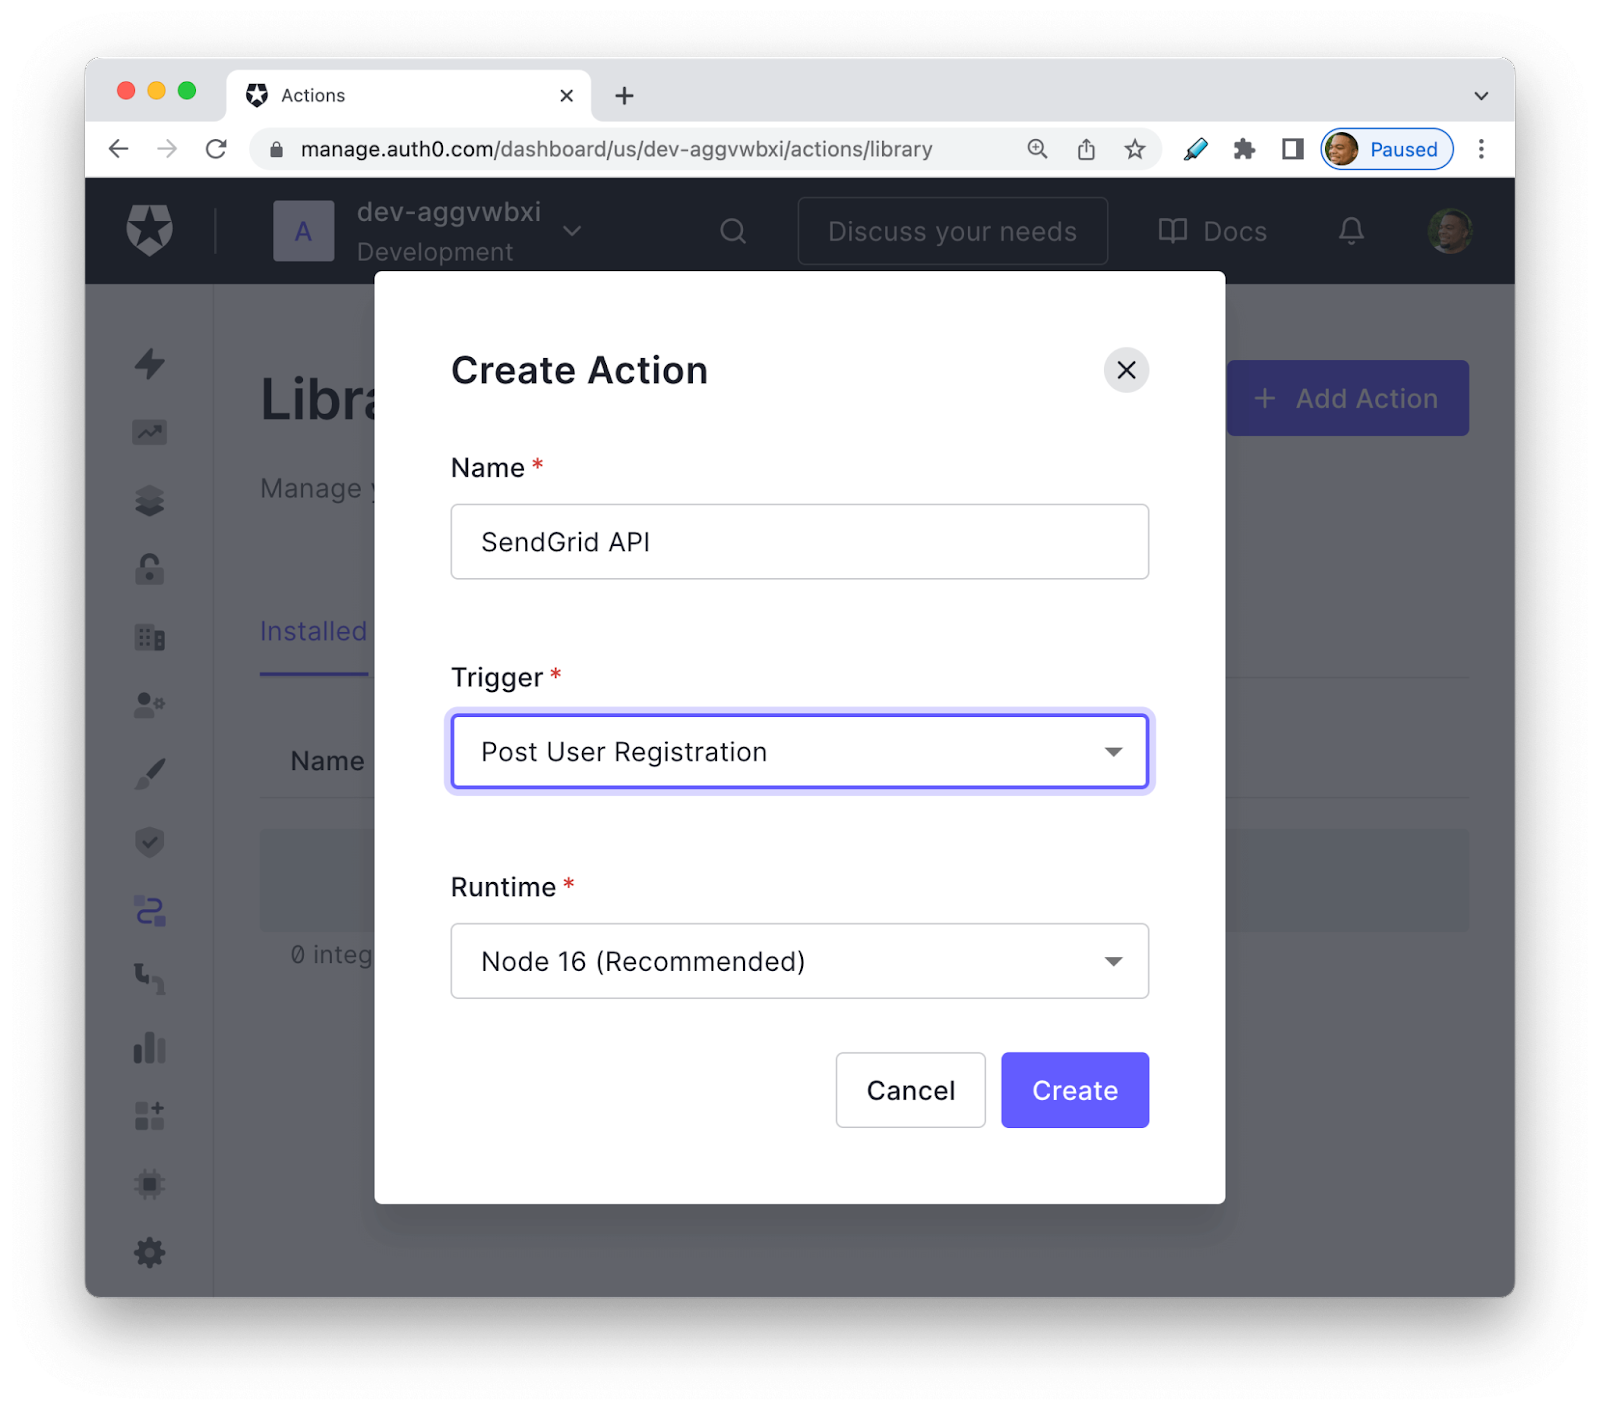
Clicking Build Custom will bring up the Create Action modal. Here, you'll give your Action a name, select which trigger you want to use, and the Node version.
For this example:
- Fill in "SendGrid API" in the Name field.
- Select Post User Registration from the Trigger drop-down.
- Keep the Runtime on the recommended Node 16.
After those three fields are filled out, click Create.
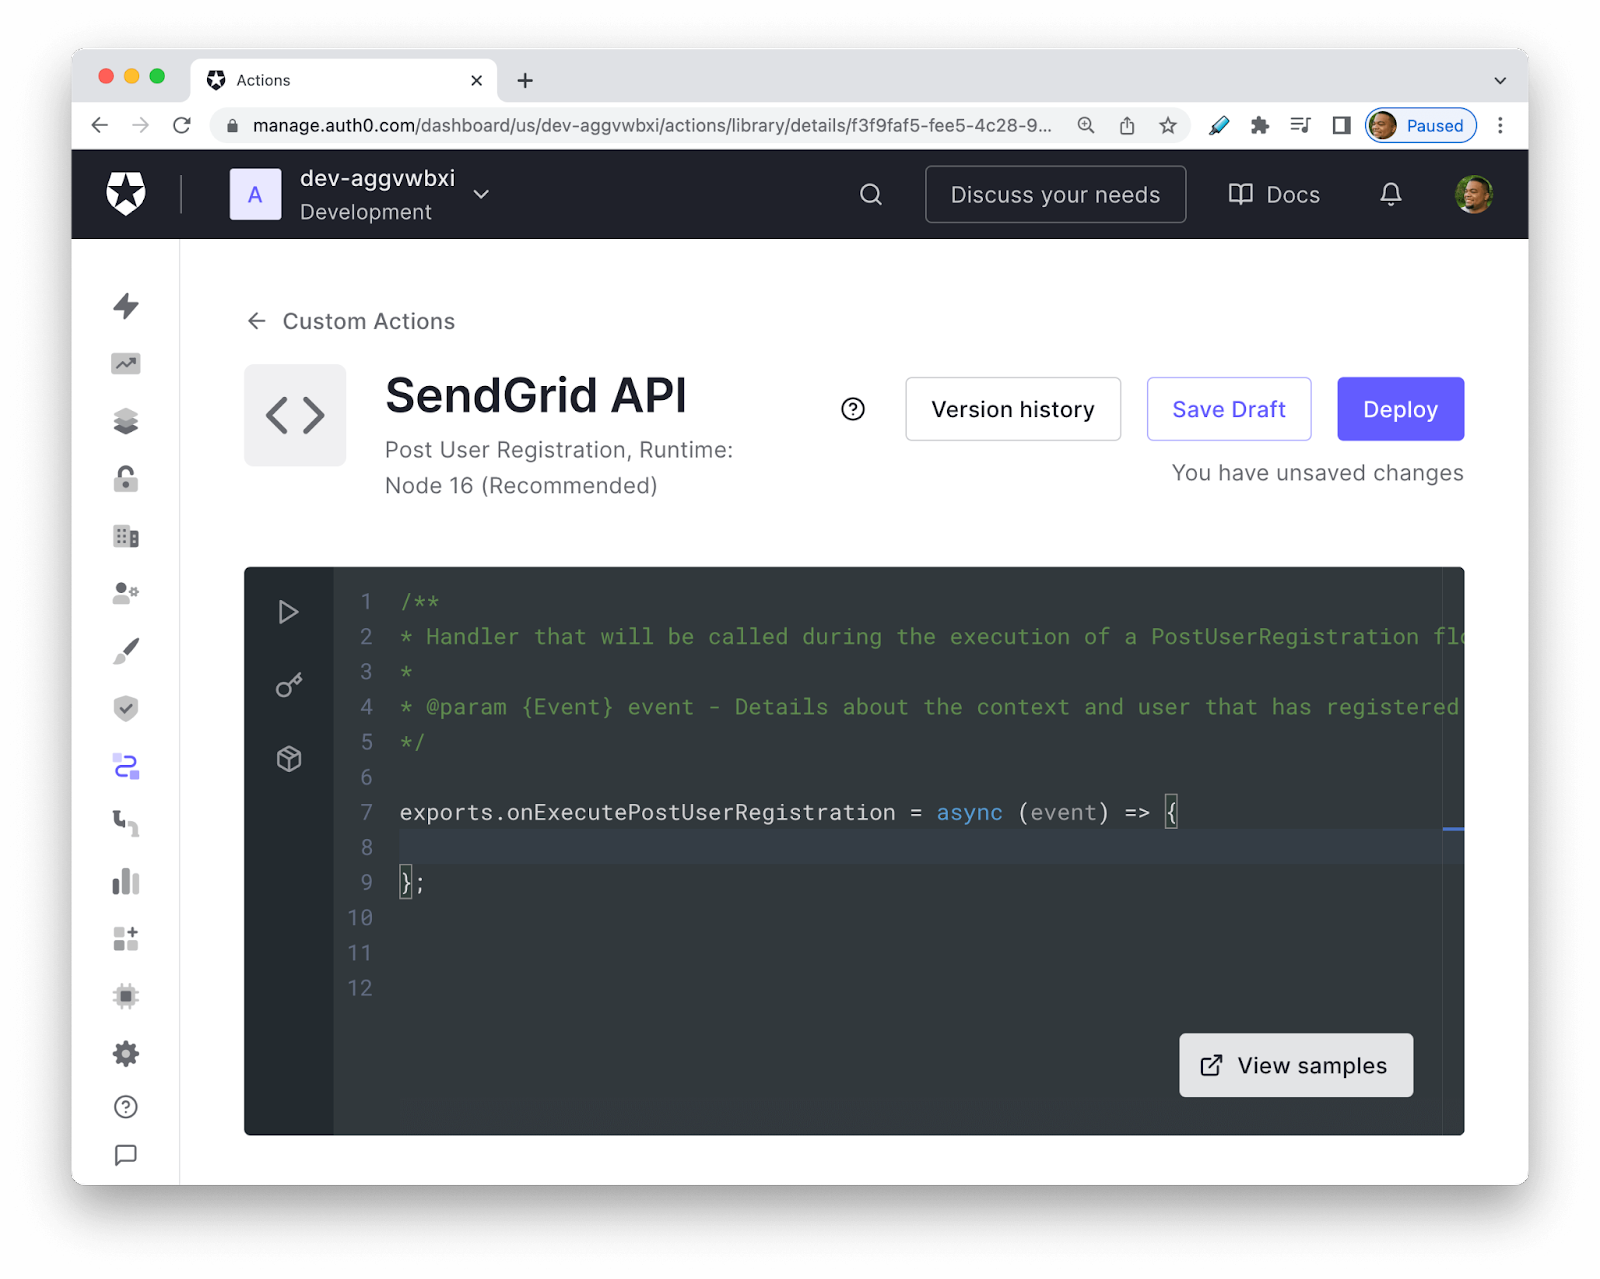
Clicking Create will bring up the Actions in-browser code editor. Here, you can write the code to send the email using the SendGrid API.
Write Auth0 Actions Code with SendGrid Mail Send Endpoint
Before diving headfirst into writing code, take a tour of the code editor.
In the upper right corner, there are three buttons: Version History, Save Draft, and Deploy:
-
Version History is where you can store your Actions and revert to previous versions.
-
Save Draft is for saving your code and returning to work on it later.
-
Deploy is when your code is complete and tested, and you're ready to use it.
On the left side of the editor, you’ll see three symbols
- The first is the "play" symbol, where you'll test your Action before deploying it.
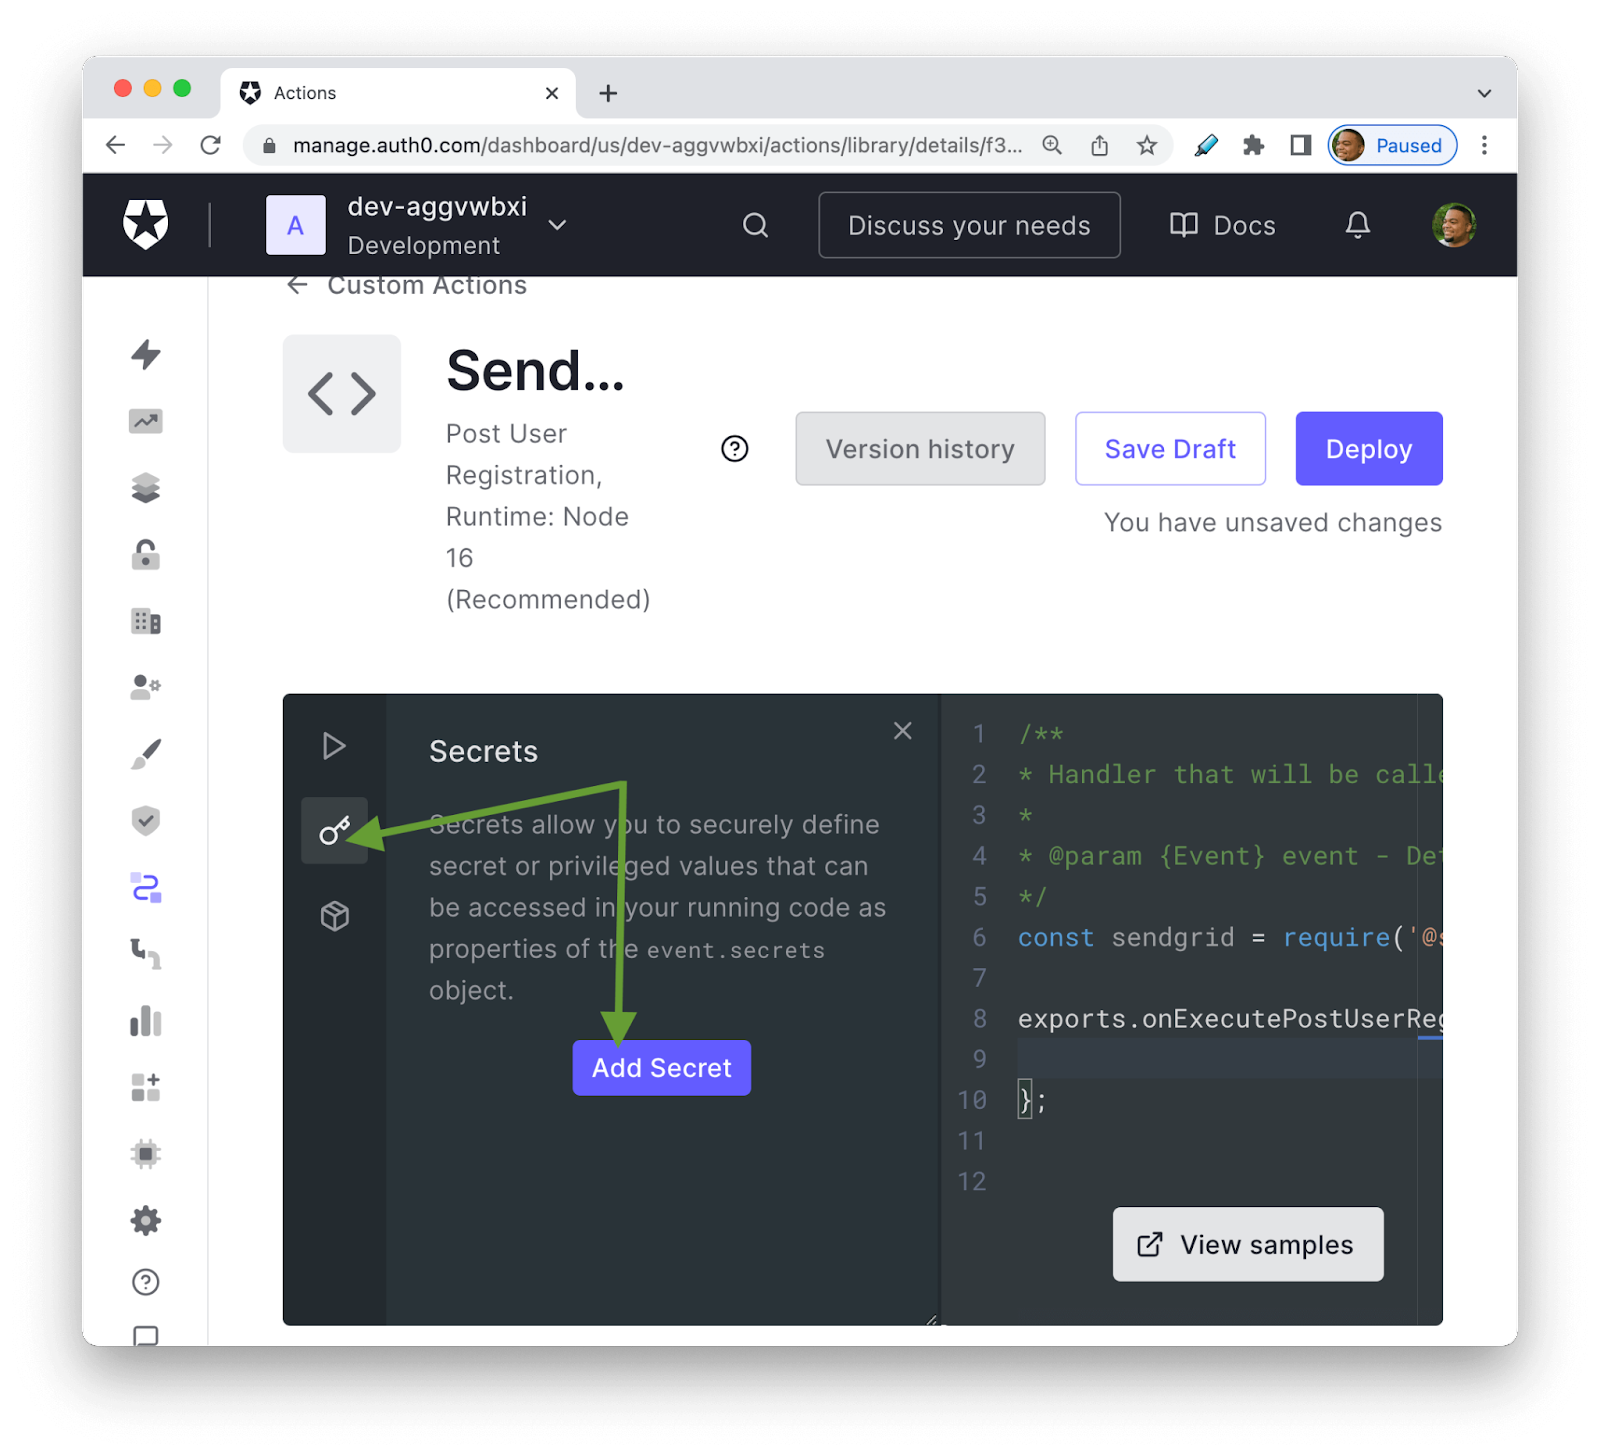
- Below is a key symbol where you'll store your secrets, like an API key.
- The last symbol is a box; this is where you'll install npm packages.
The first steps you’ll take to send the welcome email are:
- Install the axios npm package to send HTTP requests with Node.js
- Store your SendGrid secret key.
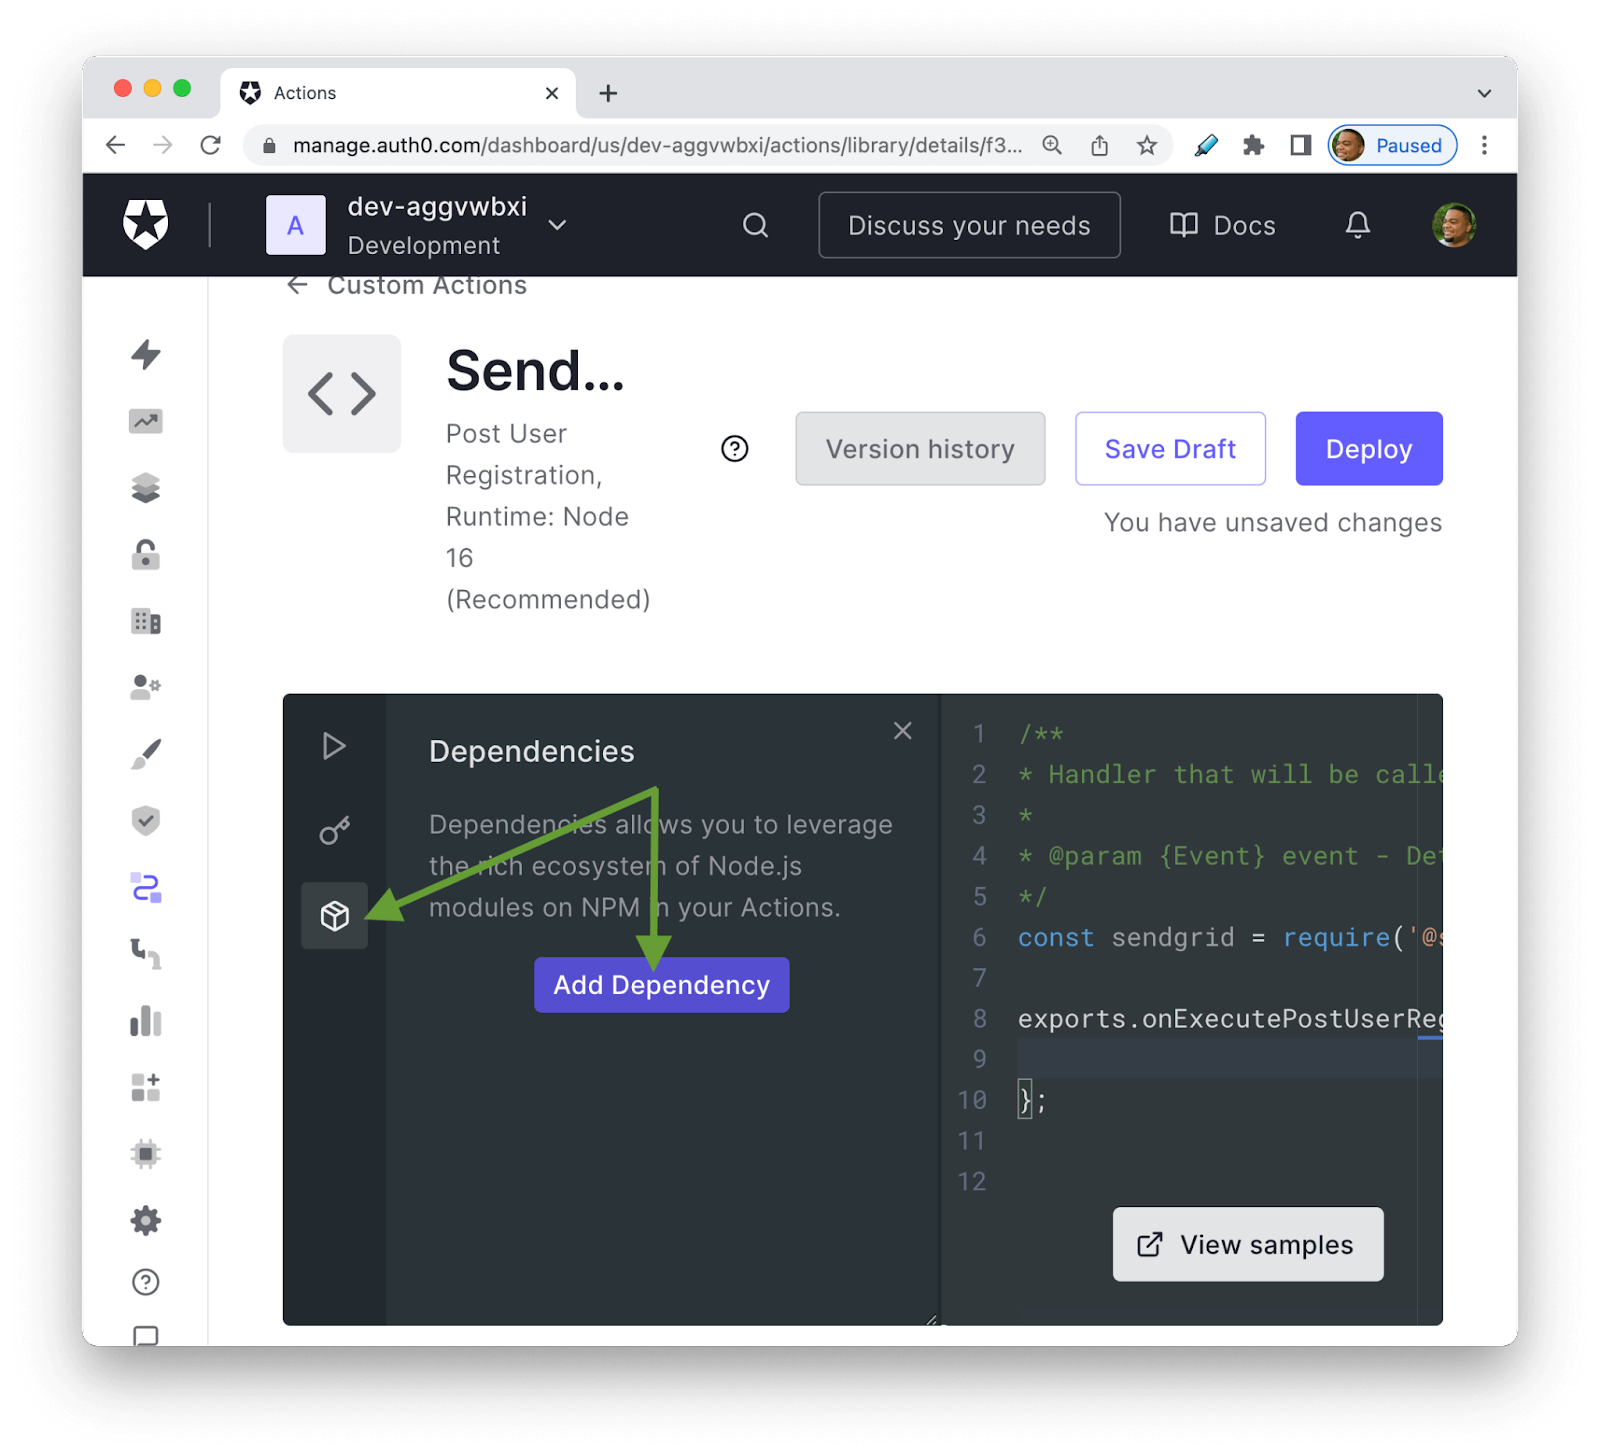
Add a dependency to Auth0 Actions
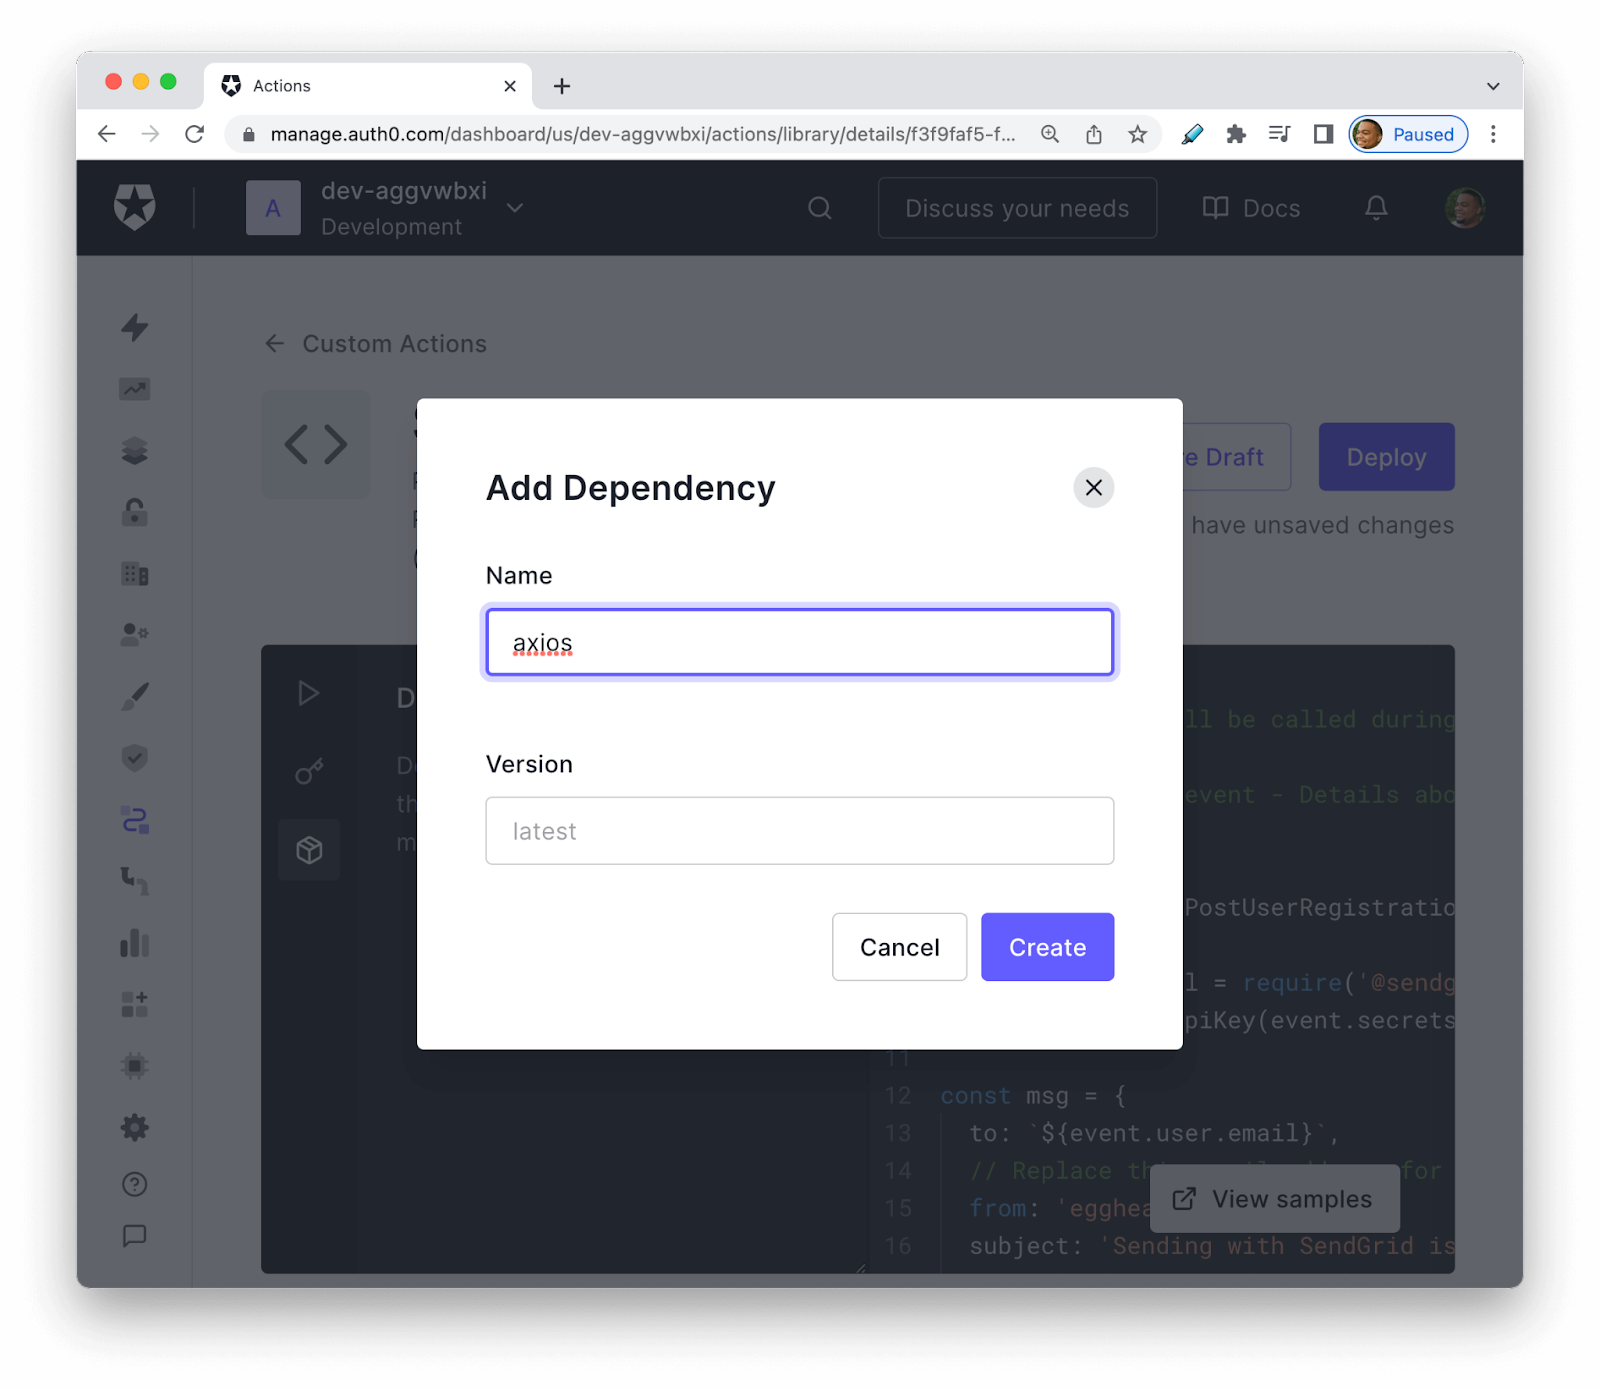
Take the first step and install the axios npm package. Click the "box" icon on the left side of the editor. When the Dependencies menu pops out, click Add Dependency.
In the Add Dependency modal, enter “axios” in the Name field. You can leave Version alone as it defaults to the latest published version. The last step is to click Create. Now axios@latest will show up on the Dependencies menu.
Store API key as a secret
Next, you’re going to add your SendGrid API key. Click the key icon to bring up the Secrets menu. Click Add Secret to bring up the Add Secret modal.
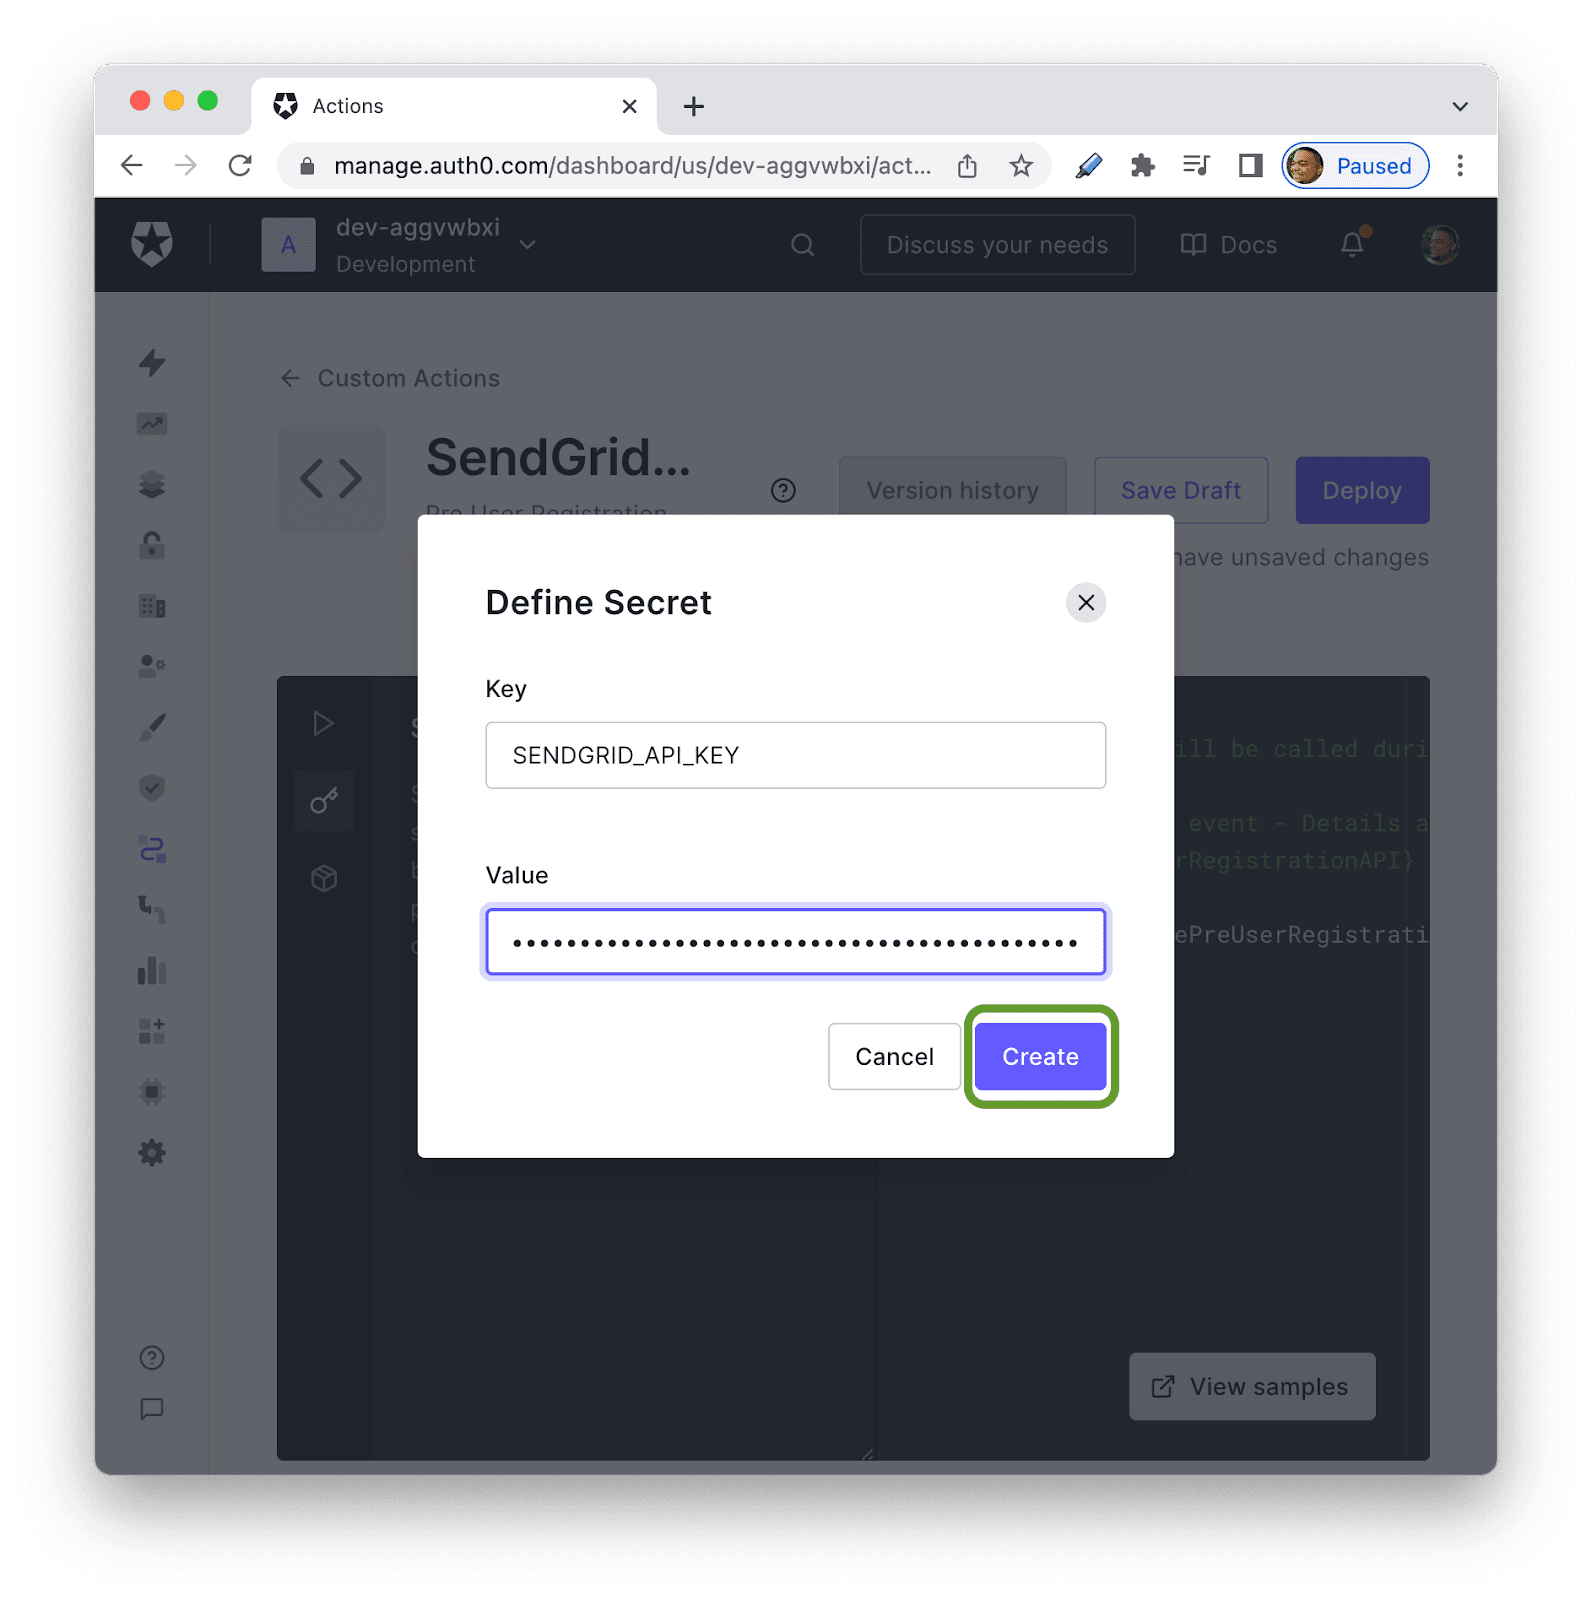
For this example, enter SENDGRID_API_KEY in the Key field. Then, paste the API key you created on the SendGrid dashboard into the Value field and click Create.
Close the Secrets menu by clicking the X, and get ready to write some code!
Replace the code in the editor with the following:
Here’s a breakdown of the code inside the exports.onExecutePostUserRegistration function:
The first line of code, const axios = require("axios"), includes the axios npm package in your project.
Inside the exports.onExecutePostChangePassword function, you run an axios POST request with two parameters: the SendGrid Mail Send endpoint URL and an object containing the properties you want to send to the server.
Inside the object that is part of the axios request, you defined Personalizations, which is an array of objects with metadata about the email. In this example, the personalizations array defines the metadata for to, from, subject, and content. You access users’ email addresses using the Actions event object which contains different information depending on which Actions trigger you're using.
Replace the example@sample.com placeholder within the “from” value to the email address you verified with SendGrid during the Sender Identity setup.
The subject can be any text. The email body can be either plain text or HTML. The helper library allows you to specify the email body type using either the "text" or "html" properties.
There's also an Authorization Header with your request that includes your API key to authenticate this request.
Now click the Save Draft button above the text editor so that your code is safe. Before you deploy your Action, it's a good idea to test it before adding it to your application.
Test Auth0 Actions
You can test your code to ensure it runs correctly without leaving the editor page. Click the "play" icon to bring up the Test menu. This menu also shows you all the properties you can access with the event object.
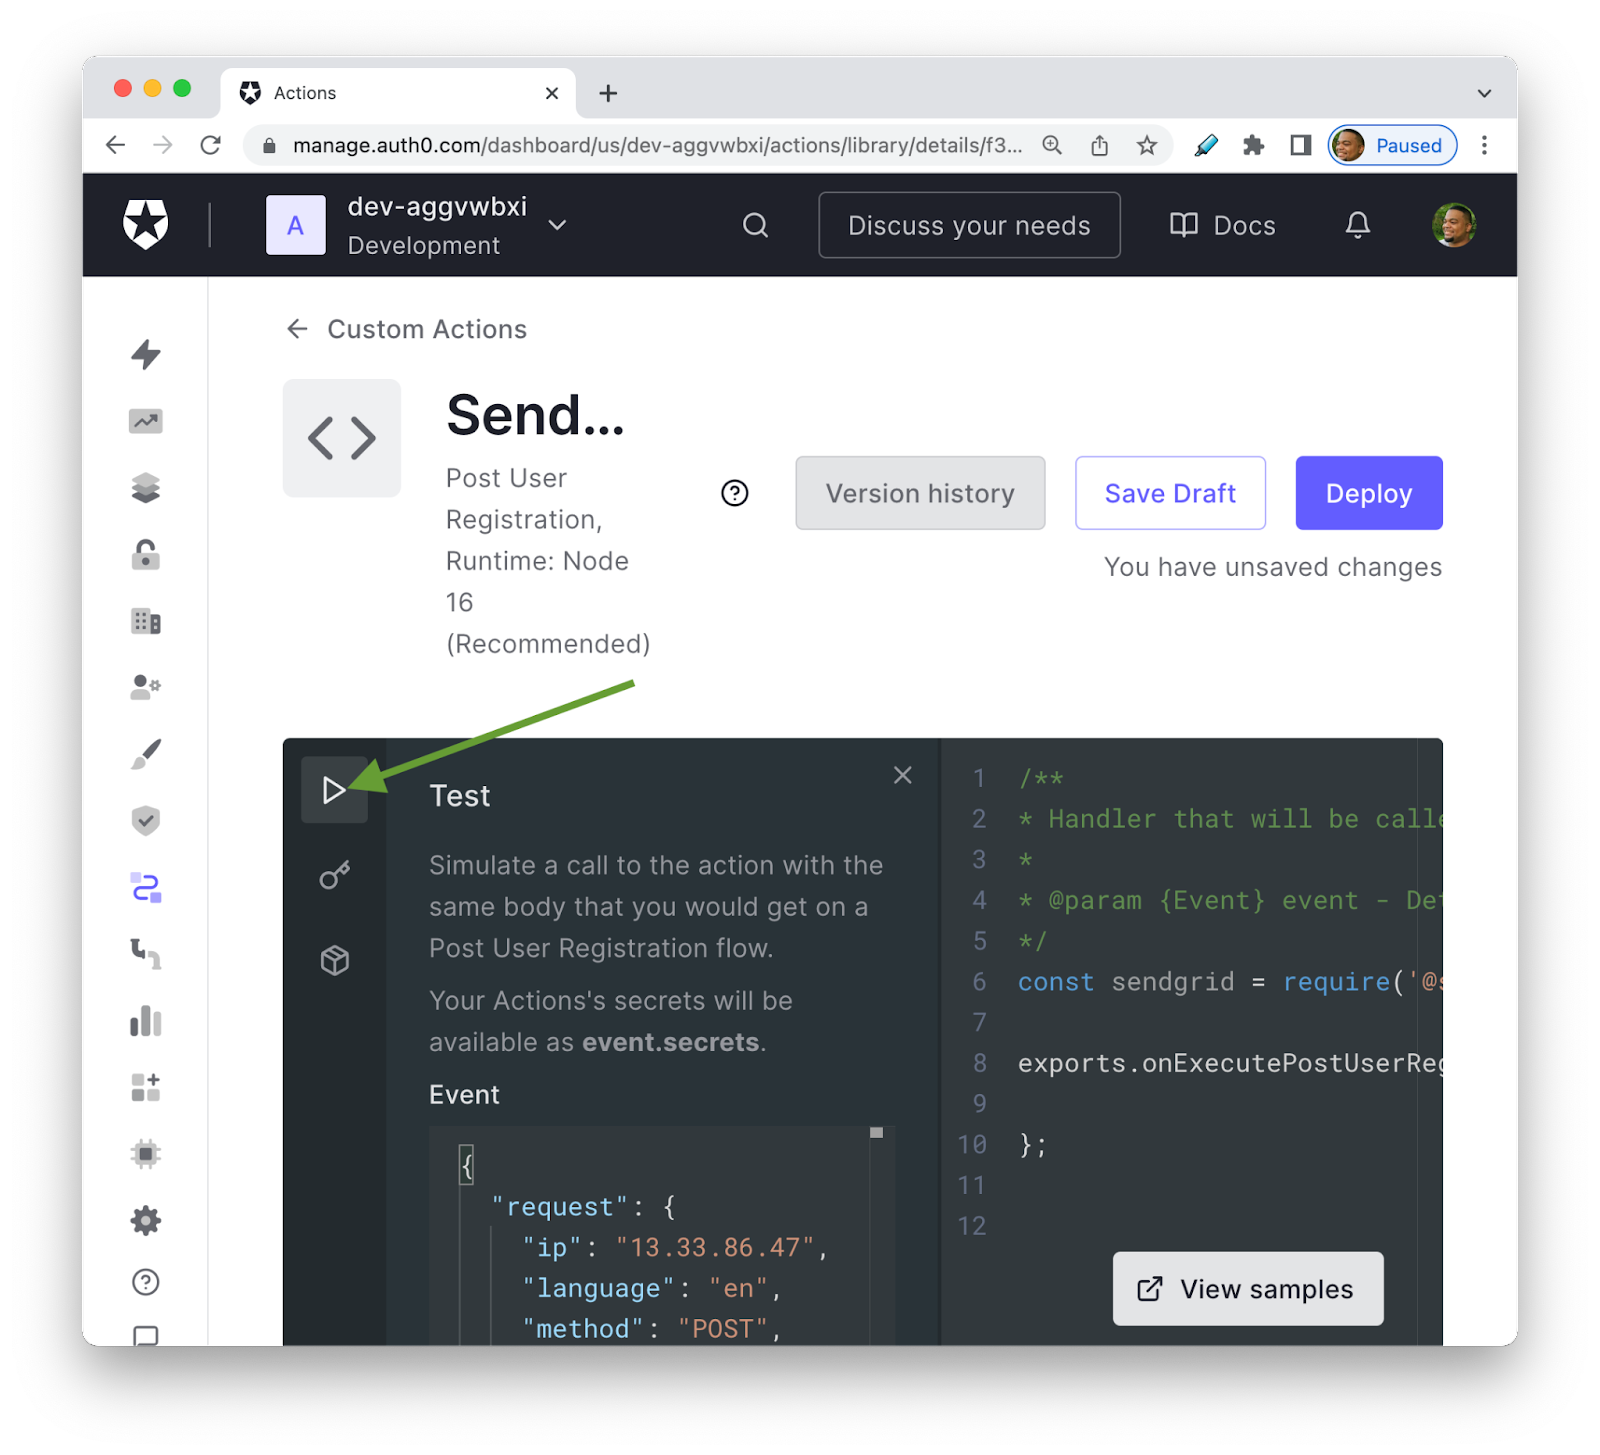
Scroll down to the user section of the event object and change the email property to an email address you have access to. Click the Run at the bottom of the menu.
You'll get a Test Results pop-up that will tell you if there are any errors and give you some stats like the runtime and network duration. Make sure the errors section is empty and click Deploy.
With a tested and deployed Action, the next step is to add the Action to the Post User Registration flow, so it’s live to your users.
Add Action to Post User Registration Flow
Actions have a drag-and-drop editor to add the code you just wrote to your application. You can add multiple Actions to a flow for a truly customized experience.
On the left side menu, click Actions > Flows.

You're now on the Choose Flow page. This page lists all of the available flows you can attach to Actions. For today's application, choose Post User Registration.
Here you’ll see the drag-and-drop flow editor. In the center of the screen, you have two points: Start (the trigger) and Complete. Drag the Actions you want to run between these two points. On the right, there is the Add Action section. There are two tabs in the Add Action menu. The Installed tab is for Actions you've added from the marketplace. The Custom tab is for the custom Actions you’ve written.
Click the Custom tab to see the SendGrid API Action you just created. Now click and drag your Action between the Start and Complete points and click Apply.
With a few lines of code, your app is configured to send an email to new users when they sign up. The final step is to test the password change in your actual application.
Test Password Change in Live Application
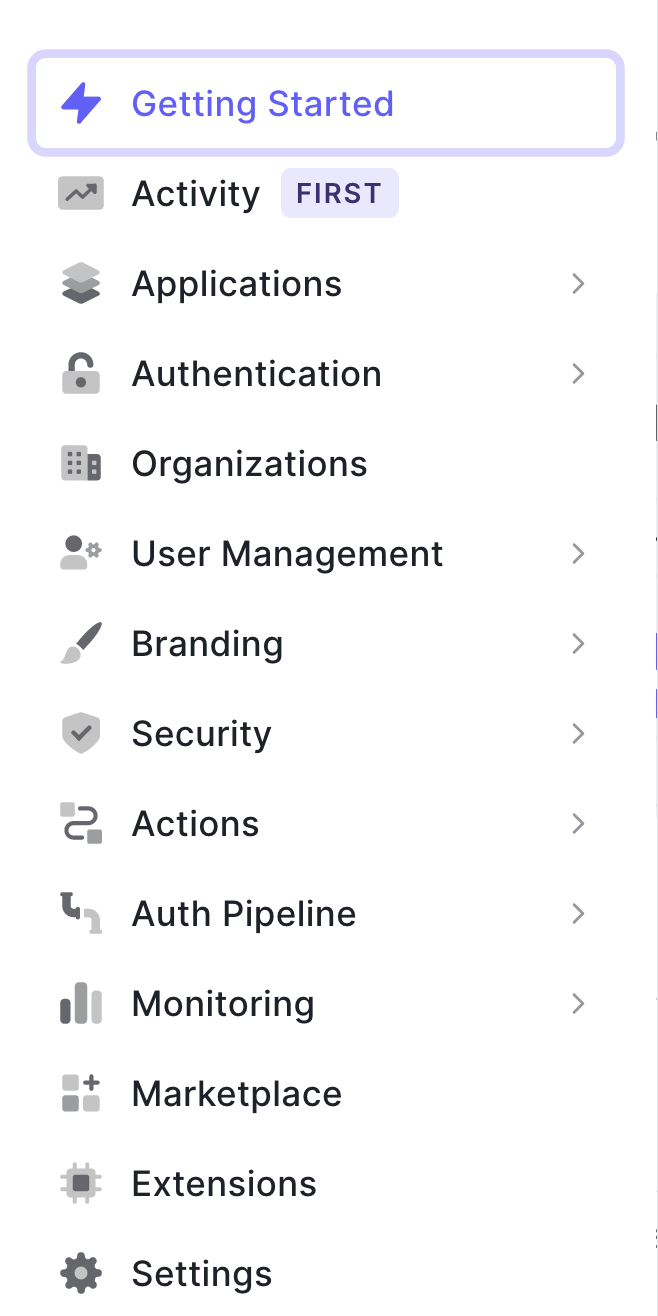
The Action is now live for your users to try on your application. You can test the login experience from the user's perspective in the Auth0 dashboard. On the right side menu, click Getting Started.
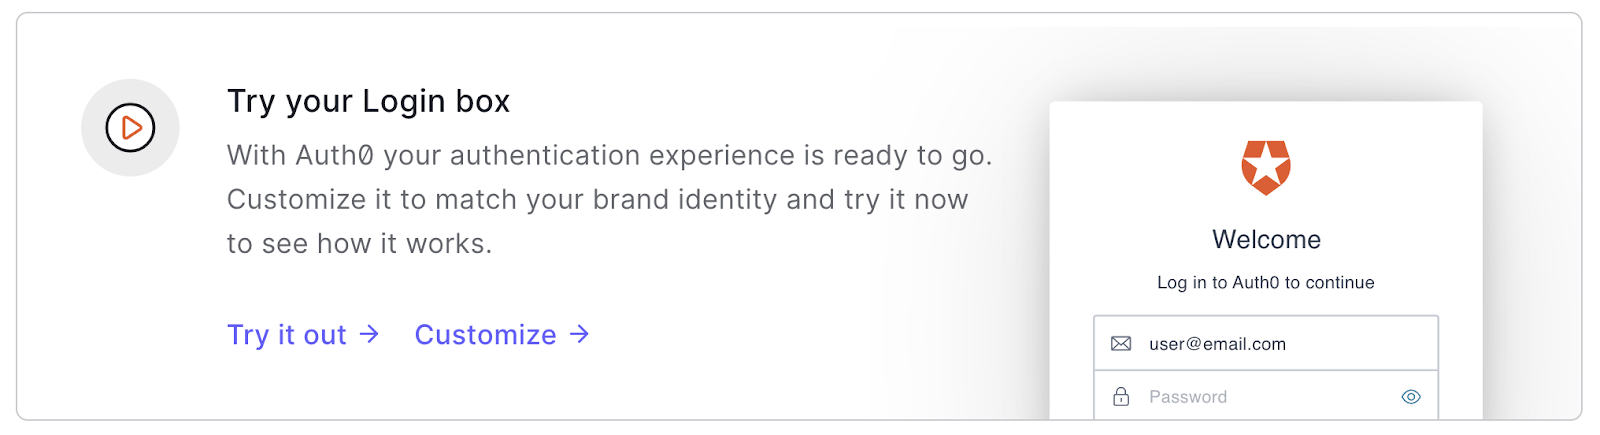
This brings up the Auth0 Getting Started page. Scroll down to the Try your login box section, then click Try it out.
This brings up the Auth0 Login form. Click Sign Up, then Enter the credentials for a new user. Click Continue. Next, you’ll see the It Works! Page confirming that the sign-up was successful!
In your email client, you’ll find an email with the subject “Verify Your Email.” Inside of the email, click the Verify Link. Now that your email is confirmed, in a few minutes, you’ll receive the welcome email from your Auth0 Action!
What’s next?
You combined the SendGrid Mail Send endpoint with Auth0 Actions with minimal code to send users a welcome email when they sign up for your app.
If you’re looking for another way to use SendGrid and Auth0 Actions to make sending emails to users easier, check out how to Send Email After Password Changes with SendGrid and Auth0 Actions.
Will Johnson is a Developer Advocate at Auth0. You can find Will teaching on egghead.io, speaking at conferences, or interacting with the developer community on Twitter.
Related Resources
Twilio Docs
From APIs to SDKs to sample apps
API reference documentation, SDKs, helper libraries, quickstarts, and tutorials for your language and platform.
Resource Center
The latest ebooks, industry reports, and webinars
Learn from customer engagement experts to improve your own communication.
Ahoy
Twilio's developer community hub
Best practices, code samples, and inspiration to build communications and digital engagement experiences.