SMS Affirmations With Twilio And Flic Buttons
Time to read:
November 26, 2019
Written by

Earlier this year I built an affirmations button with Twilio Internet of Things. When I’m feeling insecure or anxious (which is often), the button lets me ground myself with a physical gesture and receive a reassuring text message in return.
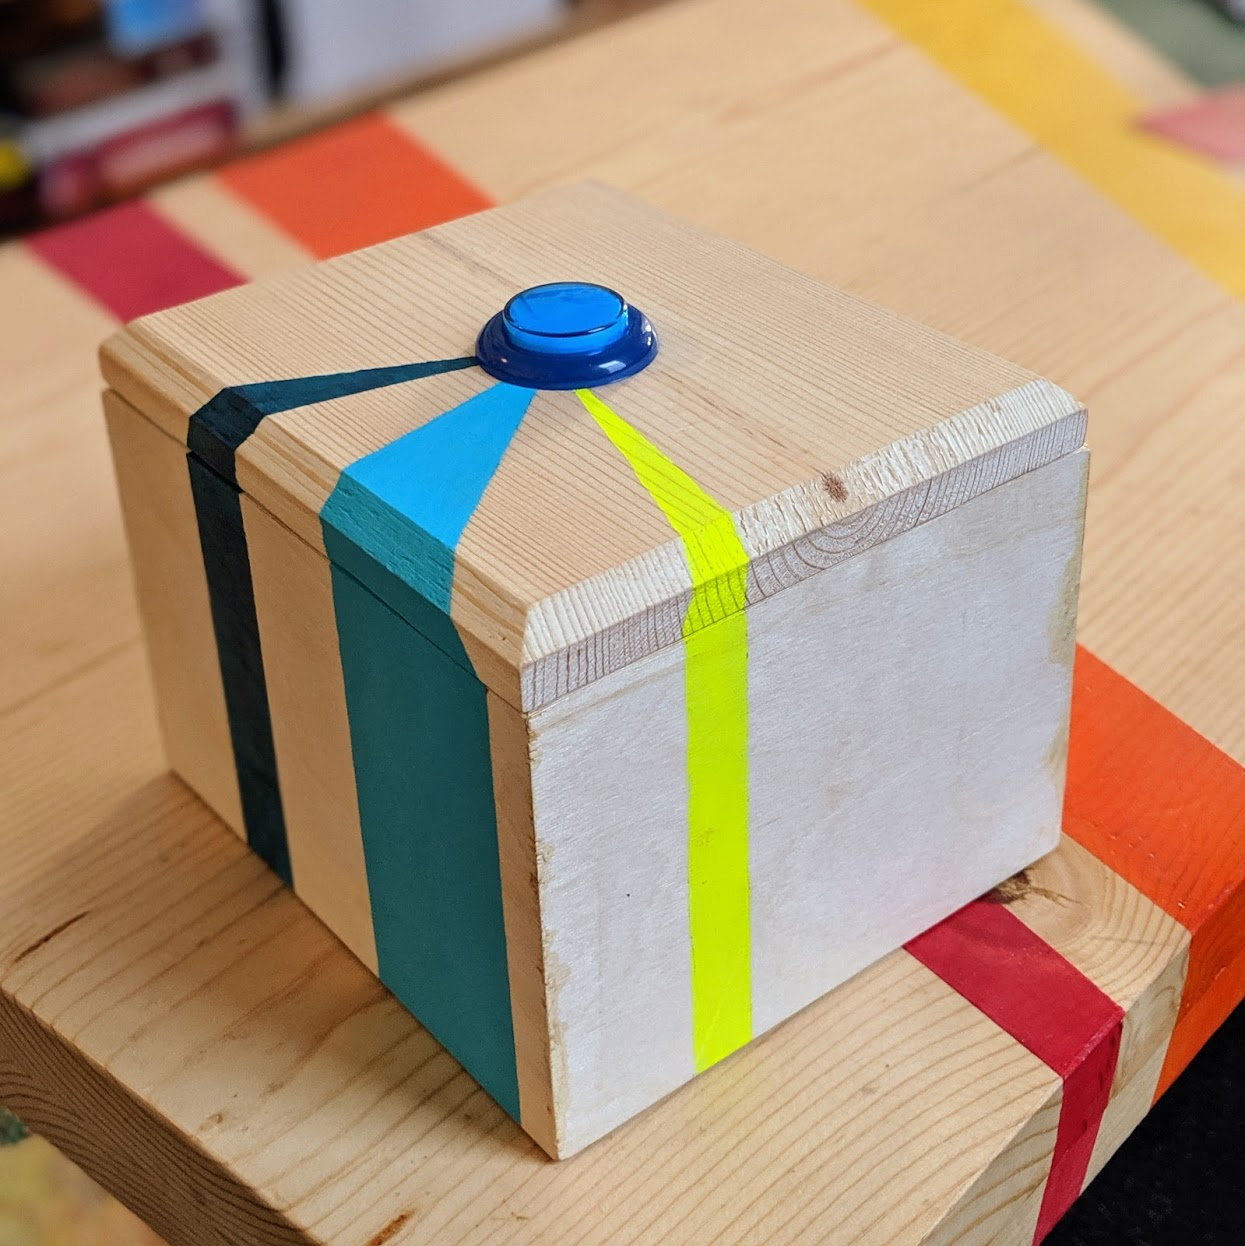
The box holding the button looks cool but it's not as portable as I’d like, since it contains a Raspberry Pi. As a Twilio Developer Evangelist, I’m on the road writing code fairly often. I needed something that takes up less space in my luggage.
Today I’ll show you how to build a more portable affirmations button with Flic.
What is a Flic button?
Flic buttons are hardware buttons that are small enough to fit in a pocket. Out of the box, they can be configured to do various things when pushed, such as:
- control Philips Hue lights
- start a Pomodoro timer
- make a phone call
You can also make HTTP requests with a Flic button, which opens up a lot more possibilities. Flic buttons pair with your phone via Bluetooth to communicate with the rest of the Internet. Today we’ll write some code to fetch an affirmation and send an SMS message. Also, we’ll create a URL where we can send a POST request and kick things off. To avoid the hassle of standing up a server, we’ll use Twilio Functions. Using the Serverless Toolkit allows us to develop and test our function locally.
Prerequisites
- A Twilio account - sign up for a free one here
- a Twilio phone number with SMS capabilities - configure one here
- A Flic button and an IOS or Android phone to pair it with
- Node.js installed on your local machine. The Serverless Toolkit uses version 8.10 at the time of this writing.
Coding time
Install the Twilio CLI if you haven’t already. From the terminal, run twilio login. You’ll be prompted to enter your Twilio credentials which can be found in the console.
Create a project called affirmations-function by running the following command:
npx create-twilio-function@next affirmations-function
If you have Twilio account credentials in your local environment, you’ll be asked if you want to import them into your project. If so, do that. If not, you’ll be prompted to add them.
cd affirmations-function/
The boilerplate functions created by the serverless plugin can be removed. Open the project in your editor of choice.
Create a file in the functions folder. Let’s call it affirmations-response.js. This filename becomes a part of the function URL, so avoid anything too long.
Now we’re going to make a request to the affirmations.dev API to get our affirmation. Although there are many ways to make requests from Node.js. Today we’ll use request-promise. Run npm install request-promise from the command line to install this library.
Copy the following code into functions/affirmations-response.js. Replace the “to” phone number with the number you want to send the affirmation to, and the “from” number with your Twilio phone number :
When callback() is called the outer function immediately returns, killing any asynchronous processes that are running. Since the affirmation is fetched asynchronously, in the code above the callback is invoked after we’ve finished fetching the affirmation data.
Run twilio serverless:start --live to test things out.
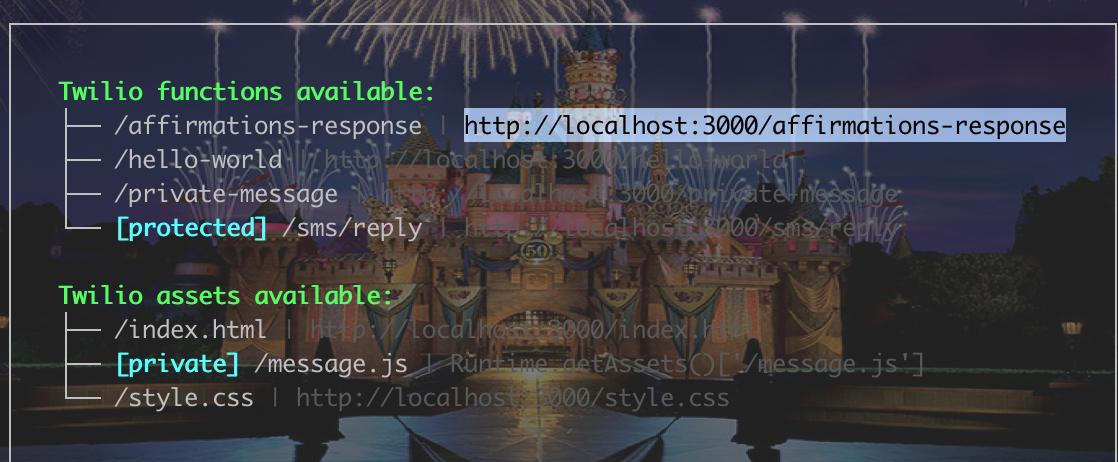
This command will give you a URL, which you can copy and paste into your browser to execute the function from your localhost. You should see some output in the browser:
Also, you should receive an SMS affirmation!
Next, deploy your function from the terminal by running twilio serverless:deploy. In the Twilio console, you should see your function listed here. The URL for your function is the domain name under “Environment” plus the filename of the file your function lives in.
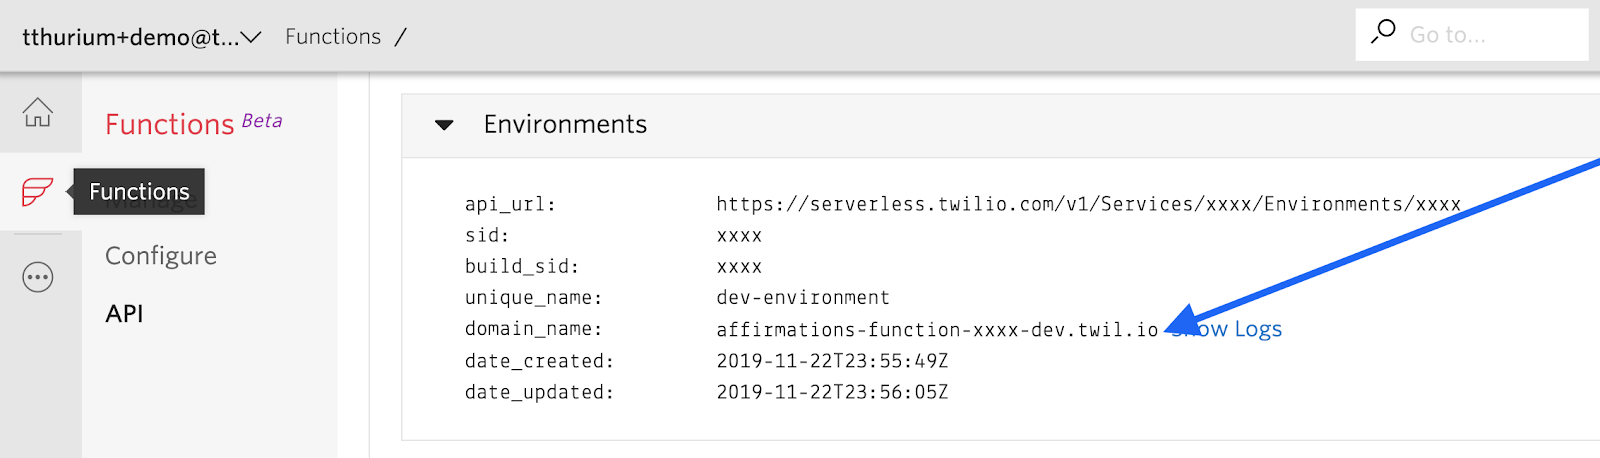
For example, this function URL would be https://affirmations-function.xxxx.dev.twil.io/affirmations-response but your URL will be different. Make a note of your URL. You’ll need it in a few minutes when you configure the button.
Configuring the Flic button
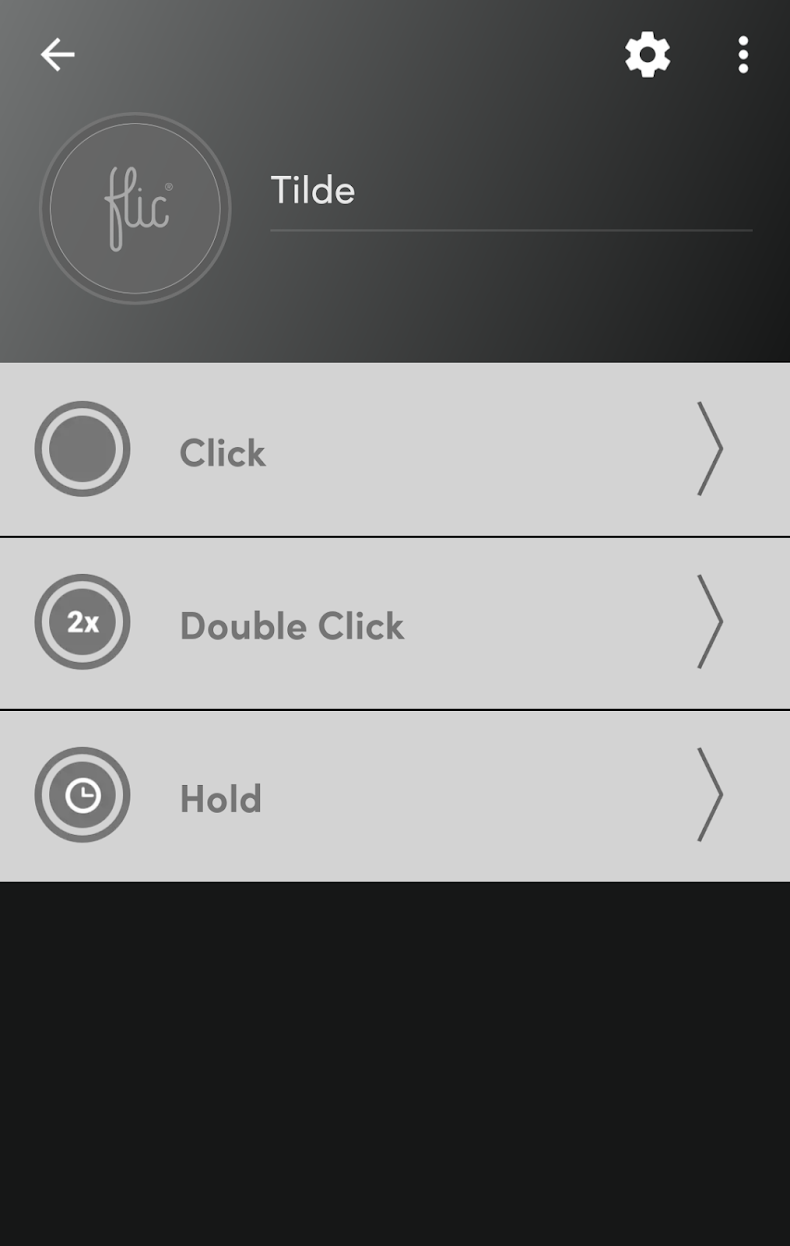
Download and install the Flic app, and follow the instructions for pairing the button with your phone. Tap the large Flic button icon on the main screen.
On the next screen, tap on the “Click” option, unless you wanna use a double click or hold instead. Who am I to stop you?
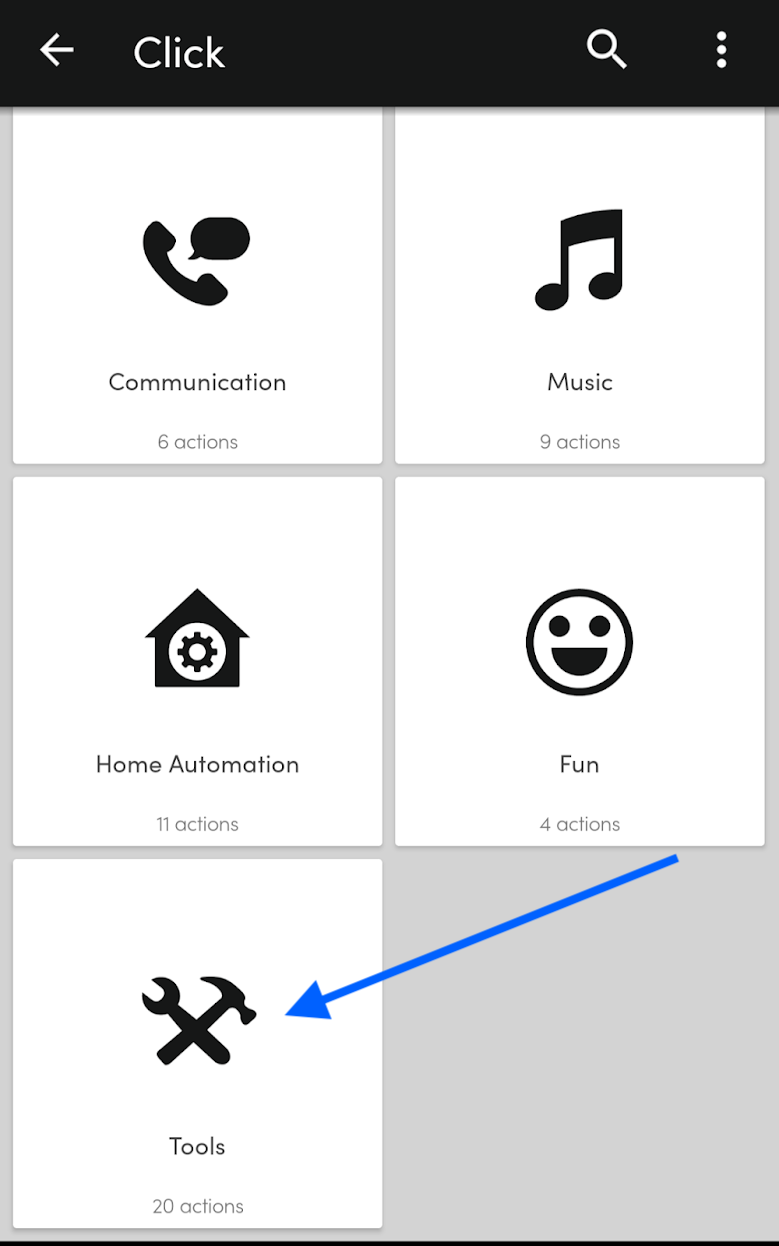
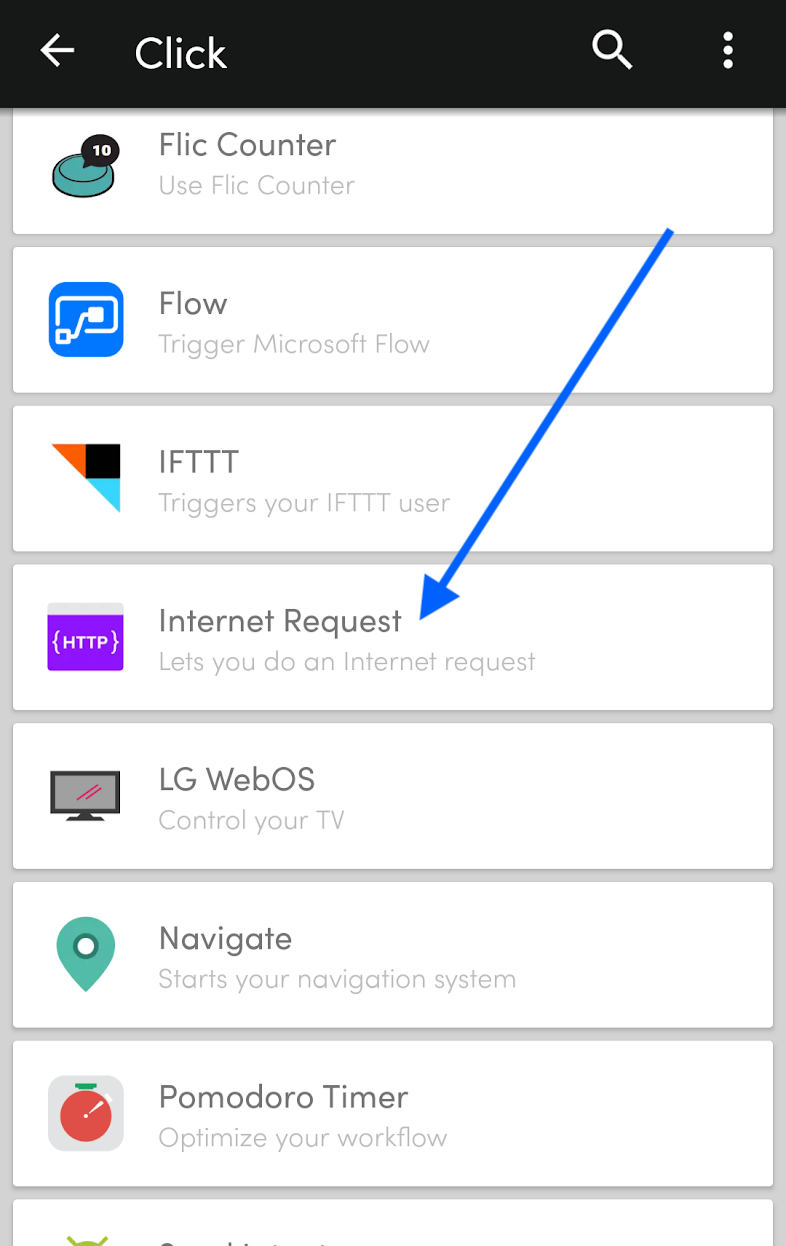
On the next screen scroll to “Tools” and then select “Internet Request.”
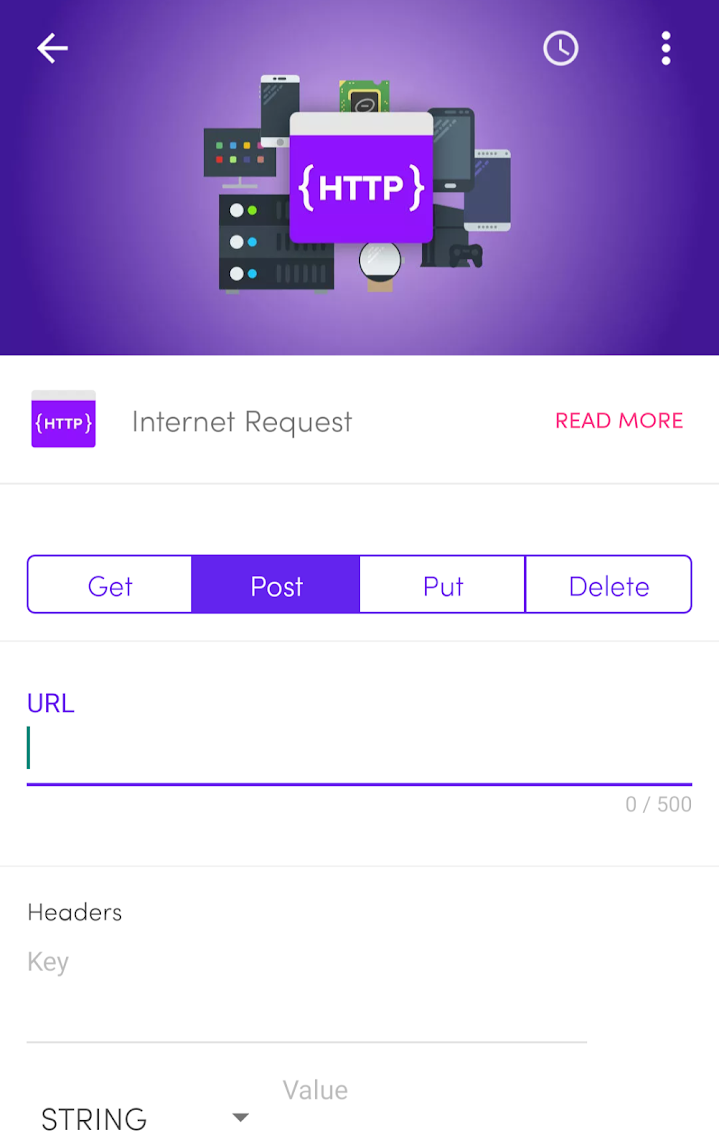
We are going to make a POST request to the URL of our function, which we noted in the previous section. Type the URL in the box, click “POST”, and then hit “SAVE ACTION” at the bottom of the screen.
Well done. Reward yourself for all this hard work by clicking the button and sending yourself an affirmation. 💝

What’s Next
Let’s review what we’ve learned today:
- How to fetch asynchronous data within a Twilio Function
- How to use the Twilio CLI with our Serverless Plugin to create, test, and deploy Twilio Functions
- How to configure the Flic button to make a post request to a URL
If you want to learn about other cool things you can do with Twilio and Flic, check out Chloe Condon’s fake boyfriend or Fernando Larranaga’s panic button.
If you build something fun after reading this post, I’d love to hear about it! Hit me up in the comments below or on Twitter.


Related Resources
Twilio Docs
From APIs to SDKs to sample apps
API reference documentation, SDKs, helper libraries, quickstarts, and tutorials for your language and platform.
Resource Center
The latest ebooks, industry reports, and webinars
Learn from customer engagement experts to improve your own communication.
Ahoy
Twilio's developer community hub
Best practices, code samples, and inspiration to build communications and digital engagement experiences.