Using Twilio SendGrid To Send Emails from Python Flask Applications
Time to read:
December 13, 2019
Written by

Deciding how to add email sending capabilities to a web application is always difficult. Do you go through the trouble of setting up and maintaining your own email server, or do you opt for a third-party email service? While the answer is dependent on a number of variables such as volume of emails, your hosting platform and your budget, the tendency is often to favor the simplicity offered by a dedicated email service.
In this tutorial you’ll learn how to configure an application based on the Flask framework and the Flask-Mail extension to deliver email through the Twilio SendGrid service.
Tutorial Requirements
To follow this tutorial you need the following items:
- Python 3.6 or newer. If your operating system does not provide a Python 3.6+ interpreter, you can go to python.org to download an installer.
- A free Twilio SendGrid account. If you are new to Twilio Sendgrid you can create a trial account. With a trial account you can send 100 emails per day forever.
SendGrid Configuration
Before you can send email through SendGrid, you have to create an API key that you will use to authenticate. Log in to your SendGrid account, then click on the left sidebar, select Settings and then API Keys. Click the “Create API Key”.
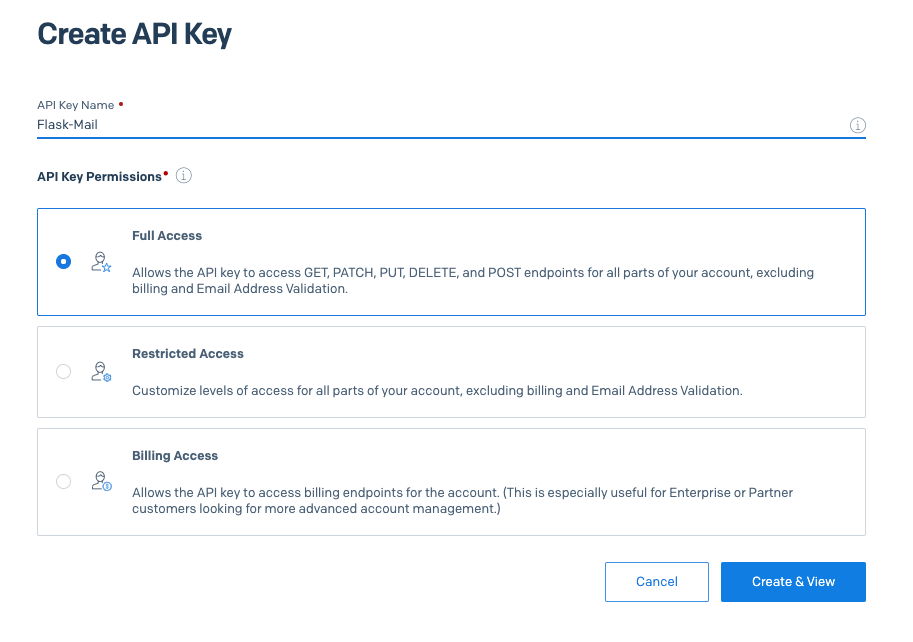
You need to give your API key a friendly name. For this tutorial I chose the name Flask-Mail. I selected “Full Access” for permissions, which gives the key the ability to perform all the necessary email sending functions. If you prefer to create a key that has very specific permissions, then select “Restricted Access” and configure your access as needed.
When you click the “Create & View” button you will be presented with your key. This key will never be shown again, so you need to click on it to copy it to the clipboard, and then paste it in a secure document so that you can use it later. If you lose your key, you will need to generate a brand new one. Once you have saved your key, you can click the “Done” button.
Creating a Python Environment
Now we are ready to see how to send an email in the context of a Flask application. We’ll begin by making a new directory on your computer called *twilio-sendgrid-tests* or similar, then creating a new Python virtual environment in it.
For Mac and Unix users, the commands are:
For Windows users, the commands are:
Next, install Flask, Flask-Mail and python-dotenv in your virtual environment:
Creating a Flask Application
Let’s create a starter Flask and Flask-Mail application in file app.py:
Here you can see how to properly configure Flask-Mail to use SendGrid’s SMTP service. The important settings are:
- The mail server should be
smtp.sendgrid.net. - The mail port should be 587 (port 25 is also supported, if you prefer)
- TLS must be enabled
- Authentication is required. For the username you must use
apikey(this is the same for all SendGrid accounts). The password is the SendGrid API key that you created earlier.
For this Flask application I added the above settings in the proper configuration keys for the Flask-Mail extension. For security reasons I am importing the API key from an environment variable named SENDGRID_API_KEY. I’m also setting a default sender email address from an environment variable. This is the email address that will appear in the “from” field of all emails by default.
Create a .env file with the two required variables:
Flask will automatically import the variables defined in the .env file (as long as you have the python-dotenv package installed), so this is enough to get these two variables into the Flask application configuration.
Sending an Email
Let’s see how you can send yourself a test email from the Python shell:
Note that I started the Python shell with the flask shell command, as this will ensure that the Flask application we created in app.py is imported.
Once in the shell, import the mail instance we created in app.py and the Message class from Flask-Mail:
Next create a Message instance:
The last step is to send this email:
And that’s it! If everything goes well, the email should arrive at your inbox a few seconds later.

If you want to see a Flask route example that integrates this functionality, here is a simple one you can add at the bottom of app.py:
To complete the example application, you need to add the index.html template file. First create a directory for your templates:
And then write the following content in file templates/index.html:
Run the test application with:
Then navigate to http://localhost:5000 in your web browser to access the application.
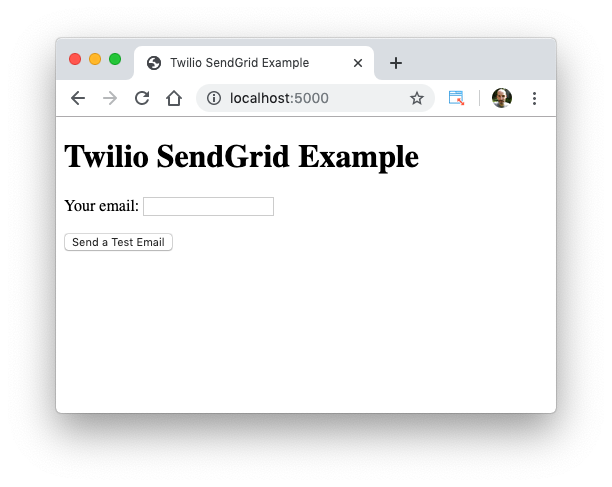
You can now enter a recipient email address and when you click the button a test email will be sent to that address.
The complete Flask example application is available on GitHub if you prefer to download it: https://github.com/miguelgrinberg/sendgrid-flask-mail.
If Your Emails Aren’t Delivered
My hope is that using the Flask application above you are successful in sending emails. There is a chance, however, that your emails will fail to be delivered. Since SendGrid sends emails asynchronously, most delivery errors occur after the sender completes their side of the transaction, so your application will not have any indication that there has been an error. If this happens, then it is likely that the email was rejected by the recipient’s email server.
Luckily, if you experience this when you try to send an email as shown in the previous section, you can use the Twilio SendGrid dashboard to help you debug what happened. From the SendGrid dashboard, click on Activity, and then on the “Show All Activity” button in the middle of the page. This will show you a list of all the emails that you attempted to send, indicating if they were successfully delivered or not.
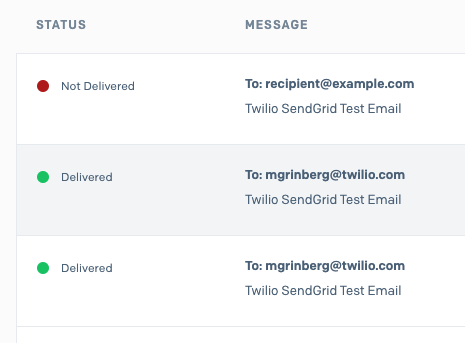
You can see in the picture above that an email that I accidentally sent to an example.com address failed to be delivered. For any emails that were not delivered, you can click on the email to see detailed information, including any error responses sent by the recipient’s email server.
Conclusion
Twilio SendGrid is an extremely simple service that integrates nicely into the standard Flask email sending workflow based on the Flask-Mail extension.
I hope you decide to give Twilio SendGrid a try. If you want to learn more about this service in a fun way, download the TwilioQuest game and follow the SendGrid mission!
Miguel Grinberg is a Python Developer for Technical Content at Twilio. Reach out to him at mgrinberg [at] twilio.com if you have a cool Python project you’d like to share on the Twilio blog!

Related Resources
Twilio Docs
From APIs to SDKs to sample apps
API reference documentation, SDKs, helper libraries, quickstarts, and tutorials for your language and platform.
Resource Center
The latest ebooks, industry reports, and webinars
Learn from customer engagement experts to improve your own communication.
Ahoy
Twilio's developer community hub
Best practices, code samples, and inspiration to build communications and digital engagement experiences.