Get a Word of the Day SMS with Python and Twilio
Time to read:
August 12, 2020
Written by

Due to the current Coronavirus situation all of us are doing more work online. For effective collaboration, good written communication skills have become the need of the hour. Taking this into account I decided to build a service that sends a new word, along with its definition, each day as an SMS notification.
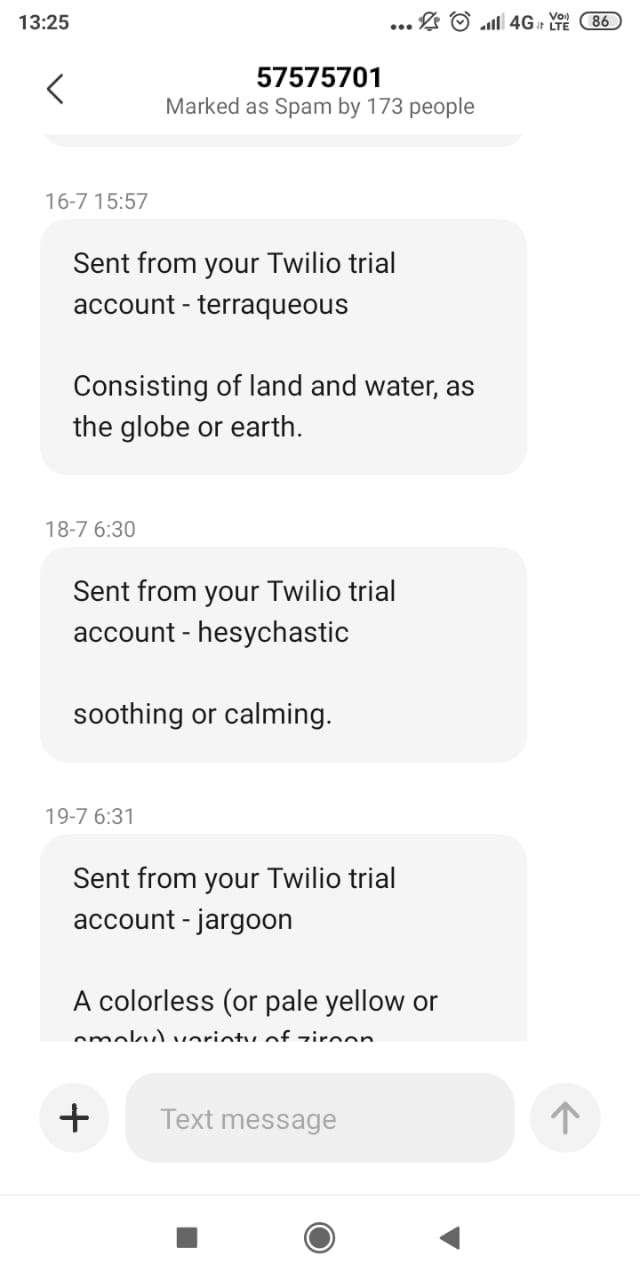
This tutorial will show you how to create a service that sends you a new word every day using the Twilio Programmable Messaging APIs, Python and Heroku. Below you can see the notifications that come on my smart phone each day.

Tutorial Requirements
To follow this you need the following components:
- Python 3.6 or newer. If your operating system does not provide a Python interpreter, you can go to python.org to download an installer.
- A smartphone with an active phone number and SMS capability.
- A Twilio account. If you are new to Twilio create a free account now. You can review the features and limitations of a free Twilio account.
Create a Python Virtual Environment
Let us start by creating the directory where our project will live. Inside your terminal enter:
Following best practices we are going to create a virtual environment where we will install our Python dependencies.
If you are using a UNIX or MacOS system, open a terminal and enter the following commands to do the tasks mentioned above.
For those of you following the tutorial on Windows, enter the following commands in a command prompt window:
In the command above, venv is a Python module that creates virtual environments. The word-notifier-venv argument is the name of the virtual environment we created. The last command uses pip, the Python package installer, to install the packages that we are going to use in this project, which are:
- Twilio Python Helper Library, to send messages using the Twilio service.
- The Requests package to access the third-party APIs
- The Dotenv package to load environment variables from a
.envfile.
For your reference, at the time this tutorial was released these were the versions of the above packages and their dependencies tested:
Next we are going to write the list of packages and dependencies installed in the virtual environment to a requirements.txt file, as we will need this later in the tutorial. To do this, run the following command:
Configuring Twilio Programmable Messaging
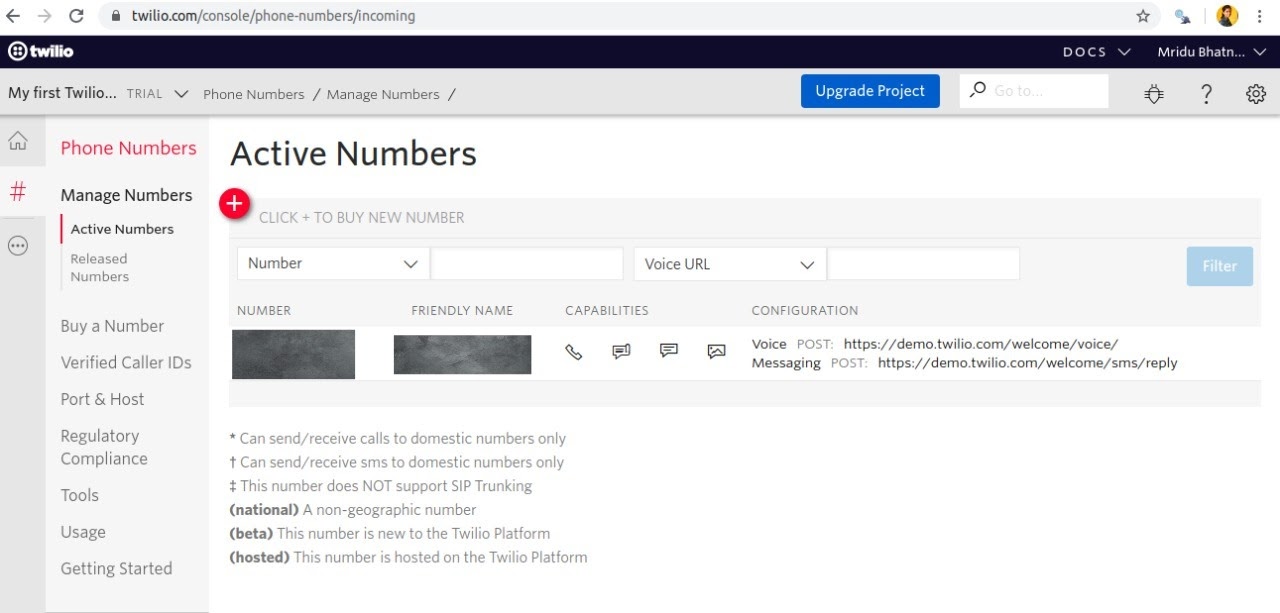
This is where we make sure you have a Twilio phone number activated. Log onto the Twilio Console to view your Active Numbers. Click on the number you want to use to view the details. If you haven’t purchased a number yet, learn how to search for and buy a Twilio phone number. Note that if you are using a trial account you will be using your Twilio trial credits for this purchase.
We’ll now create a .env file (note the leading dot) to save the secret credentials and other configuration options. Add the following variables to your .env file. These are going to be used by our application to be able to authenticate and send SMS.
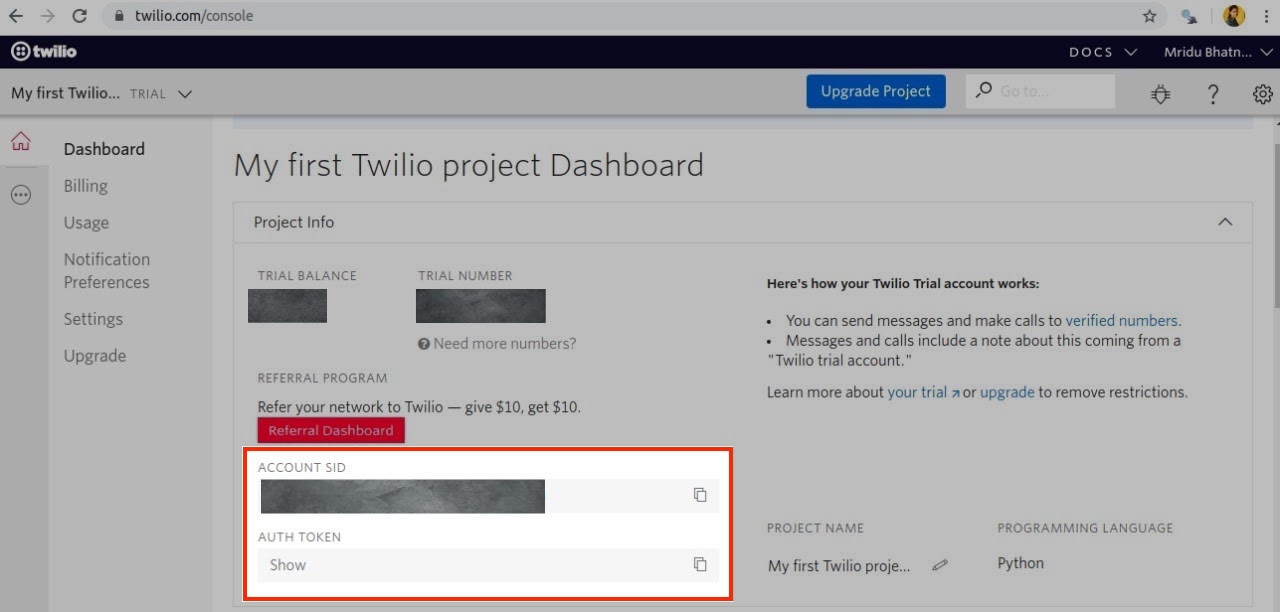
For the TWILIO_ACCOUNT_SID and TWILIO_AUTH_TOKEN variables, you can obtain the values that apply to your account from the Twilio Console.
The TWILIO_PHONE_NUMBER variable must be set to the Twilio number that you purchased. This is going to be the number that is sending the SMS. The RECEIVER_PHONE_NUMBER variable should be set to the number on which you want to receive the SMS notifications. Both phone numbers need to be given in the E.164 format.
Setting up the Wordnik API
To get a word of the day we will use the Wordnik API, for which we require an API access key. Follow the steps below to get the API key.
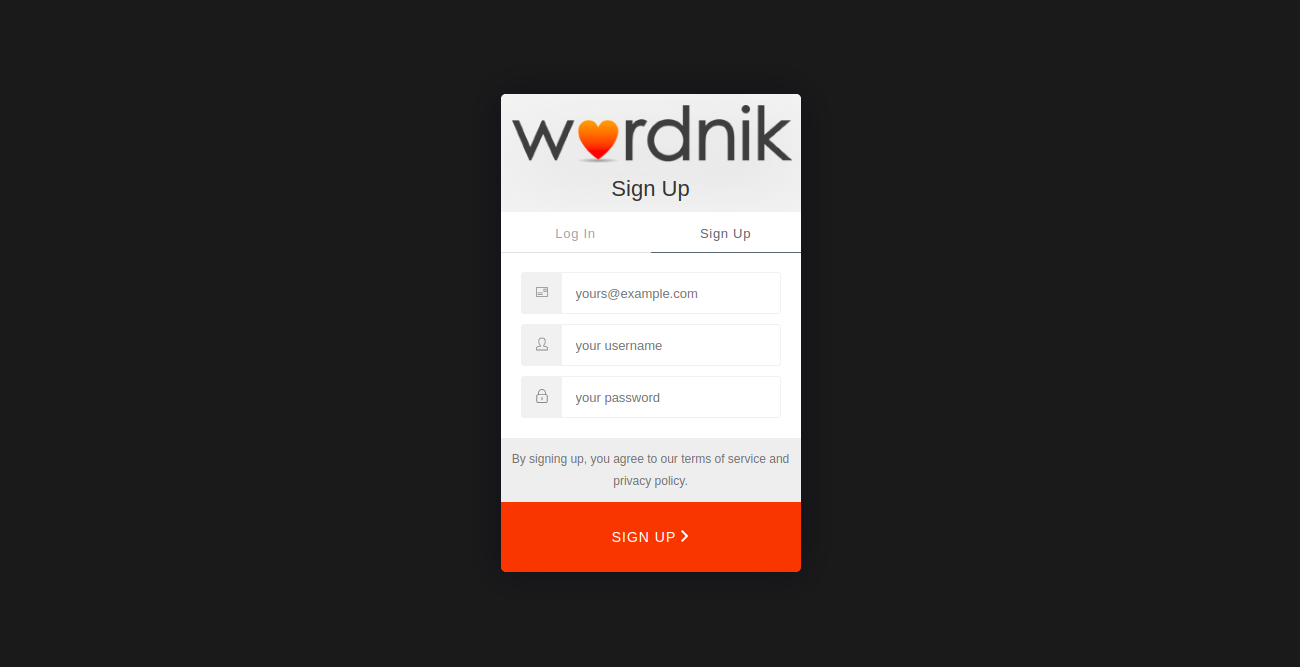
1. Sign Up on the Wordnik platform. After signing up, you’ll receive an email from Wordnik to verify your account.
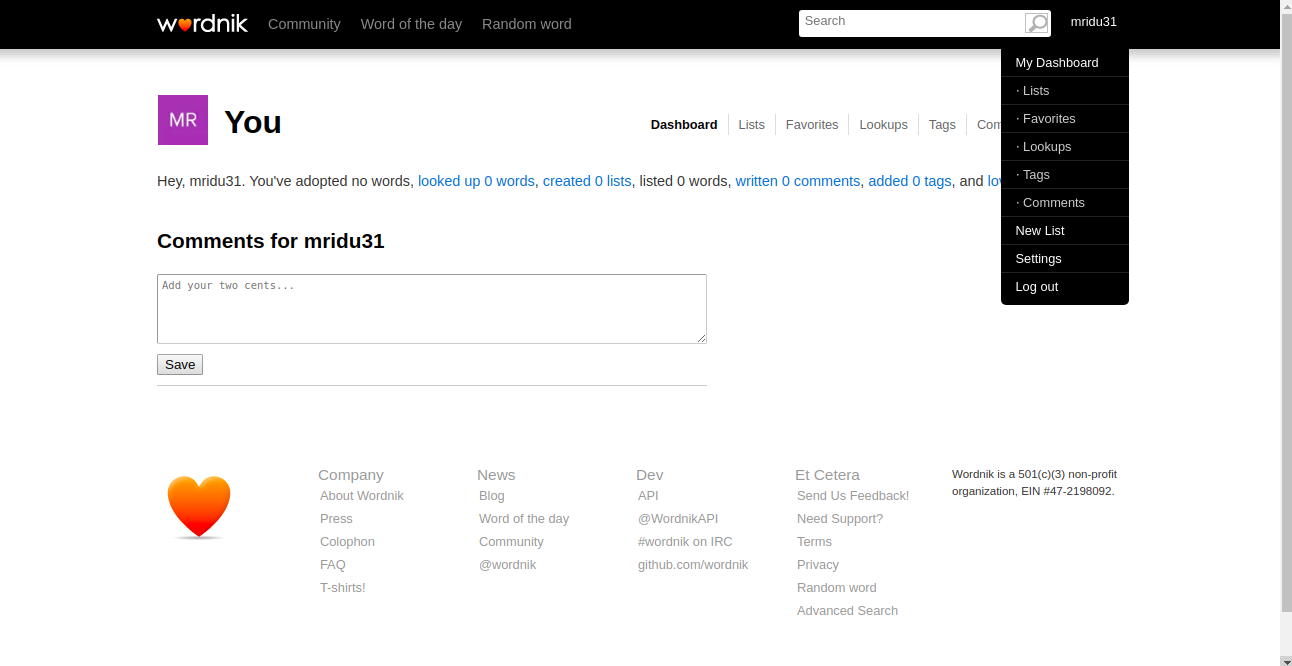
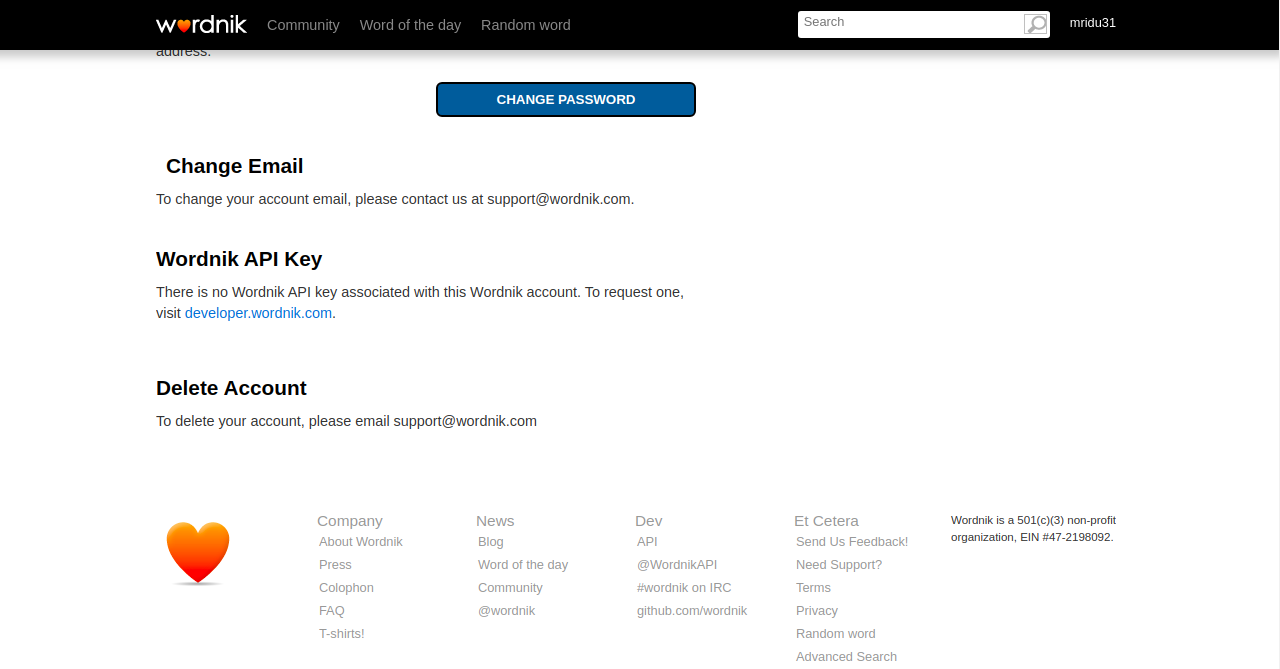
2. Once the account is verified, log in to request the Wordnik API key. On the Wordnik dashboard, click on your username and select the settings option from the dropdown as shown in the image below.
3. Go to the bottom of the settings page. Just below “Wordnik API Key” there is a link to the developers page, where you can request a key.
4. On the developer page there is a sign up form. You need to submit the sign up form, and you’ll receive the API keys through email in up to a few days. Don’t worry about the delay in getting the key, you’ll be able to complete this project using a fake word of the day while you wait for your key.
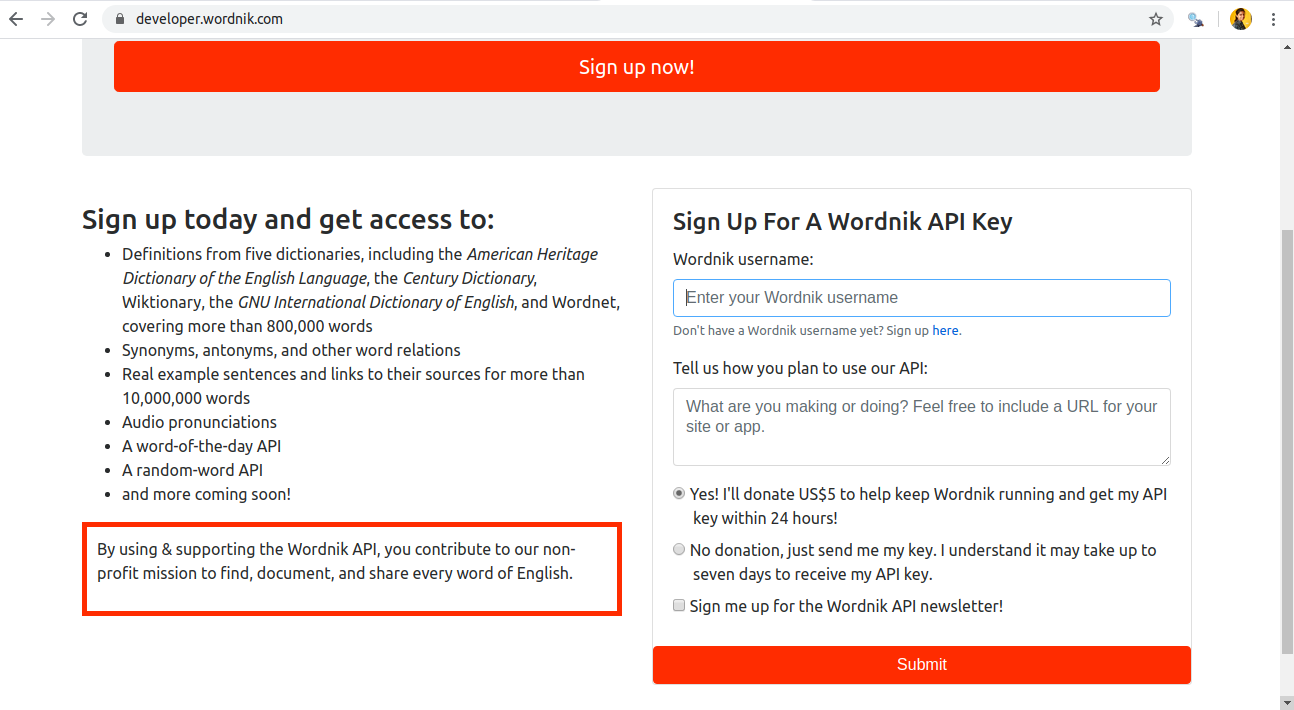
If you already have the Wordnik API key, you can add it to your .env file:
If you are waiting to receive the key, you can leave this variable set to an empty value until you receive it:
Create the Python web service
The Word Notifier application we are going to build is split into 2 functions:
get_word_of_the_day- helps in querying the data source and fetching a new word every day based on the current date.send_sms- helps in communicating with the Twilio Programmable Messaging API to deliver an SMS to the receiver’s phone.
In the following sections we’ll develop the application.
Importing the dependencies
Create a new file app.py inside of your project directory with the following code that imports all our dependencies:
Imports in the code snippet:
os- Part of the Python standard library. We’ll use it to read environment variables.json- Part of the Python standard library. We’ll use it to convert JSON data to a Python dictionary.date- Part of the Python standard library. We’ll use it to get the current date.requests- A Python HTTP client library. We’ll use it to query the Wordnik API and get the word of the day.load_dotenv- This function imports all the variables stored in the.envfile into the environment.twilio.rest.Client- This is the Twilio Client library to access the Twilio Programmable SMS API.
Reading environment variables
Next we are going to read all the environment variables that we stored in the .env file. Add the following code at the bottom of app.py:
The load_dotenv() function imports the contents of the .env file into the environment, and the os.getenv() function then reads individual variables from the environment. We assign each environment variable to a variable of the same name in the application.
Getting the Word of the Day
Following the Wordnik documentation, to get the word of the day we have to send a request to the https://api.wordnik.com/v4/words.json/wordOfTheDay URL with two parameters given in the query string:
dateis the requested day, given in the formatYYYY-MM-DDapi_keyis the Wordnik API key.
Below you can see the implementation of the first of our two functions, get_word_of_the_day. Add this code at the bottom of app.py.
If the Wordnik API key is an empty string we use a mock word and word definition. If the API key is present, then we send a GET request to the API. If the API call is successful we update the default values of word and definition in the response_data dictionary.
The Wordnik API response includes a word key, which contains the word of the day. The response includes a list of definitions for this word in a list from different sources. We are using only the first definition.
Below is the example usage of this function from a Python shell:
Sending messages with Twilio
The primary aim of writing this web service is to be able to send SMS notifications with a new word and its definition every day to your smartphone.
In the next code snippet we will authenticate the Twilio client and define the function send_sms. Add this function at the end of app.py.
Notes on the send_sms function:
1. We authenticate the Client object using the TWILIO_ACCOUNT_SID and TWILIO_AUTH_TOKEN.
2. The body variable contains the new word along with its definition, formatted as a string.
3. Using the client.messages.create function we create the message that will be delivered. The body, from_ and to arguments define the message, the sender and the recipient respectively.
Now that our two functions are implemented we can invoke them one after another to obtain the word of the day and send the SMS with it. Add the following code at the bottom of app.py to make these calls:
Everything together
Now, we have seen all aspects of the implementation. Let us integrate all the pieces and create the complete web service. If you haven’t built the application yet, you can copy the code below to the app.py file. You can also use the code listing as a reference if you have been building the application incrementally.
Running the application
To start the application, run the following command from the terminal:
After the application finishes, check your smartphone. You should receive a SMS notification with the word of the day and its definition. Note that if you are running the application while you are waiting to receive your API key from Wordnik, then you will always get the same word. Once you receive the key you can add it to your `.env` file to start getting real words.
Schedule the application to run daily
In this final part of the tutorial we are going to deploy the application to Heroku and configure it to run automatically every day.
Create a local Git repository
Make sure you have git configured on your terminal. You can follow these steps to configure git. Then run the following command to initialize your working directory to a local git repository:
Next, you can add your project files and commit the changes to git.
Deploying the application on Heroku
We’ll be now deploying and scheduling our web service on Heroku. Create a free account on the Heroku web site, and then setup the Heroku CLI by following the steps mentioned in the official documentation.
Create an application on Heroku by running the following command on the terminal:
Note that you may need to pick a different name than word-notifier, as the application names have to be unique. When you create the app, a git remote (called Heroku) is also created and associated with your local git repository.
Now deploy your code to Heroku by pushing your code to this remote:
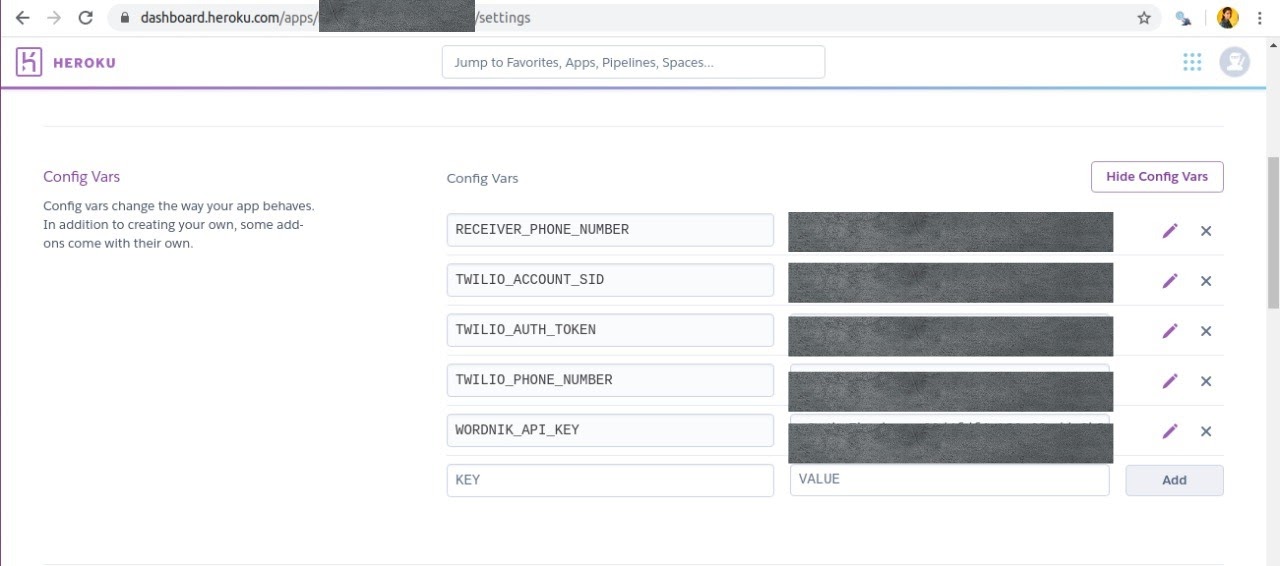
Finally, we need to define the environment variables that we have in our .env file so that they are also available on Heroku. Go to your Heroku application dashboard, select the application and then click on “Settings”. Then click on “Reveal Config Vars”.
Add the five environment variables that you have defined in the .env file:
You can now test the deployment. Run the application using the command below:
When the application finishes you’ll receive the SMS notification on your mobile phone.
Scheduling the web service on Heroku
We are now going to schedule the deployed application so that it runs everyday at a given time.
Install the Heroku Scheduler add-on. Note that even though this add-on is offered for free, Heroku requires the account to be verified by entering credit card details before you can install it. Once installed, the scheduler add-on will be visible in your app dashboard, under the “Resources” tab.
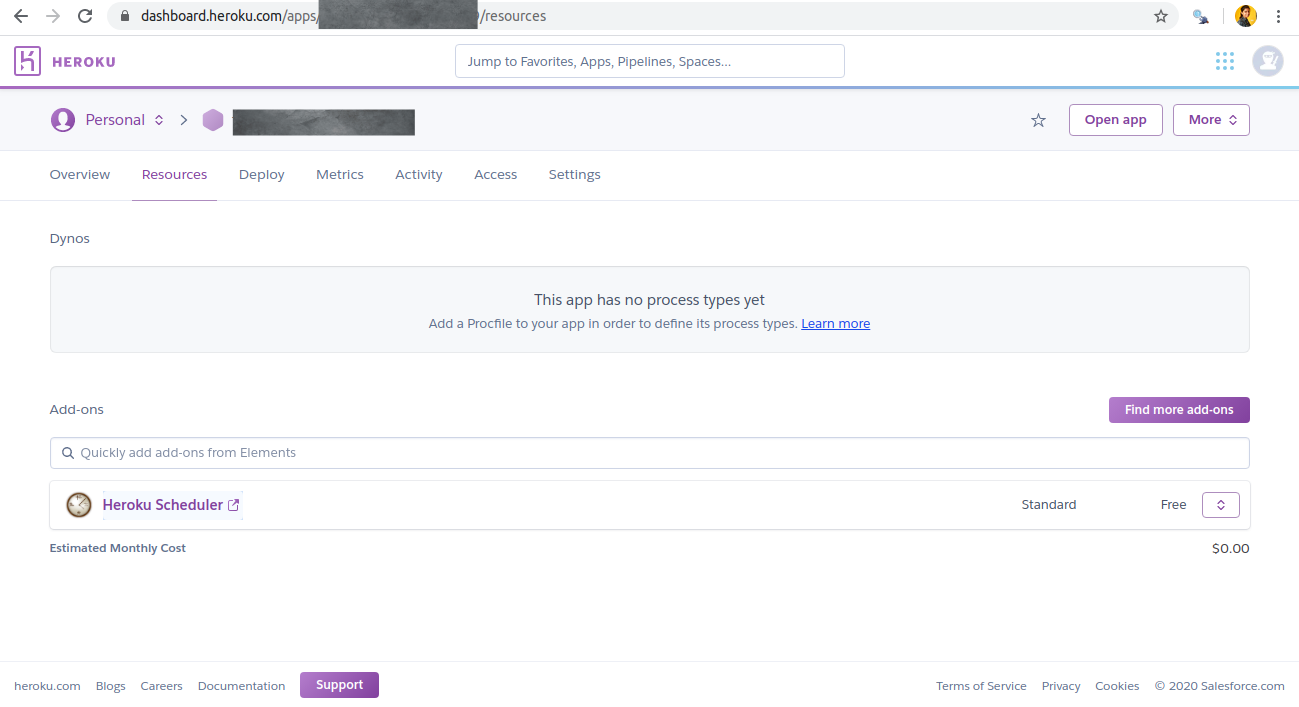
To schedule the web service to run every day click on “Heroku Scheduler” under “Resources”. You can set a time according to your preference in the scheduler dashboard.
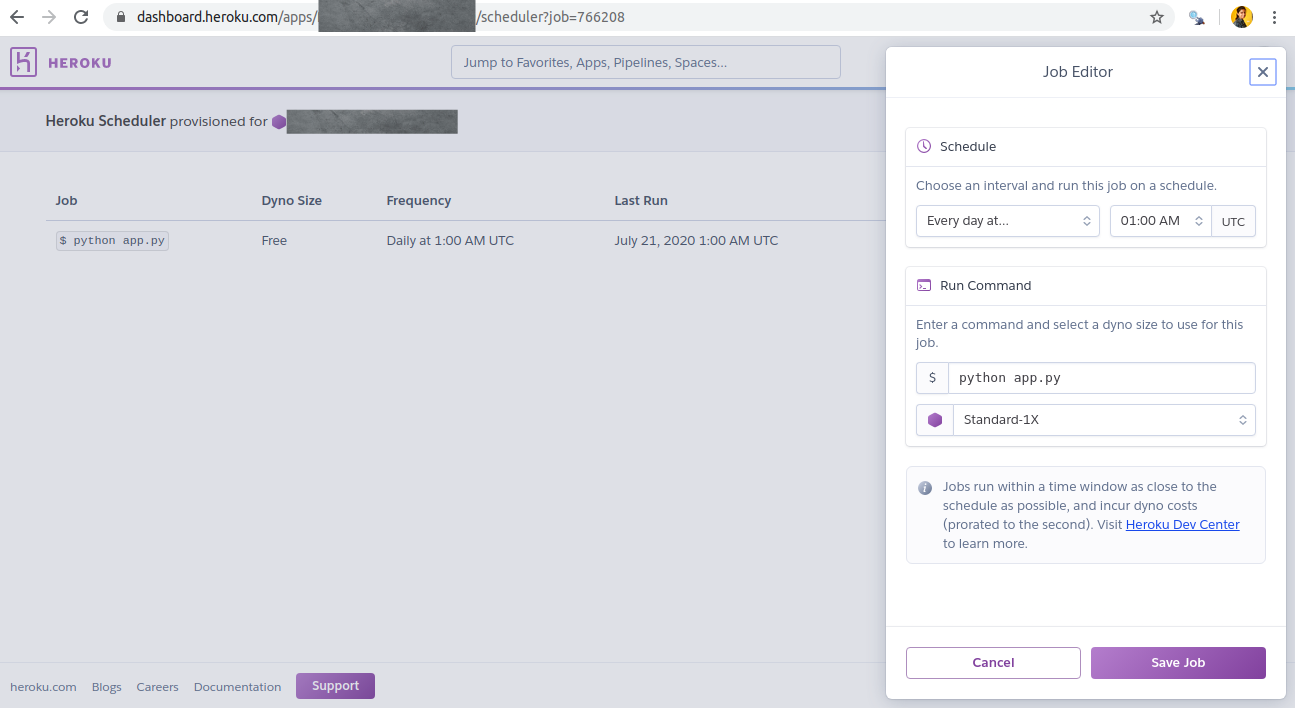
Once the time is set, the application will run according to this schedule, and each time it runs an SMS with the current word of the day will be delivered to your phone.
Conclusion
In this tutorial, we have created a Python web service that sends a Word of the Day SMS notification each day at the scheduled time. This was implemented using Python and Twilio API for Programmable Messaging. The service is deployed and scheduled on Heroku. The data for fetching a new “Word of the Day” and its definition was fetched from the Wordnik API. The GitHub repository with the complete source code can be found here.
Mridu Bhatnagar
Blogs: https://dev.to/mridubhatnagar
Github: https://github.com/mridubhatnagar
Twitter: https://twitter.com/Mridu__


Related Resources
Twilio Docs
From APIs to SDKs to sample apps
API reference documentation, SDKs, helper libraries, quickstarts, and tutorials for your language and platform.
Resource Center
The latest ebooks, industry reports, and webinars
Learn from customer engagement experts to improve your own communication.
Ahoy
Twilio's developer community hub
Best practices, code samples, and inspiration to build communications and digital engagement experiences.