Building an Interactive Voice Response (IVR) System with Python, Django and Twilio
Time to read:
February 12, 2020
Written by
 System with Python, Django and Twilio")
IVR stands for Interactive Voice Response system. It's a way for you to communicate with your users over the phone. IVR is operated by voice and by the DTMF tones that phones produce when pressing keys on the keypad.
Just like your web site, mobile app or chatbot, IVR is another way for you to interact with your users. IVR holds a unique set of features that makes it ideal under some circumstances:
- Visual impairments: Users that rely on screen readers to navigate websites and mobile apps are used to interact with voice based interfaces.
- No Internet access: Users in remote areas or in places where an Internet connection is not constantly available or very expensive.
- Technologically challenged: Users that have trouble dealing with websites and apps, like the elderly, often find IVR much easier to operate.
- No access to smartphones or a computer: Users that don't own a computer or a smartphone at all, or users such as drivers that at certain times cannot handle a smartphone.
In this tutorial you are going to build an IVR system using Python, Django and Twilio IVR.
The IVR system you are going to build will provide your users with information about movie showtimes. Users will call your Twilio phone number, select a theater and a movie, and get the next showtimes. To give you a taste of what you are going to build, below you can play a few recorded calls in which a caller interacts with this application:
Requirements
To follow along with this tutorial you are going to need:
- Python: you can find installation instructions on the Python website.
- Django: a web framework for Python.
- ngrok: a utility program to create a secure tunnel from the internet to your local development environment. In production your server is most likely already exposed to the internet, so this is necessary only for development.
- A Twilio Account: If you are new to Twilio create a free account now. You can review the features and limitations of a free Twilio account.
- A phone line: to test your IVR system you'll need a phone to make voice calls to your application (just not a rotary dial telephone!).
Ready to setup your project? Let's get started!
Project Setup
In the first part of this project you are going to set up your development environment.
Create a Python Virtual Environment
To follow Python best practices you are going to create a python virtual environment. Using a virtual environment you can install packages and dependencies specific to each project without affecting other projects on your system.
Create a new directory called "twilio-ivr-test" for your project:
Next, create the virtual environment:
After running this command you'll see that a new directory called venv was created. This is the name of your virtual environment.
To start using the virtual environment you need to activate it. From your terminal, activate the virtual environment for the current shell:
If you are using Windows, enter the following commands to activate the virtual environment:
While activated, any Python package you install will be installed only in the virtual environment.
Create a Django Project
Now that you have a fresh virtual environment, it's time to install your first package. From your terminal, install Django:
Great! Django is installed and you can create your project.
From your terminal, use Django's command line utility django-admin to create a new project called "ivr":
The command creates a new directory called "ivr". This directory contains project settings such as database configurations, installed apps etc. You are going to make some adjustments to these configurations in a moment, but first, you need to complete setting up Django.
Django comes with a few built-in apps such as authentication, admin and session, that require database tables. By default, Django will use a file based database called SQLite. For production environments you can configure Django to use other database engines such as PostgreSQL or MySQL.
To complete the setup, run the initial database migrations:
To make sure everything is working correctly, run a local server:
Open a browser and navigate to http://localhost:8000. If everything is working correctly you should see the following page:
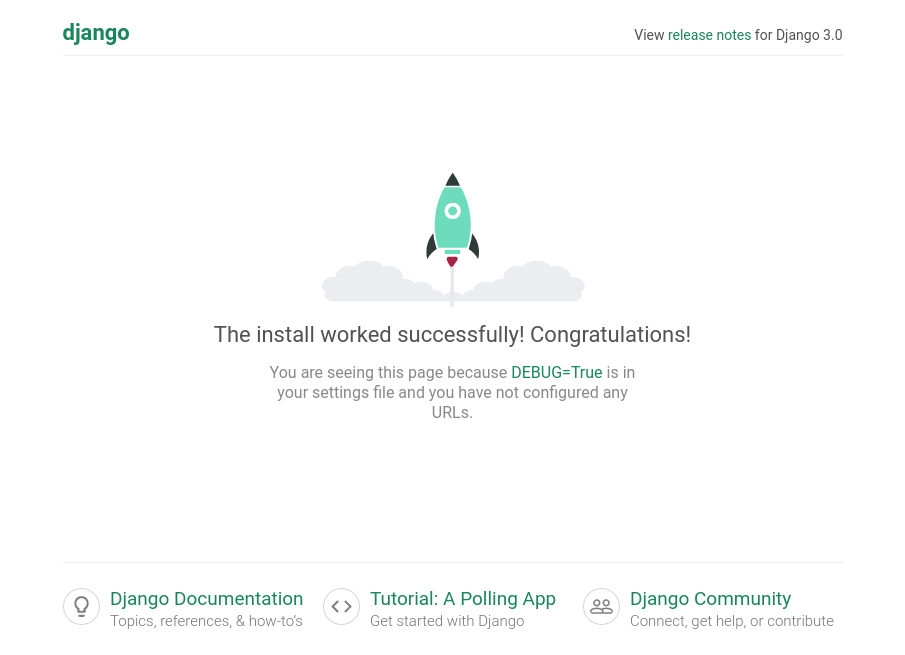
Congratulations! You just created a Django project.
Setup a Local Tunnel Using ngrok
Your new Django server is running on your computer at port 8000. To accept calls, you need to make this server reachable from the Internet. To safely expose a local service running on your computer, you are going to use ngrok.
First, download ngrok and unzip to the current directory. Leave the Django server running and in a new terminal window execute the following command:
On Windows computers you may need to execute ngrok directly, without the leading ./.
Ngrok is now accepting HTTP requests at http://29960fa6.ngrok.io, and forwarding them to your local server at port 8000. On your system the address is going to be different, so let’s use YOUR-LOCAL-TUNNEL as a placeholder for the unique subdomain ngrok assigns.
To test the tunnel, open a browser and navigate to the address ngrok assigned to you. You should get the following error message from Django:
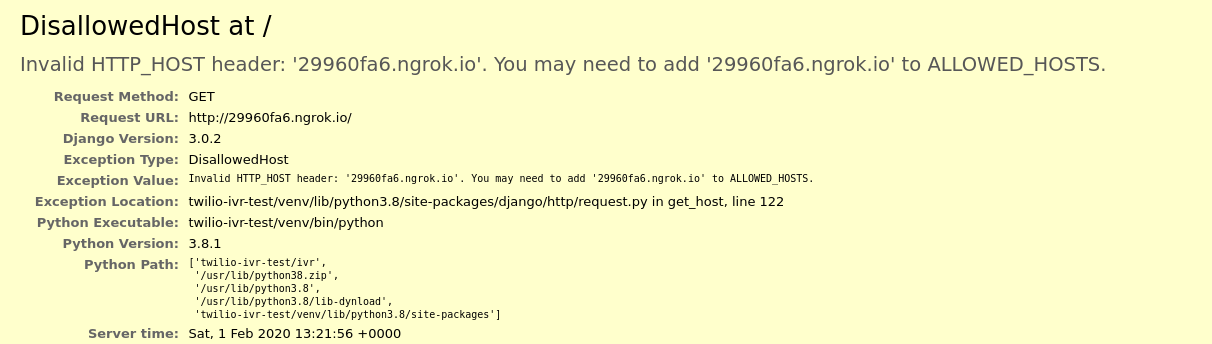
This means that the local tunnel is working, but Django blocked the connection because it didn't recognize the host. As instructed in the error message, add the host to the list of allowed hosts in Django's ivr/settings.py file:
Ngrok assigns a random URL every time you activate it. To avoid having to update this setting for every ngrok URL, you can use “.ngrok.io” (note the leading dot) to allow all subdomains from ngrok.io.
Try to navigate again to your ngrok address. You should now see Django's welcome page.
Buy a Twilio Phone Number
Login to your Twilio console. In the console, go to the Programmable Voice Dashboard, select Numbers from the sidebar, and hit "get a number".
To accept calls you need to get a phone number. In the console, choose "phone number" from the side bar and go to "buy a number".
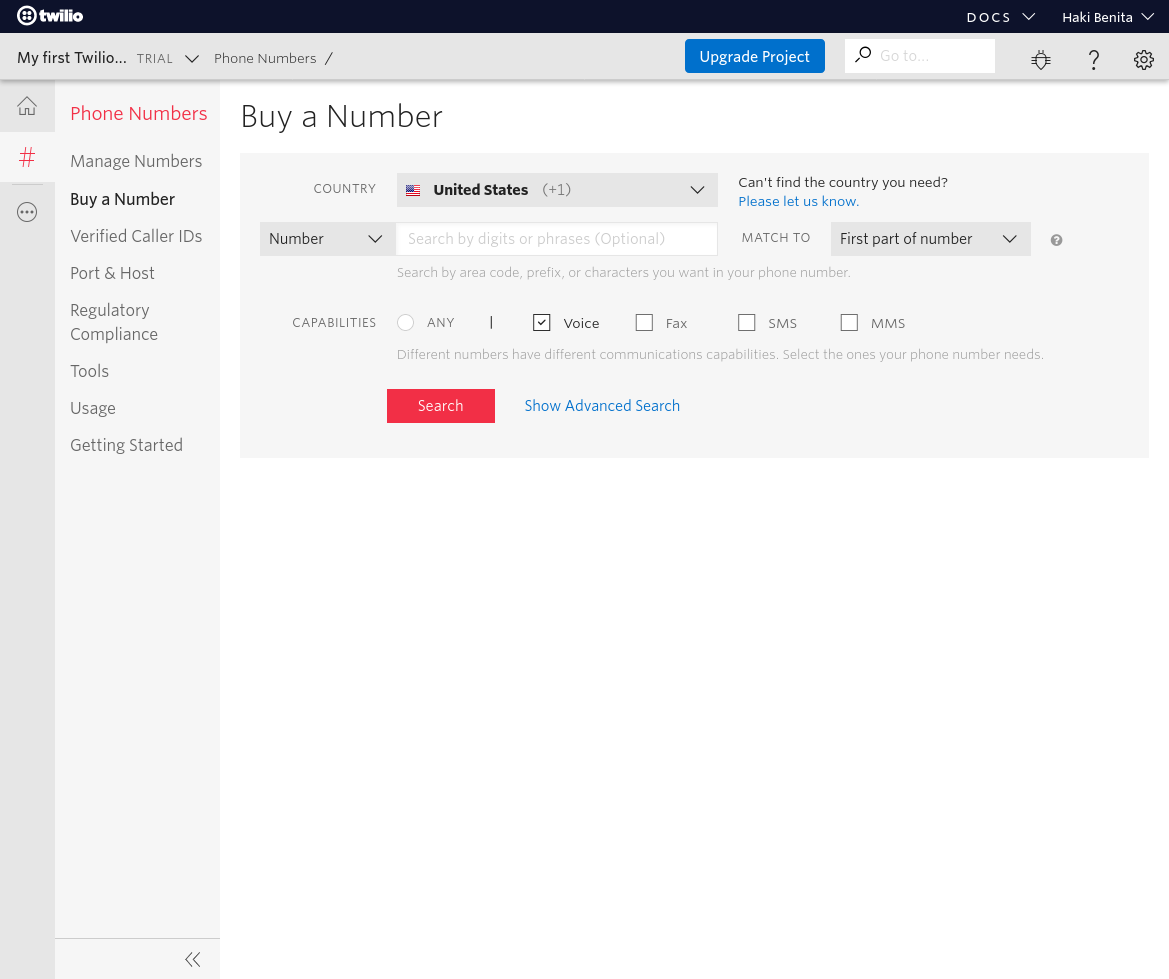
Phone numbers have a wide variety of capabilities. In this tutorial you'll be working only with voice, so make sure to check the "voice" option in the "Capabilities" section. If you intend to use this number for other services such as SMS or Fax, make sure to mark those as well.
Next, hit the "search" button and pick one of the suggested numbers. Once you complete the process you'll own a phone number, and you'll be able to accept calls. For a detailed walk-through check out how to sign up and get a phone number.
Accept a Call
To begin this application, you are going to add a webhook to accept a call and greet the user.
A Webhook is a URL in your server that is triggered in response to some action. In the case of IVR, when a call comes in Twilio will make a request to the webhook in your server.
Twilio supports two methods of communicating with your server: POST and GET. If you choose to use GET, the information about the call such as the called phone number, call unique identified and so on, will be passed as URL parameters. URL parameters are not a secure way of transferring information because they are not encrypted and they appear in logs. You should generally avoid GET and use POST instead. In this tutorial you’ll use POST.
Install Twilio Helper Library for Python
To pass instructions between the caller and your server, Twilio is using a special markup language called "TwiML". TwinML is an XML document with special tags for various voice and call commands.
To make it easier to work with TwinML, Twilio provides a Helper Python library. In a new terminal window, activate your virtual environment and install the "twilio" package:
Now that twilio is installed in your virtual environment you will use it to generate TwiML.
Create a Django App
Django projects are organized in units called "apps". Apps are roughly similar to Python modules, and they contain views, models, urls and other related objects.
To start your movies app, create a new Django app called "movies":
After running this command you'll see that a new directory called "movies" was added. To register your new app with Django, add the "movies" app to the list of installed apps in Django's ivr/settings.py:
To respond to http requests in your Django project, you need to create a view. In your new movies app, open the file views.py and add the following content:
Let's break it down:
- You created a new Django view called
answer(). The view accepts anHttpRequestobject and returns anHttpResponseobject. - You used the TwiML support in Twilio’s package to create a
VoiceResponseinstance. - You used the function
sayof the voice response object to create the TwiML markup to greet the user 'Hello' using text-to-speech. - You disabled Django's CSRF protection for this specific view using the decorator
csrf_exempt.
Note about CSRF in Django: Django includes a middleware to protect your website against cross site request forgeries (CSRF). The middleware uses special inputs embedded in the HTML document to prevent requests from external sites to your server. It's not a good idea to disable this middleware, so instead, you disable it just for specific views that answer calls from Twilio. Twilio provides other security measures which we'll discuss later.
To reach your new view, you want the URL /movies/answer to point to it. Create a new file called urls.py in the movies app, and add the following content:
You registered the view answer with the movies app urls. To reference the view in the code, Django let’s you provide a name for the path. In this case you named the url answer.
You are going to have more than one view, and you want all of them to be under the URL /movies/. To achieve this, you register all the views in the app’s url, and then register the app under the URL /movies/ in the project’s url list. This pattern is very common and it helps keep your project and URLs organized.
Add the URLs of the movies app to the project:
Django already registers its own admin app under admin/. Now, you registered your movies app under movies/.
To test your new view, first make sure your Django server is running in one terminal, and ngrok in another. Then, open a browser and navigate to http://YOUR-LOCAL-TUNNEL.ngrok.io/movies/answer. You should get the following response:
Great! Your view is working.
The response is using the TwinML markup. As you can see, it's just an XML document with special tags.
Connect the Twilio Phone Number to Your Application
From your Twilio console, choose "Phone Numbers” from the sidebar select your new number.
Scroll down to the "Voice & Fax" section and make sure “Accept Incoming” is set to “Voice Calls”. In the "A Call Comes In" add your ngrok address "http://YOUR-LOCAL-TUNNEL.ngrok.io/movies/answer" and hit “Save”:
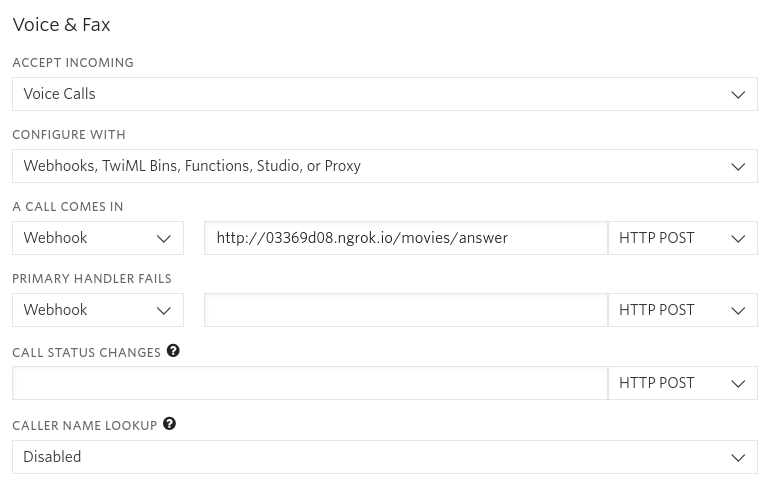
Now when a new call to your Twilio number comes in, Twilio will issue a POST request to this URL.
For the moment of truth, call your Twilio number from your phone. If everything is working as expected, you should be greeted by a text-to-speech “Hello!”.
Congratulations, you just made your server talk!
Build an IVR System
Now that you have your local environment all set up to receive phone calls, the fun part starts!
Creating a Movie Database
Your IVR movie system is going to provide information about movie showtimes. To store the information about the movies and the showtimes you need to create some database models.
In your editor of choice, edit the file movies/models.py, and enter the following models:
You created three models:
Theater: movie theater with a name and an address.Movie: movie with a title.Show: specific showtimes of movies in theatres.
The Movie and the Theater models also include a unique field called “digits”. You are going to use this field to mark the digits to enter for choosing a movie or theater in the IVR menu.
To create the tables in the database, generate migrations:
Migrations are part of Django ORM. They are used to create tables from models.
From your terminal, apply the migrations:
When applying migrations Django creates the tables in the database.
You are now ready to create some data. Enter Django shell from your terminal:
Create some data:
The statements create your movie database:
- Two theaters: Castro Theatre in San Francisco and Alamo Drafthouse in Austin, Texas.
- Two movies: Clockwork Orange and The Godfather.
- Several shows for each movie in each theater.
Now that you have movies, theaters and shows you can provide this data to your users.
Implementing the IVR View
If you are used to developing APIs or websites, then IVR is going to require some getting used to. One way of thinking about IVR is like an HTML form where the user submits one input at a time. Another way of thinking about IVR is like a conversation: you ask a question, the user responds, you ask another question and so on.
Accepting Input
To get a sense of how your movie IVR system is going to work, pretend it's already working and imagine how the conversation would go:
- User: calls your number
- IVR: say "Welcome to movie info. Please select a theatre: for T1 press 1, for T2 press 2"
- User: select 1
- IVR: say "Please select a movie: for M1 press 1, for M2 press 2"
- User: select 2
- IVR: "The movie M2 will be playing at theater T1 at t1, t2 and t3. Thank you for calling."
Now that you have a better sense of the mechanics, you can start writing some code. Open the file movies/views.py file, and replace the previous answer() function with the first part of the conversation:
Like before, you created a VoiceResponse object and used it to greet the user with the verb say.
You also used a new TwiML verb called gather to accept input from the user. To control how the input will be gathered from the user, you provided the following attributes:
finish_on_key: what key indicates the user has finished entering digits. Another option to finish is to use the attributenumDigitsthat finishes automatically after the user enters a specific number of digits. Since your movie database can have more than 10 theaters it is best to use the key "#" to indicate the finish.action: What URL to go to next. In this case, after selecting a theater, the user will be directed to choosing movie. The URL can be relative. Twilio will use the base URL of the request as the base for the next step URL.timeout: How long to wait for input from the user. In this case you'll wait for 20 seconds.
An interesting thing about gather is that it's implemented as a Python context processor. To better understand why a context processor is used here, take a look at the TwiML markup this view produces:
The say commands that list the options are all nested inside the gather verb. When using this nested structure, Twilio will accept input from the user while the say commands are played out. If the user found the theater they were looking for they can press the button and move immediately to the next action. Commands after the gather command will not be executed in this case.
If the user did not select any option for the amount of time you set as timeout, the commands after the gather block are executed. This is a good place to instruct the user they should make a selection, and redirect them back to the same view.
Before you move on, update the URL /movies/answer to reference the new view. Replace the contents of movies/urls.py with this content:
The URL /movies/answer now references the view choose_theater. When a call comes in to Twilio, Django will use this view to process the request.
Processing Actions
At this point your system is reading the list of theaters to the user, and waiting for them to pick one. Once the user press "#", Twilio will make a request to the next action URL http://YOUR-LOCAL-TUNNEL.ngrok.io/movies/choose-movie.
Add another view in movies/views.py to handle the user’s theater selection:
Next, add the view in the movies/urls.py file:
Just like the previous view, you created a VoiceReponse object that you’ll use throughout the view to generate TwiML.
This view also accepts the user’s theater selection. You have the digits the user entered from the request body in request.POST['Digits']. So first, you validate the data entered by the user by trying to fetch the Theater object identified by the digits.
If you did not find a theater matching the digits the user entered you redirect the user back to the previous view using the redirect verb.
If you find a matching theater, you can proceed to choosing a movie. Choosing a movie is very similar to choosing a theater. You use gather to accept a selection from the user, and then list the movie options.
Unlike before, your action URL now contains the selected theater in the theater query string argument. The next view is going to need this information in order to find showtimes. Passing previously selected values in the request is a way of maintaining state between requests.
Finishing Up
The last action you need to handle is when the user selected a movie. Create another view that accepts the user movie selection and lists showtimes:
Don’t forget to register the view in urls.py:
You first got the ID of the selected theater from the query parameter theater. You then validated the user’s movie selection. If the movie selection is invalid, you let the user know and redirect them back to the movie selection view.
If the movie selection is valid, you fetch the showtime in the selected theater in the next 12 hours, and read them to the user.
Securing the IVR View
Now that you have a functional IVR system it's time to tighten things up a bit. Twilio provides a few features to keep your IVR system secure.
Authenticating Requests From Twilio
To prevent any user from interacting with your view, it's necessary that you make sure requests to your view are originating from Twilio.
The Twilio helper library for Python includes a class named RequestValidator for this purpose.
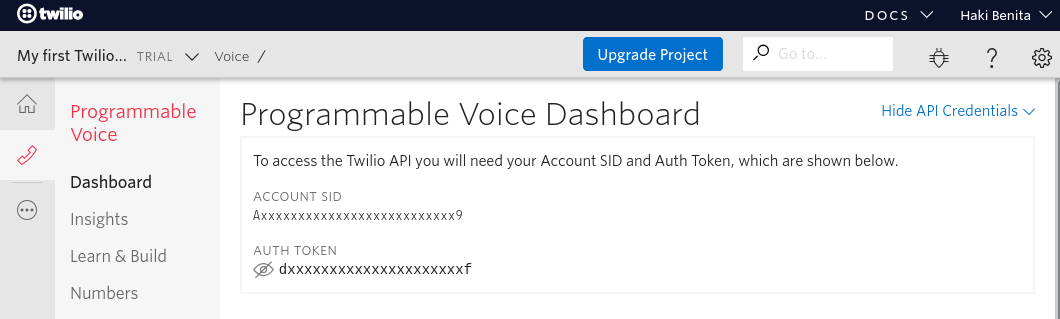
To validate a request coming from Twilio you first need to get your auth token. Go to your Programmable Voice Dashboard, click the little link on the top right "show api credentials" and copy the auth token.
The auth token should be kept secret and secure. One way to keep it safe is using an environment variable. Add a new variable at the bottom of Django’s settings.py file that loads the token from an environment variable:
Now add the auth token as an environment variable in your computer.
Once the token is available to Django you can create a function to validate requests. Add the following at the top of your movies/views.py:
Twilio adds a special header called "X-Twilio-Signature" to every request made to your server. The header contains a signature that Twilio generated based on the URL and the contents of the request. To validate requests you create a RequestValidator object with your private auth token. When you get a request, you provide the validator with the URL, the contents of the request and the signature. If the request was made by Twilio it will validate successfully, otherwise it will fail.
To integrate this check into your view, validate the request at the beginning of your view:
After adding this check, only Twilio will be able to issue requests to your view.
Going Farther
This tutorial highlights some of Twilio IVR features, but there are plenty more features you can use to build your IVR system.
Text-to-Speech
In this tutorial you used the say verb to generate speech from text. Twilio's Text-to-Speech (TTS) contains many more languages, voice and pronunciation features and support for SSML, a speech synthesis markup language.
Accept Payments
TwiML has a nice verb called "pay" that you can use to accept credit card payments. Credit card information is considered sensitive, so you need to be extra careful with it. Accepting payments require some additional configuration in the dashboard and is compliant with various regulations.
Play and Record
Using the TwiML "play" and "record" you can play audio files directly from your server and record the user’s response. For example, to make your IVR system special you can play a unique sound at the beginning of the call.
Conclusion
In this tutorial you learned how to:
- Create a Python virtual environment.
- Setup a new Django project.
- Run a secure tunnel to your local Django server using ngrok.
- Accept phone calls from Twilio.
- Build an IVR system to interact with your users over the phone using TwiML markup.
- Secure your IVR view.
You are now ready to build your own IVR system!
The source files for this tutorial are available in this Gist.
Haki is a software developer and a technical lead. He takes special interest in databases, web development, software design and performance tuning.
- Personal Website - https://hakibenita.com
- Twitter - https://twitter.com/be_haki
- Github - https://github.com/hakib

Related Resources
Twilio Docs
From APIs to SDKs to sample apps
API reference documentation, SDKs, helper libraries, quickstarts, and tutorials for your language and platform.
Resource Center
The latest ebooks, industry reports, and webinars
Learn from customer engagement experts to improve your own communication.
Ahoy
Twilio's developer community hub
Best practices, code samples, and inspiration to build communications and digital engagement experiences.