How to Play Video Files in a Twilio Video Call
Time to read:

A common need in video calling applications is to allow a user to play a media file for the other participants in the call. This can enable, for example, a teacher or doctor to share a recording with the call attendees.
In this article I will show you how a participant in a Twilio Video call can share video and audio content in formats such as mp4 or webm.
The MediaStream API
The JavaScript version of the Twilio Video SDK uses existing APIs in the browser to obtain access to the camera and microphone. More specifically, it uses the MediaDevices.getUserMedia() function to access MediaStream objects for these devices, which expose the raw video and audio tracks that are then published to the video call.
But the MediaStream APIs cover much more than webcams and microphones and can be used to obtain MediaStream objects from other sources. For example, the HTMLMediaElement.captureStream() function returns a MediaStream object associated with a <video> or <audio> element. To play a video file on a call, the browser application running on the originating participant’s computer must create a <video> element loaded with the intended video file, and get a MediaStream instance from it. The media stream’s video and audio tracks can then be published to the call, so that they are received by the other participants.
The following sections describe how to use HTMLMediaElement.captureStream() to play a video file, along with its audio if available, on a video call. Near the end of the article you can find the link to a complete example that you can install and try out.
Adding a video element
The video file will need to play in a <video> element on the page of the originating participant. This element can be created dynamically with JavaScript or can be part of the page from the start.
Here is an example HTML video element that can be used to play video files:
The id attribute is not required, but makes it easier to locate this element from JavaScript later on. Using vanilla JavaScript, the element can be accessed as follows:
Loading a video file
When the participant decides to play a video file on the call, they must select which file to play. If the video file is known in advance, it can be provided as the src attribute when the <video> element is defined:
In many cases the application will need to allow the user to select a file while the call is taking place. This can be done in the browser via drag and drop, or with a file input element. In both cases, the selected file can be retrieved with JavaScript as a File object.
This File object needs to be converted to a URL that can be assigned to the src attribute of the audio element. The URL.createObjectURL() function does this for us:
Loading the video file into the element happens asynchronously. The canplaythrough event fires when the video element is ready to play the file.
Publishing video and audio tracks to the video room
The video element is now ready to play the file, so the next step is to publish the video and audio tracks to the video room.
The captureStream() method of the video element returns a MediaStream instance, which includes all the media tracks that are available. The video and audio tracks are provided by the getVideoTracks() and getAudioTracks() methods respectively. In the example that follows, the code takes the first video and audio tracks and ignores any extra ones.
The Twilio Video library uses the LocalVideoTrack and LocalAudioTrack classes to represent the tracks coming from the local participant. The constructor from this class accepts standard browsers' tracks such as the videoStream and audioStream from the code example above.
The extraVideoTrack and extraAudioTrack variables are defined globally because these tracks will need to be accessed later when video and audio playback end, to clean everything up.
Now the new tracks can be published to the video room:
Playing the file
The video and audio tracks are now published, and all participants are ready to receive content from them. The last step to share these tracks is to tell the HTML video element to start playing. If you are using a video element with visible playback controls, this can be done manually by the user by pressing the play button, but in the case of a video element without playback controls, you can use the play() method from JavaScript:
At this point the content will start playing for the local participant inside the video element, and will also be streamed to the remaining participants as secondary video and audio tracks from this participant. These participants will receive the trackSubscribed event, which their application should handle by adding the new tracks to the page.
It is important to note that the participant sharing the file will still be seen and heard, as the tracks generated from the video file do not replace the base tracks. Instead, they are added to the stream.
Cleanup
The application needs to decide when to stop sharing content from the file. One option is to offer a UI element for the user to stop playback. Another is to rely on the controls offered by the video element, if configured to be visible. Yet another option is to wait for the playback to end. This really depends on the application, but whenever the application decides to stop sharing content from the file, the tracks that were published to the room must be unpublished.
In the following example, a handler for the video element’s ended event is used to perform the cleanup operations:
When the tracks are unpublished, all the participants will receive the trackUnpublished event, which should remove the video and audio elements associated with the file playback.
A working example
Are you interested in trying this out with a fully working application? I have implemented the techniques discussed in this article on the project I developed for my serverless video tutorial.
To try it out you need the following:
- A Node.js version that is compatible with Twilio Functions. Currently (March 2022), versions 12 and 14 are supported (14 is recommended, since 12 is about to drop out of maintenance). You can download a Node.js installer from the Node.js website.
- A free or paid Twilio account. If you are new to Twilio get your free account now! This link will give you $10 when you upgrade.
- The Twilio CLI. You can find installation instructions on the Twilio CLI Quickstart page of the documentation.
- The Twilio Serverless Toolkit. This installs as a plugin to the Twilio CLI. Find installation instructions in the documentation.
Clone the project’s repository with the following commands:
Note that the video file playback support is in the playvideo branch of this repository.
Create a file named .env in the project directory with the following contents:
Replace the XXXXX with appropriate values for your Twilio account. If you don’t know what to set these three variables to, see the original tutorial for detailed instructions.
Run the project locally with the following command:
Then navigate to the application in your browser at http://localhost:3000/index.html.

Note that some browsers impose limitations on media usage when the page is hosted locally. I have only tested Chrome with this application running on localhost.
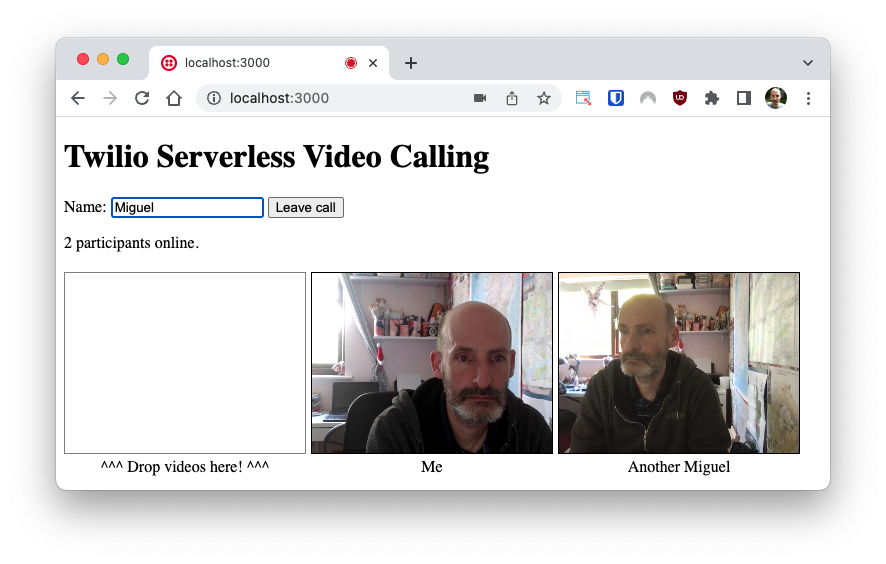
You can now connect from two different browser tabs as I did above to quickly test video playback locally. Make sure you use different names when you join the video room.
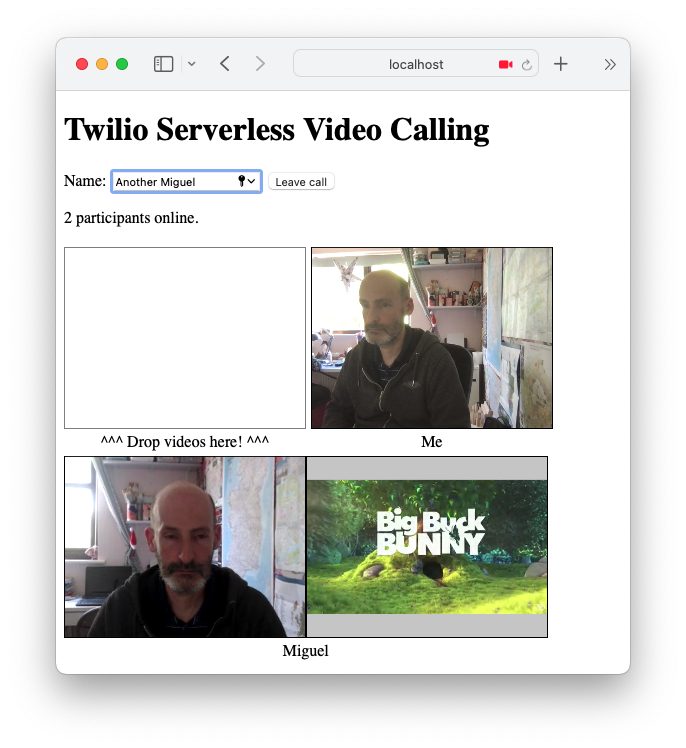
To share a video on the call, find the file that you want to play and drop it on the designated area on the page. The video will play for you on the drop region, but it will appear next to your video for other participants, as you can see in the screenshot below.

To test this with external participants, you first need to deploy this application to the Twilio Serverless platform. The command below does that:
Note that for this command to work, your Twilio CLI must be authenticated in advance. You can authenticate with the twilio login command, or by setting the TWILIO_ACCOUNT_SID and TWILIO_AUTH_TOKEN environment variables.
The deploy command will give you the URLs for all the assets and functions. You can use the URL for the index.html file, or just navigate to the domain, without any files.
Once the application is running, invite all the participants to connect to the video room, and then any of the participants can drag and drop a video file to play the file on the call.
Next steps
I hope this article gives you some ideas on how to work with media files in your video calling application.
If you are interested in an audio-only sharing solution, see my previous tutorial. A similar concept can be used for sharing a participant’s screen, which also has a MediaStream object, returned by the MediaDevices.getDisplayMedia() function. I have written a tutorial about this as well.
I can’t wait to see what you build with Twilio Video!
Miguel Grinberg is a Principal Software Engineer for Technical Content at Twilio. Reach out to him at mgrinberg [at] twilio [dot] com if you have a cool project you’d like to share on this blog!
Related Posts
Related Resources
Twilio Docs
From APIs to SDKs to sample apps
API reference documentation, SDKs, helper libraries, quickstarts, and tutorials for your language and platform.
Resource Center
The latest ebooks, industry reports, and webinars
Learn from customer engagement experts to improve your own communication.
Ahoy
Twilio's developer community hub
Best practices, code samples, and inspiration to build communications and digital engagement experiences.


