Transcribe audio messages with Twilio for WhatsApp and OpenAI Speech to Text
Time to read:
May 01, 2023
Written by

Not so long ago, you could have a conversation using your phone by either sending an SMS or making a phone call. Both have their benefits and drawbacks. These days, most messaging applications also let you send voice messages, which have their own combination of benefits that SMS and phone calls have. With voice messages, you can have an asynchronous conversation like SMS but still hear the inflections and emotions like a phone call.
Depending on the messaging application and the region, voice messaging is quite popular, and you can take advantage of this in your application when building Twilio SMS and WhatsApp applications. In this tutorial, you'll learn how to receive audio messages from WhatsApp and transcribe the audio using OpenAI Speech to Text.
Prerequisites
You will need the following for your development environment:
- a .NET IDE (Visual Studio, VS Code with C# plugin, JetBrains Rider, or any editor of your choice)
- .NET 7 SDK (earlier and newer versions should work too)
- A Twilio account (try out Twilio for free)
- ngrok CLI
- An OpenAI account (try an OpenAI account with free credits)
- FFmpeg to convert audio files/streams
You can find the source code of this tutorial in this GitHub repository.
What is OpenAI Speech to Text?
OpenAI Speech to text is the API provided by OpenAI to transform audio to text in different languages, both for the transcription and translation (for now only into English) of information. It allows audio in various formats (such as MP3 and MP4) with a maximum size of 25 MB.
Create and set up the .NET Project
Open a shell and create a Web API project using the .NET CLI:
Install the Twilio SDK and the Twilio helper library for ASP.NET Core which will help you send and receive WhatsApp messages:
Receive audio messages
Update the Program.cs file with the following code:
Next, you will create the controller where you will process each incoming message. Create a file MessageController.cs and add the following code:
The Index method accepts the HTTP request sent by Twilio when a message comes in. Twilio submits the webhook data as an HTTP form, so the action reads the form and extracts the relevant fields for retrieving the attached media, if any.
The action will only accept a single audio file, in any other case, an error message is sent in response using Messaging TwiML.
Twilio doesn't actually pass the media file via the webhook request, instead, the URL where Twilio stored the media file is passed in, and the action will send an HTTP request to download the file and store it to disk.
After storing the audio file on disk, the action will respond with a success message using TwiML.
Now, run your project and continue with the next steps while the project is running:
Set up the Twilio Sandbox for WhatsApp
To send WhatsApp messages through your Twilio account, you need to create a WhatsApp Sender, but for testing and developing locally, you can, and in this tutorial, you will use the Twilio Sandbox for WhatsApp.
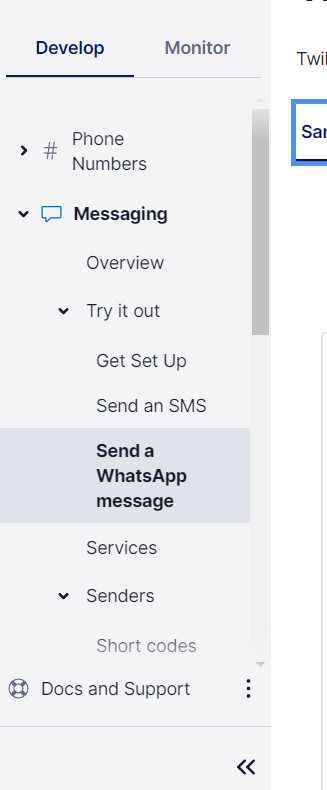
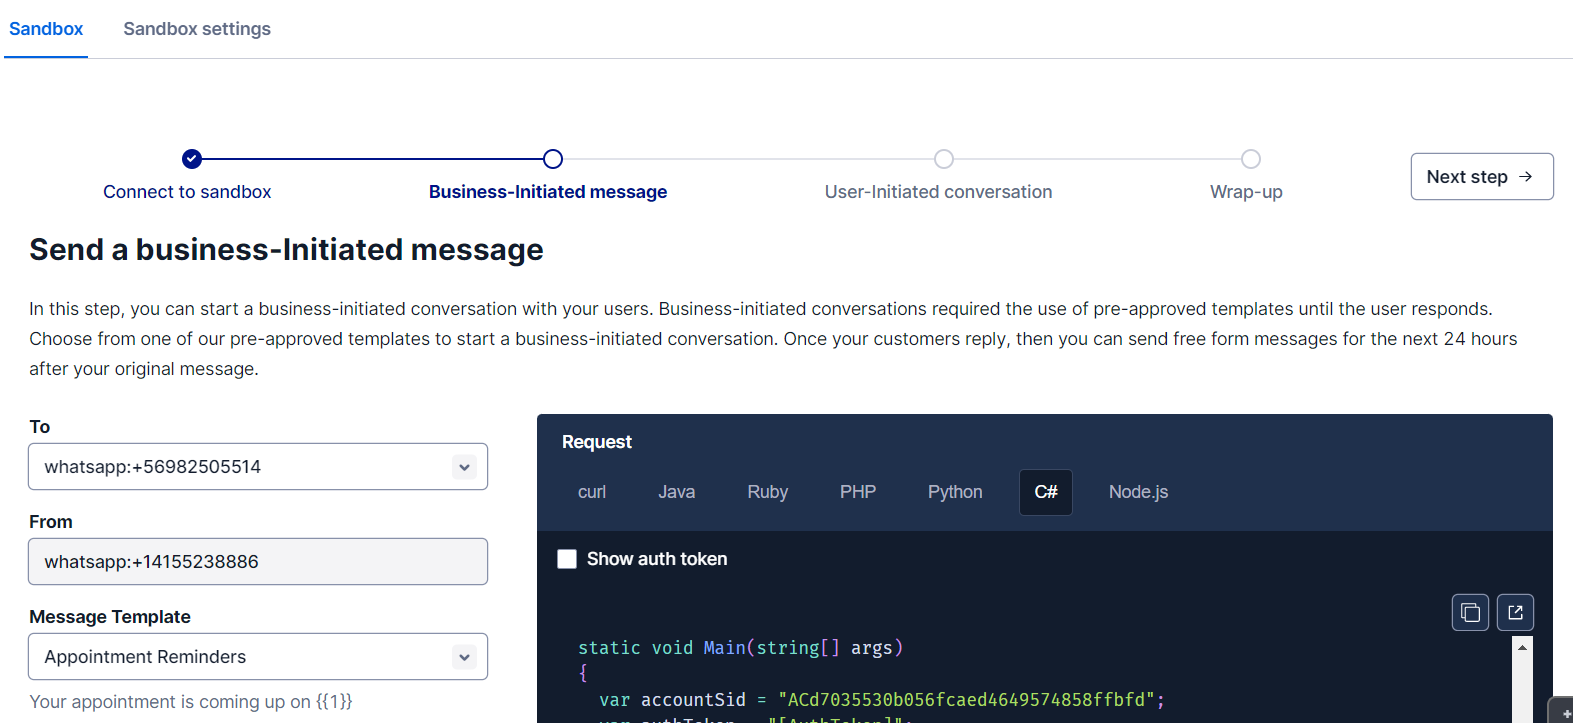
In order to get to the WhatsApp sandbox, in the left-side menu of the Twilio console click on "Messaging" (if you don't see it, click on "Explore Products", which will display the list with the available products, and there you will see "Messaging"). After that, in the available options open the "Try it out" submenu, and finally, click "Send a WhatsApp message".
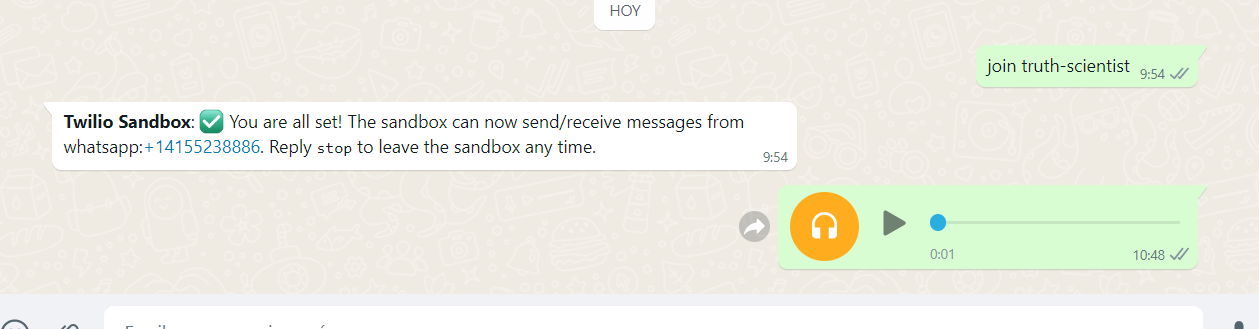
Next, you have to follow the instruction on the screen, in which you must send a pre-defined message to the indicated number through WhatsApp. This will enable that WhatsApp number to use to send messages to your own WhatsApp number. If you want to send messages to other numbers, the people who own those numbers will have to do this same step.
After that, you will receive a message in response confirming the Sandbox is configured.

Now you are able to send messages to the Sandbox number and receive messages from the Sandbox number.
Make your webhook public with ngrok for testing
Your API needs to be publicly accessible for Twilio to send the message webhook requests to your application. That's why you'll use ngrok to create a secure tunnel between your locally running API and ngrok's public forwarding URL.
Leave your .NET application running and open a separate shell. In the new shell, run ngrok with the following command, specifying the HTTP URL that your application is listening to:
Copy the Forwarding HTTPS address that ngrok created for you, as you will use it in the Twilio Sandbox for the WhatsApp console.

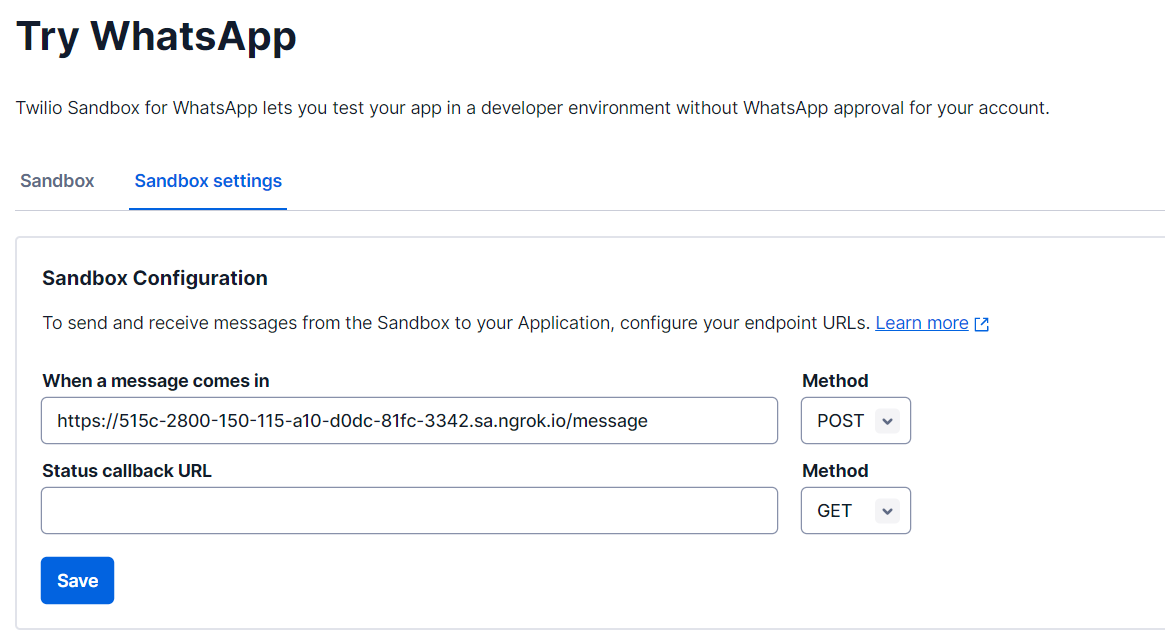
In the Twilio portal, go to the Twilio WhatsApp page, in the “Sandbox settings” section, and change the “When a message comes in” endpoint with the generated URL by ngrok, including the /Message path.
Test the project
To test, in the conversations with the Sandbox number, send an audio message using WhatsApp by pressing and holding the microphone button and speaking your message.
In a few seconds, you will see the message confirming that the audio was received by the endpoint.

Convert unsupported audio formats using FFmpeg
OpenAI's transcription API does not support all audio formats. This will be a problem in particular for WhatsApp which sends audio recordings as ogg-files which OpenAI does not support. To work around this, you'll use FFmpeg and the FFMpegCore library to convert the audio from unsupported formats to the supported wav-format.
First, make sure you have installed FFmpeg on your machine, and it is in the PATH environment variable. Then, make sure you leave ngrok running, and stop the running ASP.NET Core application by pressing ctrl + c. Then, add the FFMpegCore NuGet package:
Now, add the following using statements at the top of MessageController.cs:
Then, update the DownloadAudioFile method with the one below, and add the rest of the code after the DownloadAudioFile method:
This code will download the file just like before, but if the format is not in the SupportedContentTypes map, the audio is converted to wav-format using FFmpeg, and then stored on disk.
Feel free to verify the new code by starting the application again and sending another audio file.
Transcribe audio with OpenAI
Create an OpenAI API key
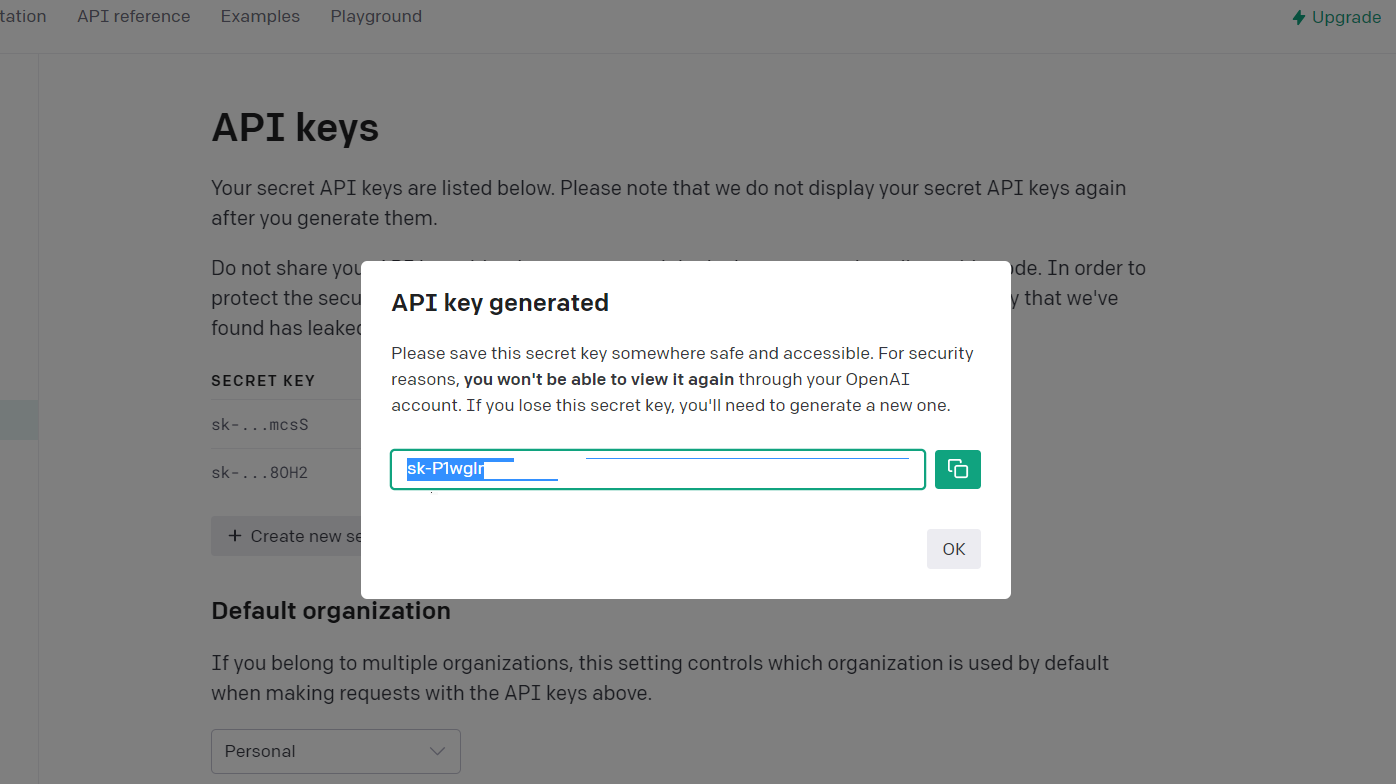
You need to generate an API Key with an OpenAI account to use the Speech to Text service. To do this, log in with your account, in the options of your account (right side), click "View API keys".
On the displayed page, click on the "Create new secret key" button, which will display a modal with the secret key. You will not see this secret again, so make sure you copy it somewhere safe, as you'll need it in the next section. API keys are secret, so make sure to keep them private, don't share them with others, and don't check them into source control.
Install an OpenAI library
To start using the OpenAI API, you must first add the secret key to the project, using user secrets. To do this, run the following command line statement in the root directory of the project:
Replace <OpenAI Secret Key> with the secret key copied previously.
OpenAI doesn't have an official library for .NET, but there are several community libraries that make it easier to integrate with OpenAI's APIs. In this tutorial, you'll be using the Betalgo.OpenAI library.
Install the library by adding it as a NuGet package using the .NET CLI:
Then, add the OpenAI service to ASP.NET Core's dependency injection container, by editing the Program.cs file:
Now that you installed and configured the OpenAI library, you are going to pass the audio data from Twilio to the OpenAI's transcription API. The transcription API will return the text from the audio, which you'll respond with to the user via WhatsApp.
First, import the following namespaces for the OpenAI library that will be necessary:
Next, update the constructor for the MessageController to receive the OpenAI service:
Previously, the application would download the audio file from Twilio's API and then store it to disk, however, now that you'll upload the audio data to OpenAI's API, you can directly pass the audio data through without storing it to disk first.
Delete the DownloadAudioFile method and add the TranscribeAudio method:
The TranscribeAudio selects the AI model to use, and send the audio stream through the Betalgo.OpenAI library which will send it to OpenAI. If OpenAI succeeds in transcribing, the transcription is returned, otherwise, an exception is thrown with the error message from OpenAI's API.
Finally, update the Index action so that it calls the GetAudioStream method to retrieve the audio, and then passes the audio stream to the TranscribeAudio method, and finally responds with the transcription as a TwiML message:
Test the project
To test the updated application, run the project again:
Finally, send another voice message using WhatsApp, wait a few seconds, and you should receive the transcription of your audio message as a response:
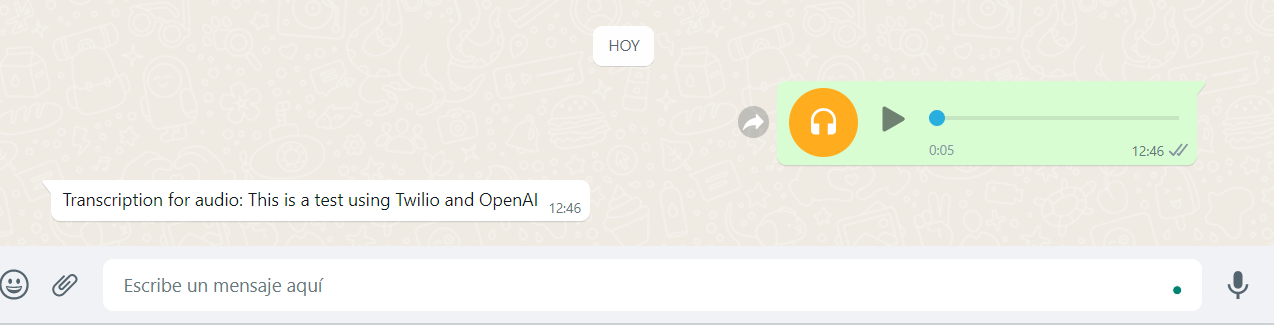
And with that, you already have an audio-to-text translator using OpenAI through WhatsApp thanks to Twilio.
Future improvements
This is a great start, but you can improve the solution further:
- Audio processing should be done independent of audio reception so that the user does not have to wait too long without receiving a response. Twilio Webhooks have a timeout of 15 seconds, after that, the request is considered failed.
- Turn on Basic Authentication for message media and update the code to download media from Twilio's API using Basic Auth.
- Validate that incoming HTTP requests originate from Twilio by validating the Twilio signature header.
Additional resources
Send and Receive Media Messages with the Twilio API for WhatsApp
OpenAI Speech-To-Text Quickstart - You can explore basic examples with OpenAI and supported languages.
OpenAI libraries - Libraries created by OpenAI and the community in different languages to use the different services available.
FFmpeg - A complete, cross-platform solution to record, convert and stream audio and video.
Convert audio from one format to another using FFmpeg and .NET - A tutorial walking you through how to install and use FFmpeg from .NET applications using the FFMpegCore library.
Source Code to this tutorial on GitHub - You can find the source code for this project at this GitHub repository. Use it to compare solutions if you run into any issues.
Néstor Campos is a software engineer, tech founder, and Microsoft Most Value Professional (MVP), working on different types of projects, especially with Web applications. He has had to receive files from emails automatically through SendGrid Inbound Parse because he did not have access to the original repository of the data in some projects.


Related Resources
Twilio Docs
From APIs to SDKs to sample apps
API reference documentation, SDKs, helper libraries, quickstarts, and tutorials for your language and platform.
Resource Center
The latest ebooks, industry reports, and webinars
Learn from customer engagement experts to improve your own communication.
Ahoy
Twilio's developer community hub
Best practices, code samples, and inspiration to build communications and digital engagement experiences.