Hiding PII/PCI from Studio
Time to read:
June 01, 2022
Written by
Reviewed by

Studio is PCI and HIPAA compliant – if you follow the rules. For example, you can employ best practices such as using the Capture Payments widget to collect payment information. Or you can refrain from announcing or requesting information that is not directly necessary. And yet, there are times when Studio’s verbose logs just record too much. In this article, I’ll walk through how to use the <REDIRECT> TwiML verb and Add TwiML Redirect Studio widget to “hide” data values from Studio.
Prerequisites
There are a couple prerequisites to using the tools presented here. You have to have a Twilio Account, and you have to have a phone number in your account. You can create a Twilio Account easily, and for FREE! Once you have the account, you can add a phone number. New accounts are given a little bit of credit, so these preliminary steps should not cost you anything right away.
Finally, it can help to review the definition of PII, or Personally Identifiable Information, so that you know what it is exactly and why you need to handle it with care.
How it’s done
What might we hide?
First, identify what bits of data you want to leave out of Studio’s logs (described at this link). Perhaps your IVR interactions involve innocuous information except for the caller’s social security number (SSN) or Tax ID Number. Or you must ask the caller to confirm a PIN. Even in a HIPAA compliant platform, you may have the requirement that this data value not be recorded. Let's work with the sample of entering the last four digits of the caller’s SSN.
What tools do we have?
Studio’s Add TwiML Redirect widget adds the <REDIRECT> TwiML verb to your flow. This verb passes “control” of a phone call to another system. This could be TwiML Bins, some microservices hosted on your own infrastructure, or as we’ll use here, Twilio Serverless Functions.
We also have the <REDIRECT> verb itself. We will be leveraging <REDIRECT> to pass control of the phone call back to Studio. The rest of your IVR can proceed from that point.
The sample presented below uses the Add TwiML Redirect widget to pass control to a Twilio Function. The Twilio Function then issues TwiML to gather some digits. The configuration of the <GATHER> verb includes an action URL to call once the gather is complete. The action URL points to a second Twilio Function that we will share below. The second Twilio Function builds a URL linking back to the Studio flow, and issues its own <REDIRECT> verb using the newly constructed URL.
It actually makes a certain amount of sense to build the functions first, then build the Studio flow. But we are talking in a Studio-centric fashion, so we’ll look at the flow first.
The Studio flow
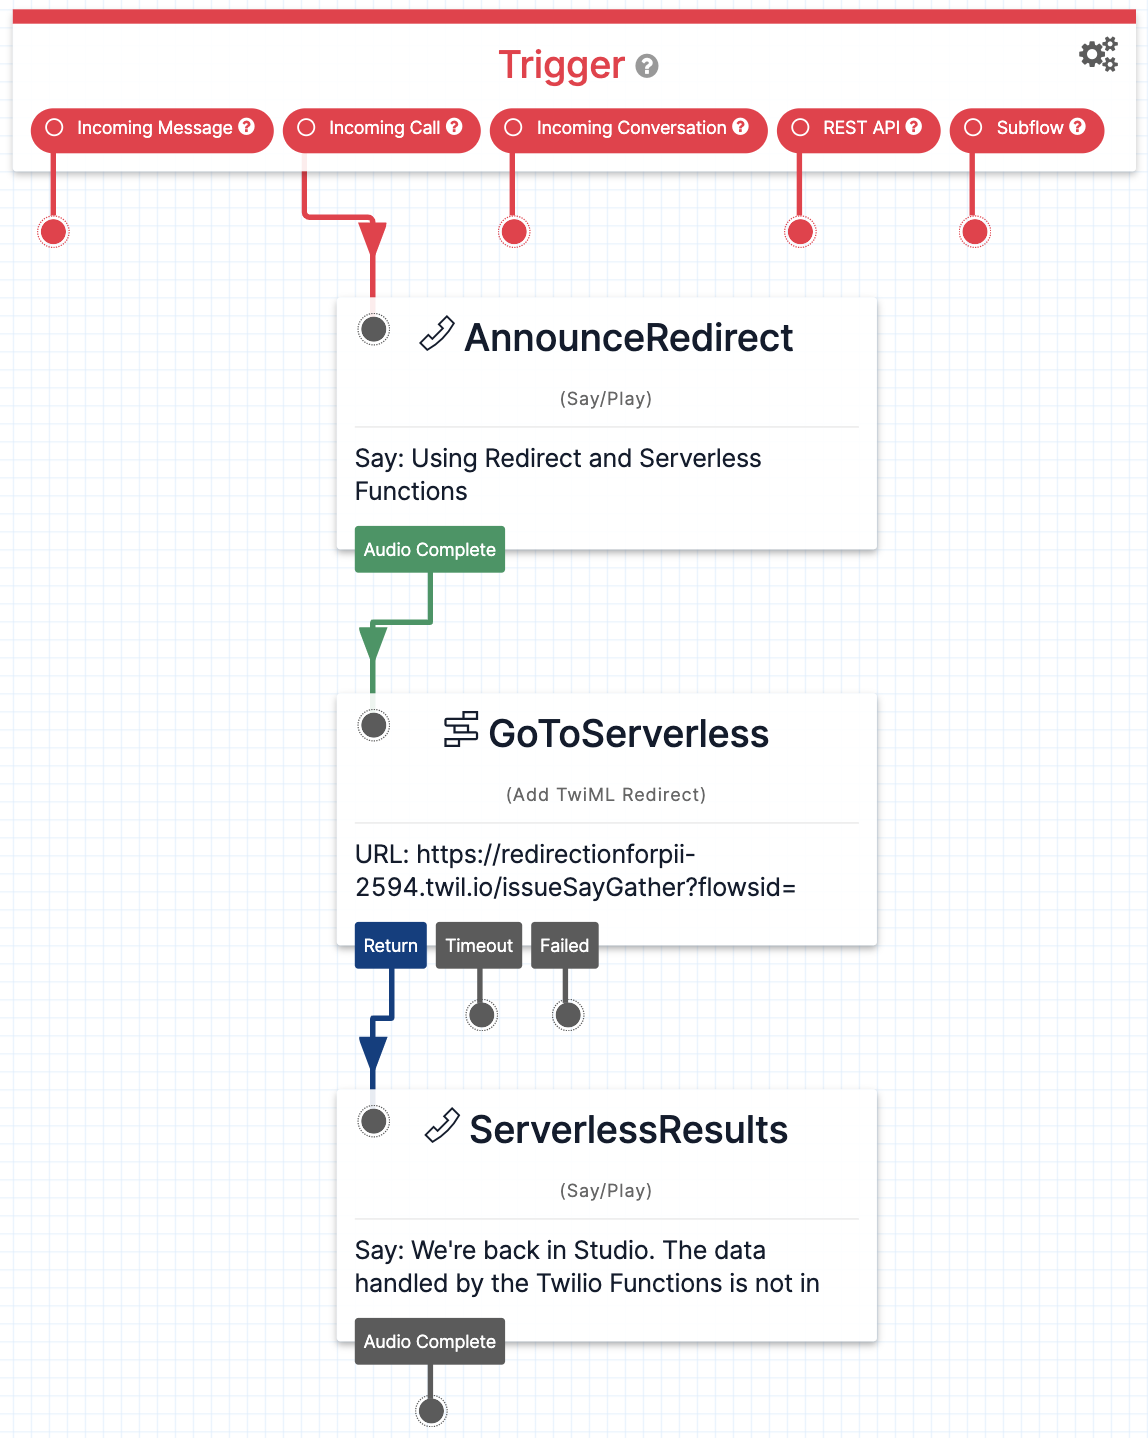
Our demonstration flow is short – just three widgets! We do a quick announcement, then pass control to the Function we’ll write below, and finally announce that Studio has the call again. Once you hear that, the call ends and you can review the Studio logs in Twilio Console.
The configuration of the GoToServerless widget is shown below. The URL to the first Function is entered, with the “flowsid” parameter added. Note how we use Liquid to dynamically set the flowsid parameter.
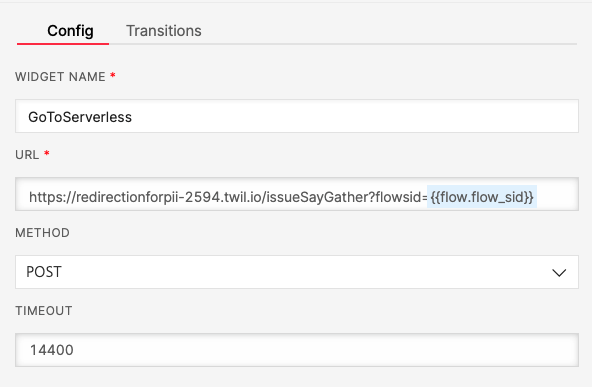
The URL to your Function will be revealed after the Function is deployed. You’ll have to come back to Studio to update the URL parameter in the widget with the actual value.
The Twilio Serverless Functions
There’s two ways to go about building Twilio Functions: leverage the Twilio Serverless Toolkit; or by using the Twilio Console. We’ll be showing the Twilio Console here, but everything could be done using the Serverless Toolkit.
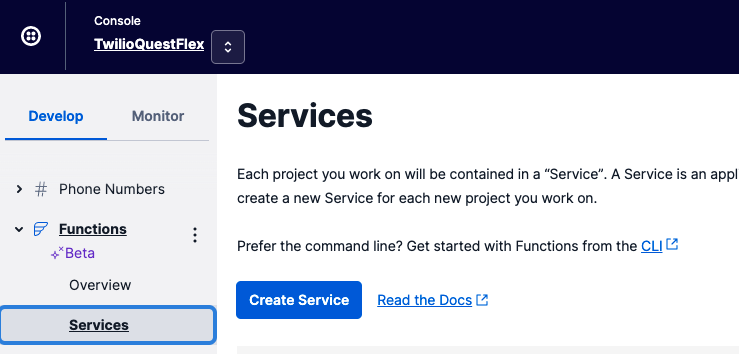
In order to define any functions in Twilio Console, you first create a Service. Login to the Twilio Console, then navigate to the Functions product, and click Services in the left hand menu. There you can click Create Service.
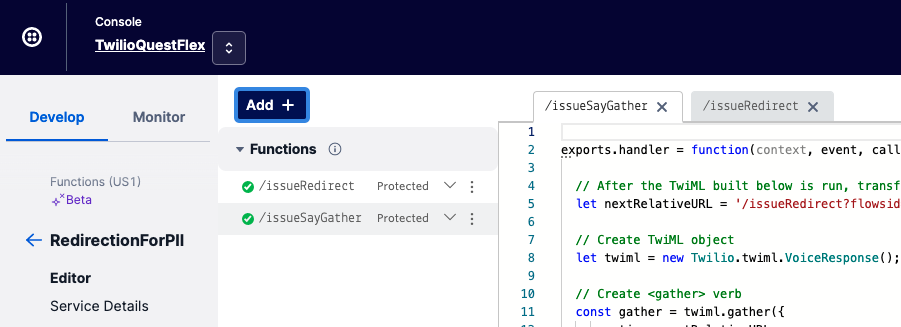
Give your new Service a descriptive name - we used “RedirectionForPII.” Then click the blue Add + button and select Add Function. We named our function “issueSayGather” - use that name to follow along here, or choose your own name. Just remember to carefully replace “issueSayGather” with the name you select! Leave the Function set as Protected - Studio knows how to call protected functions.
Since we’re here, go ahead and click Add + again and create the second Function, which we name “issueRedirect.”
The single purpose for the “issueSayGather” Function is issuing TwiML to gather some digits from the caller. We will be using an embedded <SAY> verb to provide some guidance to the caller. The Twilio helper libraries make this task easy.
We’re doing the bare minimum of configuration of the <GATHER> verb - please check the documentation for all the options! We specify the next URL that should be called after the caller takes their action (pressing digits), the http method to use on that URL (“get” does the job), and we indicate that we want our action URL to be called even if there is no caller input. Note that the action URL is relative - we can do it this way as the second Function is in the same Twilio Service.
Our source code looks like this:
Copy and paste that into the Function editing pane in Twilio Console, then click the Save button.
The issueRedirect Function is similarly bare-bones. We use the Twilio helper libraries to build the <REDIRECT> verb, providing the http method and the URL to call next. This will pass control of the phone call to the system indicated by the URL. In this case, we are calling a Studio API. Specifying the AccountSid and flowsid targets our Studio flow. The “FlowEvent” parameter in the URL tells Studio that we are returning the call, and not trying to start a new execution.
The source code for the “issueRedirect” function looks like this:
Copy and paste that into the Function editing pane in Twilio Console - remember to use the pane for issueRedirect and not issueSayGather! Then click Save and finally, click Deploy.
Once the Service deployment completes, click Copy URL. Back in Studio you can update the Redirect widget we named “GoToServerless” with the full URL (remember to keep the liquid variable for flowsid), save the widget properties and publish the flow.
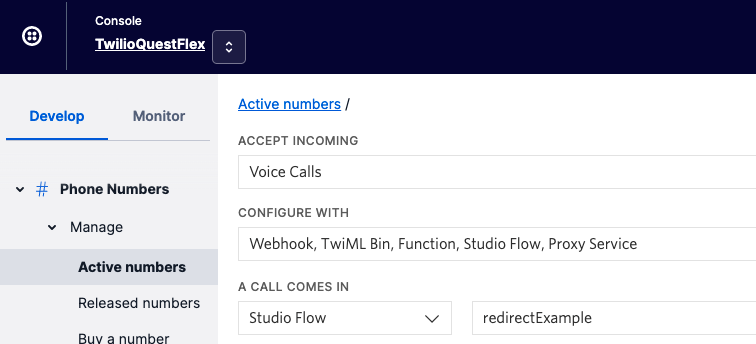
Configure your phone number
If you haven't already, buy a phone number to use on your Twilio account. On the configuration page for your phone number, scroll down to the Accept Incoming section, and configure it as shown. Note that the list of published Studio Flows is populated in the A Call Comes In section - select the flow you published for this exercise from the dropdown list.
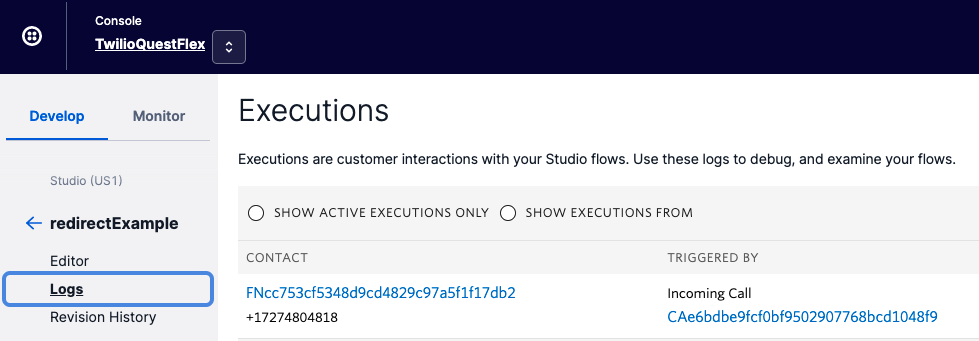
Save and you are done! Call your number to test the flow, then check the Studio logs. Even viewing the full json list of the flow execution won’t show the digits the caller pressed. You do get to see that the issueSayGather function was called, and what parameters were passed in, as well as any data returned by the issueRedirect function.
What else can this pattern do?
Call other Services
So you’ve created flows and functions to replicate the above pattern. You have also collected (but not recorded!) some data. But our sample code and flow presented don’t actually DO anything with it.
The issueRedirect function could very easily be used to call other Services, verifying that (in our stated example use case) the last four digits of the caller’s SSN match company records. In this use case, a true/false value would be passed through the action URL to the issueRedirect function, which in turn would add the value to be returned to Studio in the redirection URL. At that point the value can be accessed and evaluated in the flow. Do remember to NOT return the values you were trying to hide in the first place!
Return tokens
If your use case and design absolutely require that an identifier be returned to Studio, use a temporary token that is generated and valid just for the duration of this Studio interaction. This token would then be returned to Studio, and Studio would pass the token to later API calls to identify the caller. At the end of the call or after a short lifespan, the token is “forgotten” and doesn’t relate to the caller or anyone else.
Where to go from here
Those are the basics. There are many more fine details that will often come up: how to give the caller a limited number of retries; should you switch from the dual-function pattern as presented, or move to a single function that “calls itself” using a switch construct to manage state; and on and on. We’ll leave those as advanced topics up to you to build!
Ready to upgrade from the free trial or learn more about building with Twilio, reach out to our team of experts.
Jeff Yates is a Senior Solution Architect on the NAMER Professional Services team, helping build the best customer solutions on the Twilio platform of products. He can be reached at jyates [ at ] twilio.com.

Related Resources
Twilio Docs
From APIs to SDKs to sample apps
API reference documentation, SDKs, helper libraries, quickstarts, and tutorials for your language and platform.
Resource Center
The latest ebooks, industry reports, and webinars
Learn from customer engagement experts to improve your own communication.
Ahoy
Twilio's developer community hub
Best practices, code samples, and inspiration to build communications and digital engagement experiences.