Sharing Data Between Services Using Python and Twilio Sync
Time to read:
December 11, 2020
Written by
This post is part of Twilio’s archive and may contain outdated information. We’re always building something new, so be sure to check out our latest posts for the most up-to-date insights.

If you have an application that uses multiple Twilio services, you’ve probably used a database to share data from one medium to another. Although this gets the job done, it’s not always scalable, fast, or easy to implement. Twilio Sync is a service that allows data to be easily stored and shared across devices, services, and even other Twilio APIs. This blog post will demonstrate how to use Sync by building a voice memo application that utilizes Autopilot, SMS, and Voice, all from Python. By the end of this project, you’ll know how to make data flow from text to voice and back to text all within milliseconds!
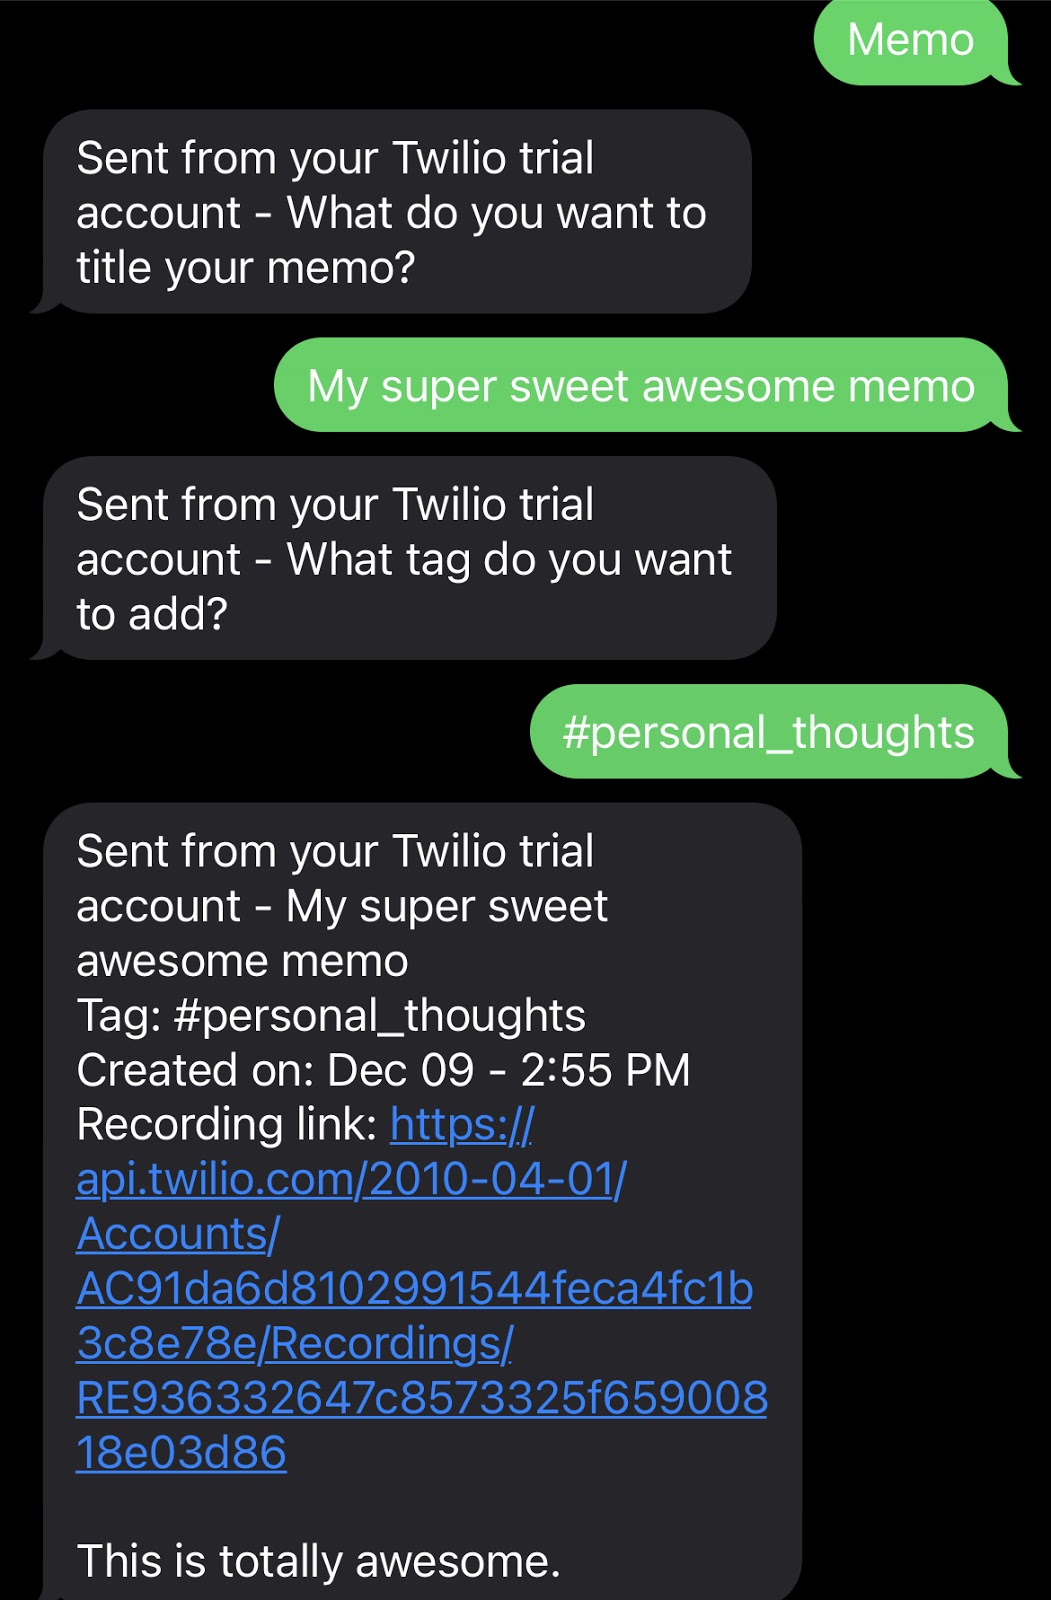
The goal of the Voice Memo bot is to allow users to create, record, and retrieve voice memos on their phone. First, the user sends a text to the project’s Twilio number saying that they want to create a memo. This then starts an Autopilot task which collects the memo’s name and tag. The user is then called so that they can record the memo over the phone using Programmable Voice’s record command. After the recording is done and the memo has been transcribed on the backend, the user is sent a summary of their new memo. As an added bonus, the application will also allow them to look through previously saved memos. Sharing data between all of these components is easy thanks to Sync.
Prerequisites
To follow this tutorial, you will need the following:
- Python 3.6 or newer. If your operating system does not provide a Python interpreter, you can go to python.org to download an installer.
- Virtualenv - Virtualenv is an environment manager. It’s a best practice to use one so that your code runs with the right versions of packages for this project
- Flask - Flask will be used to create the backend for the application
- ngrok - Ngrok is a handy tool that assigns a public URL to an application that you’re running locally. We’ll use this public URL in the Autopilot bot. If you don’t have ngrok installed, you can download a copy for Windows, MacOS or Linux.
- A mobile phone that can send and receive SMS messages
- A Twilio account. If you are new to Twilio create a free account now. You can review the features and limitations of a free Twilio account.
Because this tutorial will focus more on Sync, some familiarity with Autopilot will be helpful. To learn more about Autopilot, you can view this blog post
Environment Set Up
You can download the starter code for this project here. You can also browse the files on GitHub.
Here’s an overview of the file structure:
app.py- The Flask app used to retrieve and send data will live herebot.jsonandtasks.txt- These files will be used to set up Autopilot later on.config.py- We’ll use this file to manage the project’s environment variablesrequirements.txt- All of the project’s dependencies live here
After installing the files locally, create a virtual environment and install the dependencies found in the requirements file by running the following from a terminal in the project folder:
Project Set up
Head over to the Twilio console and buy a phone number if you don’t have one yet. Write the number down for reference later.
Next, create a new .env file in the project directory and copy and paste the Account Sid and Auth Token displayed on the Twilio dashboard. The .env file should look like this:
On the left panel, click the three dots to open up the services pane and select Sync, which should be near the bottom of the panel. Click on “Services” and create a new service for this project. You can give it any name you like. After the service is created, copy the service SID and paste into a third line in the .env file. Now, the file should look like this:
Lastly, Autopilot can be set up interactively or from the command line with the Autopilot CLI. If you want to use the CLI, install it following these instructions.
From the project’s directory, you can now set up the Autopilot bot, its tasks, and its samples by entering the following command in the terminal:
To set up the bot manually from the Twilio console, open the services pane and click on “Autopilot”. From there, create a new bot with the name voice-memo. Remove all the default tasks and then define two tasks called get_memo_data and list_memos. The code to program the tasks can be found in the tasks.txt file that you downloaded earlier, and below is a list of the samples I used for each of the tasks. Feel free to modify as you see fit.
Samples for get_memo_data:
- Memo
- Start memo
- I want to record a memo
- Record
- Record memo
- Voice memo
Samples for list_memos:
- List memos
- What memos do I have?
- All memos
- List my last {limit} memos
- What are my last {limit} memos?
- List {limit} memos
- List {limit} memo
The last step is to connect Autopilot to the Twilio phone number. Click on “Channels” in the side bar and select “Programmable Messaging”. Copy the messaging URL to the clipboard and head over to the “Phone Numbers” section of the Twilio console. Click on the number you’ve chosen earlier. Scroll down to the “Messaging” section and paste the URL under “A message comes in”. Make sure the dropdown to the left of the URL is set to “Webhook”, and the dropdown to the right is set to “HTTP POST”.
Everything is all set up! Let’s work on the app.
Starting the Conversation
Remember all of the environment variables we stored earlier? Now it’s time to access them in the application. Update your config.py file so that it looks like the following:
The load_dotenv function loads the environment variables from the .env file into the environment. Then, you’re able to save them into the TWILIO_ACCOUNT_SID, TWILIO_AUTH_TOKEN, and TWILIO_SYNC_SIDvariables.
At the top of the app.pyfile, import these variables so that they can be accessed later.
Let’s go ahead and create an instance of the Twilio client for use throughout the application. First import the Client class at the top of the app.py file:
And then create a client instance right below the app = Flask(__name__) line:
When a user initiates a conversation with the bot and sends a prompt that matches the samples stored for the get_memo_data task, Autopilot will run a collect task that asks the user to provide a memo title and a tag. It will then send these responses to the URL listed in the task actions.
Import the json package at the top and update the start_memo route with the following lines of code to parse the user’s responses.
Here we store the information provided by Autopilot in the data variable, from where we extract all the details from the user. The api_url variable extracts the URL from the server, so that we can use it later in follow-up callbacks.
Now that we have the user’s phone number, information about their memo, and the api_url, the next step is to initiate a phone call. Continue the start_memo function, by adding the following code which calls a user using TwiML.
The TwiML snippet tells Programmable Voice to give some instructions to the user after they pick up the phone, and then start a recording, which should be transcribed and should timeout after 10 seconds of silence. After the recording is complete the call will end. We are requesting that the audio transcription is sent to the process_memo route on this same server. We’ll define this route shortly.
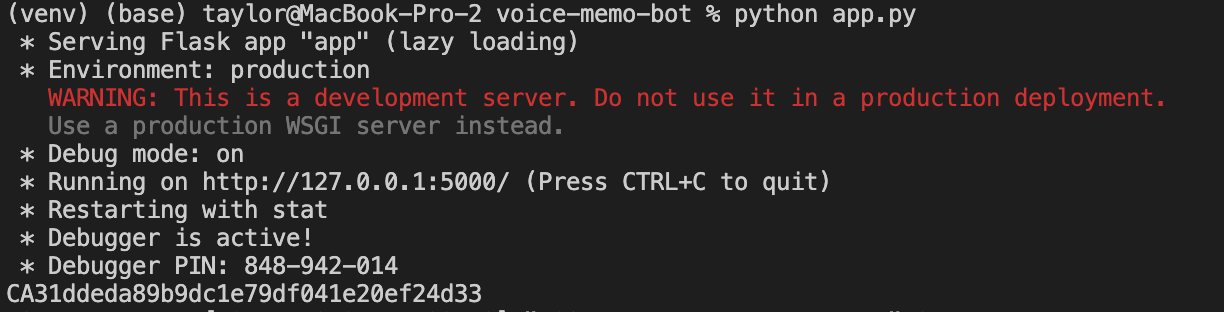
Ready to test the work we’ve done so far? Run python app.py in the terminal which should start the server on localhost port 5000.
Leave the Flask application running and open a second terminal window. On this new terminal run ngrok http 5000 to allocate a temporary public domain that redirects HTTP requests to our local port 5000. On a Unix or Mac OS computer you may need to use ./ngrok http 5000 if you have the ngrok executable in your current directory. The output of ngrok should be something like this:
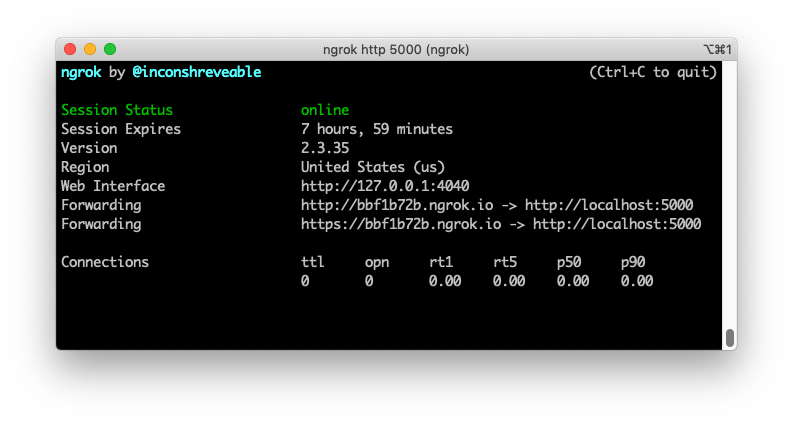
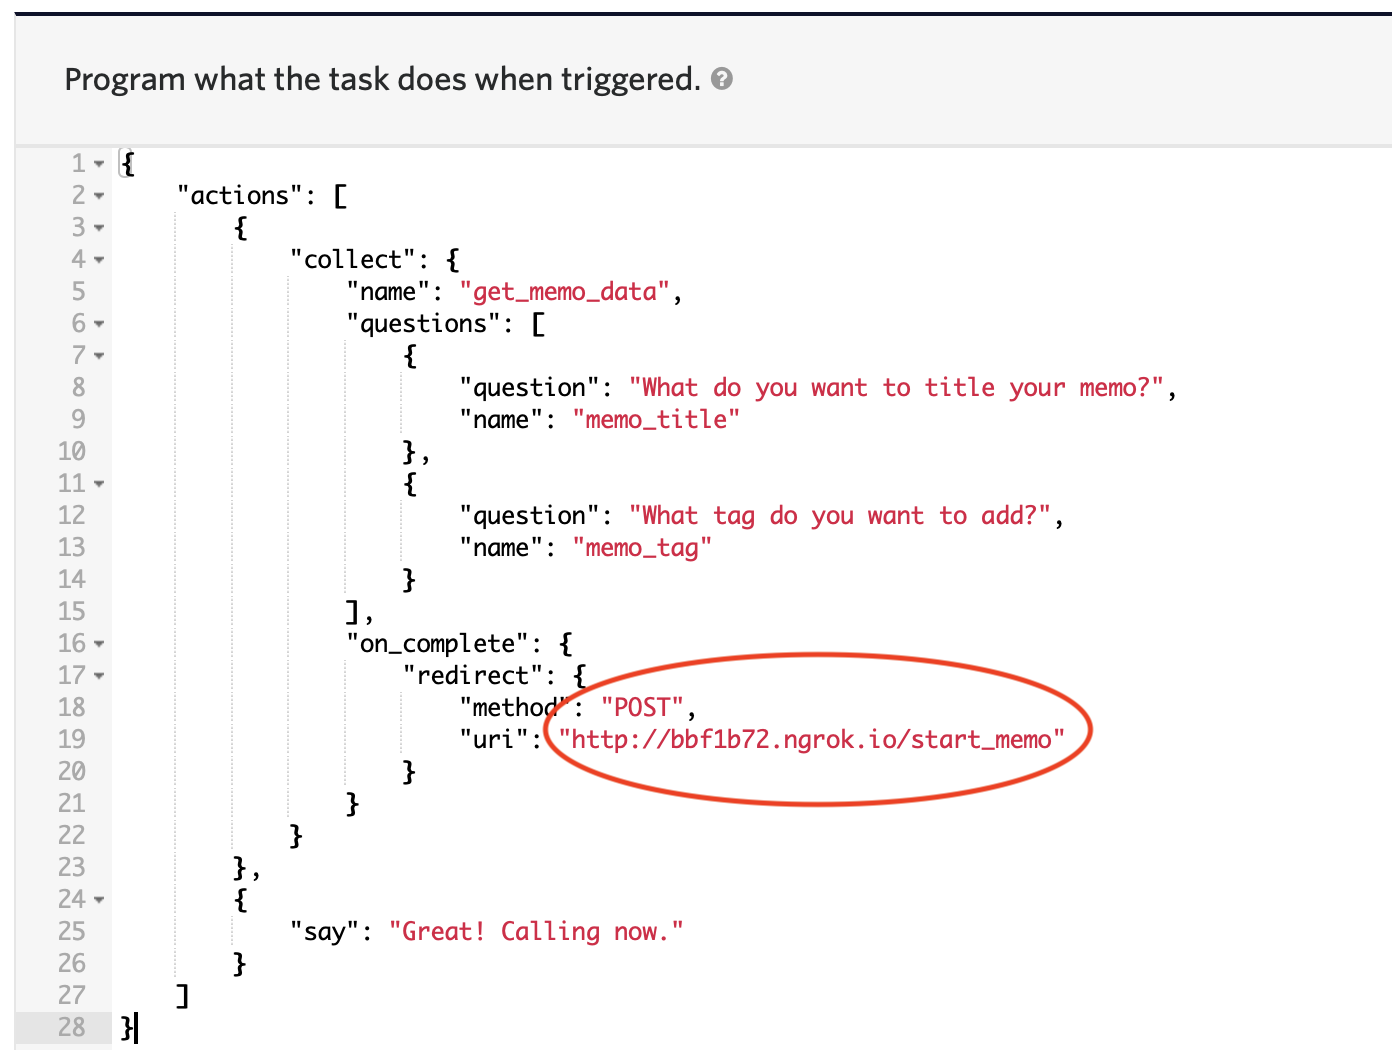
Note the lines beginning with “Forwarding”. These show the public URL that ngrok uses to redirect requests into our service. Copy either one of these URLs and replace <ENTER_API_URL_HERE> with this value in both of the get_memo_data_ and list_memos Autopilot tasks in the console. For example, your get_memo_data task should look something like this:
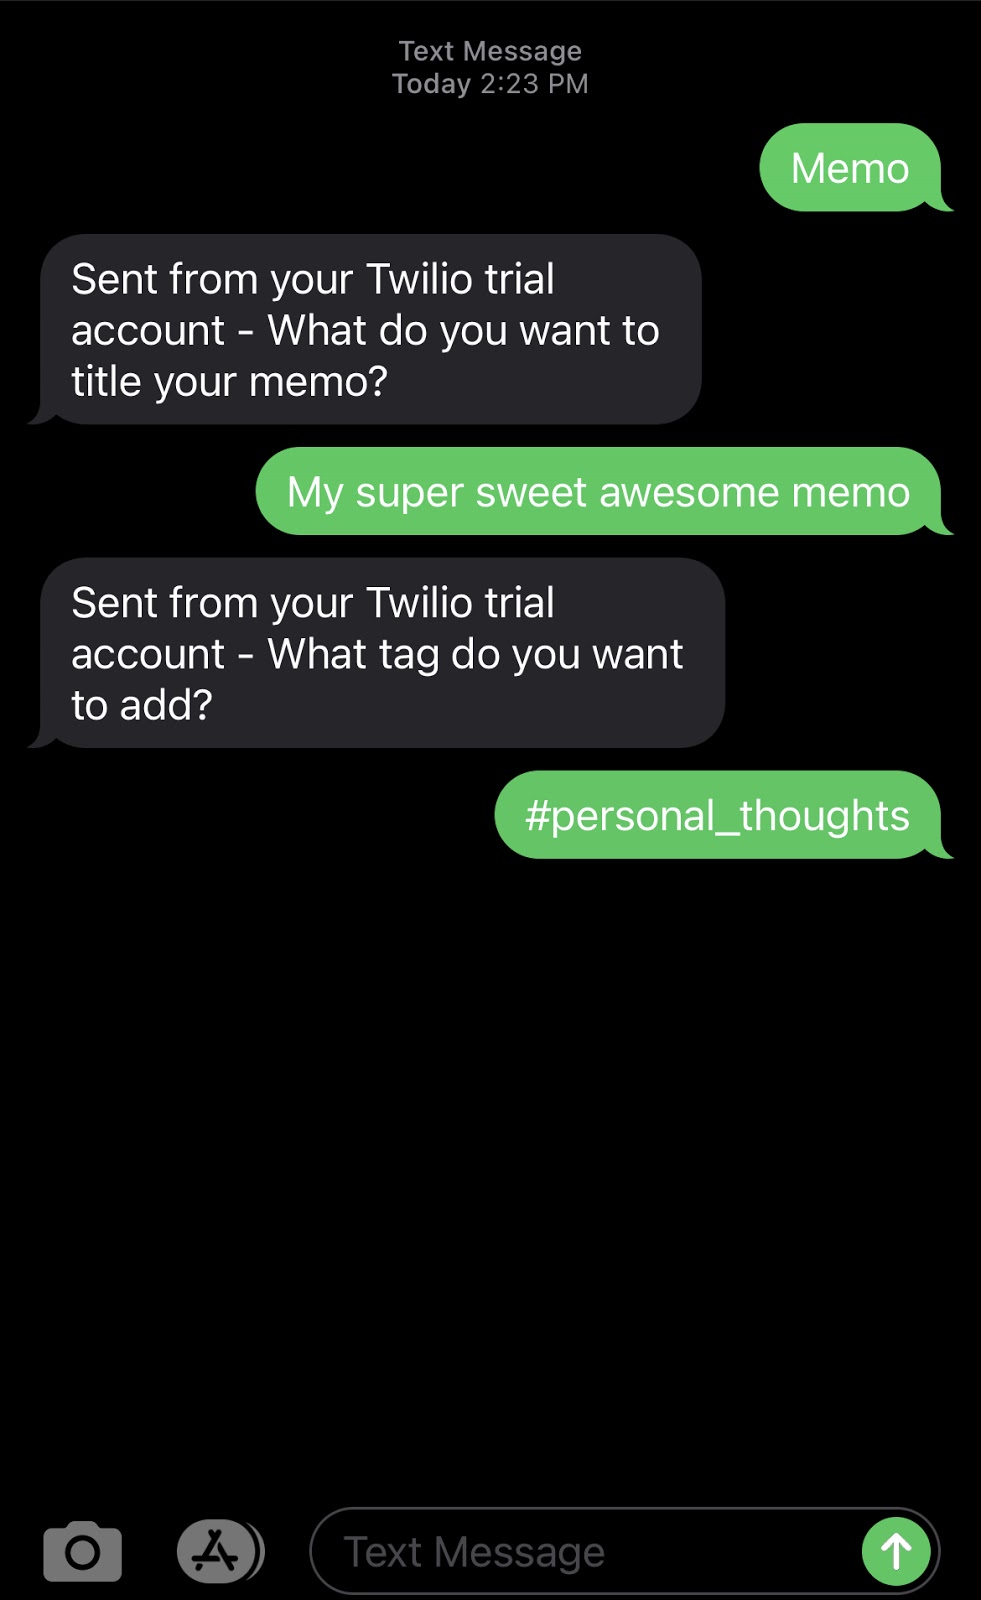
Let’s test the application out by texting “Memo” to the bot’s number. You will be asked to send the memo’s title and tag, and then you will receive a phone call. You should see the call’s sid printed out to the terminal where you launched the Flask application.
If you have any problems running the code up to this point, you can see how it should look here.
Storing Data via Sync
Let’s add Sync! Because we want each user to be able to store multiple memos, we’ll set up a sync list for each unique phone number. For each new memo that a user records, we’ll add a sync list item.
Below the client definition at the top, create a sync variable that we’ll use to access sync services.
First we’ll need to get a user’s sync list if they already have one or create one if they don’t. There’s currently no way to check for existence of a sync list, so as a workaround, we’ll use a try, except block. ImportTwilioRestException at the top of app.py:
Then, right after we print the call sid, we query for a sync list with the user’s phone number as its unique name. If that raises an exception, meaning the list doesn’t exist, we create a new one.
Now, we can store the memo data as a list item to the user’s list. Import datetime at the top and then add the following code after you created the sync list.
This list item has the title and tag given by the user, the unique identifier for the call on which the user will record the memo, and a formatted datetime string of when the memo was created.
We’ll finish up this route by returning back an empty list of actions which signifies that the SMS Autopilot conversation should end.
Here is how the code looks after everything we’ve done so far.
Storing the Memo Recording
When the recording of the memo is finished processing in the backend, Programmable Voice sends the results to the URL listed in the transcribeCallback argument earlier. We’ll start off similar to how we started the start_memo route.
Then, let’s look through the last 5 items in our sync list to find the memo with the same call_sid as the one relating to this recording:
Once we’ve found the right list item, we can now add the recording link and transcription to the document:
We now have all the information we need to send the processed memo back to the user.
Saving these changes automatically updates the Flask server, so we are now ready to test it out! By this point, you should be able to create a memo, record the memo on the phone, and receive a message describing the memo after it’s been processed.
You can check out the code up until this checkpoint here.
How to Retrieve Previous Memos
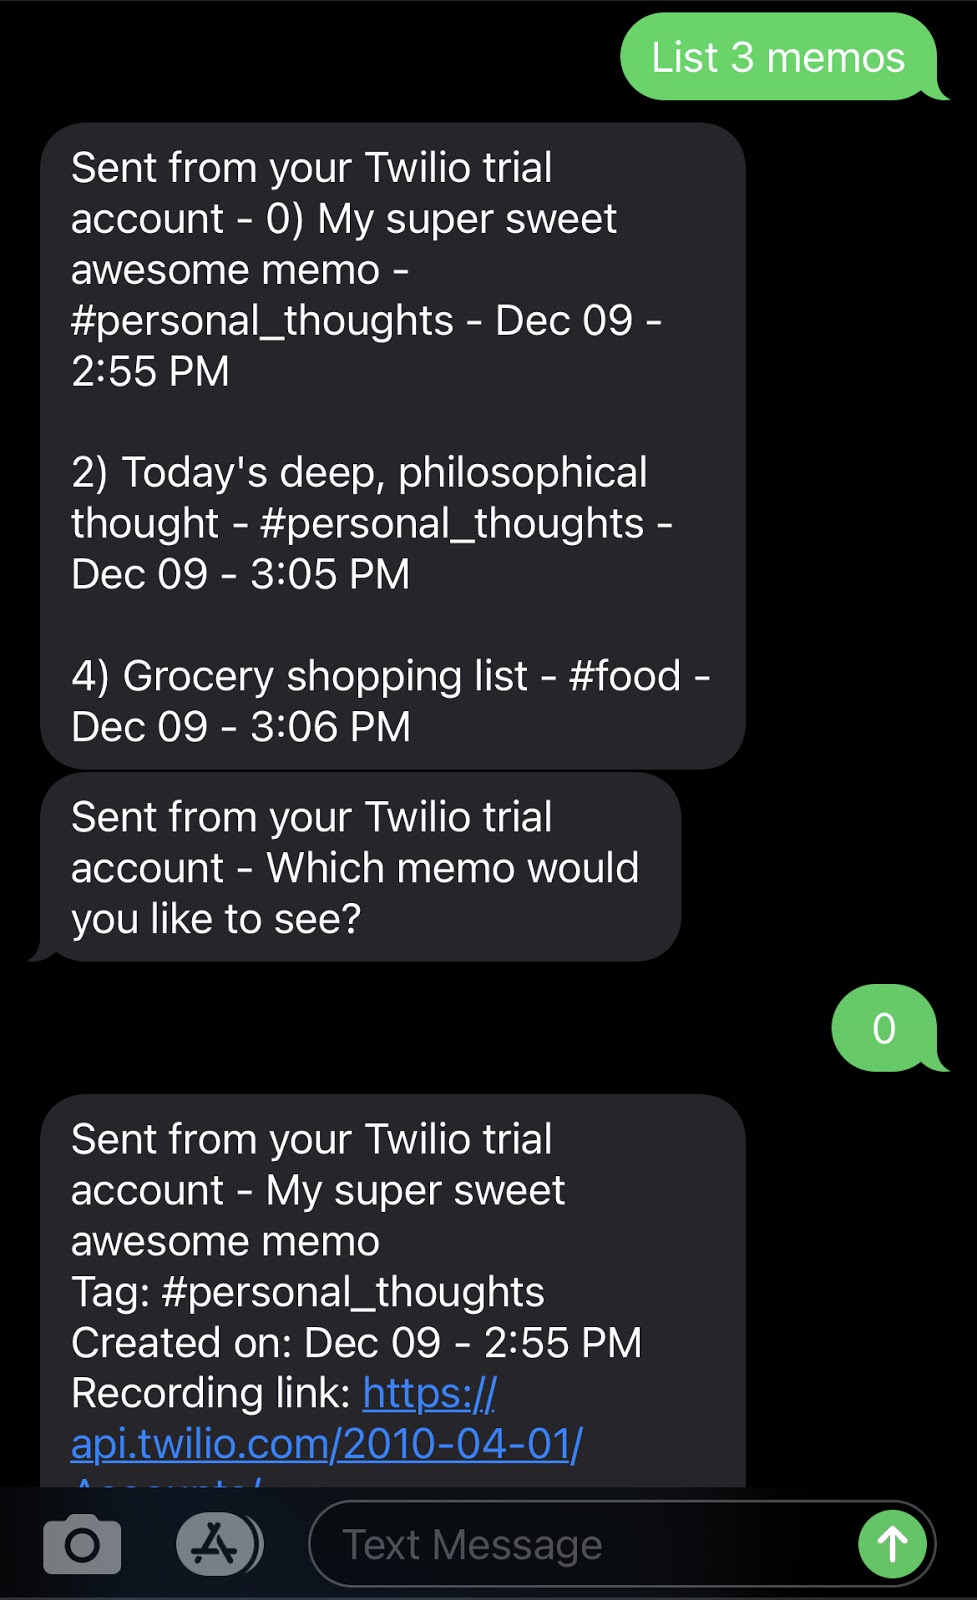
Alright, one memo down, many more to go! The user should be able to query all of their previous memos. The second Autopilot task, list_memos, will first ask the user how many memos they would like to look through (if not already presented in the task initiating message) and then return high-level information about those few last memos, including their name, tag, and when they were created. If the user wants to see more, they can specify which memo to retrieve by using the list item’s index. The index is generated by Sync and can be used to access a specific list item.
Update the list_memos route with the following.
This code parses the incoming request from Autopilot, fetches the requested number of memos from the user’s sync list, formats the memo metadata into a string, and then returns actions for the Autopilot conversation, which include showing the list of memos and asking the user to select one for more details.
When the user responds with the index of a particular memo, a request is made to the fetch_memo route, and all of the information of the resulting memo is sent back to the user. To set this up, update the fetch_memo route with this code:
Now, try to list some memos! You now have a working voice memo bot that you can use to send, store, and retrieve memos!
You can find the final iteration of the code used for this project here.
You may notice that while memo indices are in ascending order, they may skip some numbers. As stated in the Sync documentation, that’s totally fine.
Conclusion
You’ve now built an application that utilizes Twilio Sync to store and retrieve data across multiple services like Autopilot and Programmable Voice. From here you can add more features such as allowing the user to filter by tag, letting the user delete a memo after it’s been recorded, and even allowing the user to create and retrieve memos from WhatsApp.
Taylor Facen is currently a dual degree MBA and Masters of Engineering student at MBA who loves to build bots, advise startups on their tech strategy, and (now virtually) hanging out with her fellow Twilio Champions. You can learn more about her on her website or by following her on Twitter.

Related Resources
Twilio Docs
From APIs to SDKs to sample apps
API reference documentation, SDKs, helper libraries, quickstarts, and tutorials for your language and platform.
Resource Center
The latest ebooks, industry reports, and webinars
Learn from customer engagement experts to improve your own communication.
Ahoy
Twilio's developer community hub
Best practices, code samples, and inspiration to build communications and digital engagement experiences.