How to Create and Send vCards with Go
Time to read:
October 02, 2026
Written by
Reviewed by
How to Create and Send vCards with Go
More than likely you've shared a friend's contact details with someone. When you did that, you likely copied their name and phone number or email address, etc from your phone's contacts app into a message using your messaging app of choice, e.g., Signal, WhatsApp, Messenger, SnapChat etc.
While it might seem quick and easy — despite repeatedly switching between apps to copy everything you need — it's actually a pretty ineffective way of sharing contacts. A far better way is to send a vCard (Virtual Contact File).
If you're not familiar with it, vCard is a data format which can store a lot of information about people and organisations, such as their name, phone numbers, email addresses, postal address(es), anniversaries, and photos.
What's more they're supported by:
- All major desktop and mobile operating systems
- The most common email services and apps, such as Apple Mail, Gmail, and Thunderbird
- The contact apps which ship with the major operating systems
What's more, you can send a contact's completed details in one go — in a well-structured and organised way. That's easier for everyone involved.
If this sounds like something you're interested in, in this short Go-focused tutorial, you'll learn how to create them, and how to then send them via SMS powered by Twilio's Programmable Messaging API.
Prerequisites
To follow along with this tutorial, you will need the following
- Go installed on your development machine
- Your preferred Go editor or IDE, such as Neovim or Visual Studio Code
- A Twilio account (either free or paid). Create one now if you don't already have one.
- A Twilio phone number that can send SMS
- A mobile/cell phone that can receive SMS
Create a new Go project
Let's get started building the code by creating a new Go project and initialising it as a Go module. To do that, run the commands below.
Install the required dependencies
Next, you need to install the project's dependencies. These are:
- GoDotEnv: This package creates environment variables from a dotenv ( .env) file, letting us keep our application's configuration separate from its code
- go-vcard: This package simplifies reading and writing valid vCard files
- Twilio's Go Helper Library (SDK): This package simplifies sending SMS with Twilio
To install them, run the command below.
Set the required environment variables
Now, we need to set some environment variables, so that the application can make authenticated requests to Twilio's Programmable Messaging API, and that it knows who the SMS sender and receiver are.
Start by creating a file named .env in the project's top-level directory with the following content.
After that, open the Twilio Console and go to the Account Info panel.
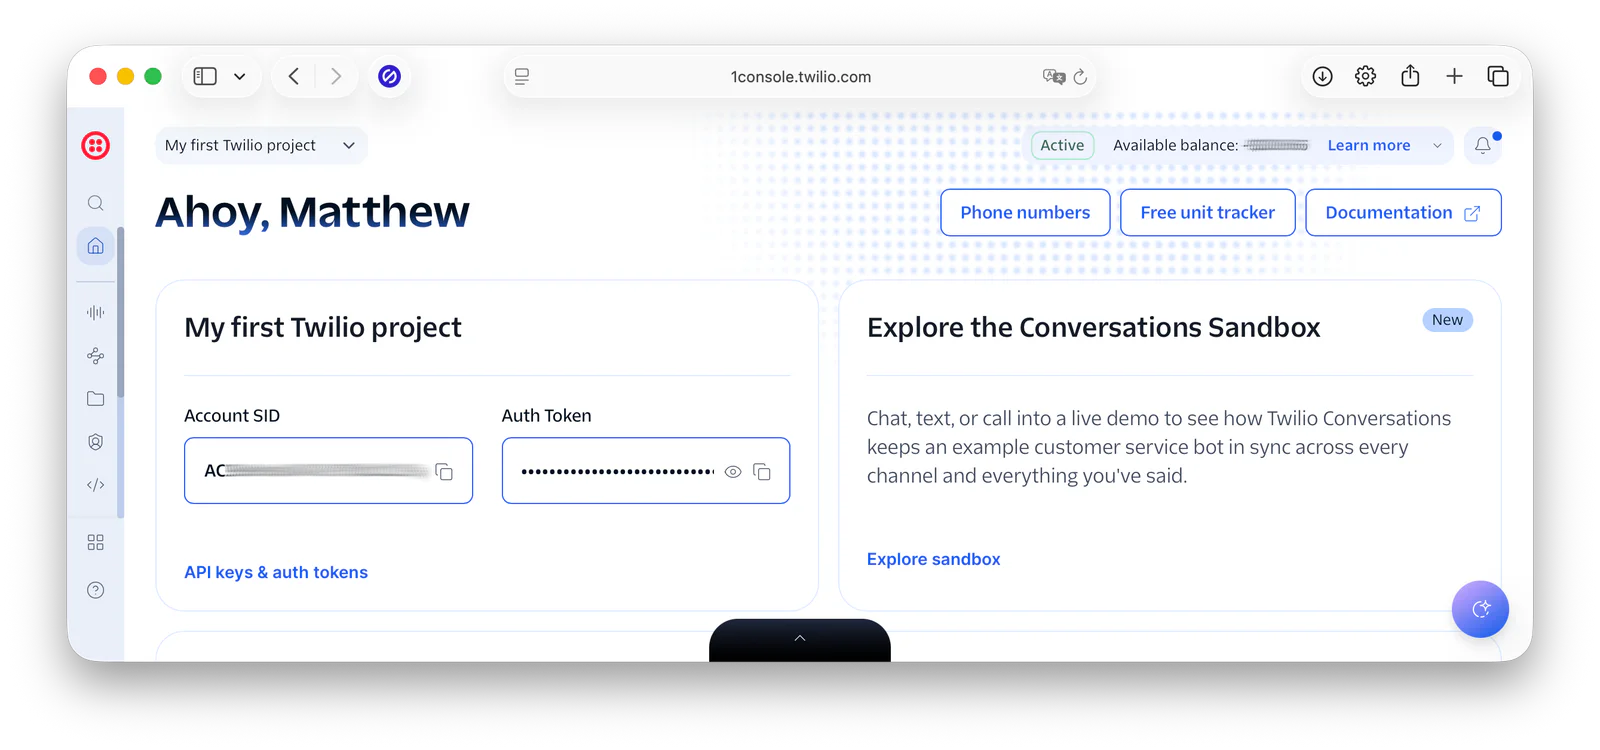
There, copy your Account SID, Auth Token, and Twilio phone number. Then, paste them into .env as the values of TWILIO_ACCOUNT_SID, TWILIO_AUTH_TOKEN, and TWILIO_PHONE_NUMBER, respectively. Then, set TO_PHONE_NUMBER to your mobile/cell phone number — formatted in E.164 format, e.g., "+61493123456".
Write the code to create a vCard file
With the setup now complete, it's time to write the Go code. In the project's top-level directory, create a file named create-vcard.go, then paste the code below into the file.
The main() function initialises a new Card object, which models a vCard, and sets its version, along with an address, name, URL, telephone number, and email address. The code makes use of a number of constants, which you can find in card.go in the project's GitHub repository.
After that, it creates a new file named vcard.vcf in the current directory and writes the vCard data to the file. If it's unable to do so, because, for example, the current directory isn't writable, the code prints the failure reason to the terminal and exits.
Run the code
With the code ready, run the command below to create the vCard file.
Assuming that you kept the dummy data in the code above, if you look in vcard.vcf you'll find that it looks like the following:
Make the vCard file publicly accessible
Before we can send the vCard via SMS, we need to make it publicly accessible on the internet. This is so that Twilio can include it with the SMS when it's sent.
There are numerous ways that we can make a file publicly accessible, including an AWS S3 Bucket, putting it in a publicly accessible directory on a webserver, or using a service such as DigitalOcean Spaces. However, each of these require some manual setup and an account with the respective service or server.
So, we'll use Twilio Assets instead as it's bundled with every Twilio account. If you're not familiar with Twilio Assets, it's a static file hosting service we can use to quickly upload and serve files, such as MP3 audio files.
In the Twilio Console, navigate through Builder tools > Functions & Assets > Services. There, click Create Service, enter a name for the new service, and click Next.
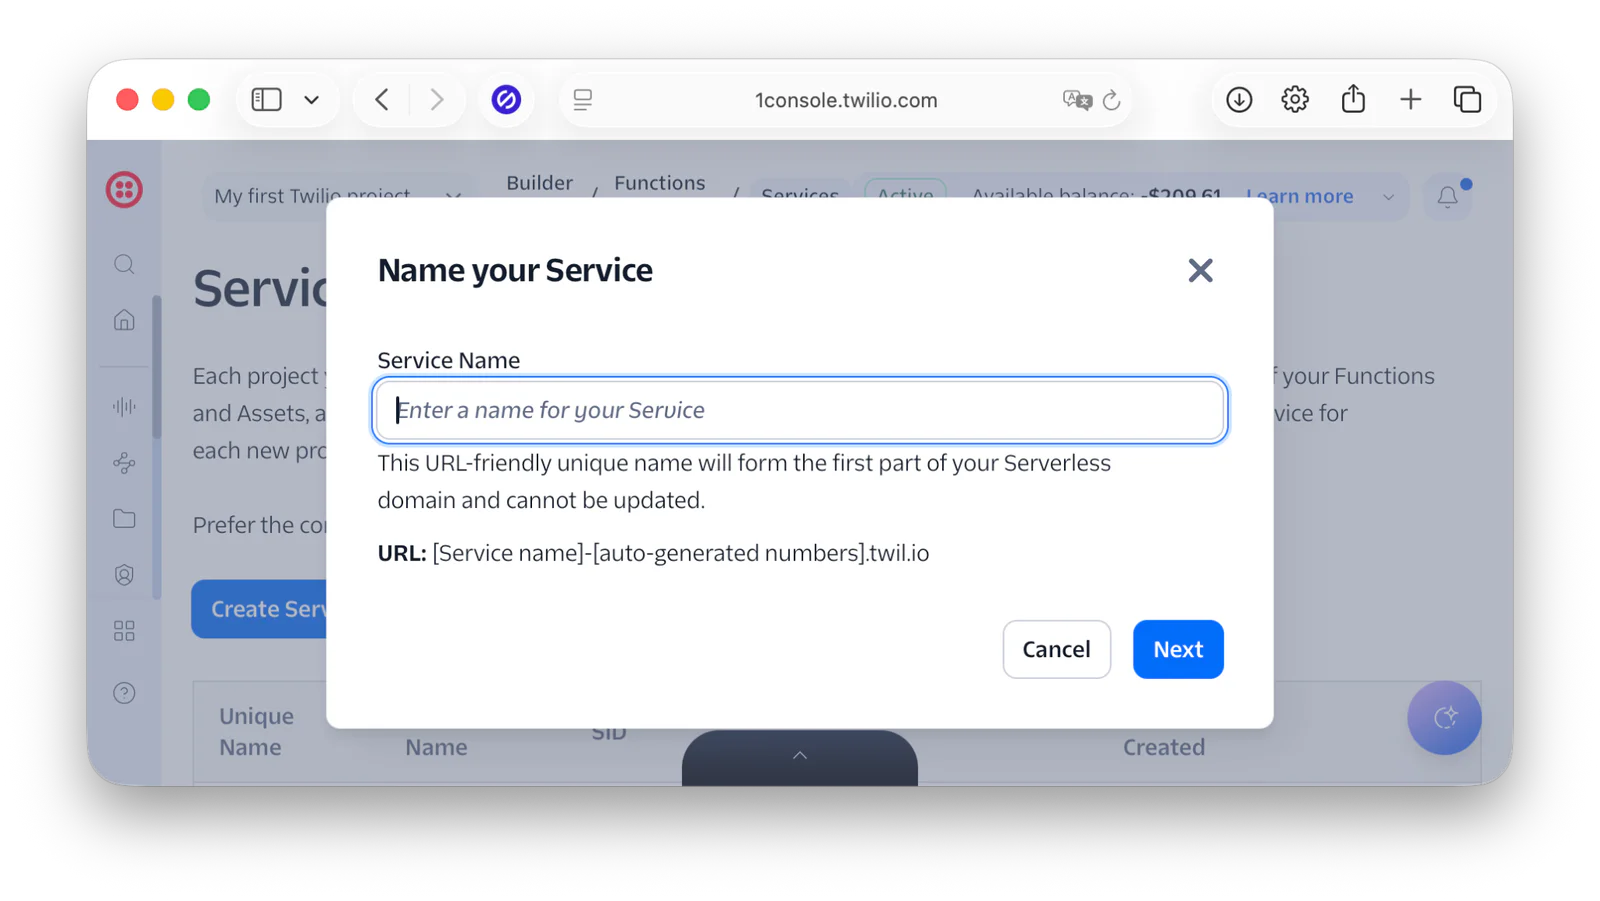
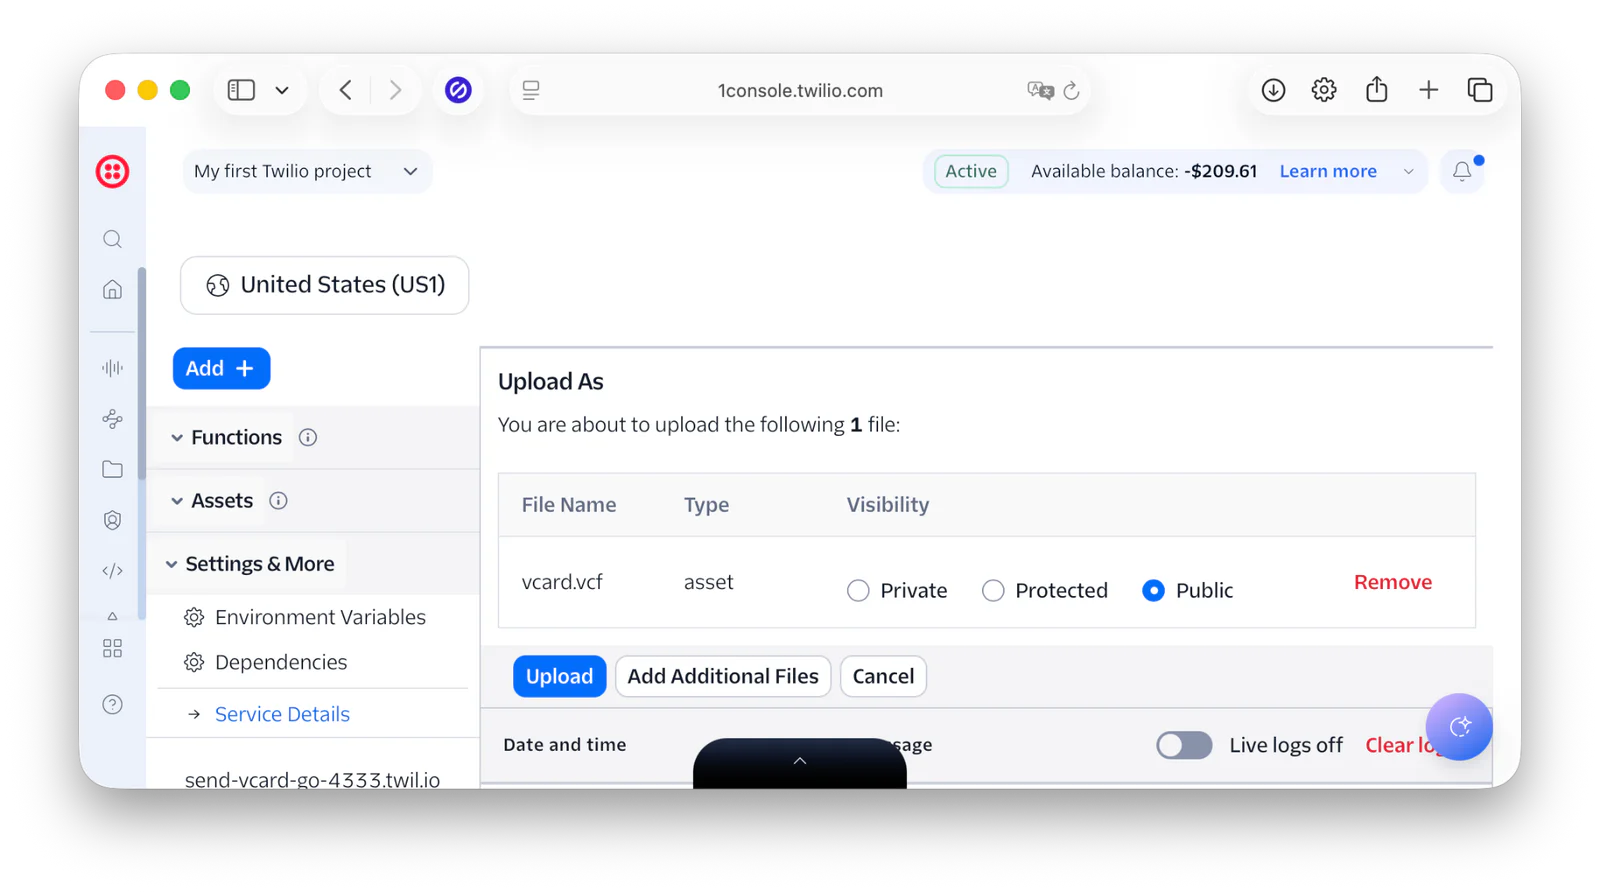
Then, click "Add +", and click Upload File. Pick the file from your filesystem. Set Visibility as Public, and click Upload.
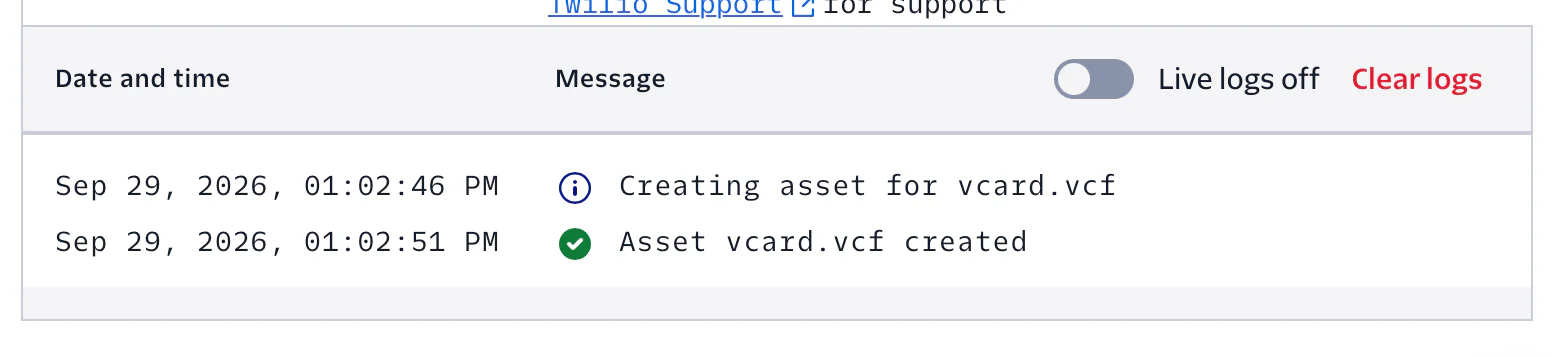
In the logs, you'll see "Asset <your file's name> created" when the file is uploaded.
Press Deploy All and wait for the service to deploy, which should take less than a minute. When deployed, expand the Assets menu and click the vertical ellipsis button next to the name of the file that you just uploaded. Now, click "Copy URL".
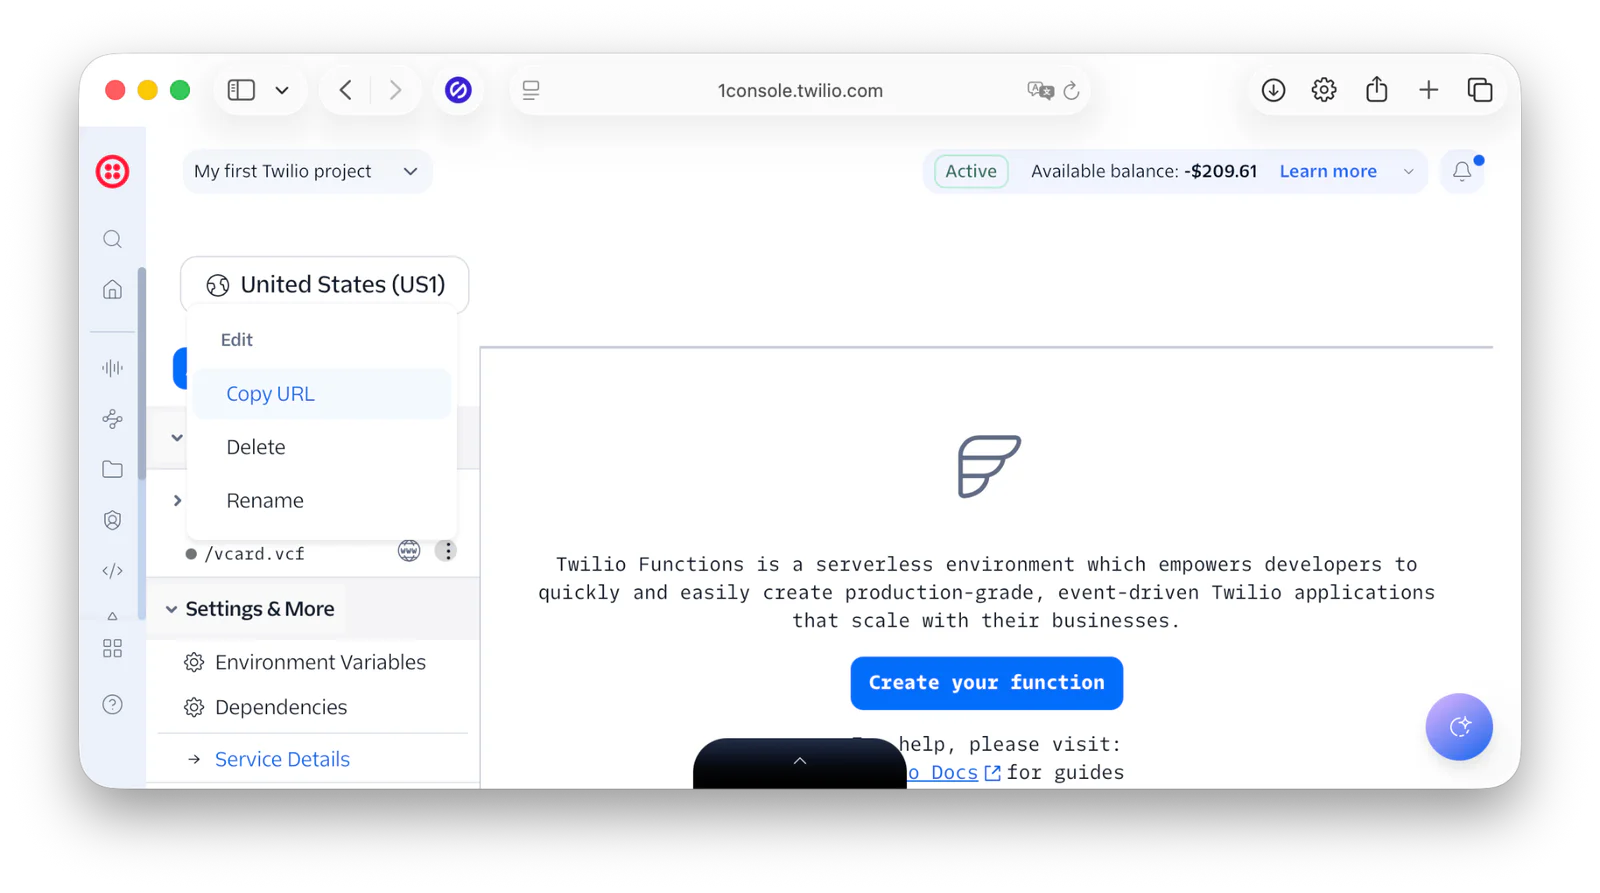
Now, paste the URL that you just copied as the value of TWILIO_ASSET_URL in .env.
Write the code to send a vCard
Now, let's write the code to send the vCard. Create another Go file in the project's top-level directory named send-vcard.go and paste the code below into the file.
The code loads the environment variables from .env, and then instantiates a new Twilio.RestClient object, transparently retrieving your Twilio Account SID and Auth Token from the respective environment variables; Twilio.RestClient is the core Go object for making RESTful calls to Twilio's APIs.
Then, it sets several SMS parameters, the sender, recipient, message body, and link to the vCard file (the media URL), and passes them to the call to client.Api.CreateMessage() to send the SMS.
Run the code
With the code complete, run the command below to send the vCard by SMS.
After the command's completed, you'll see "SMS sent successfully!" printed to the terminal, and you'll receive an SMS with a link to the vCard, similar to the screenshot below.
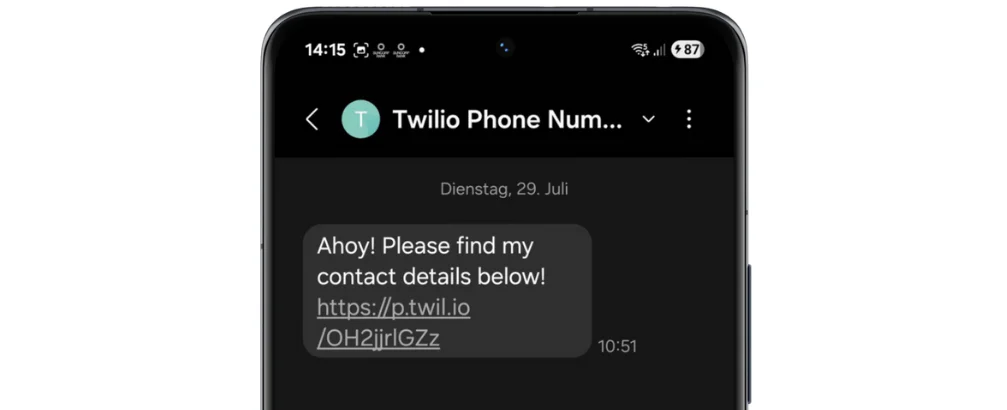
Open the link. You should see the vCard open in your phone's contact application, where you can then see all of the contained contact details.
That's how to create and send vCards with Go and Twilio
You've now learned how to create vCards, and how to send them via SMS, using Go and powered by Twilio's Programmable Messaging API. By doing so, you can save time and effort sharing contacts with friends when they ask you for them.
I hope that you've seen how they're much more effective and organised than sending details using either a messaging app or email. I've only touched on what vCard offers in this tutorial, so hope you will dive into the spec to see everything else on offer.
I'm excited to see what you build!
Matthew Setter is (primarily) the PHP, Go, and Rust editor on the Twilio Voices team. He’s also the author of Mezzio Essentials and Deploy with Docker Compose. You can find him at msetter[at]twilio.com. He's also on LinkedIn and GitHub.


Related Resources
Twilio Docs
From APIs to SDKs to sample apps
API reference documentation, SDKs, helper libraries, quickstarts, and tutorials for your language and platform.
Resource Center
The latest ebooks, industry reports, and webinars
Learn from customer engagement experts to improve your own communication.
Ahoy
Twilio's developer community hub
Best practices, code samples, and inspiration to build communications and digital engagement experiences.