How to Build Passwordless Auth With Twilio Verify in Go
Time to read:
August 19, 2026
Written by
AI generated summary
- Implement passwordless authentication to enhance security and simplify the login process.
- Use Twilio Verify in a Go API with routes for sending and verifying OTP codes via SMS.
- Follow step-by-step instructions to set up environment variables, dependencies, and route handling in Go.
This summary was generated by AI.
How to Build Passwordless Auth With Twilio Verify in Go
Typing or generating a unique password for every new account or website is a hassle. Although password managers help, passwordless auth (authentication) offers a more streamlined and secure alternative.
In this tutorial, you will learn about passwordless auth, and build a Go app that uses Twilio Verify to implement it.
Architecture
This application will be a small API with four routes:
- A GET and a POST route with the path "/". These display the sign-in form where users can enter their mobile phone number to receive the OTP code, and validate submissions of that form. If the form successfully validates, then an OTP code will be sent to the phone number provided.
- A GET and a POST route with the path "/verify". These display a form to validate the OTP code that the user received, and validate submissions of that form. After submission of the form, the user will see if the code was valid or not.
Prerequisites
Before you begin, ensure you have the following:
- A free Twilio account. Click here to create a free account if you are new to Twilio.
- Go (at least version 1.23). If you haven't installed it yet, follow the official installation guide.
- A phone that can receive SMS
- Your favourite text editor or IDE (such as neovim or Visual Studio Code)
What is passwordless auth?
Passwordless auth is an authentication method where the user does not need a password in order to log into an app or system. Rather, the user's mobile device receives a one-time code. In this authentication method, users are authenticated using other unique and more secure alternatives like one-time passwords (OTP), SMS, Passkeys, Silent Network Authentication (SNA), Voice, or email notification.
Here's a breakdown of how it works, using SMS:
- User initiation: When a user attempts to log in, instead of entering a password, they provide their phone number as their unique identifier and are redirected to a form where they can validate the OTP code that they will receive.
- OTP generation and delivery: The server initiates an OTP generation request with Twilio Verify. Twilio Verify then dispatches a unique, temporary code via SMS to the user.
- User verification: The user receives the OTP on their mobile device and input this code into the validation form.
- Code validation: Using Twilio Verify, the server verifies the entered OTP against the one that was sent, earlier. If the codes match, the user is successfully authenticated and granted access.
This approach significantly enhances security by leveraging the inherent security features of the user's mobile device as a second factor in the authentication process. It also eliminates the need for them to memorize passwords, thereby simplifying the authentication process and enhancing user convenience.
Passwordless authentication has additional advantages, including the following:
- Enhanced security: Reduces the risk of password-related breaches.
- Convenience: Eliminates the need for users to remember and manage multiple passwords.
- Reduced friction: Streamlines the login process, improving the user experience.
- Scalability: Easily scalable with Twilio's infrastructure.
Build the app
Step 1: Set up the project
Set up a new project directory with the required structure and initializing a new Go module, by running the following commands, where you store your Go projects:
If you're using Microsoft Windows, use the following command instead:
Step 2: Install the required dependencies
Next, install the required dependencies, by running the following:
In case you're not familiar with them, here's a short description of the dependencies that you just installed:
- GoDotEnv: It loads environment variables from a .env file
- Gorilla SecureCookie: It encodes and decodes authenticated and optionally encrypted cookie values
- Gorilla Sessions: It provides cookie and filesystem sessions and infrastructure for custom session backends.
- Twilio's Go Helper Library: Simplifies integrating with Twilio in Go
Now, open the project directory in your preferred text editor or IDE.
Step 3: Set the required environment variables
Dotenv files (commonly named .env) are used to store the configuration information that your app needs during development, separate from the application's code. For this tutorial, it will be your Twilio credentials (i.e., your Twilio Account SID and Auth Token) and a Verify Service SID.
In your project's top-level directory, create a file named .env. Then, in .env, add the three variables below.
With placeholders for the environment variables set in .env, you next need to retrieve the credentials to set as their values. To do that, sign into the Twilio Console. There, click the black and white up arrow at the bottom of the page, and you should see your Account SID and Auth Token in the Workbench; as shown in the image below.
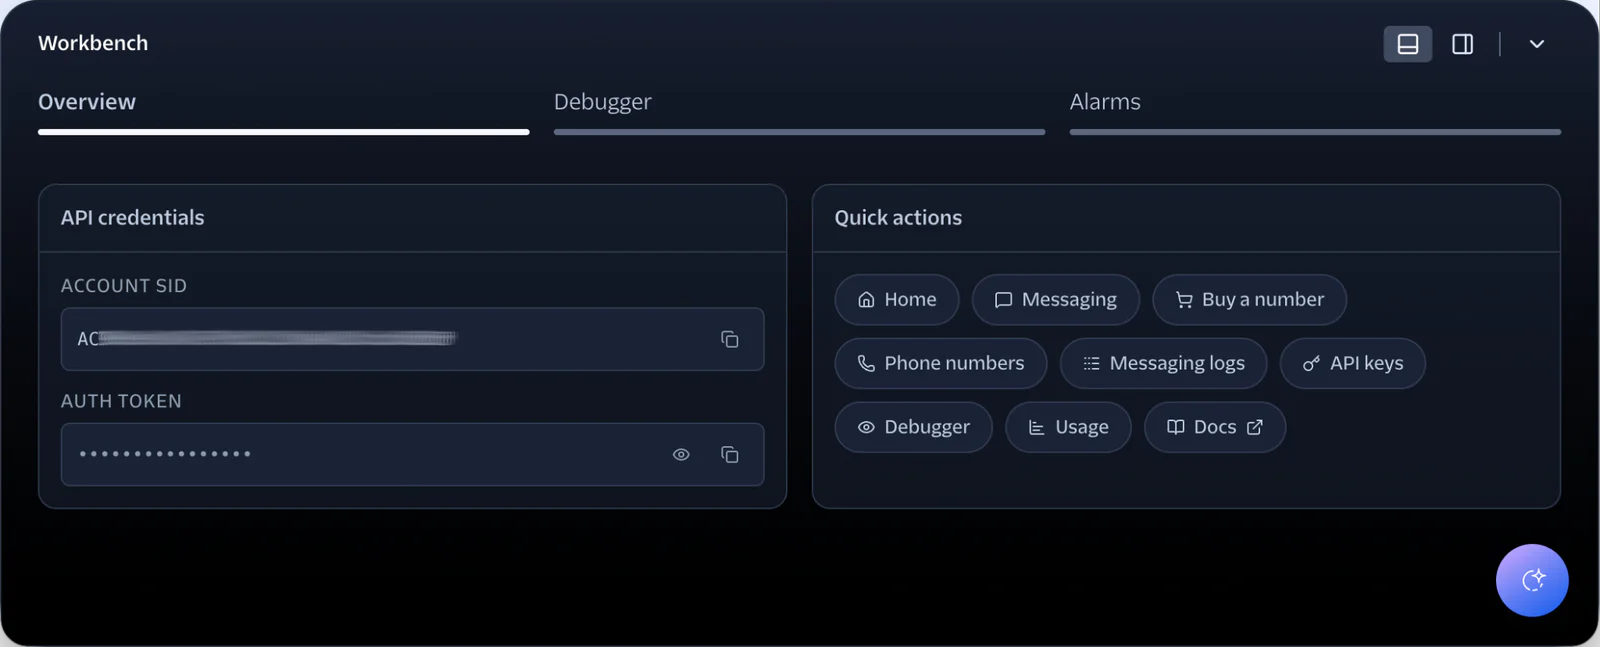
Copy these values and paste them into .env as the values for TWILIO_ACCOUNT_SID and TWILIO_AUTH_TOKEN.
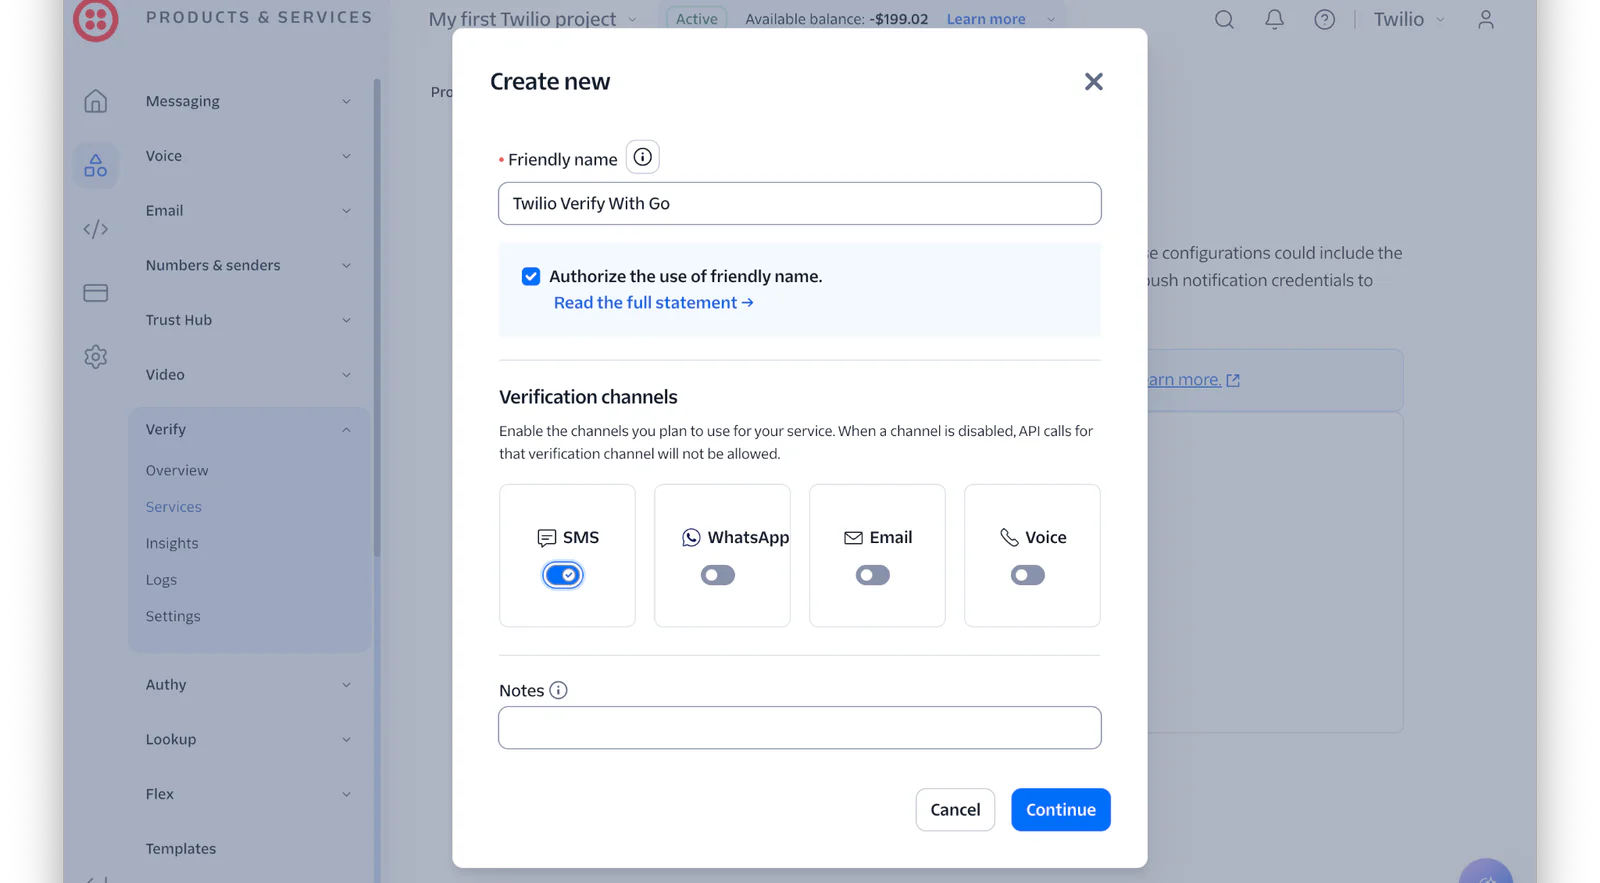
Next, navigate to Products and Services > Verify > Services. On this page, click Create new. Then, fill out the initial form with the configuration values shown in the screenshot below, and click Continue.
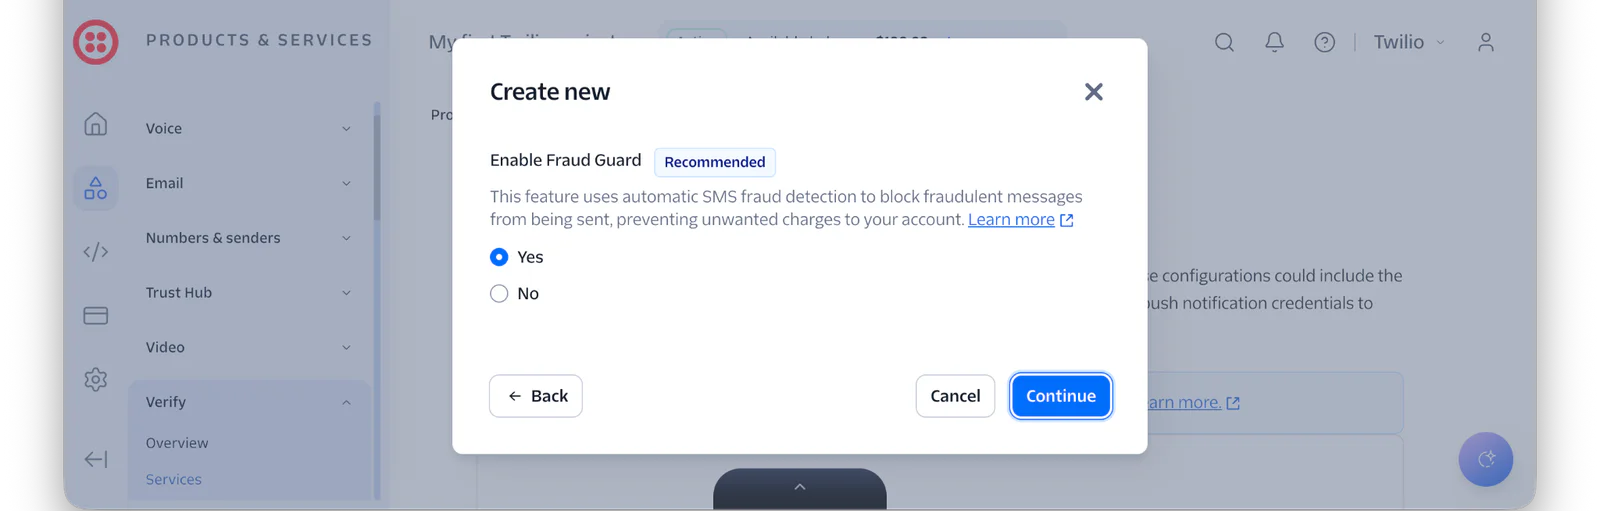
In the next step, leave Enable Fraud Guard set to "Yes" and click Continue to finish creating the service.
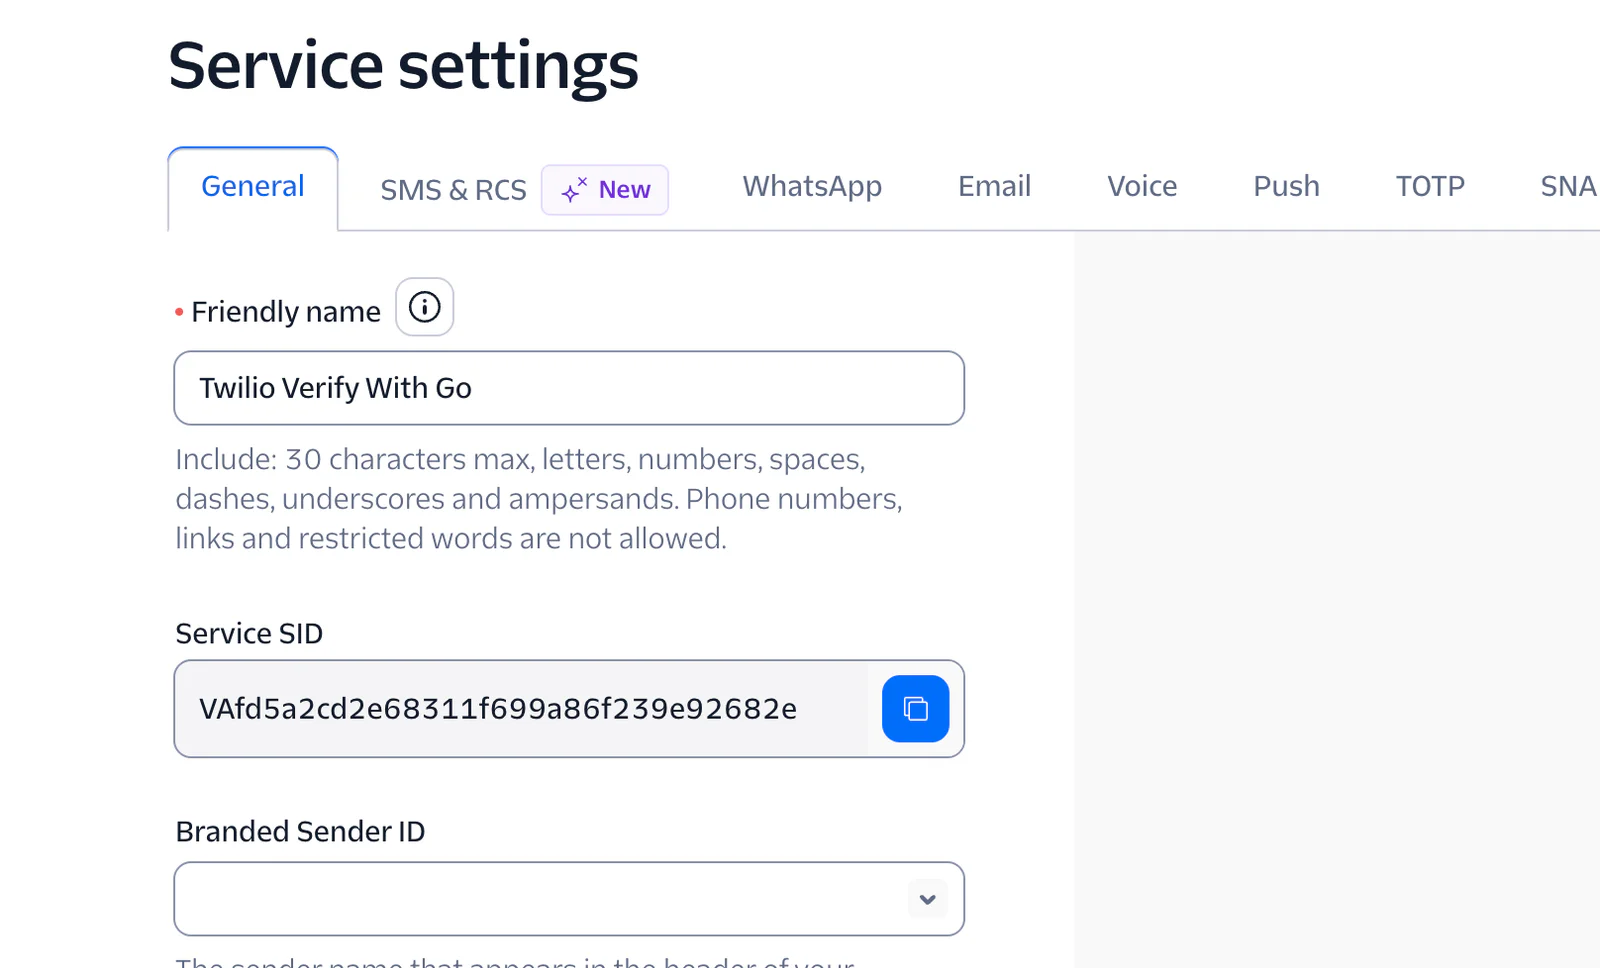
After creating the service, copy the Service SID and paste it into .env as the value of TWILIO_VERIFY_SERVICE_SID.
Step 4: Build the base Go application
Now, set up a basic web application using Go's net/http package. This web server will have four routes:
- A GET and a POST route with the path "/". These display the sign-in form where users can enter their mobile phone number to receive the OTP code, and validate submissions of that form. If the form successfully validates, then an OTP code will be sent to the phone number provided.
- A GET and a POST route with the path "/verify". These display a form to validate the OTP code that the user received, and validate submissions of that form. After submission of the form, the user will see if the code was valid or not.
Start by creating the skeleton of the application by creating a file named main.go, and pasting the code, below, into the file:
The code above:
- Loads environment variables from the variables defined in .env, using GoDotEnv
- Defines a custom struct named
Applicationthat stores the application's state; consisting of a Twilio Rest Client, that will be used to send OTP via SMS to the user, and the Verify Service's SID, required to send and verify the OTP. - Initialises an HTTP file server that serves the application's static assets from the assets directory. The only asset will be a CSS file for proper UI styling. You'll download it to the assets directory, shortly.
- Initialises a new router (or Servemux in Go-speak) and defines the first route. The route allows for static assets to be requested using the "/static/" URL path, e.g., "/static/css/styles.css". When requested, the application will strip the "/static" prefix and look for the remainder of the path in the assets directory. Using the example "/static/css/styles.css" from before, the application would then attempt to serve assets/css/styles.css if it exists.
- Starts the application listening on port 8080. If it fails to start because, for example, port 8080 was already in use, "Failed to start the application:" will be printed to the terminal's output. Otherwise, "The application's listening on port 8080" will be output.
Step 5: Add the ability to send an OTP
Now, you'll add the first of two features: the ability to send an OTP code, when requested by the user. To do that, add the following method on Application after the main() function.
The showSignInForm() function uses the html/template package to render templates/sign-in.tmpl. This function will be called in response to GET requests to the application's default route "/". If the template file either doesn't exist or cannot be rendered (for example, because the file's unreadable) the reason why will be logged to the terminal's output where the application was started, and an HTTP 500 Internal Server Error status code will be returned.
Now, in templates, create a new file named sign-in.tmpl, and in that file, paste the code below:
As you can see from the HTML above, it is a simplistic HTML page with a form, with a single field named "phone". Note that the field's type and inputmode attributes are set to "tel". This hints to browsers on mobile devices to render a virtual keyboard most appropriate for entering telephone data.
Then, back in main.go, add the following code after the showSignInForm() function.
Then, in main.go, add the following code in the main() function after the definition of the "/static" route:
Following that, add the following in main.go, before the main() function, and change "secret" to your desired secret key if desired:
And, add the following to the import list at the top of the file:
Stepping through the code snippets, the first one defines the sendOtpCode() function. This processes requests to the sign-in form. It retrieves the phone number parameter from the request, and stores it in the current session. Then, it attempts to send an OTP code to the user's phone number via SMS using Twilio Verify.
If the code was successfully sent, the user is redirected to the "Verify OTP code" form. Otherwise, the reason why the code couldn't be sent is logged to the terminal output, and an HTTP 500 status code is returned, along with the error.
The second code snippet adds the GET and POST variants of the default route ("/") to the application's routing table; the GET version is handled by showSignInForm(), and the POST version by sendOtpCode().
The third snippet initialises session support using Gorilla Sessions, storing session data in cookies. The fourth snippet adds in the final required import, to load the Verify V2 functionality from Twilio's official Go Helper Library.
Step 6: Add the ability to verify an OTP
You'll now add the functionality to verify OTP codes which the user receives. Start by adding the code below to the end of main.go.
The showVerifyOtpForm() method attempts to open and render templates/verify.tmpl. If that fails, an error message is logged to the terminal where the application was started, and an HTTP 500 status code is returned.
Then, in templates, create a new file named verify.tmpl and paste the code below into the file.
The HTML renders another, simplistic, form with a single field for the received OTP code. The field uses the pattern and maxlength field attributes to ensure that the only valid input is a 6-digit code. It also sets the inputmode attribute to "numeric" to have the browser display a keyboard appropriate for entering digits, making it easier for the user to only enter numeric input.
Now, create another file in templates named verification-status.tmpl and paste the code below into the file.
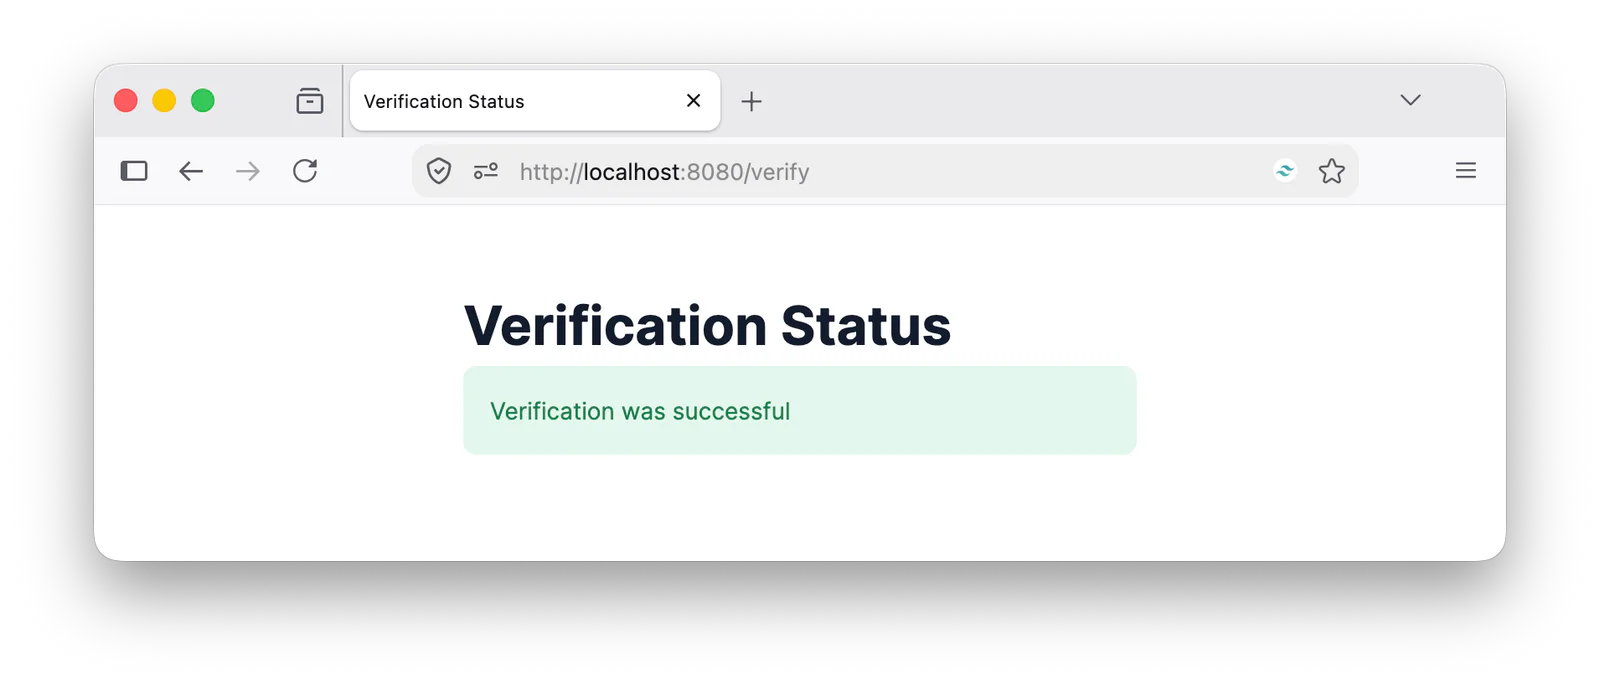
The HTML renders the message in the Message template variable, and styles it as either a success or error, based on the value of the Success template variable.
Now, add the following function to the end of main.go.
This function first retrieves the phone number from the session, then attempts to parse the form and retrieve the "code" parameter. If the "code" parameter wasn't present or was empty, the error is logged to the terminal's output, and an HTTP 400 Bad Request status code is returned.
Then, it uses the Twilio Rest Client, by calling the CreateVerificationCheck() function, to validate that the code supplied was sent to the user's phone number. If something goes wrong validating the code, the error's logged to the terminal's output and an HTTP 500 status code is returned.
Otherwise, a custom struct storing data to render in the verification-status.tmpl template, aptly named TemplateData, is initialised. If the status field of the response is "approved", its Messagefield is set to "Verification was successful" and its Success field is set to true. The function finishes up attempting to render the verification-status.tmpl template with the provided template data.
With that code added, the final thing to do is to add the following route definitions after the existing three in main().
These add the GET and POST forms of the "/verify" route, handled by the showVerifyOtpForm() and verifyOtpCode() functions, respectively.
Step 7: Download the application's CSS file
The last step in the process is to download the application's CSS file from the project's GitHub repository, to the project's assets/css directory, naming it styles.css.
Test that the application works
Finally, it's time to test that the code works as expected. Start the application by running the following command.
Your server will start on port 8080, as shown by terminal output similar to the following.
You can now navigate to http://localhost:8080 to test your passwordless auth flow.
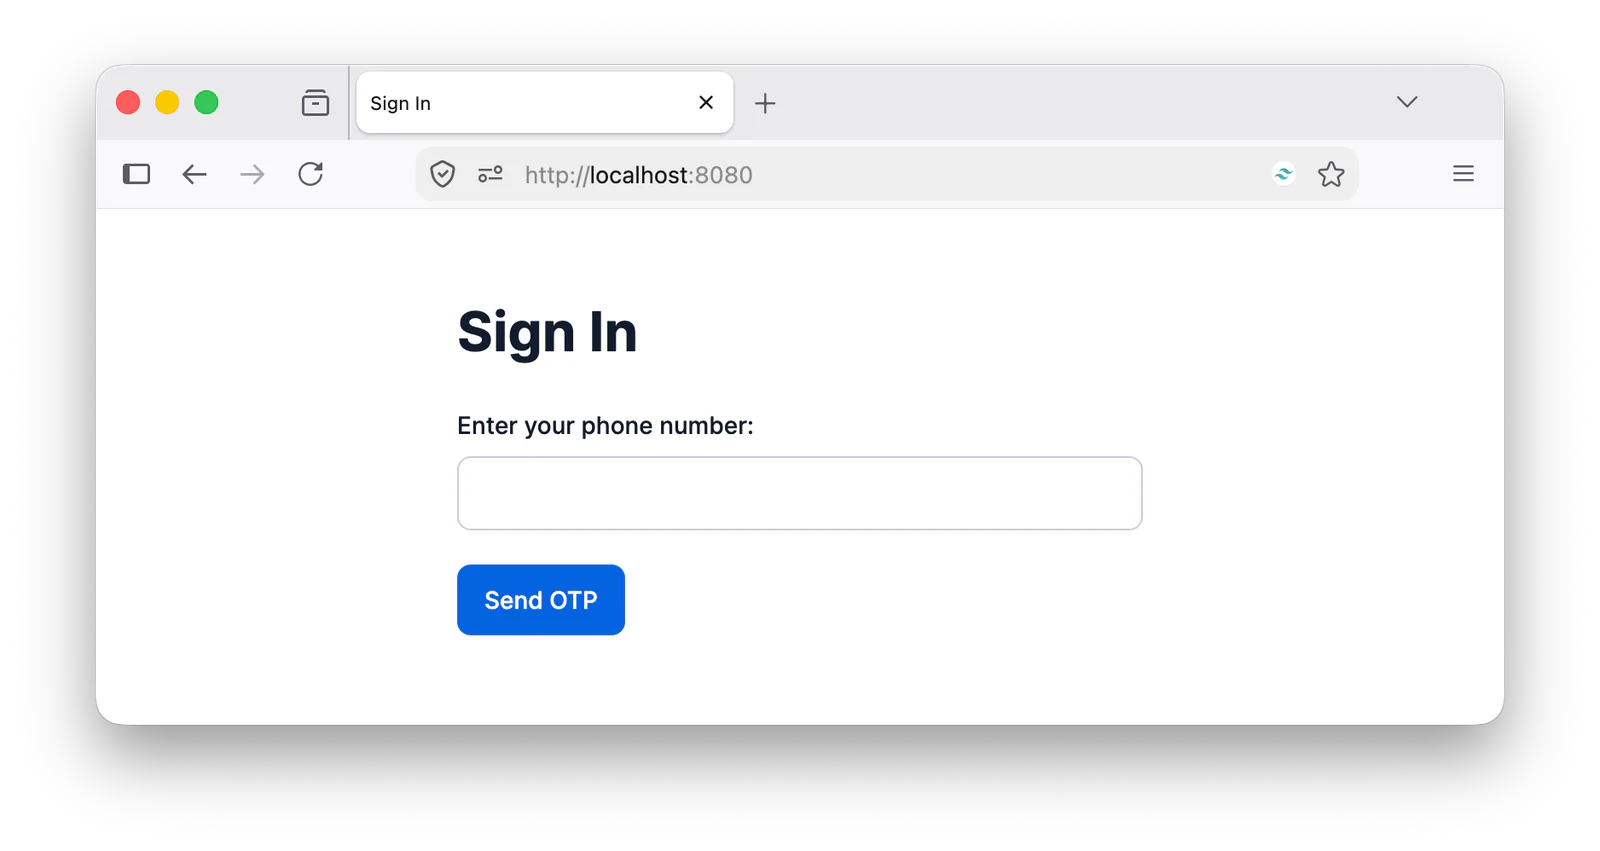
Enter your phone number and click Send OTP.
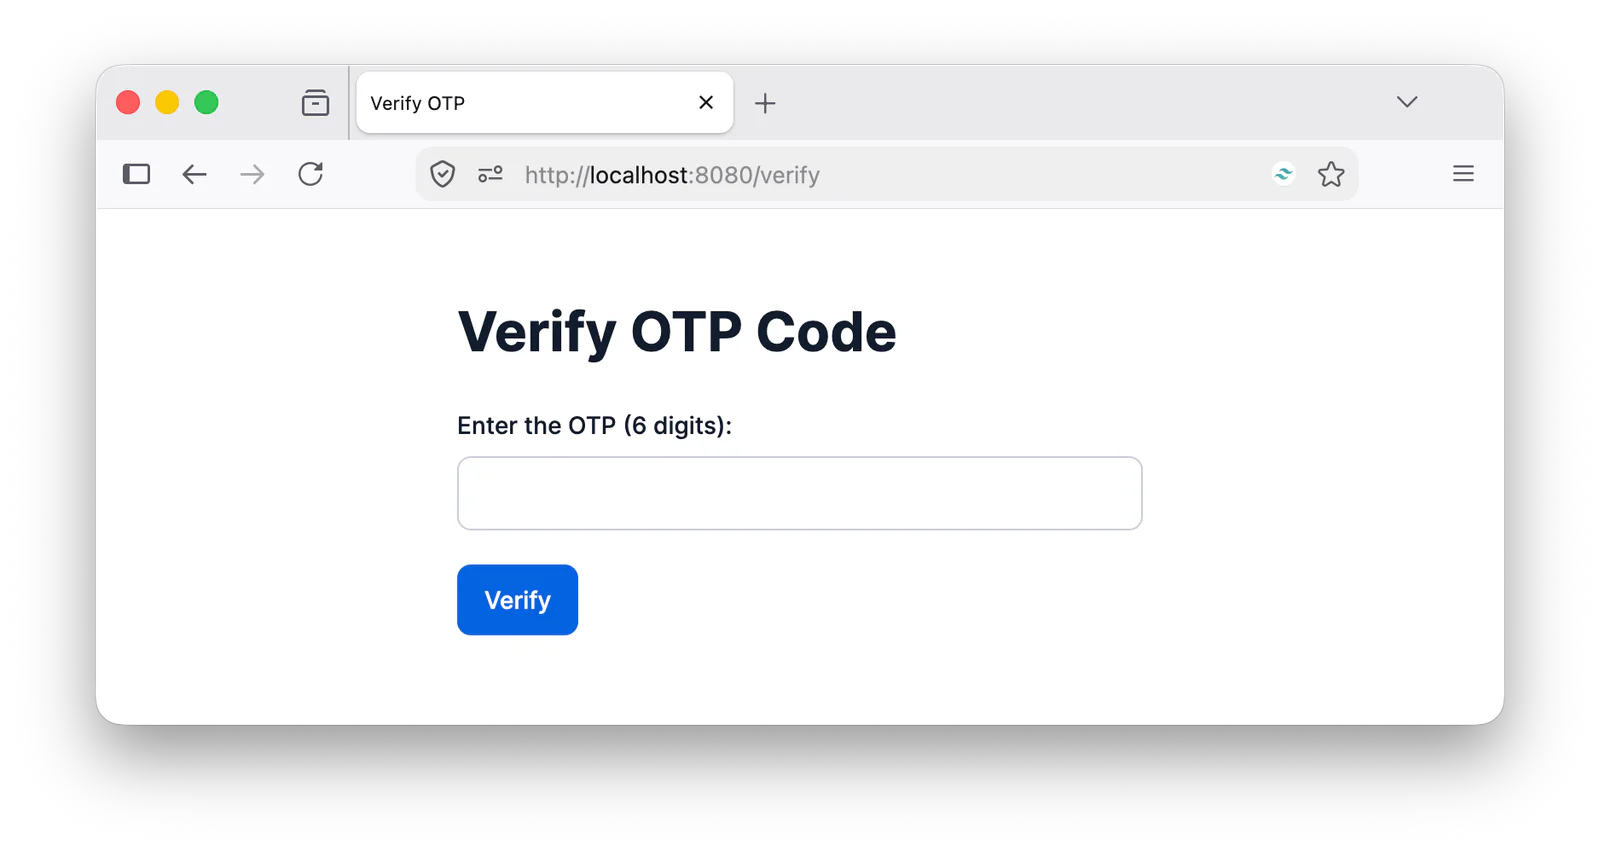
You will be redirected to the Verify OTP Code form. After you receive the code via SMS enter it into the form and submit the form. Whether the code was or not, you'll see a confirmation printed in the browser.
That's the essentials of implementing passwordless authentication in Go using Twilio Verify
Passwordless authentication using Go and Twilio Verify presents a compelling alternative to traditional password-based systems. It offers a blend of enhanced security and user convenience, making it an attractive option for modern applications. While passwordless auth introduces some extra complexity to your application, the benefits — especially regarding security and user experience — are worth the investment.
Matthew Setter is a PHP, Go, and Rust Editor in the Twilio Dev Content team. He’s also the author of Mezzio Essentials and Deploy with Docker Compose. You can find him at msetter@twilio.com. He's also on LinkedIn and GitHub.


Related Resources
Twilio Docs
From APIs to SDKs to sample apps
API reference documentation, SDKs, helper libraries, quickstarts, and tutorials for your language and platform.
Resource Center
The latest ebooks, industry reports, and webinars
Learn from customer engagement experts to improve your own communication.
Ahoy
Twilio's developer community hub
Best practices, code samples, and inspiration to build communications and digital engagement experiences.