Augment Voice Calls with Twilio Conversation Intelligence Using Node.js
Time to read:
September 30, 2026
Written by
Augment Voice Calls with Twilio Conversation Intelligence Using Node.js
You know how to build a voice AI agent from scratch, one that supports speech recognition, text-to-speech, turn detection, and real-time audio streaming — all at low latency. But, what if you could also analyze customer conversations in real time and collect useful data insights for future calls?
With Twilio Conversation Intelligence and Conversation Orchestrator, backed by Conversation Memory, you can!
Specifically, in this tutorial you’re going to learn how to use these three technologies together to retrieve a short summary of each customer call, and an analysis of the caller’s sentiment. What’s more, you’ll also see whether your agent followed the guidelines you set for it. All of this information will then be persisted to a SQLite database, so that you can make use of it later.
Programming language support
This tutorial is geared toward Node.js developers. If you would like to build this project in a different programming language, see the following options:
Architecture
As this tutorial adds three new technologies to the previous application, here’s a quick overview of how the new functionality works.
You will add a new route which receives a POST (webhook) request from Twilio after customer calls end. The request body will be a JSON string that contains, among other things, a short summary of the call, an assessment of the caller’s sentiment, and how the agent adhered to a series of criteria. That information will be extracted from the request and then persisted to the application’s SQLite database.
You’re not going to do more with the received information. But, there are links at the end of the tutorial showing how you could continue building on the changes made in this tutorial, should you want to.
Prerequisites
To follow along with the tutorial, you will need the following:
- A free Twilio account — Sign up for an account here
- A voice-capable Twilio phone number
- The Owl Air phone agent from the previous tutorial, or any Conversation Relay-based agent built with Node.js and Express
- Node.js v22 or higher installed on your machine
- An OpenAI API key
- The SQLite Command Line Shell, or your preferred database admin tool (which has SQLite support)
- Git
- ngrok or a similar tool, to expose your local server to Twilio
Build the app
Step 1: Set up Conversation Orchestrator and Conversation Memory
Before you can set up Conversation Intelligence, which does most of the work, you need to create a Memory Store and Conversation Configuration.
To do that, sign in to the Twilio Console, and go to Products & Services > Conversation Orchestrator > Conversation configurations. There, click Create a Conversation configuration. On the Name Configuration step, enter a name and description, then click Next.
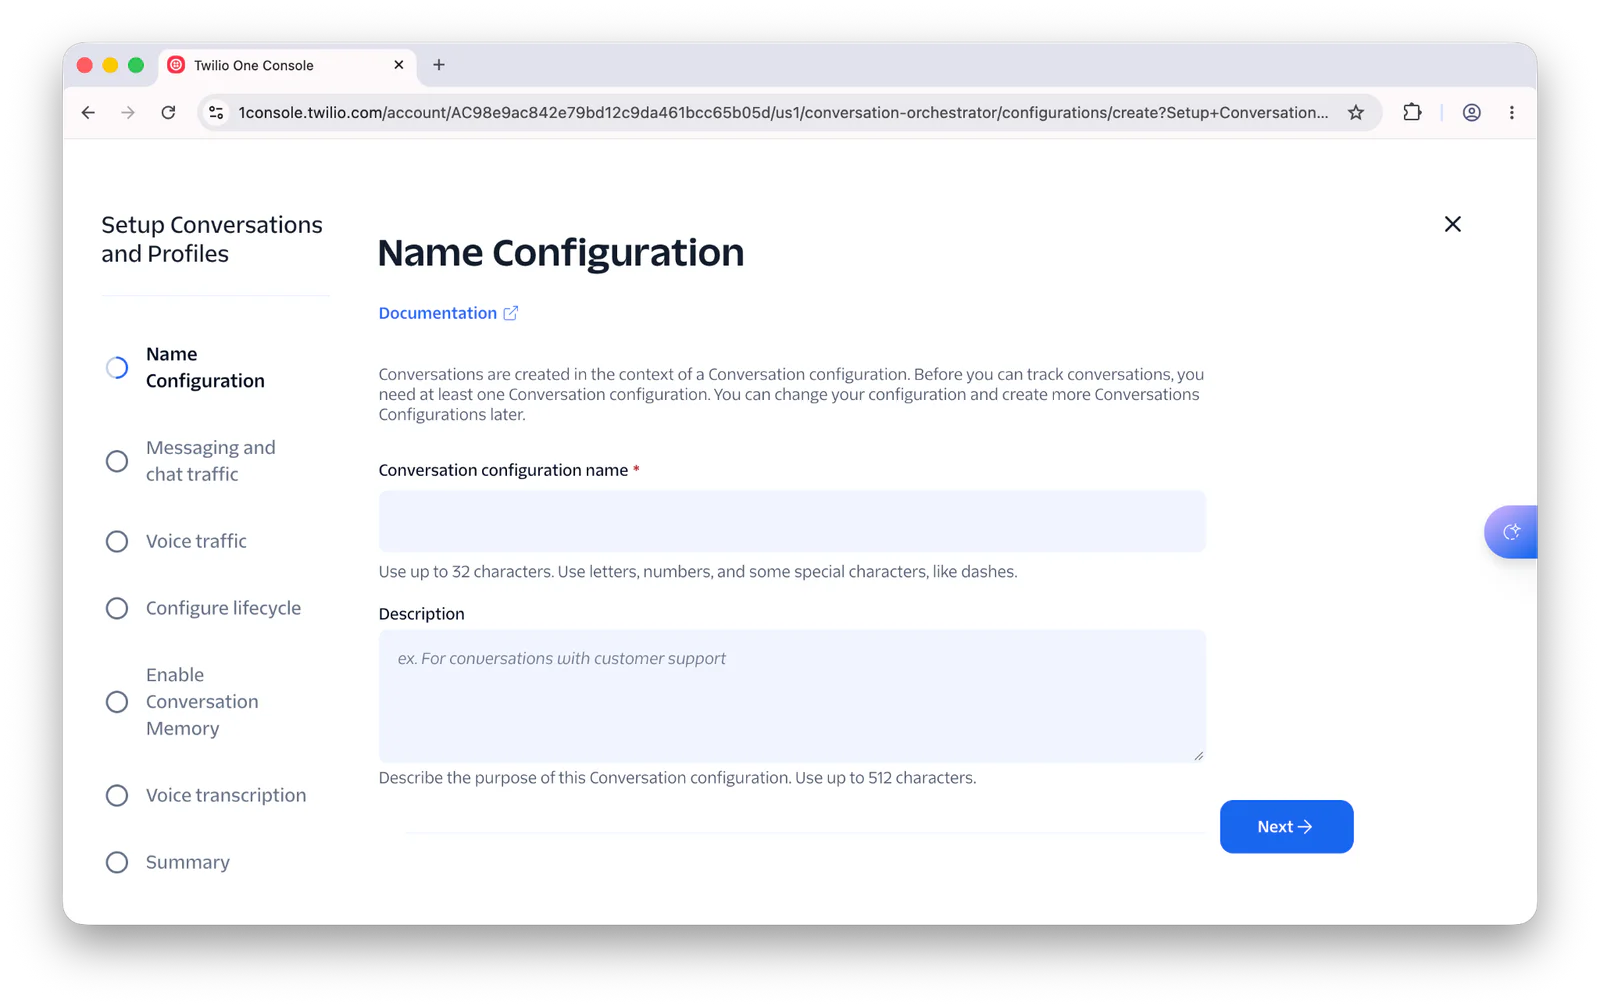
On the Messaging and chat traffic step, click Next. On the Voice traffic step, scroll down and enable the Set up automatic capture checkbox. From the Voice phone numbers list, select your Twilio phone number, then click Next.
Now, on the Configure lifecycle step click Next. After that, on the Enable Conversation Memory step, create a memory store, by clicking Create new memory store, entering a name in the Memory store name field, and clicking Save.
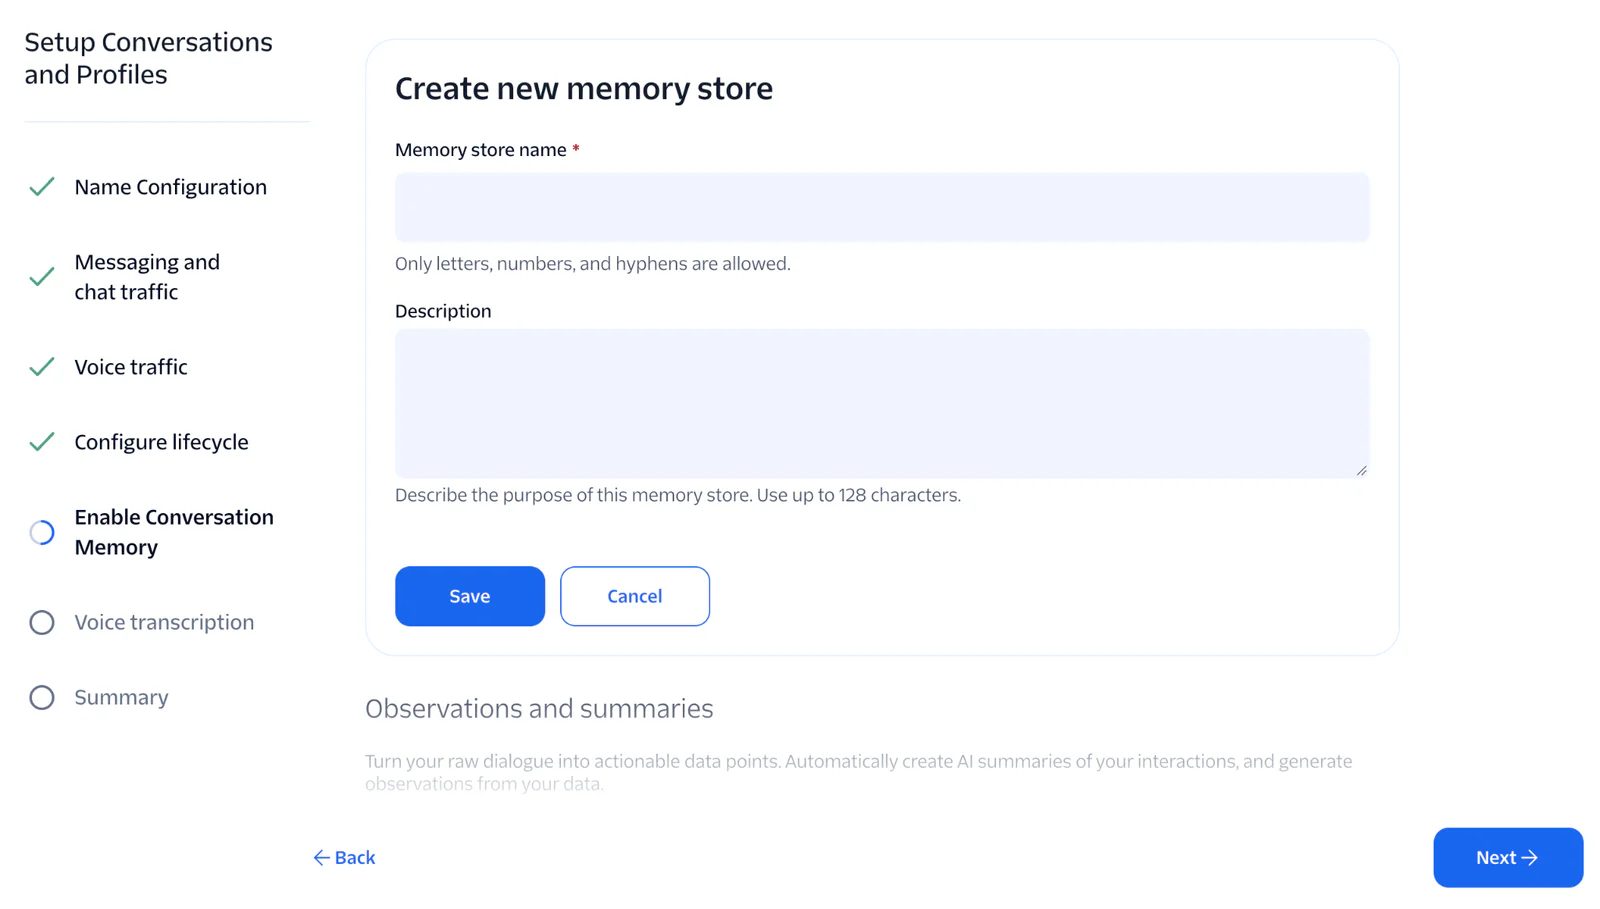
From the Memory store list, select the memory store you just created, leave Turn on observations and summaries enabled, and click Next.
Finally, on the Summary step, review your settings and click Create Conversation configuration. Copy the conversation configuration ID for use later.
Step 2: Set up Conversation Intelligence
Before you can complete this step, you need to make the application publicly accessible on the internet, as you’ll need the ngrok URL later in this section. In a new terminal window, run the command below to create a connection to the app on port 8000.
Next, go to Products & Services > Conversation Intelligence > Intelligence configurations. There, click Create Intelligence configuration. Add a name, description, and, in the Attach Conversation configurations section, select the name of the Conversation configuration that you created in the previous step, and click Submit.
With that done, in Intelligence configurations, click Create rule next to the Intelligence configuration which you just created. Then, in the Add language operators section, enable Sentiment, Summary, and Script-Adherence, and click Next.
Now, in the Script-Adherence section, at the bottom of the Set Parameters step, add the following text into the script field and click Next.
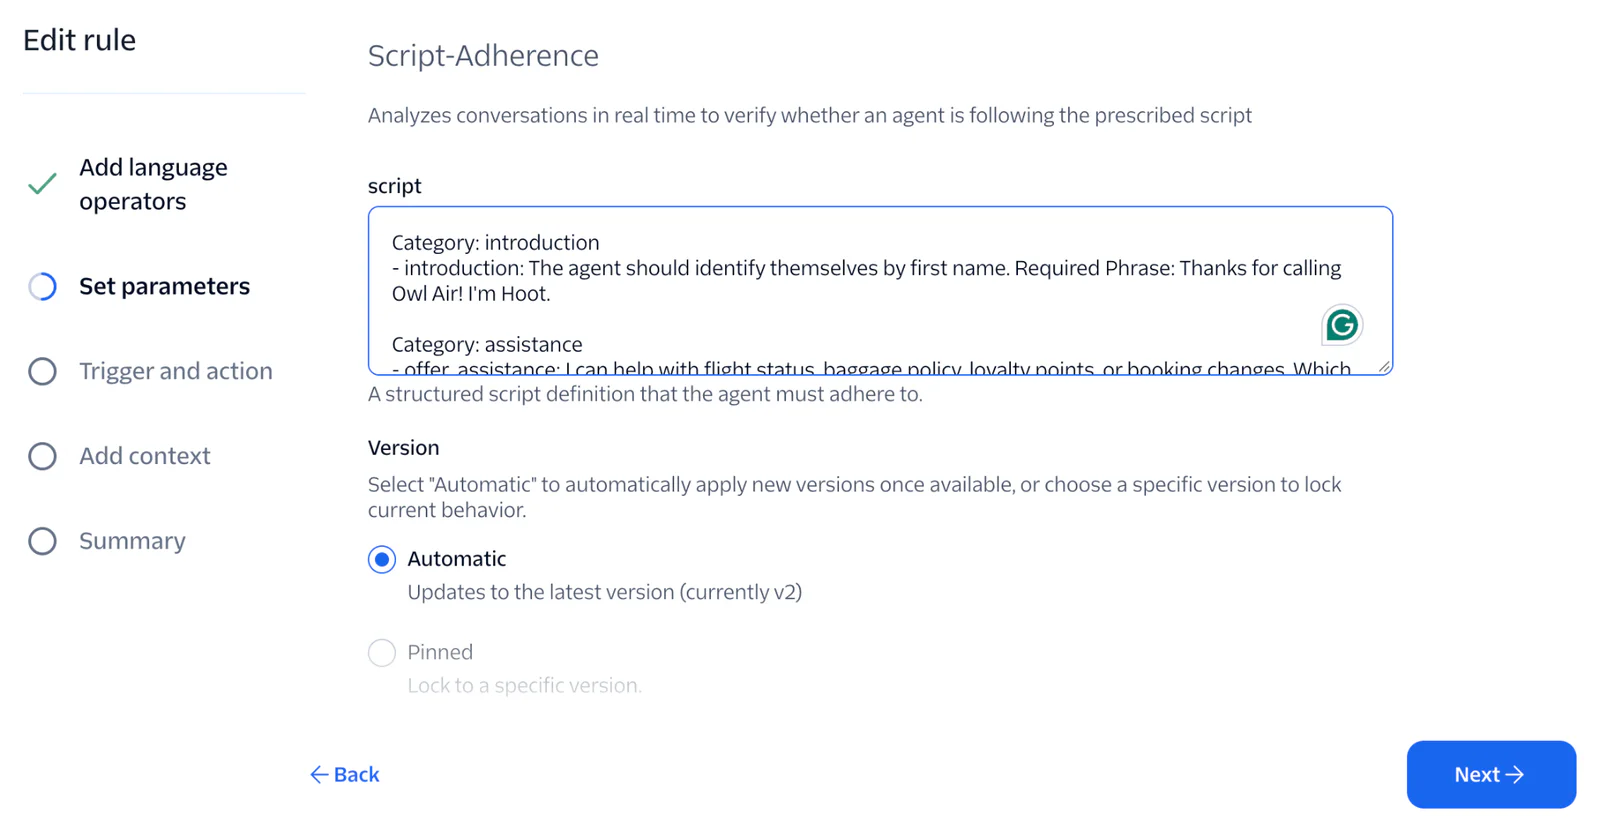
Now, on the Trigger and action step, choose At conversation end in the Trigger section. Then, in the Action section, paste your ngrok Forwarding URL plus “/intelligence-results” in the Webhook action field (for example, https://1234abcd.ngrok.app/intelligence-results). Click Next.
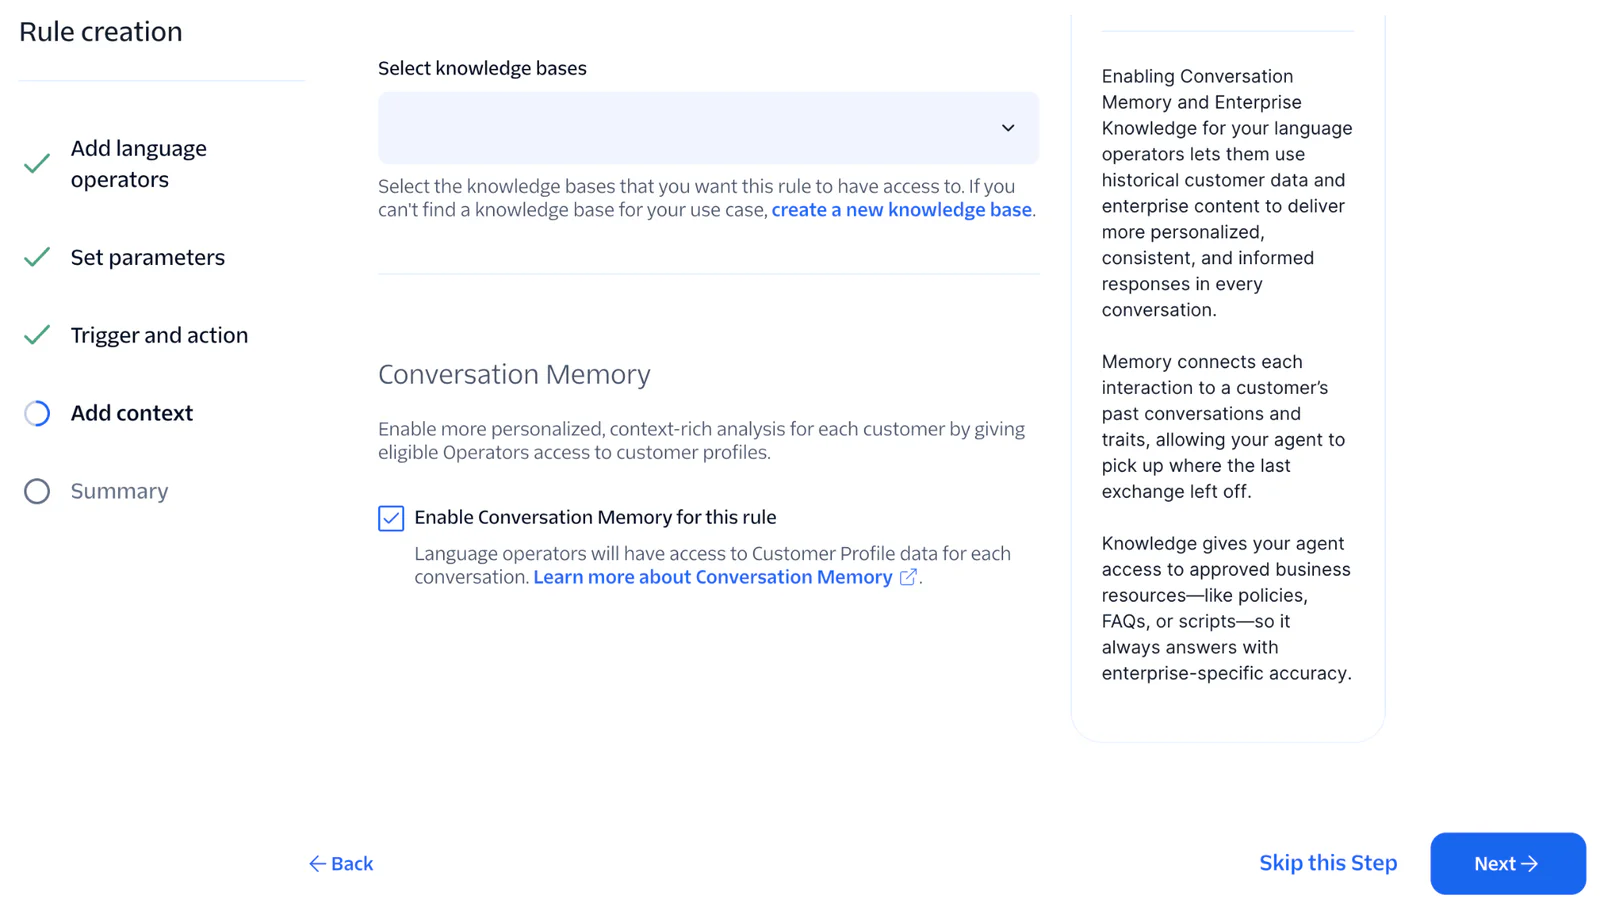
In the Add context step, scroll down to the Conversation Memory section and enable Enable Conversation Memory for this rule and click Next. In the Summary step, click Create rule.
Step 3: Update the existing project structure
Now, it’s time to start augmenting the Node.js code. But, before you can do that, you have to add a few new directories. In your terminal, change into the root directory of your Owl Air project (the directory containing package.json), and run the following command.
The data/database directory will store the application’s SQLite database and a SQL file defining the database’s schema. The handlers directory will contain the code that handles the webhook request. The services directory will contain helper code for talking to the database and to Twilio. The types/operator-results directory will contain a series of plain JavaScript classes which will store and model the information extracted from the webhook received from Twilio; you’ll create those classes shortly.
Step 4: Set up the application’s database
Create a new file named dump.sql in the data/database directory and paste the following SQL into that file.
The instructions:
- Enable SQLite’s WAL (Write-Ahead Logging) mode (which, among other benefits, significantly improves performance)
- Enable foreign key support
- Define three tables:
- intelligence_results: stores the core information about the conversation
- operators: stores the information extracted by Conversation Intelligence, such as the call summary and sentiment. The
operator_idcolumn gives each record a unique, auto-incrementing ID - operator_script_adherence_categories: stores the script adherence information, linking it to the relevant record in
operatorsthrough itsoperator_id
It’s not the most sophisticated schema, but it can store the information in a maintainable way.
Now, use SQLite’s Command-Line Shell (or your preferred database management tool) to provision the database with the following command.
The command prints wal, confirming that WAL mode is enabled, and creates the database file data/database/database.sqlite3.
Step 5: Create the Conversation Intelligence route
Add the required packages
The application needs two extra packages: better-sqlite3, to simplify interacting with the application’s SQLite database, and the Twilio Node.js Helper Library, to query Twilio’s Conversations API. It also uses dotenv to load your credentials from a .env file. To install them, run the following command in your terminal, from the root directory of your project.
If your project already has twilio or dotenv installed, npm updates them to the latest version.
Create a route and handler for processing the webhook
Next, create the handler which processes the webhook request. In the handlers directory, create a new file named intelligence-results-handler.js. You’ll add the code to this file in two parts.
First, paste the code below into the file.
The importOperator() function converts one operator result from the webhook into an object. It instantiates a Sentiment object from the result.label element, a Summary object from the result.text element, and a ScriptAdherence object from the result.categories element. Each category is marked as met when its criteria_met value is Succeeded. If Conversation Intelligence sends an operator that the app doesn’t know about, the function returns null so the operator can be skipped.
The ?. (optional chaining) and ?? (nullish coalescing) operators protect the code from missing data. For example, data.result?.label ?? '' returns an empty string instead of throwing an error if result or label is missing.
Now, paste the code below at the bottom of the same file, after the importOperator() function.
The createIntelligenceResultsHandler() function is the central focus of the file. It receives the Twilio client and the database service as arguments, and returns an Express route handler that uses them. Passing dependencies in this way, instead of creating them inside the handler, keeps the handler small and makes it easy to swap in test versions later.
The returned handler is called when the “/intelligence-results” route is requested. It starts off by reading the JSON request body, which Express has already parsed into a JavaScript object, before progressively extracting the essential information from it. This is the conversation ID (the conversation’s unique identifier), and the details that Conversation Intelligence determined about the call, contained in the operatorResults element, using the importOperator() function.
With the relevant information collected, the handler makes a call to the Conversations (v2) API to get the start and end time of the call (details which aren’t available in the received webhook data). The Twilio Node.js Helper Library returns these as JavaScript Date objects in the createdAt and updatedAt properties. Then, using the DatabaseService’s recordCall() function, the collated information is persisted to the SQLite database. If anything goes wrong, the error is logged to the terminal.
Finally, the handler responds to Twilio with a JSON response, confirming that the webhook was received.
Create the plain JavaScript classes
Now, it’s time to create the classes to store the Conversation Intelligence data. Start off by creating a file named summary.js in types/operator-results, and paste the code, below, into the file.
Then, create a file named sentiment.js in types/operator-results, and paste the code, below, into the file.
Create another file, this time named script-adherence.js in types/operator-results, and paste the code, below, into the file.
The categories property holds a list of Category objects, one for each category in the script. Create a file named category.js in types/operator-results, and paste the code, below, into the file.
Finally, create a file named index.js in types/operator-results, and paste the code, below, into the file.
This file gathers all four classes in one place. When other files call require('../types/operator-results'), Node.js loads this index.js file automatically, so they can import every class with a single line.
JavaScript doesn’t have interfaces, so there’s no equivalent of a shared interface that the classes must implement. Instead, Summary, Sentiment, and ScriptAdherence each provide a getValue() method. This makes it simpler to work with them in DatabaseService, which you’ll create shortly, as it can call getValue() on any of them without checking which class it is.
Update the application’s routing table
Next, you need to register the new route with Express. To do that, open your project’s index.js file in the root directory.
If the file doesn’t already load environment variables with dotenv, add the following line as the very first line of the file.
Then, add the following require statements near the top of the file, below your existing require statements.
You’ll create the database-service.js and twilio-client.js files in the next two sections.
Now, add the code below after the line where you create your Express app (const app = express();), and above the app.listen() call.
This code creates the Twilio client and the database service once, when the app starts, and passes them to the handler. The path.join() function builds the full path to the SQLite database file, so it’s found no matter which directory you start the app from.
The new route accepts only POST requests to the “/intelligence-results” endpoint, passing requests through the express.json() middleware (which parses JSON request bodies into req.body) and then to the handler. Because express.json() is added to this route only, it doesn’t change how your existing routes, such as the one that returns TwiML, process their requests.
Create the database service
It’s time to create the database service which the handler uses to simplify persisting the retrieved webhook data into the application’s database. In services, create a file named database-service.js, and paste the code below into the file.
Here’s what the code does:
- The
formatDate()helper function converts a JavaScriptDateinto a string such as2026-09-18 01:10:41, which is how the call start and end times are stored. - The
getOperatorType()helper function returns the value stored in theoperator_typecolumn, based on which class the operator is an instance of. - The constructor opens the SQLite database, turns on foreign key support for the connection, and creates three prepared statements, one for each table. A prepared statement is an SQL query with named placeholders, such as
@conversationId, which better-sqlite3 fills in with values when you callrun(). Using placeholders, instead of building SQL strings by hand, protects the database from SQL injection. - The
recordCall()function inserts one record intointelligence_results, then one record intooperatorsfor each operator. For theScriptAdherenceoperator, it uses the ID of the newly inserted operator record (lastInsertRowid) to link each category to it inoperator_script_adherence_categories.
All of the inserts are wrapped in a transaction, using this.db.transaction(). This means that either every record for the call is saved, or, if something goes wrong part way through, none of them are. That way, your database never contains half of a call’s results.
You may notice that recordCall() isn’t an async function. better-sqlite3 runs its queries synchronously, which keeps the code short. For a local SQLite database, the queries finish quickly enough that this won’t slow down your voice agent.
Create a Twilio REST client
Now, you need to create a Twilio REST client, as the application will need it to query the Conversations (v2) API to retrieve a conversation’s start and end time in the handler. To do that, in services, create a file named twilio-client.js, and in that file paste the code below.
The createTwilioClient() function creates a new Twilio client with your Account SID and Auth Token, which are read from environment variables. You’ll add these values to your .env file in the next step.
Step 6: Start the application
With the code now complete, you need to make sure that the application has all of the credentials it needs. Open the .env file in the root directory of your project (or create it, if it doesn’t exist), and make sure it contains the following four environment variables.
Replace each XXXXXX placeholder with its respective value:
TWILIO_ACCOUNT_SIDandTWILIO_AUTH_TOKEN: your Twilio Account SID and Auth Token, which you can find in the Account Info section of the Twilio ConsoleDOMAIN: your ngrok Forwarding URL, which your Owl Air agent uses to build its WebSocket URLOPENAI_API_KEY: your OpenAI API key, from the OpenAI dashboard
If your Owl Air agent already uses different names for any of these values, keep the names that the rest of your code expects.
Save the file. Then, start the application by running the command below in your terminal, from the root directory of your project.
You will see output similar to the example below, after the application starts. The exact message depends on the console.log() call in your existing app.listen() code.
Test that the app works as expected
With the application running, call your Twilio phone number. You should hear Hoot’s greeting within a second or two of the call connecting:
“Thanks for calling Owl Air! I’m Hoot. I can help with flight status, baggage policy, loyalty points, or booking changes. Which of those can I help you with?”
Then, like when you tested the first version of the app, try a few test questions to verify the full flow is working:
- “What’s the baggage policy?”: Hoot should describe carry-on and checked bag rules in natural spoken language.
- “How do loyalty points work?”: Hoot should explain the earn and redemption rates.
- “Can I change my flight?”: Hoot should give the change fee policy, with amounts spelled out in words.
After the call finishes, using your database tool of choice, have a look at the records in the application's database. There, you should see a summary of the conversation, along with the related operator information.
Conclusion
You’ve now learned how to use Conversation Intelligence, Conversation Orchestrator, and Conversation Memory, as well as the Conversations API (V2), to retrieve a short summary of each call and an analysis of the caller’s sentiment, and persist the information to a SQLite database, so that you can make use of it later. What’s more, you also know whether your agent followed the guidelines you set for it.
But don’t stop there! Now that the application can store conversation information, why not add a route for viewing a summary of all stored conversations, and one for viewing individual conversation details?
Then, I strongly encourage you to learn more about Conversation Intelligence, Conversation Orchestrator, and Conversation Memory, as well as the Conversations API (V2).
Dhruv Patel is a Developer on Twilio’s Developer Voices team. You can find Dhruv working in a coffee shop with a glass of cold brew or he can be reached at dhrpatel [at] twilio.com.


Related Resources
Twilio Docs
From APIs to SDKs to sample apps
API reference documentation, SDKs, helper libraries, quickstarts, and tutorials for your language and platform.
Resource Center
The latest ebooks, industry reports, and webinars
Learn from customer engagement experts to improve your own communication.
Ahoy
Twilio's developer community hub
Best practices, code samples, and inspiration to build communications and digital engagement experiences.