Build Persistent Customer Memory with Twilio Agent Connect and Conversation Intelligence
Time to read:
August 14, 2026
Written by
Reviewed by
AI generated summary
- TAC and Flex integration streamlines AI-to-human escalation.
- Conversational Intelligence extracts customer preferences for future interactions.
- Twilio Memory API enables persistent customer profiling without a manual database.
This summary was generated by AI.
Build Persistent Customer Memory with Twilio Agent Connect and Conversation Intelligence
Introduction
What if your AI assistant already knew a customer's preferred language, favorite car model, and color before they said a word? That's exactly what this tutorial builds.
You'll integrate Twilio Agent Connect (TAC) with Twilio Flex to handle AI-to-human escalations, and layer on Twilio Conversational Intelligence to extract customer preferences from conversation summaries and persist them as traits in Twilio's Conversation Memory. The next time that customer reaches out, the AI assistant picks up right where the relationship left off.
By the end of the tutorial, you'll have a working escalation pipeline, an OpenAI-powered trait extractor, and a memory profile that survives across sessions with no database of your own to manage.
How it works
Here's the end-to-end flow before you write a single line of code:
- A customer contacts your Twilio number (voice or SMS), and TAC routes them to the AI assistant.
- The AI assistant handles the conversation. If the customer asks to speak to a human, TAC triggers a Twilio Studio handoff flow and routes them to a live Flex agent.
- The conversation ends, and Conversational Intelligence generates a plain-language summary of the exchange.
- A webhook fires your Twilio Function. The function calls OpenAI, which extracts structured preferences (model, color, language, etc.) from the summary and writes them as traits to the customer's Memory profile via the Twilio Memory API.
- The next time the customer calls, TAC fetches the Memory profile at session start and injects those traits into the system prompt, so the AI responds in their preferred language automatically, without being asked.
Prerequisites
To deploy this project, you will need:
- Python 3.10 or newer installed on your local machine (tested on Python 3.14.4).
- A Twilio account with an active, SMS- and voice-capable phone number.
- A Twilio Flex instance configured and running.
- An OpenAI account alongside a valid API key.
- A Twilio Functions service (you'll create this in Step 7).
- ngrok installed to expose your localhost to Twilio's webhooks.
- A phone to place test calls and verify the escalation workflow.
Build the app
Step 1: Project setup and initialization
Open your terminal, navigate to your project directory, and install the required SDKs and dependencies:
Create a .env file in the same folder. Open .env in your preferred text editor and add the following fields:
The empty variables at the bottom fill in as you progress through the next steps.
Step 2: Provision Flex and configure Conversations (classic)
If you don't have a Flex instance running yet, follow the Twilio Flex Account Setup Guide to set up Flex in your account. This automatically creates a default Flex Conversation Service behind the scenes.
Next, create an address rule so Twilio knows what to do when a text hits your phone number:
In the Twilio Console, navigate to Conversations (Classic) and select Addresses.
Click Create Address, or select your active Twilio number from the list.
Under Address Configuration, set Auto-create a Conversation to Yes.
For Conversation Service, select Flex Conversation Service from the dropdown.
Quick sanity check: make sure this matches the service listed under Conversations (Classic) > Settings > Default, or your routing will break.
For the Want to set up an integration? prompt, select No. A hardcoded webhook is not needed here, because your Studio flow and Conversation Orchestrator will handle the handoff logic dynamically.
Save your changes.
Step 3: Configure the Twilio Conversation Orchestrator
The Conversation Orchestrator handles interaction traffic and acts as the brains behind your routing and profiling.
Open your Twilio Console and navigate to the Conversation Orchestrator dashboard.
Create a new configuration and provide a distinct Conversation configuration name.
For Conversation grouping, select Group by profile.
Under the Webhook section, leave Webhook URL and HTTP Method empty for now. You'll return to update these once your tunnel is live in Step 5.
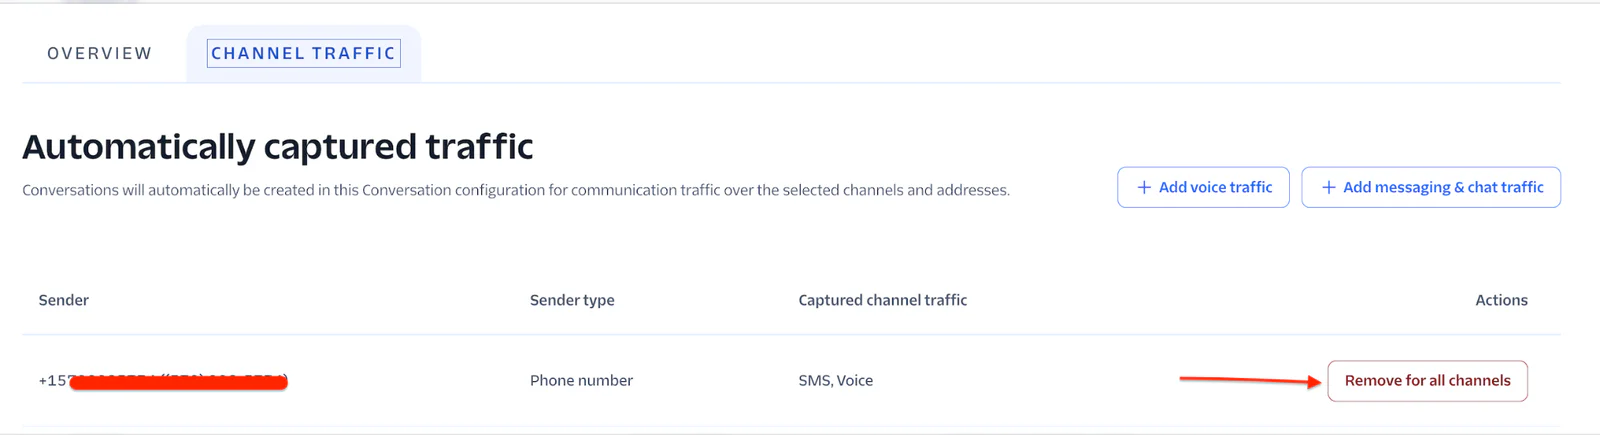
Do not select any Twilio phone numbers in Messaging & Chat traffic.
Check the box to enable Connect Conversations (Classic) service or Flex, then select Flex Conversation Service from the dropdown. This establishes the routing pipeline to your Flex instance for human agent handoffs.
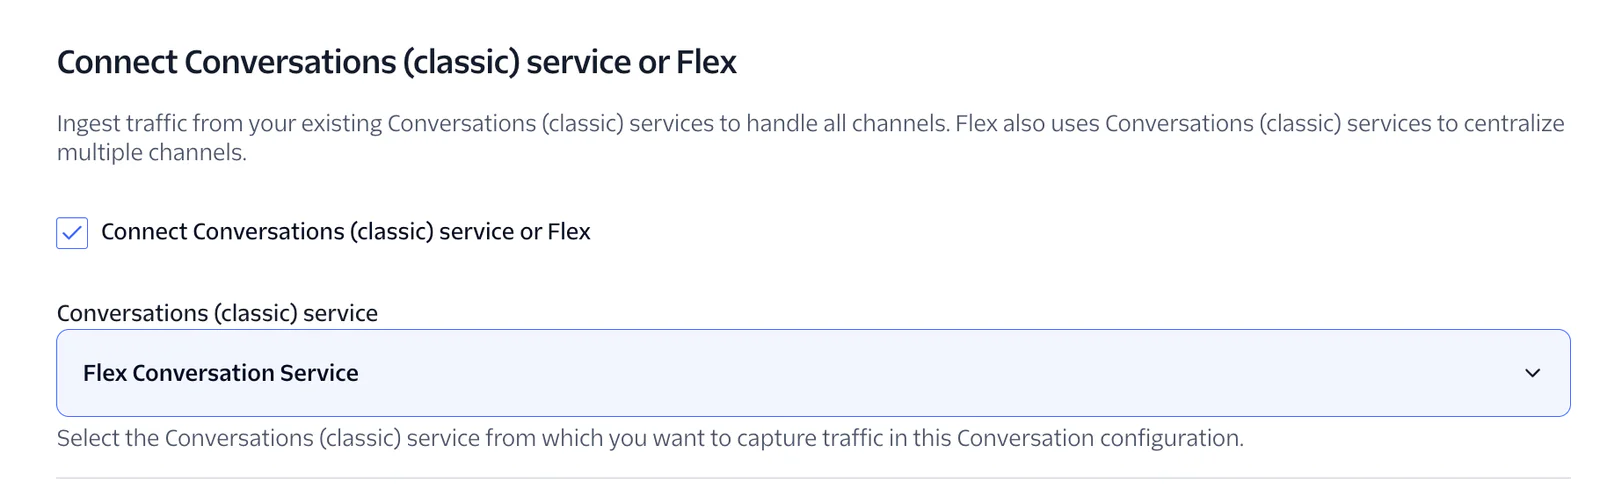
7. Do not enable Set up automatic capture for Voice traffic.
8. Enable Conversation memory. For an initial implementation, click + Create new memory store and ensure both Observations and Summaries are toggled on.
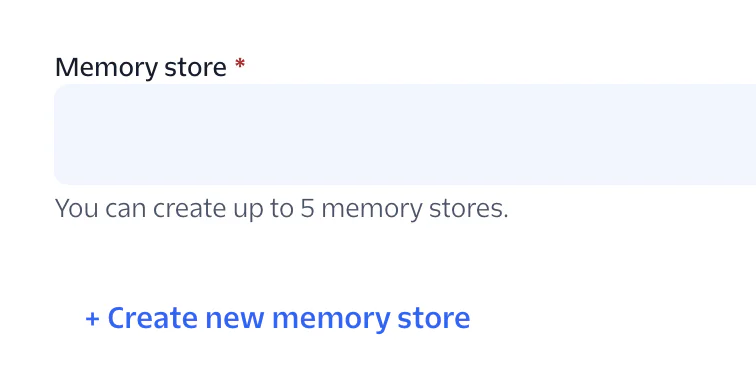
9. On the Summary page, click Create Conversation Configuration.
10. Copy the Conversation configuration ID of the Conversation Orchestrator and add it to your .env file: TWILIO_CONVERSATION_CONFIGURATION_ID=conv_configuration_xxxxxxxxxxxxxxxxxxxxxxxxxx
11. Copy the Memory SID of the memory store, and also add it to your .env file: TWILIO_MEMORY_STORE_SID=mem_store_xxxxxxxxxxxxxxxxxxxxxxxxxx
Step 4: Establish Conversation Intelligence rules
Conversational Intelligence synthesizes summaries and fires webhooks when conversations end. You'll create two rules, but Rule 2 requires your Twilio Function URL, which you won't have until Step 7. Create Rule 1 now and return for Rule 2 in Step 8.
- Go to Products & Services > Conversation Orchestrator > Conversation Intelligence > Intelligence configurations.
- Link your new intelligence profile directly with the Conversation Orchestrator you built in Step 3.
- Click your newly created intelligence configuration to view its parameters.
- On the Details tab, locate the Rules section and click Create Rule.
- Select Summary & Next-Best-Response as your primary language operator and click Next.
- Set the activation trigger to At conversation end and leave the Webhook action blank.
- In the Add Context section, select Enable Conversation Memory for this rule.
- Save your changes.
Step 5: Expose your local environment via ngrok
Twilio Agent Connect runs on port 8000 locally. You must expose this port to the web so Twilio can send incoming event payloads.
Open a fresh terminal window and start an HTTP tunnel on port 8000:
ngrok outputs a dynamic forwarding address similar to: https://a1b2-34-56-78.ngrok-free.app
Return to your local .env file and set TWILIO_VOICE_PUBLIC_DOMAIN to your public ngrok URL, without the https:// prefix: TWILIO_VOICE_PUBLIC_DOMAIN=a1b2-34-56-78.ngrok-free.app
Next, update your webhook endpoints:
- For Voice traffic: navigate to Numbers and Senders > Overview, select your number, and set the Voice webhook to your ngrok URL with the
/twimlendpoint. Example:https://a1b2-34-56-78.ngrok-free.app/twiml. - For the Orchestrator: go to the Conversation Orchestrator, edit your configuration, and set the Webhook URL using the
/webhookendpoint. Example:https://a1b2-34-56-78.ngrok-free.app/webhook.
Step 6: Link the Studio flow for human handoff
This step ensures that when a handoff is triggered, the call or message routes through Twilio Studio to a Flex agent.
- Create a flow from a template. In the Twilio Console, navigate to Studio > Flows. Click Create flow, then select From template from the dropdown.
- Select the handoff template. Scroll to the bottom and select Twilio Agent Connect - Human Handoff. This template contains the pre-configured logic for TAC escalations.
- Configure Flex routing. Open the flow editor and click the send_to_flex widget. Under Workflow settings, select your desired Flex workflow (for example, Assign to Anyone).
- Capture the Flow SID. Save and publish the flow. Note the Flow SID (it starts with FW).
- Finalize your .env .Add this SID to your environment file:
TWILIO_STUDIO_HANDOFF_FLOW_SID=FWXXXXXXXXXXXXXXXXXXXXXXXXXXXXXXXX
Step 7: Create the Twilio Function
Create the Function service:
- Log in to your Twilio Console.
- Navigate to Functions and Assets > Services.
- Click Create Service.
- Name your service
dynamictraitand click Next.
Create a public path:
- Inside your new
dynamictraitservice, click the Add + button at the top left. - Select Add Function from the dropdown.
- Change the path name to
/trait. - Set the visibility dropdown next to the path to Public. This allows external requests to reach your function.
Configure environment variables and dependencies:
- In the service sidebar, click Dependencies.
- Under Environment Variables, check the box Add my Twilio Credentials (ACCOUNT_SID and AUTH_TOKEN) to ENV. This automatically injects your core Twilio credentials into the function's environment.
- Manually add the following custom keys and their values:
TWILIO_MEMORY_STORE_SIDandOPENAI_API_KEY - Under Dependencies, set the Node.js Version dropdown to the latest available version.
- Add the following npm packages, each set to
latest:twilioaxiosandopenai - Click Save at the bottom of the page.
Add your Function code:
Replace the code inside your /trait function with the following:
Once you've pasted the code, click Save, then click Deploy All to bring your serverless function live.
After deploying, copy your function's public URL. It looks like: https://dynamictrait-XXXX.twil.io/trait
You'll need this URL in the next step.
Step 8: Complete Conversation Intelligence — add Rule 2
Now that your Twilio Function is live, return to your intelligence configuration and create the second rule.
- Go to Conversation Orchestrator > Conversation Intelligence > Intelligence configurations.
- Open the same configuration you worked on in Step 4.
- Under Rules, click Create Rule.
- Select Summary & Next-Best-Response as the language operator.
- Set the activation trigger to After conversation ends.
- Under Webhook action, paste your Twilio Function URL:
https://dynamictrait-XXXX.twil.io/trait - In Add Context, enable Conversation Memory.
- Save the rule.
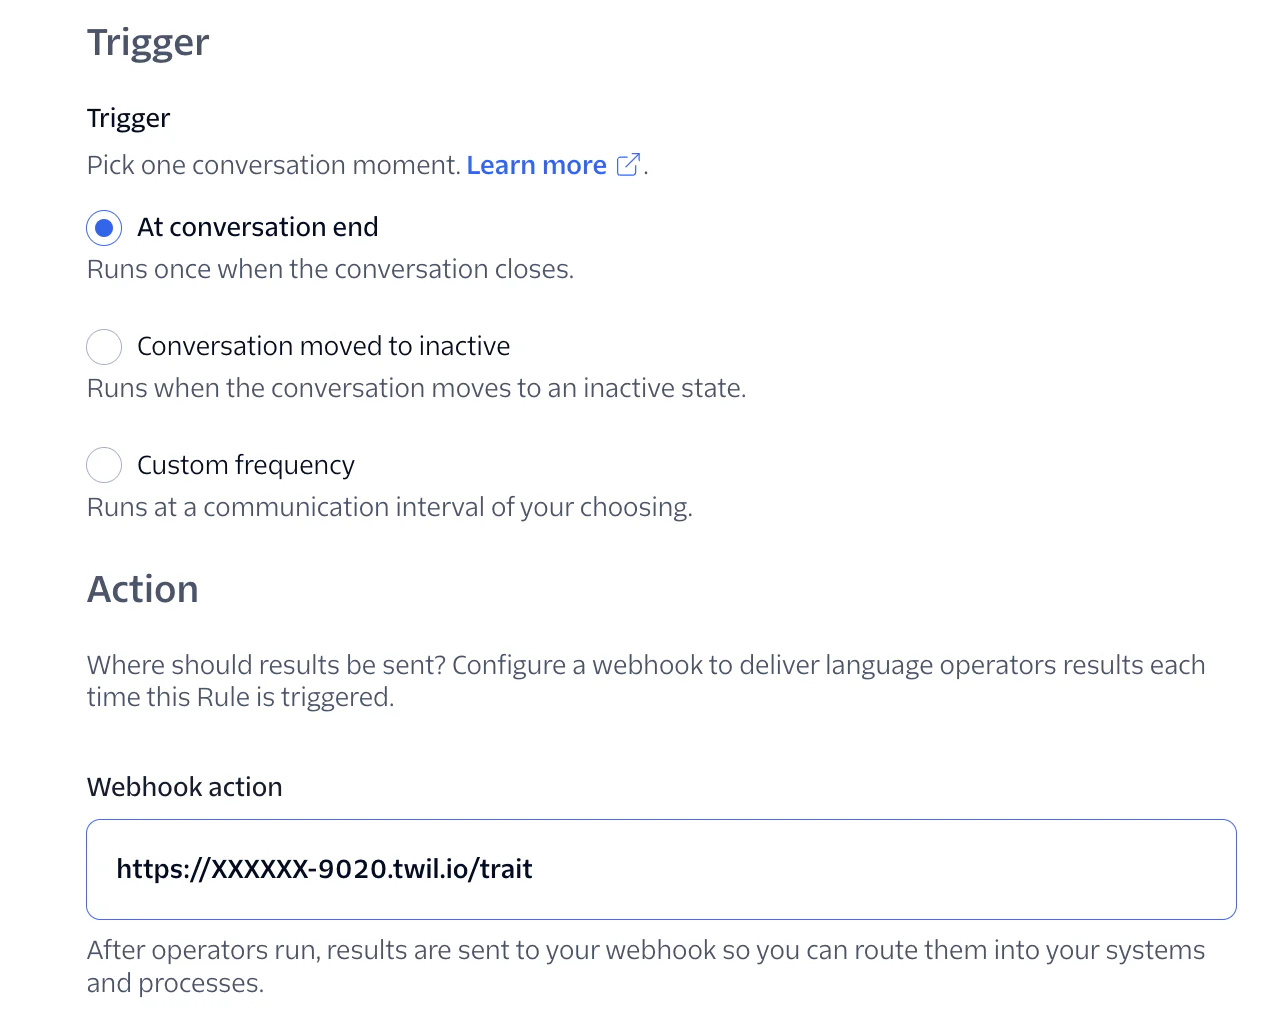
You'll now have two rules under your Intelligence Configurations service.
Step 9: Set up Memory trait groups
Before testing, define the trait structure where customer preferences will be stored.
- In the Twilio Console, navigate to Conversation Memory. Select your memory store and choose Traits.
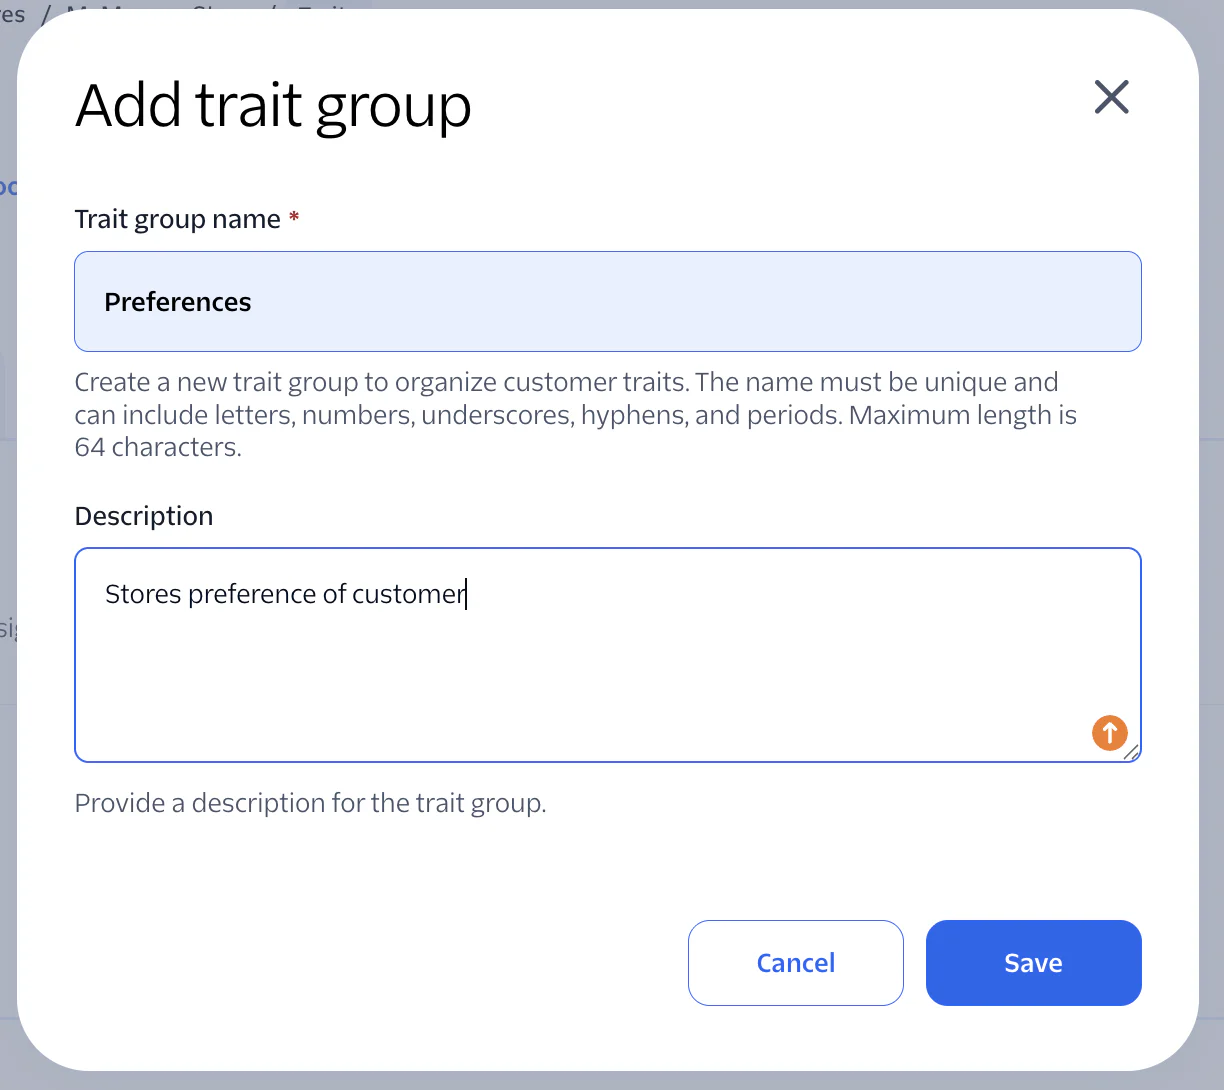
- The default trait group is Contacts traits. Create a new trait group called Preferences to store customer preferences.
- Click + Add trait group and name it Preferences.

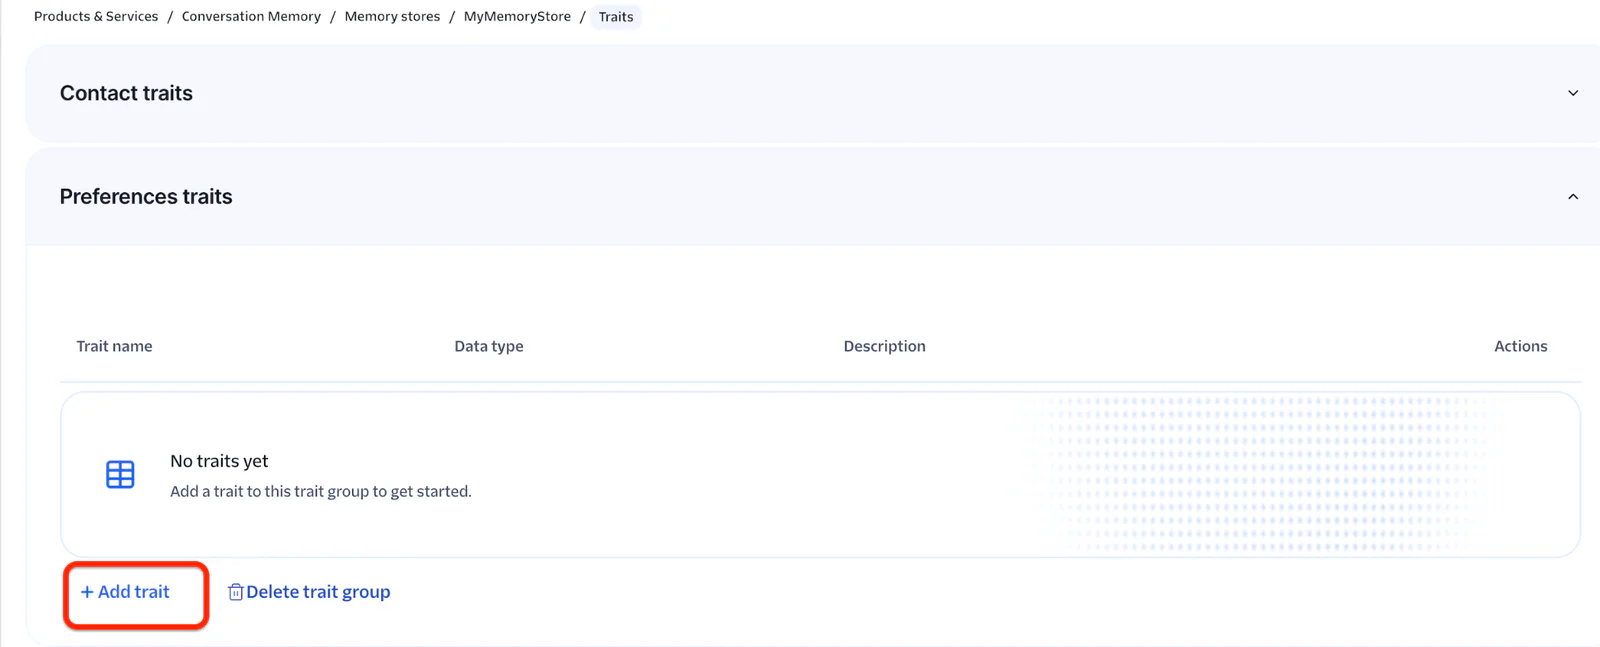
- Click + Add trait to add each trait you want dynamically populated from the customer's interaction summary.
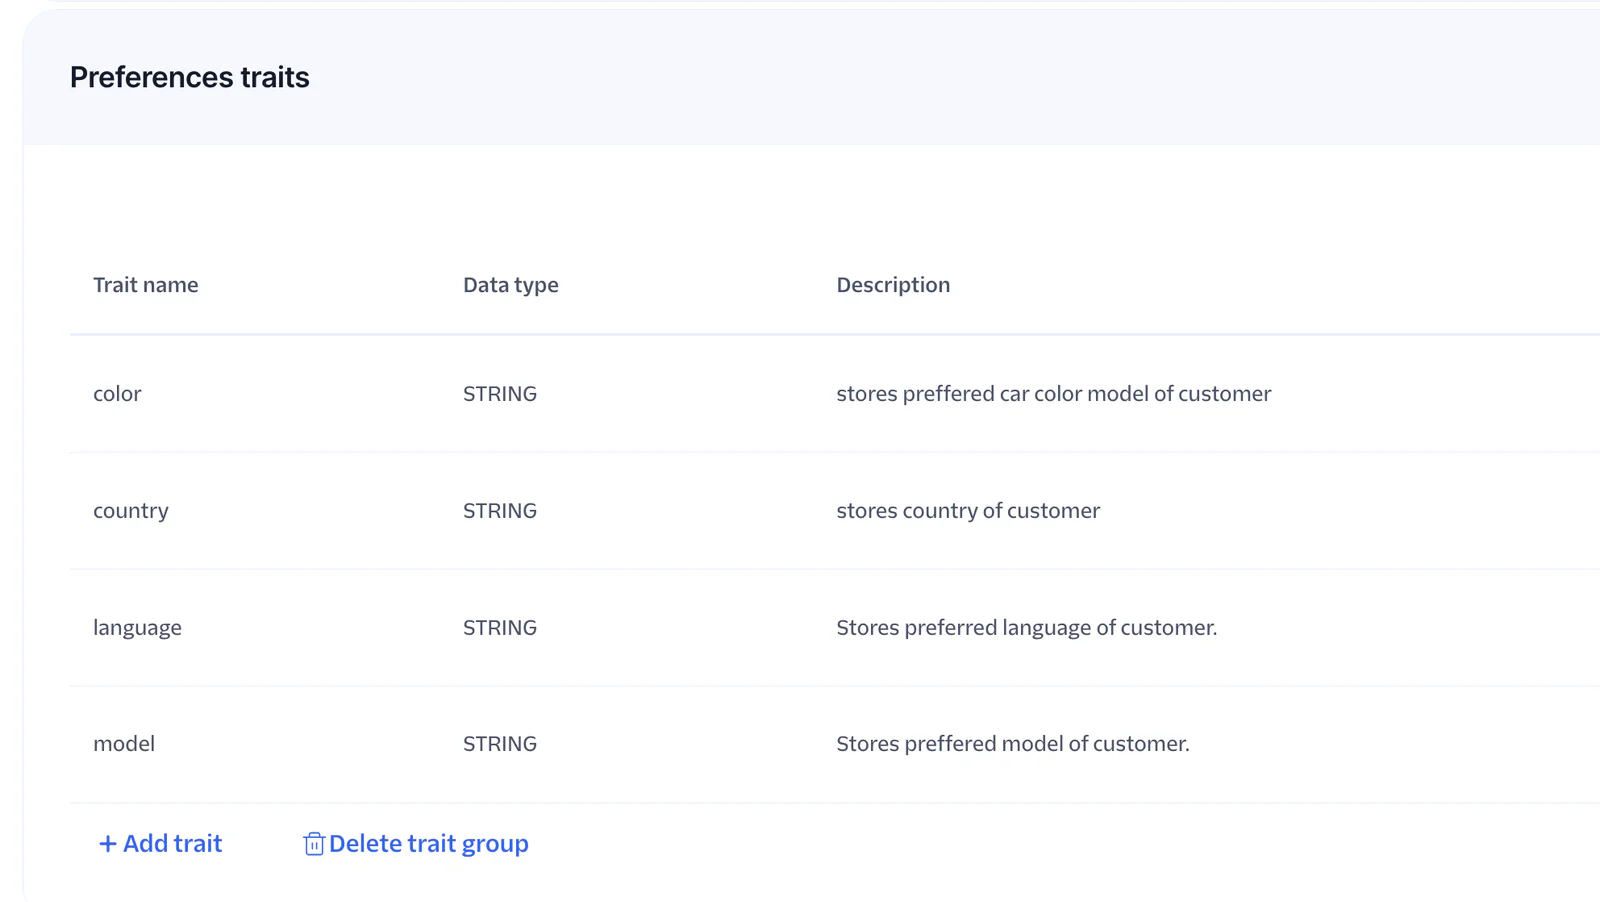
- Add one trait for each preference you want to capture. For this demo (a car company), add:
modelcolorcountrylanguage
Step 10: Implement the core TAC backend logic
Now that your Twilio infrastructure is fully mapped out, look at the Python backend script that runs the AI assistant and coordinates the handoff. The base code is available in the https://github.com/twilio/twilio-agent-connect-python.
The version below extends it with Memory retrieval and language-preference support.
Create a new file in your folder, give it a name ex : agent_handoff.py, and copy paste the code given below.
Test the end-to-end flow
Run the script from your terminal:
First interaction — new customer
- Call or text your active Twilio number. The AI assistant picks up and responds in English (the default, since there is no memory yet).
- Have a conversation about a car — for example:
- "I'm looking for a blue Model X. Do you have it in stock?"
- "What red sedans do you have available?"
- Ask to be transferred: "Can I speak to a human agent?". TAC triggers the Studio handoff flow, and the conversation routes to a live Flex agent.
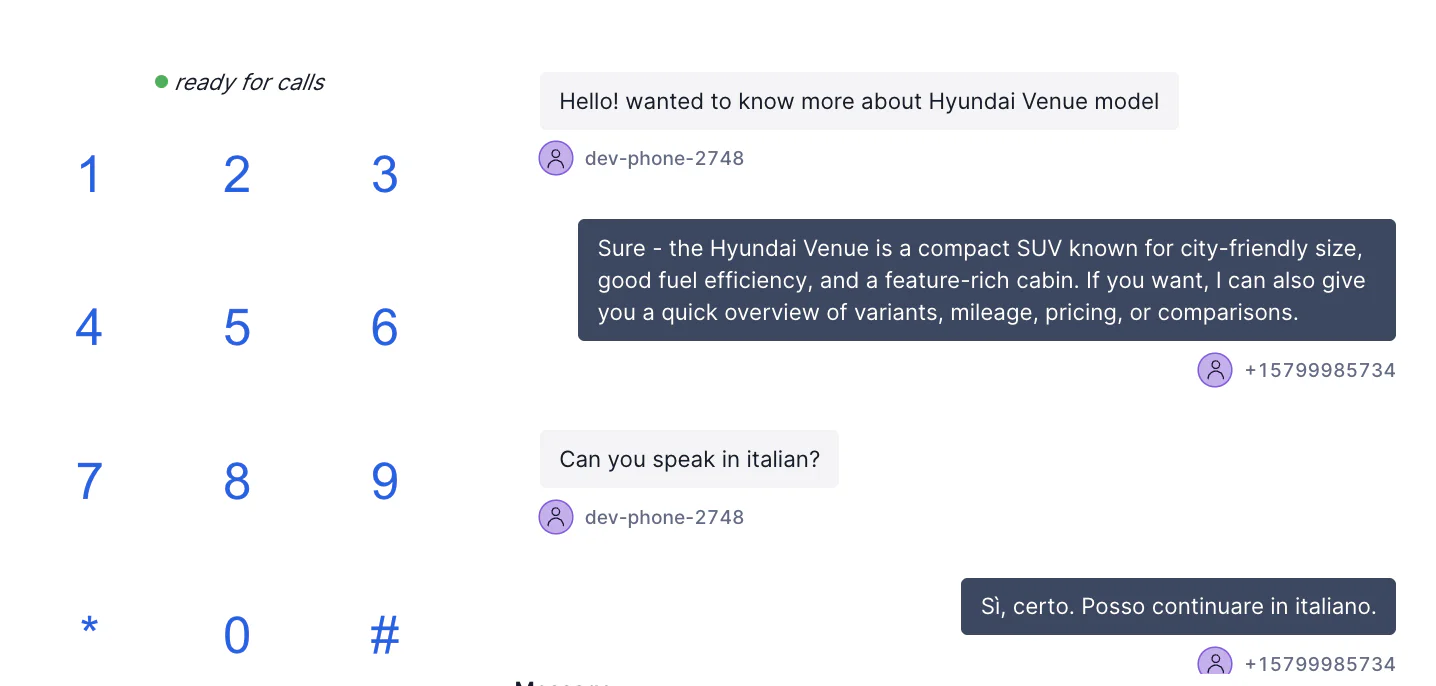
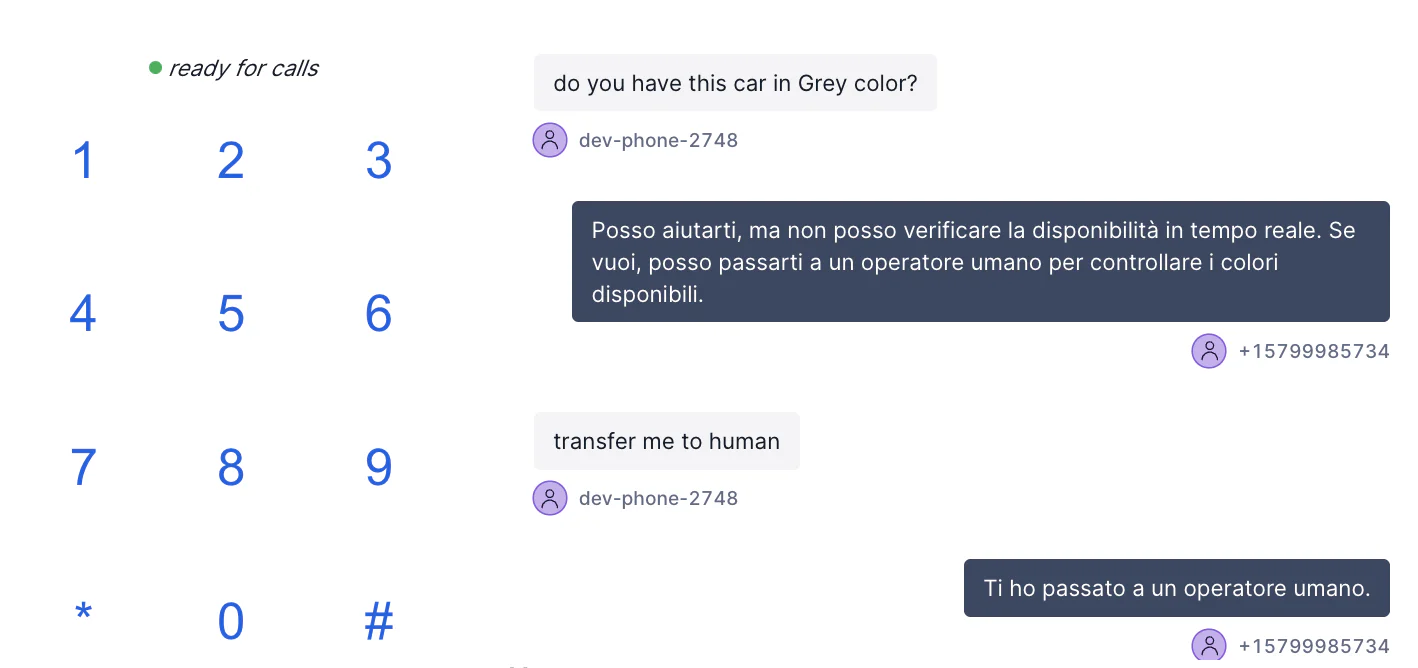
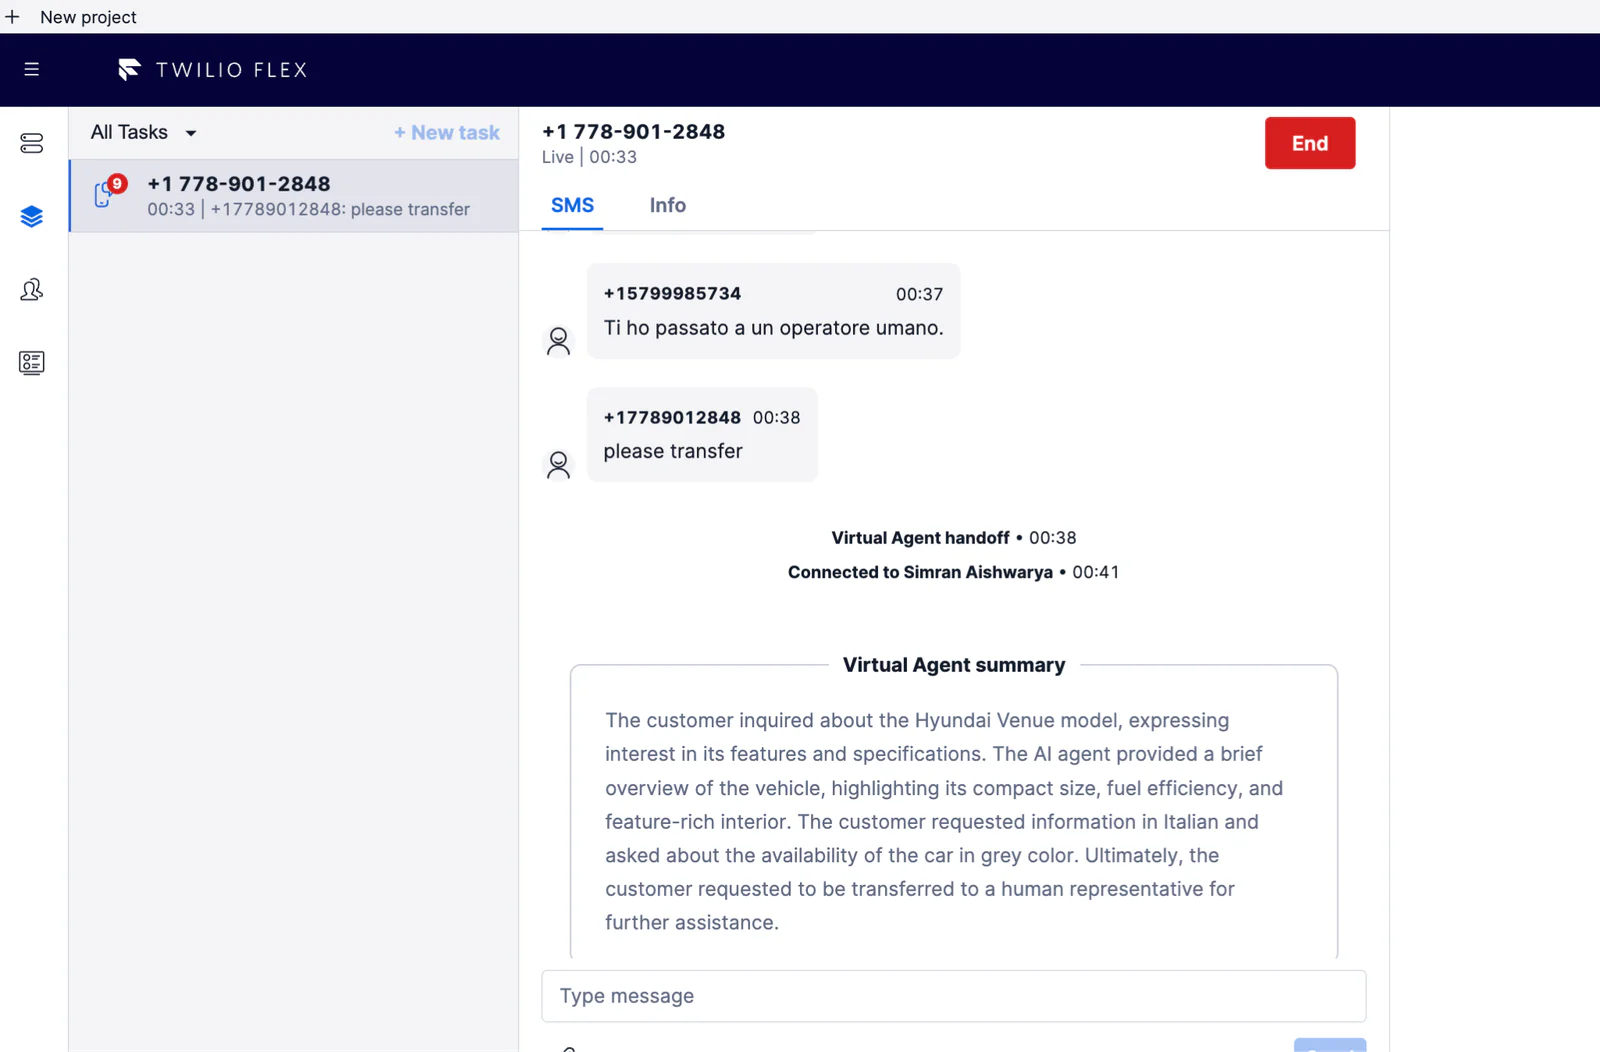
Once the conversation closes, Conversational Intelligence generates a summary. Rule 2 fires your Twilio Function, which calls OpenAI to extract preferences and writes them to the customer's Memory profile.
To verify:
- In the Twilio Console, go to Conversation Memory > Memory Store > Profiles.
- Find your customer's profile.
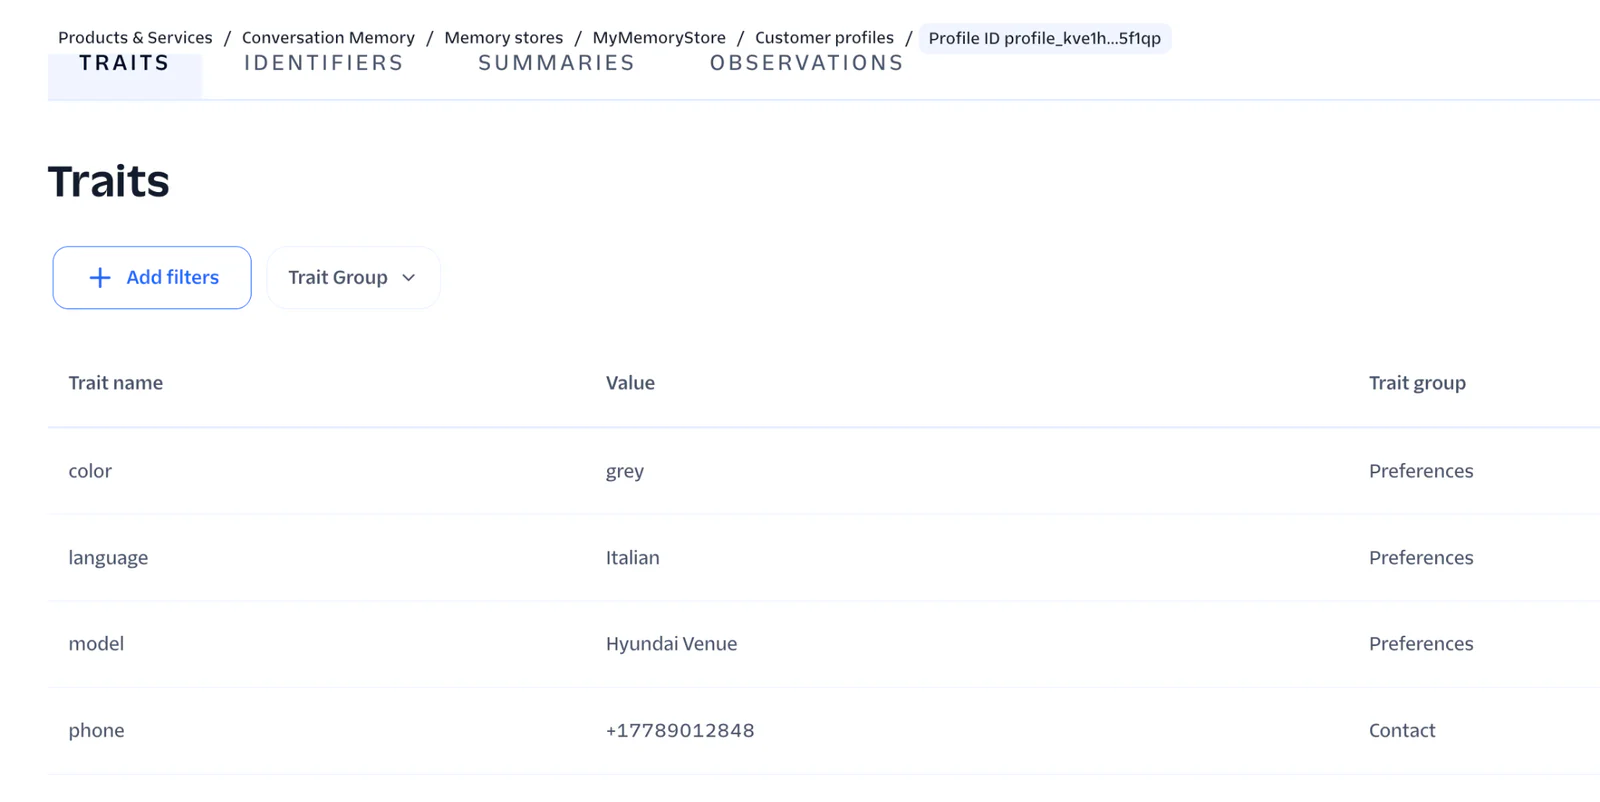
- Open Preferences Traits. You'll see the extracted values — for example,
color: grey,model: Model X.
Second interaction — returning customer
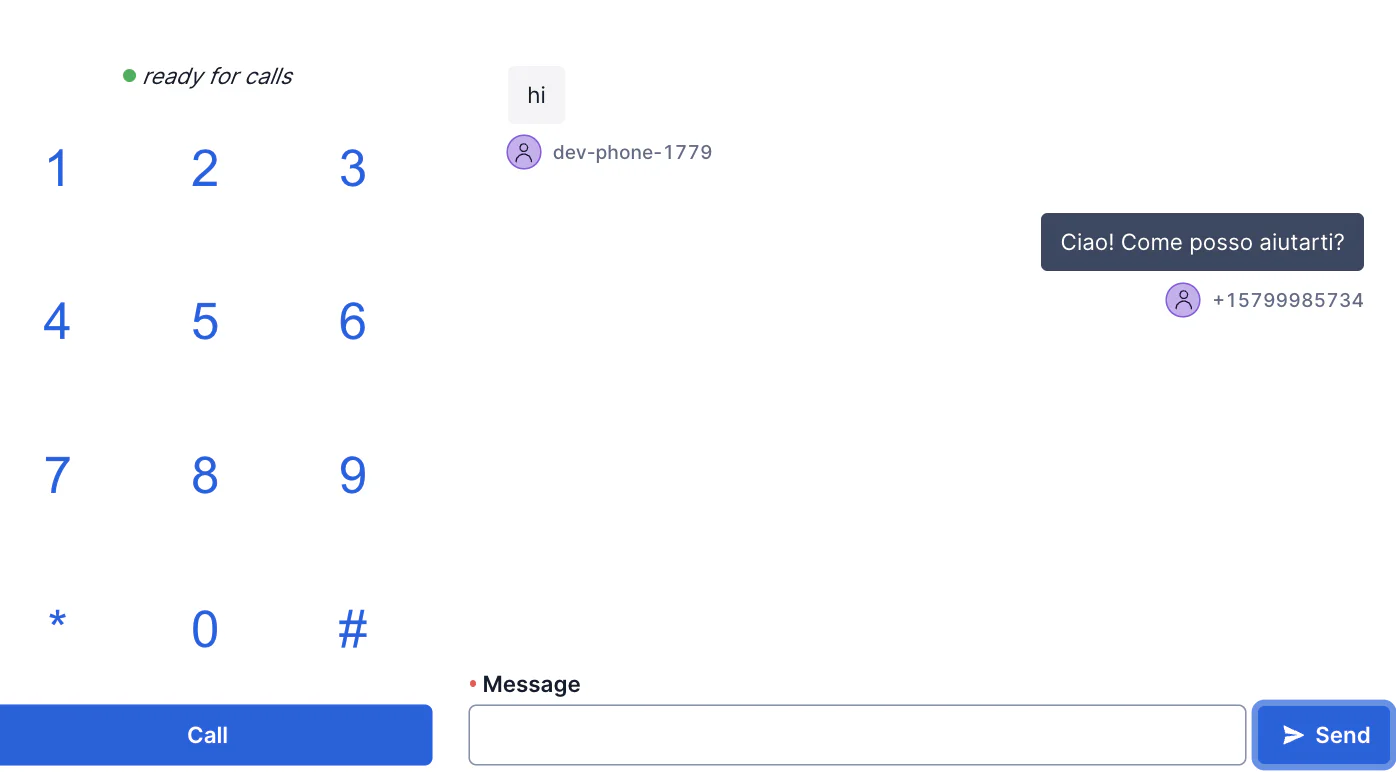
- Call or text the same Twilio number from the same phone.
- TAC fetches the customer's Memory profile at session start and injects the traits into the system prompt.
- Notice that the AI already knows the customer's preferences. If
languagewas captured, the AI responds in that language without being asked.
What happened behind the scenes
When the first conversation ended, this chain ran automatically:
- The conversation ended.
- Conversational Intelligence generated a plain-language summary.
- Rule 2 fired a
POSTto your Twilio Function/trait. - The function extracted structured traits via OpenAI .
- Traits were written to the customer's Memory profile via the Memory API.
- On the next call, TAC read those traits and injected them into the system prompt.
No manual steps. No database to manage. The customer's preferences persist across sessions automatically.
Conclusion
In this tutorial, you built a full AI-to-human escalation pipeline with Twilio Agent Connect and Twilio Flex, and extended it with persistent, personalized memory. Conversational Intelligence extracts meaning from conversation summaries, OpenAI structures that meaning into traits, and Twilio Memory makes those traits available on every future interaction. The result is an AI assistant that remembers who it's talking to.
Simran Aishwarya is a Developer Support Engineer at Twilio who specializes in communication platforms, backend systems, and technical problem solving. Her interests span Python, JavaScript, cloud technologies, analytics, and DevOps, and she enjoys building practical solutions and continuously expanding her engineering skill set.

Related Resources
Twilio Docs
From APIs to SDKs to sample apps
API reference documentation, SDKs, helper libraries, quickstarts, and tutorials for your language and platform.
Resource Center
The latest ebooks, industry reports, and webinars
Learn from customer engagement experts to improve your own communication.
Ahoy
Twilio's developer community hub
Best practices, code samples, and inspiration to build communications and digital engagement experiences.