How To Import Data From Your CRM Or Another External Source Into Conversation Memory
Time to read:
November 20, 2026
Written by
How To Import Data From Your CRM Or Another External Source Into Conversation Memory
Nobody likes spending too much time on the phone. But it's inevitable that you'll have to call someone about a business transaction, whether it's scheduling a doctor's appointment, placing online orders, getting service for a vehicle, or asking about tech support… and often, you'll have to repeat your account details every single time you make that call. Wouldn't it be nice if the business you were calling already had that information on file and ready to go?
This guide will help the owners of CRM and phone tree systems do just that. In this guide, you’ll learn how to sync customer data from your CRM into Twilio Conversation Memory.
With that external CRM data ready on demand, your voice agents, chat bots, and IVRs can pick up context immediately on incoming interactions, without making extra database calls while the customer waits.
Prerequisites
Before starting this tutorial, ensure you have:
- A Twilio Account with a voice/messaging-capable number.
- .NET 9 SDK or later
- Twilio API Key & Secret with access to Conversation products.
Configuring Conversation Memory
To use Conversation Memory data, you will first need to configure a Conversation Memory Store in the Twilio console. Conversation Memory is only available in the new Twilio console, so navigate to OneConsole and log into your account.
From here, go to Data > Conversation Memory > Memory Stores and create a new Memory Store if you do not already have one.
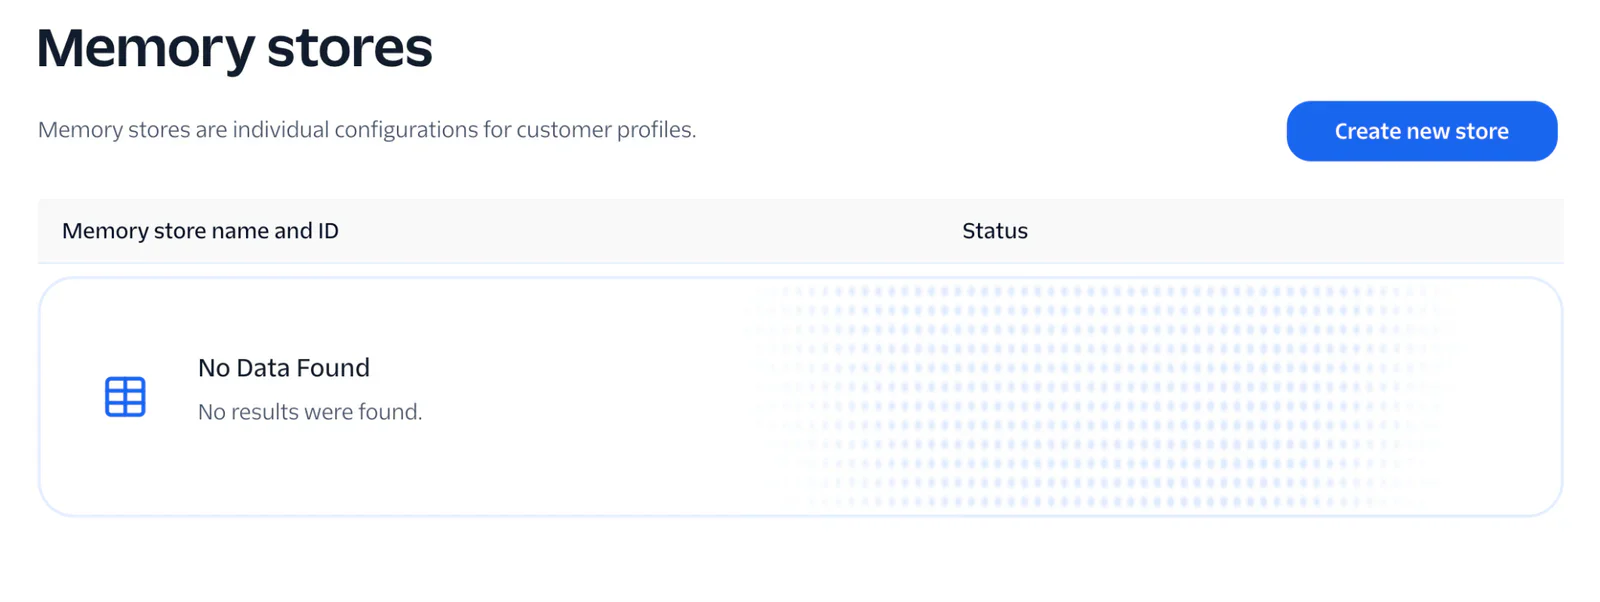
The console gives you a setup checklist to get you started, but for now, you don't have to do anything else to set up. Just create a new Memory Store with the button on the console. To create your solution, you need your memory store ID, which is at the top left of the memory store screen. There should be a convenient button to copy-paste that ID. Keep that ID for the next step.
Uploading a CSV
If your customer data is downloaded in CSV format, the next step can be done directly in the console. Simply follow the checklist to import your data, until you reach the Upload CSV option.
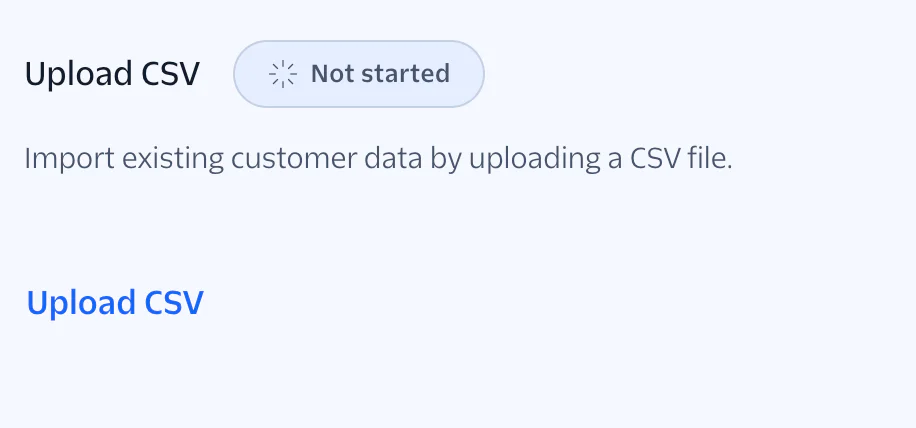
Some terms to understand in Twilio's dashboard, all of which can be tracked by Conversation Memory:
- Profiles: The central entity tied to an end user (identified via phone number or customer ID)
- Traits: Static or semi-static properties (e.g., VIPStatus: true, PreferredLanguage: "es", AccountTier: "Enterprise").
- Observations: Key past events or recent CRM activities (e.g., "Order #9401 delayed in transit", "Opened ticket #1029 regarding billing").
In order for your CSV to be processed, there must be a line for either the customer phone number or email, which will be used as the unique identifier for each customer.
Once your file is uploaded, you can use AI to automatically map some values into Twilio's customer profiles, or, you can create traits and manually select how to map the data from your CSV into those traits. Traits can be in different data types: a string, integer, boolean, or an array of these types, though traits cannot contain nested arrays.
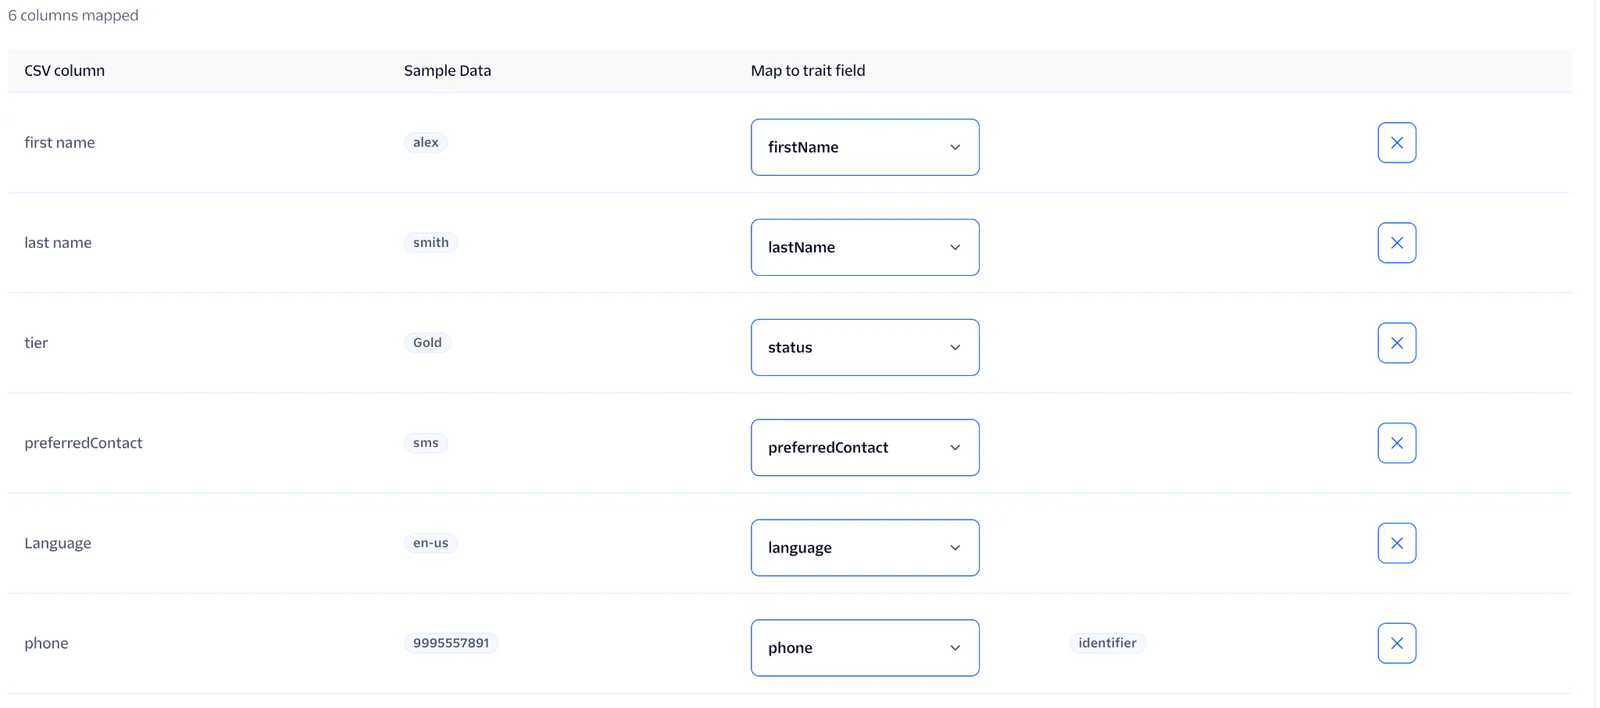
Once your traits are successfully mapped, click Complete, and Conversation Memory will import your CSV.
An automated solution for customer data import
Uploading a CSV via the dash is one solution. However, there is also an automated way to upload your data using API calls, if you'd rather do all your synchronization programmatically. The rest of this tutorial will discuss a solution using .NET 9 or higher. You can use these same APIs to make these calls in your programming language of choice.
Step 1: Set up and configure your environment
To follow along, open up your IDE of choice. Create a new C# Web API project. In Visual Studio Code, you can do this via the menus, or you can use the CLI:
Next you will need to install the DotNetEnv dependency so that your environment variables can be securely stored.
Create an .env file in your project folder. This will store important secure environmental variables for your project. Use the following text, replacing the placeholder values here with your real values. You can find all of this on your Twilio console. For your API key, you can create a new Standard API key on your Twilio dashboard. Be sure to copy down both the API key, and the API secret, when you create your key, as the API Secret will not be shown again.
If you are syncing with a real CRM, you may also need to include any secrets associated with that CRM store in this file. Adjust depending on your needs. For the purposes of this tutorial, you will be using mocked up data so no further API key is required. Proceed to creating the mocked up data.
Step 2: Mock up (or prepare) CRM data
Instead of a CSV upload, this time you will use mocked up customer data in JSON. This file could be replaced with whatever file format is created by your CRM. For the sake of demonstration, this will use fake customer data only.
Create a file named crm-customers.json and add the following:
Step 3: Map CRM entities to Twilio Conversation Memory constructs
Your data will be extracted in whatever way your CRM formats that data. In order to map your data to Twilio's Conversations, you will need to create code that maps the CRM formatted data to Twilio's memory constructs.
Create a Models folder in your project. In this folder, create a file named CrmModels.cs . Paste the following code:
This code will take in the information from the JSON file and serialize it into strings that Conversation Memory will then process.
Note that this code is using information structure that is already built in to Conversation Memory. If you want to add custom Traits, you can also do this using new Traits and Trait Groups in the console or using the Trait Groups API.
Step 4: Implement Profile lookup and creation
The next step in this tutorial is to make API calls to Conversations to post the CRM data.
Turn your attention to the Profiles API. You will be creating a profile using this call programmatically.
Create a Services folder, and in that folder, a file named CrmSyncService.cs. Paste in the following code:
This code queries a mock CRM endpoint and gets the JSON data for the customers. If a profile exists that matches the phone number for this customer, it looks up that phone number first to avoid creating duplicate entries. Then it updates that profile with the information from the CRM data. If there is no profile for a customer, such as on your first run of the code, it will make a call to /v1/Stores/{_storeId}/Profiles and create a new profile for that customer.
Step 5: Sync external data to Conversation Memory
To finish the demonstration, you will create a sync service that writes CRM updates to the user's Conversation Memory Store.
To wire your synchronized data into Conversation Memory, you will update Program.cs to load crm-customers.json into memory. Then you expose the mock GET /crm/customers/{phone} endpoint for each customer, and add a POST /sync/{phone} endpoint to trigger synchronization.
Replace the code in your Program.cs with the following:
Now, you can trigger a sync for any of the four mock customers in crm-customers.json using curl:
%2B is the URL-encoded + sign in E.164 phone numbers. This, combined with the phone number, is your customer's unique identifier and is how the API decides which customer profile to create.
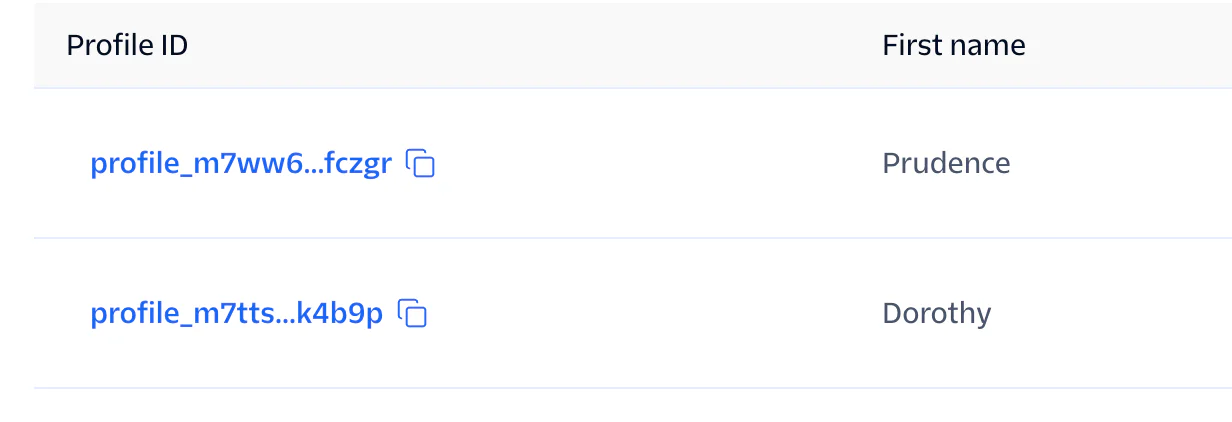
In your console, you should see {"status":"synced","phone":"+15551234567"} if the call went through correctly. Check your Twilio console to see how the data has been imported. If all goes well, you should see customer data imported into your memory store.
Conclusion
Now you know how to sync up data from your CRM to Twilio's Conversation Memory. What's next? Conversations and Conversation Memory give you a wide variety of options to make customer calls a smooth experience. Check out the documentation, or read more:
- Conversations Memory Overview
- How to Augment Voice Calls with Twilio Intelligence
- How to Orchestrate Multi-Call Conversations with an LLM and Twilio Conversation Memory
Amanda Lange is a .NET Engineer of Technical Content. She is here to teach how to create great things using C# and .NET programming. She can be reached at amlange [ at] twilio.com.



Related Resources
Twilio Docs
From APIs to SDKs to sample apps
API reference documentation, SDKs, helper libraries, quickstarts, and tutorials for your language and platform.
Resource Center
The latest ebooks, industry reports, and webinars
Learn from customer engagement experts to improve your own communication.
Ahoy
Twilio's developer community hub
Best practices, code samples, and inspiration to build communications and digital engagement experiences.