Integrating Twilio with IBM Watson for an Enhanced Chatbot and IVR Experience
Time to read:
September 28, 2021
Written by

For the last two decades, the A.I. and machine learning have been thrown around with more and more frequency. Research centers are investing in their development, more companies are using them to promote their products and – of course – more movies using them because they sound cool.
But what do they actually mean?
Artificial Intelligence is a technique for building systems that mimic human behavior or decision-making. Machine Learning is a subset of AI where algorithms are created which learn from data sets in order to solve specific tasks. These solvers are trained models of data that learn based on the information provided to them. All of this is derived from probability theory and linear algebra. ML algorithms use our data to learn and automatically solve predictive tasks.
And let’s be honest: is there a better way to use A.I. and machine learning than searching for the best spots nearby when you’re craving that slice of pizza or that double glazed chocolate donut?
In this tutorial, we will demonstrate how you can use Twilio APIs to bring together one of the most popular communication channels, WhatsApp, the leading NLU engine from IBM, Watson and the open API capabilities of Yelp.
Prerequisites
Before you can build today’s demo, you’re going to need to complete a few steps and sign up for a few accounts.
- IBM Watson API Account
- A free Twilio account
- Access to the Twilio API WhatsApp Sandbox
- A Yelp! API Key
- Node.js knowledge
- An installation of the Twilio CLI
If you don’t yet have an account with these services – don’t worry. In the next few sections, we’ll walk you through how to set things up.
Create a free IBM Cloud account
If you don’t already have an IBM Cloud account, please follow the instructions to get access to the IBM Cloud platform:
- Go to https://cloud.ibm.com/registration and provide the information needed to create a new account
- After you create a new account, you will be redirected to the main IBM Cloud page. Here you will find the Watson Service in the menu list on the left side of the page.
- On the next page, scroll down and at the all services list click on the ‘Watson Assistant’ option.
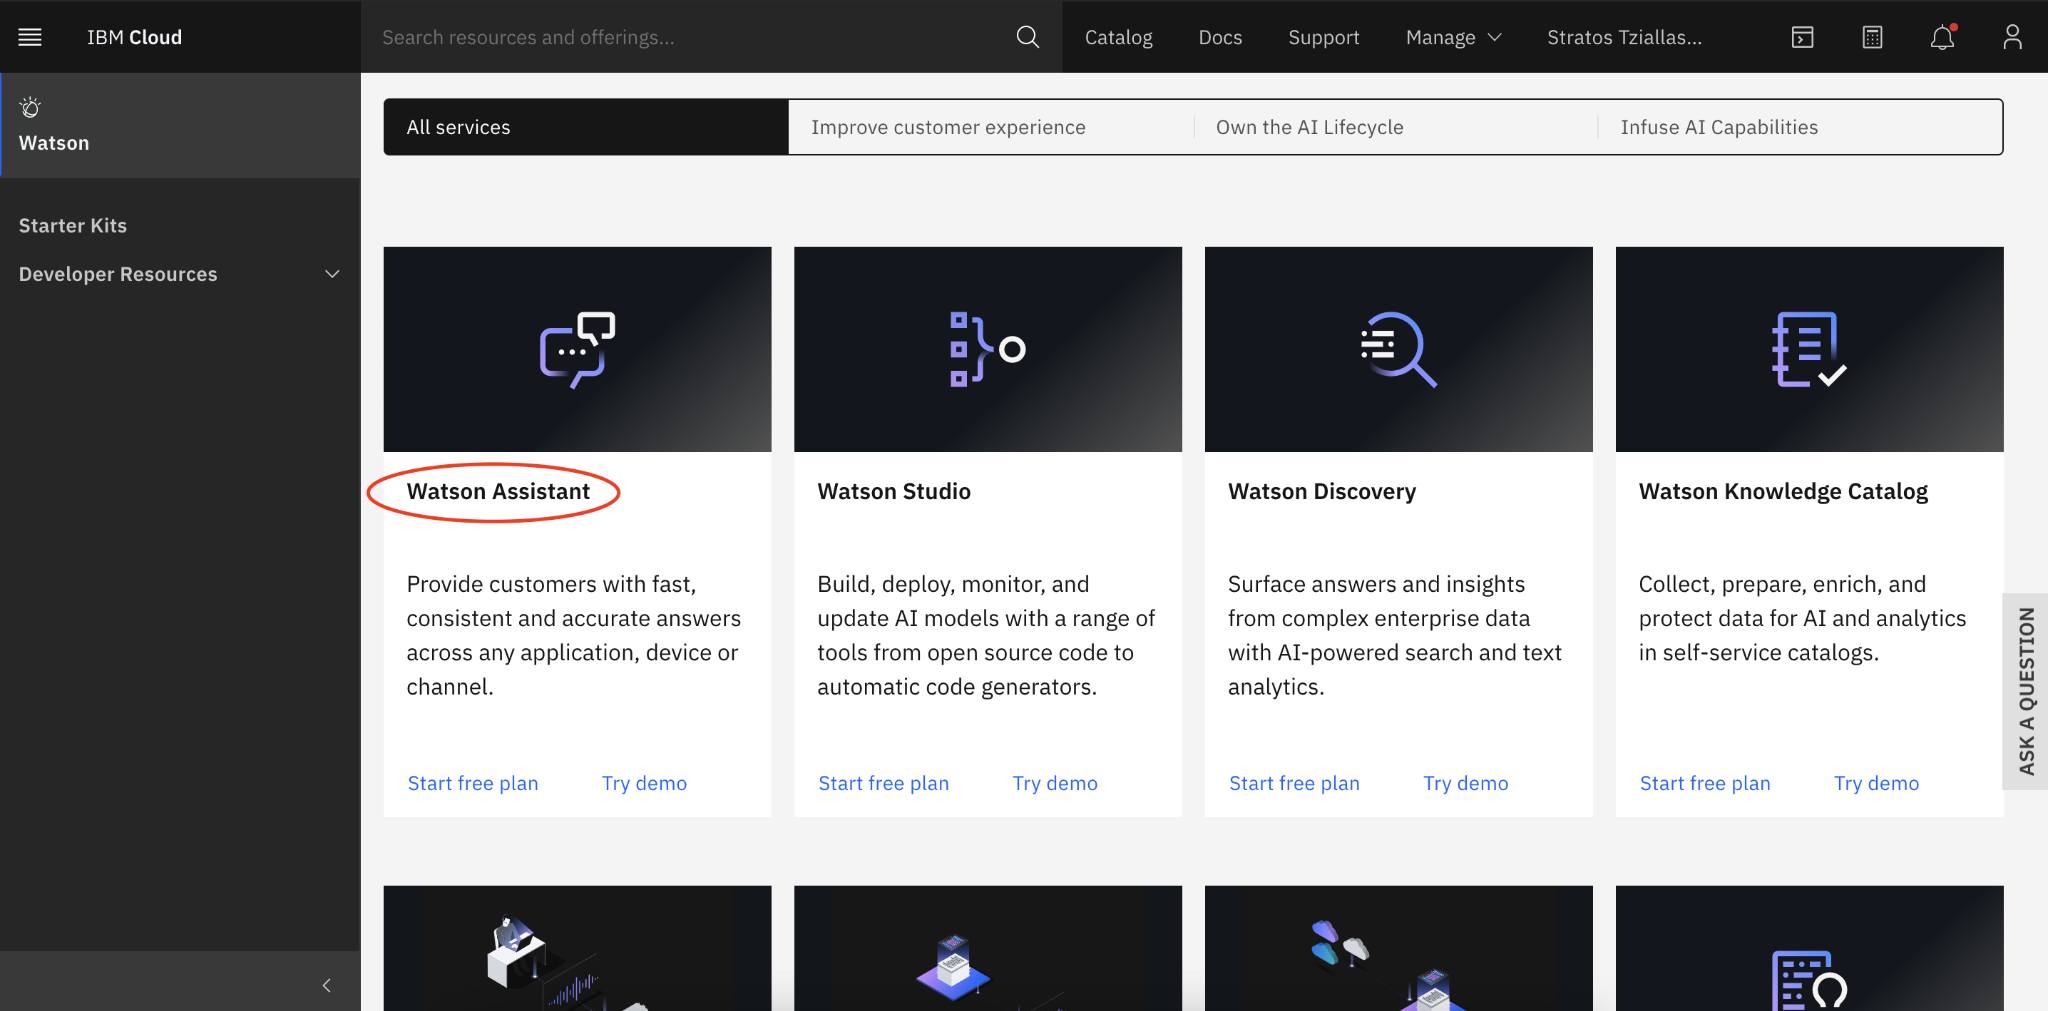
- Then you will be redirected to the Watson Assistant page.
- Click on the “Create” tab in the top left corner, then select your location and the pricing plan associated with your new Watson Assistant ( we suggest to leave it on the preselected Lite plan for the beginning) and click “Create” in the bottom right corner.
Everything is set up! Now let’s look at setting up a Watson Assistant.
Set up a Watson Assistant
Now, click on the “Launch Watson Assistant” button and you will be redirected to the actual Assistant page. From here make sure to click on “Assistant” in the top left part of the screen.
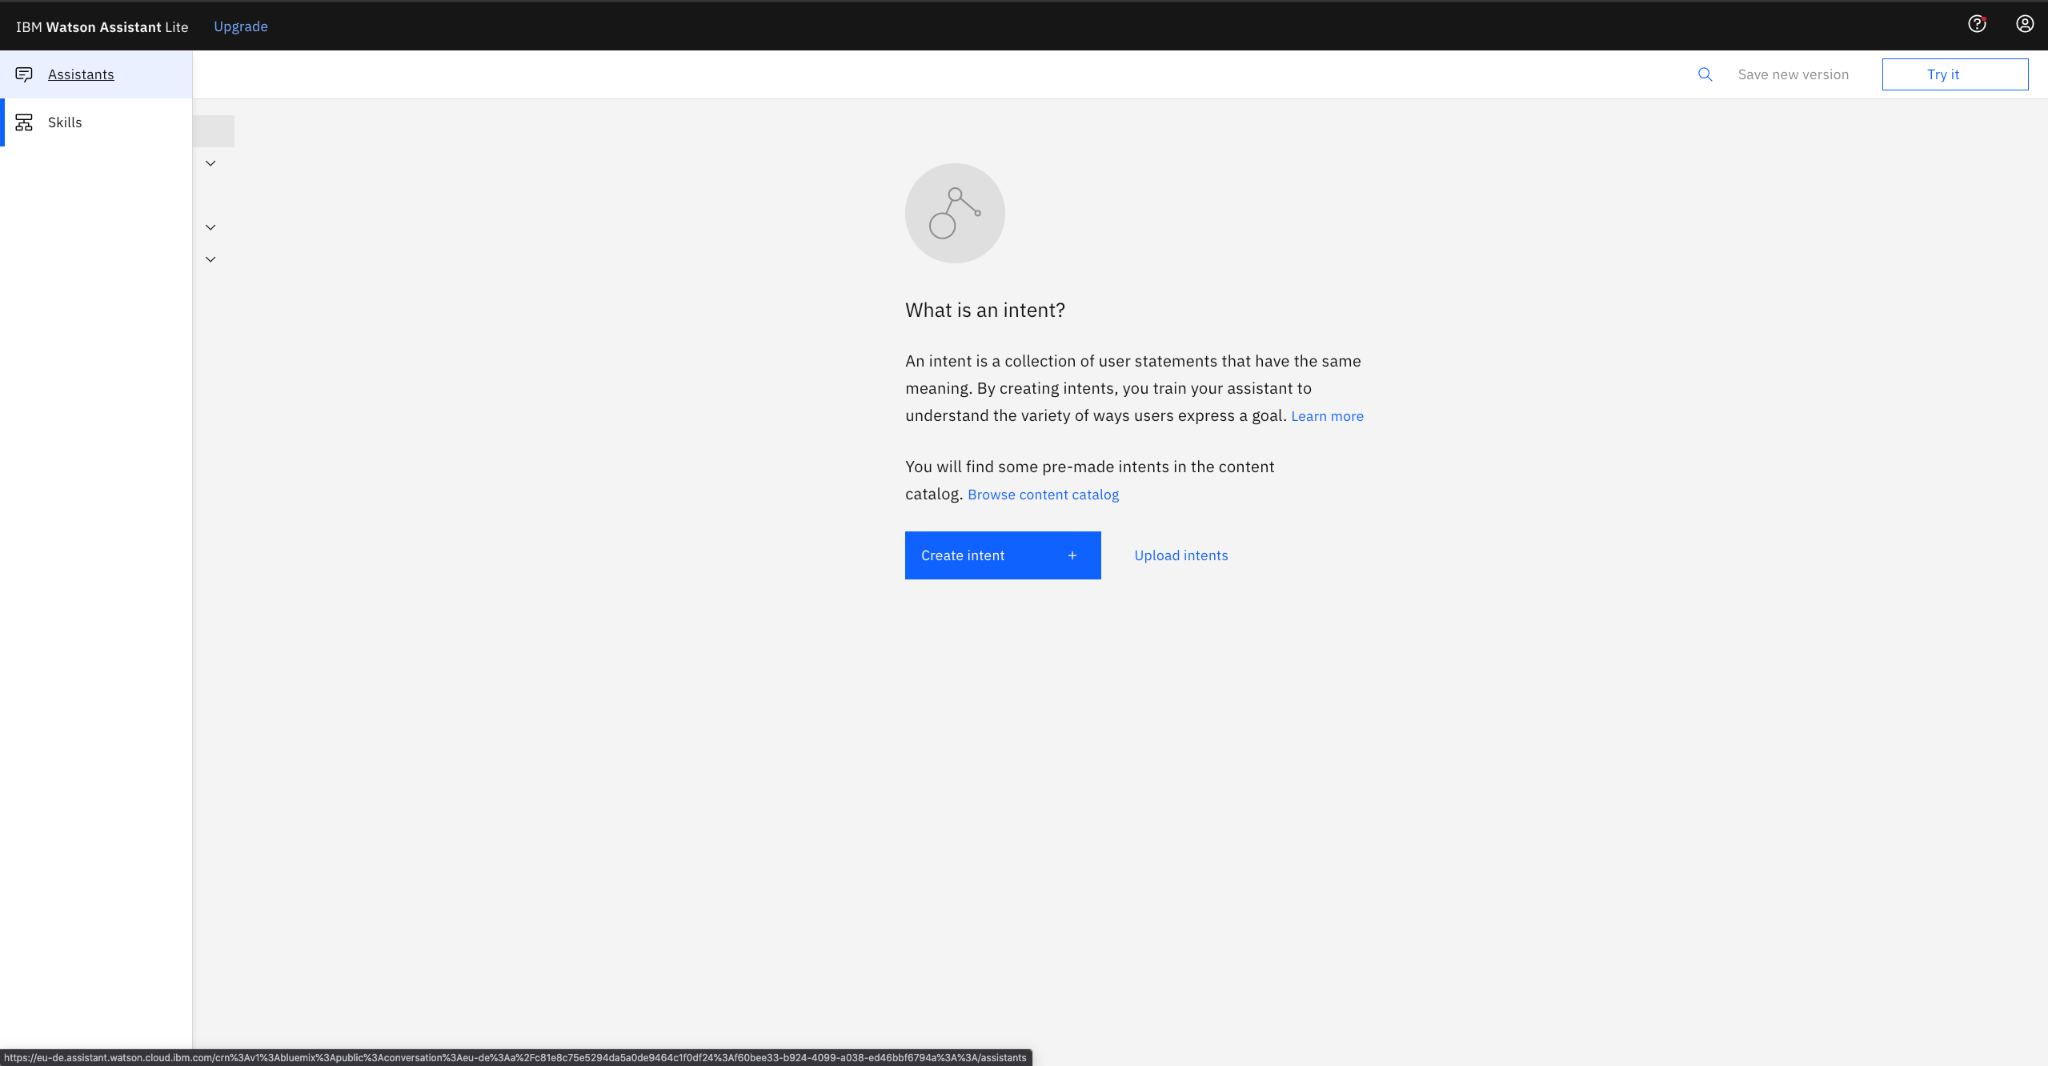
IBM is already providing you with one example assistant called “My first assistant”, but in our case we will need to create a new one.
- Go to https://github.com/HlsRobot/twilio-watson and download the file
skill-Watson-Blogpost.json. - In the Watson page, click “Create assistant”, provide a name on the next page (in our case
Restaurant Assistant) and click the “Create assistant” button. - Click on the “Add an actions or dialog skill” button and select the Upload skill tab on the following page
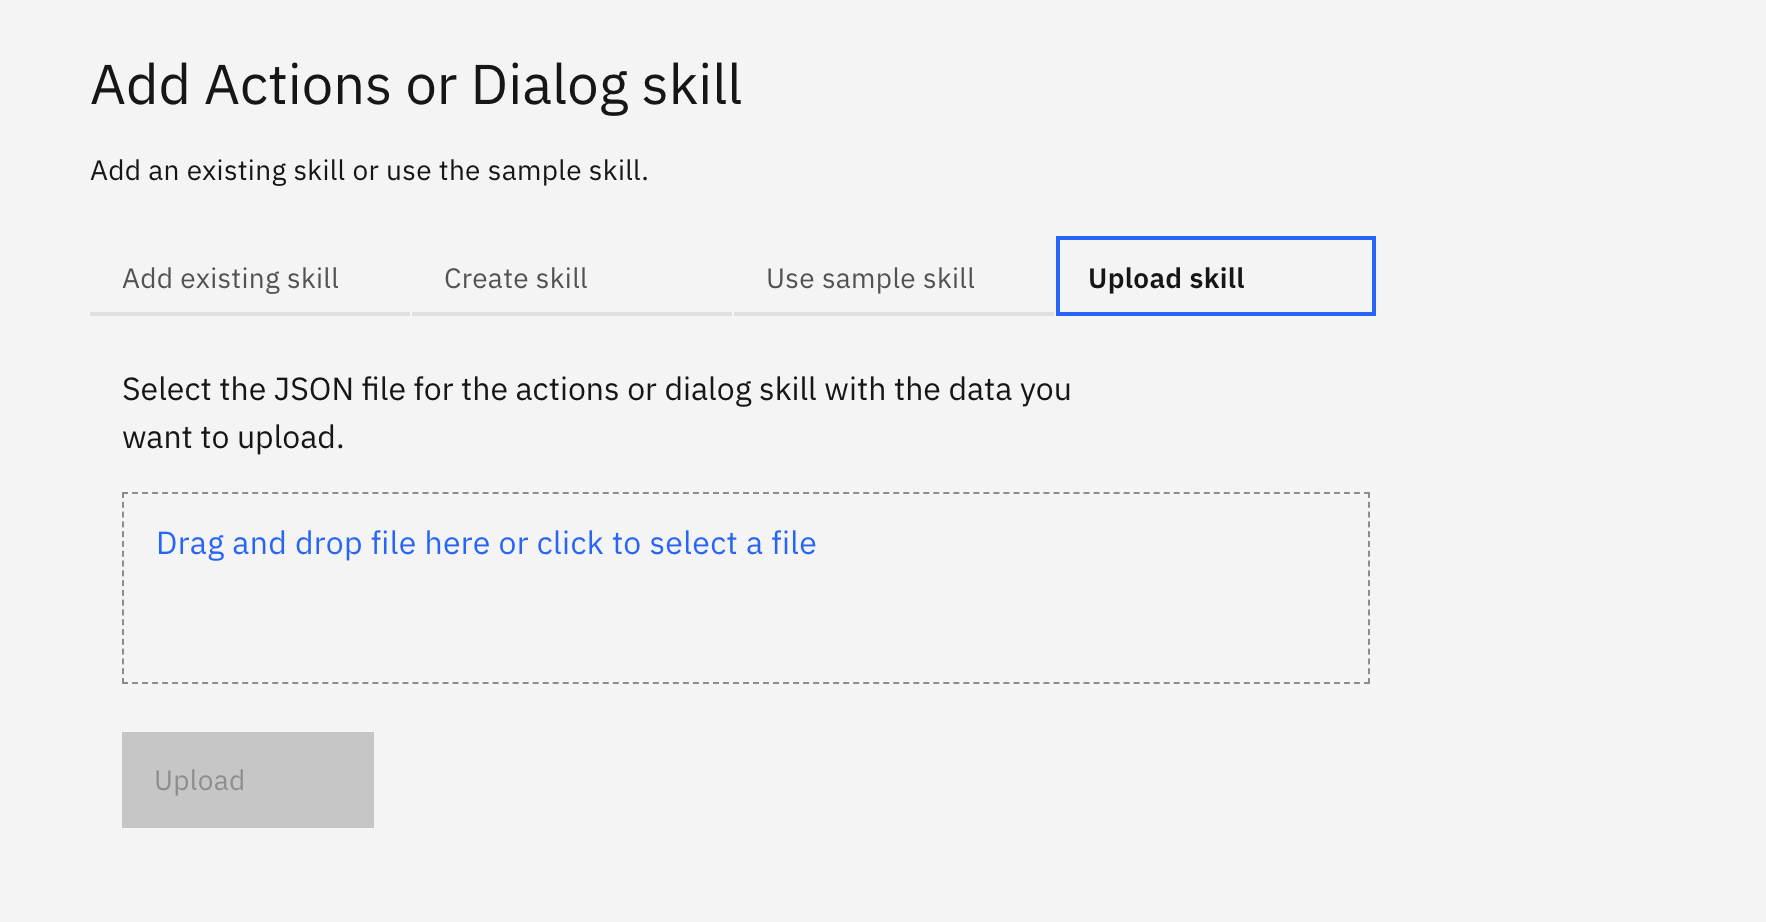
- Add the file you downloaded on the first step and click the “Upload” button.
Everything is set for now.
Now we need some additional information in order to be able to connect the assistant we just created to our logic.
Click on the three (3) vertical dots on the top right corner of your assistant and select the “assistant settings” menu. There retrieve the following information that will be needed later:
- Assistant ID
- Assistant URL
- Service credentials API key
Don't close the page because we will need to come back to it after we set up our logic with Twilio Functions.
Generate a Yelp API key
In order to gain access to the Yelp API, you will need to generate an API key from the Yelp Fusion API.
Follow the instructions on the official Yelp developer documentation page to generate an API Key that will be useful later on in our app.
As soon as you generate the Api Key for Yelp write it down because we will need it in the next section.
Create a new Twilio account
Go to this link (https://www.twilio.com/try-twilio) and follow the instructions.
As soon as you create a Twilio account you will be assigned with some free credits ($20) in order to start building immediately!
Integrate Twilio with IBM Watson
Excellent work, you’re now set with all of the prerequisites. In the next sections, we’ll look at how to integrate Twilio to complete the tutorial.
Create your Twilio Functions
Twilio provides a serverless environment called Functions where you can host your code and connect it to endpoints to make them accessible from the internet in just a few minutes.
In order to do so you will need to use the Twilio CLI that will allow you to synchronize your local environment with your Twilio account without having to manually copy your code or anything similar.
- If you didn’t install the CLI during the prerequisites, follow the instructions to set up the Twilio CLI on your local machine.
- Go to https://github.com/HlsRobot/twilio-watson/tree/main/serverless and clone the project to your local machine.
- Rename the
.example.envvariable and save it as.env - Provide the environmental variables required and save the file:
a.ACCOUNT_SID-> Your Twilio account Sid that can be found at https://www.twilio.com/console (you need to be logged in)
b.AUTH_TOKEN-> You can find it in the same page as the account_sid
c.WATSON_CLIENT_API_KEY-> copied above from the Assistant settings
d.WATSON_SERVICE_URL-> copied above from the Assistant settings
e.WATSON_ASSISTANT_ID-> copied above from the Assistant settings
f.YELP_API_KEY-> The Api key generated in the previous section - On a terminal go to the functions folder and run the command
twilio serverless:deploy
And you should have similar results to the following screenshot:
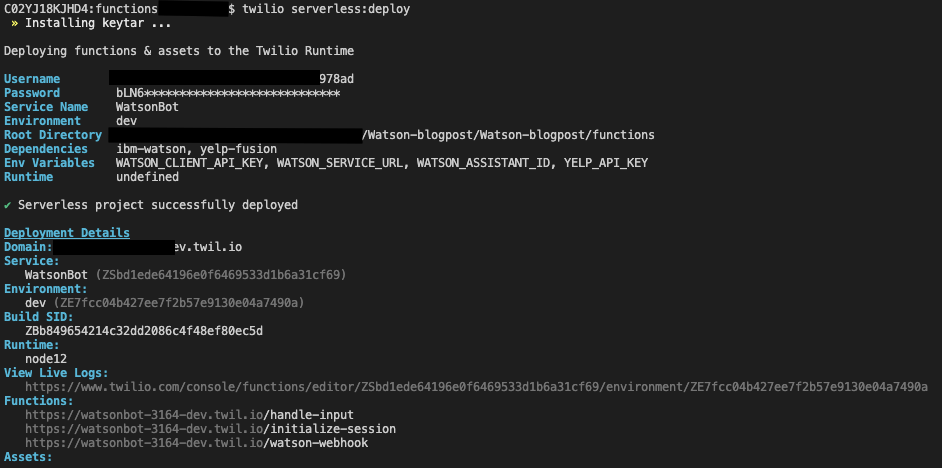
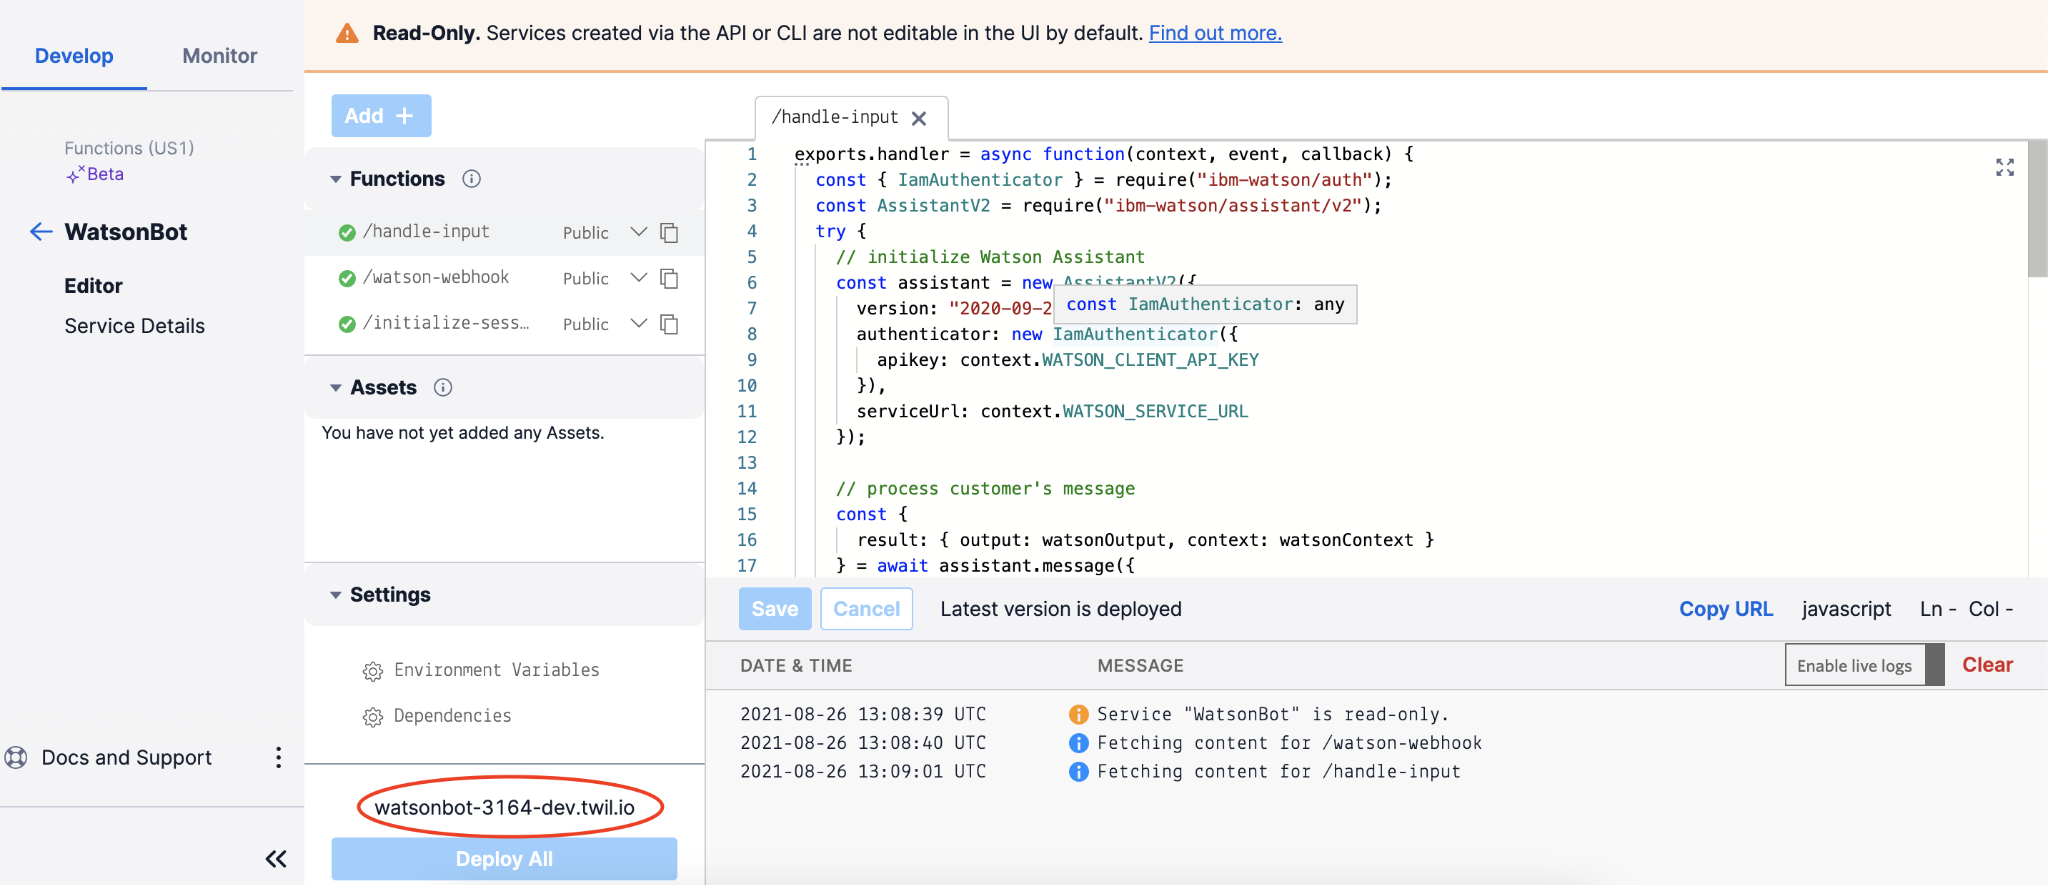
If you now visit https://www.twilio.com/console/functions/overview/services , you should be able to see your service named WatsonBot. If you click on the name, you will be able to see the deployed functions and the environment variables that we set earlier.
Additionally, under the settings, you will see the auto generated domain name of our functions:
Create your First Studio Flow
You don’t need to be a developer or a telco expert to create a Conversational Flow with Twilio. Visit https://www.twilio.com/console/studio/dashboard and you will be greeted with the following page. From the dashboard, you can jump quickly into a blank flow by clicking on “Create a Flow”.

For this app, we have created the Flow needed to connect to the IBM Watson bot. In order to import a ready Flow follow these steps:
- From the Studio Dashboard page click the “Create a flow” button (if you have existing flows then click on the Plus + button).
- Select a name and click “Next”.
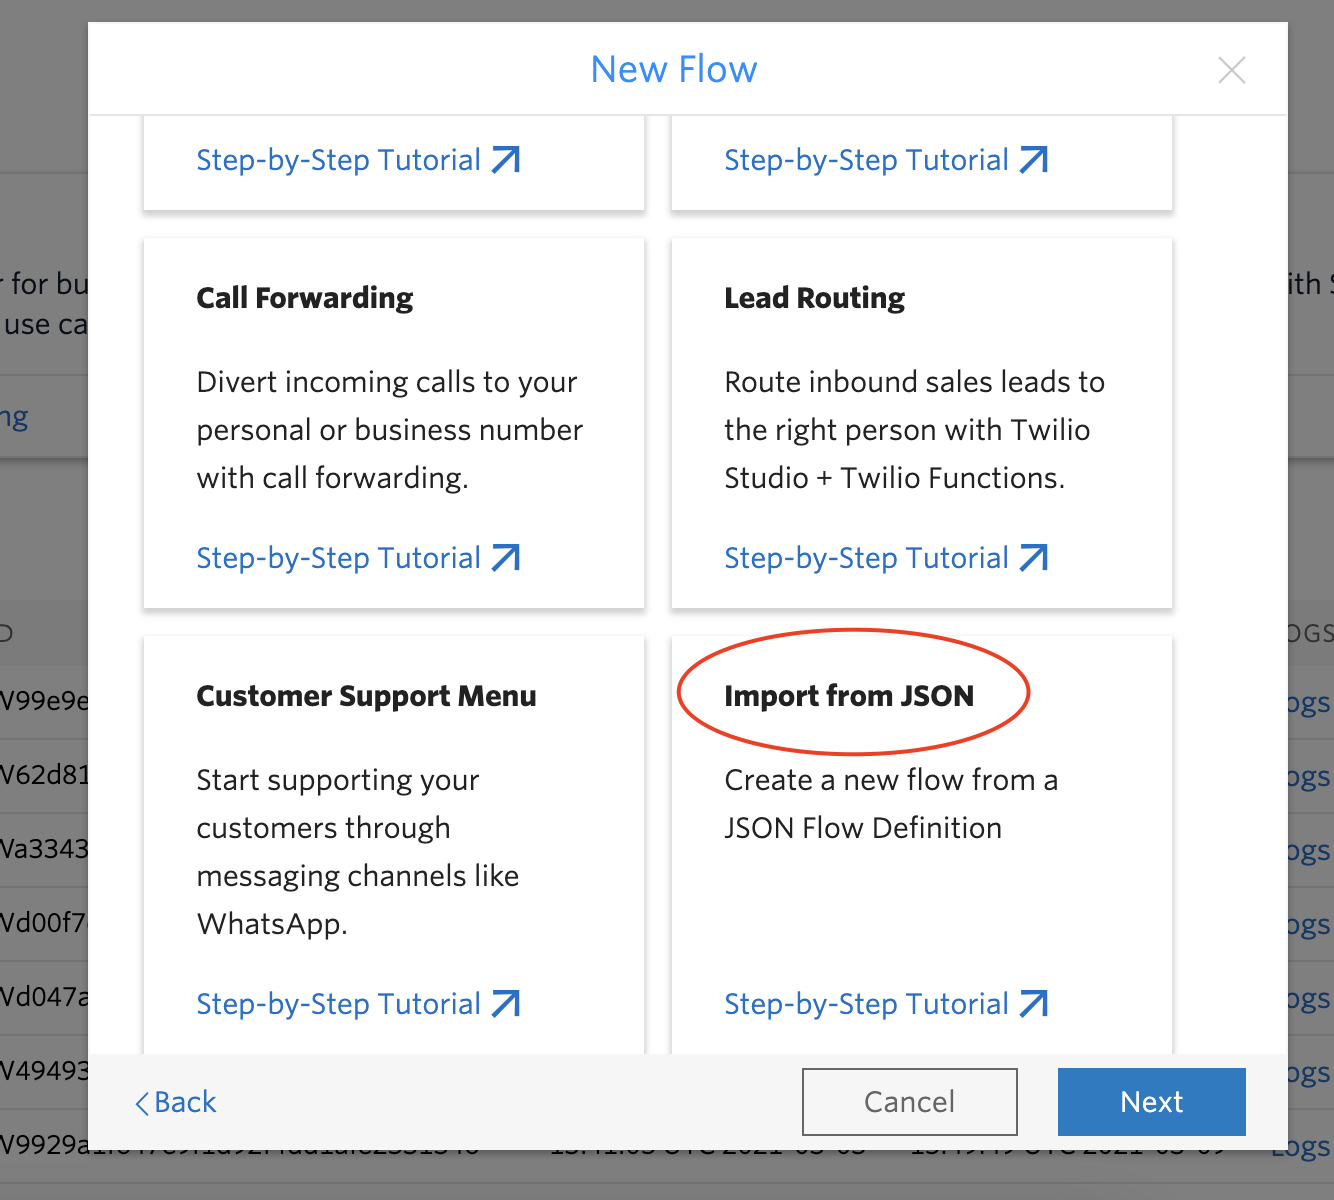
- At the next page, you are given the option to either start from scratch or choose a template. Scroll down, select the “Import from JSON” option and click Next.
- You should see an empty text area where you can provide your own JSON. Go to https://github.com/HlsRobot/twilio-watson, copy the JSON provided there, and paste it in the above text area. Click “Next”.
- You should be able to see something like the following view:
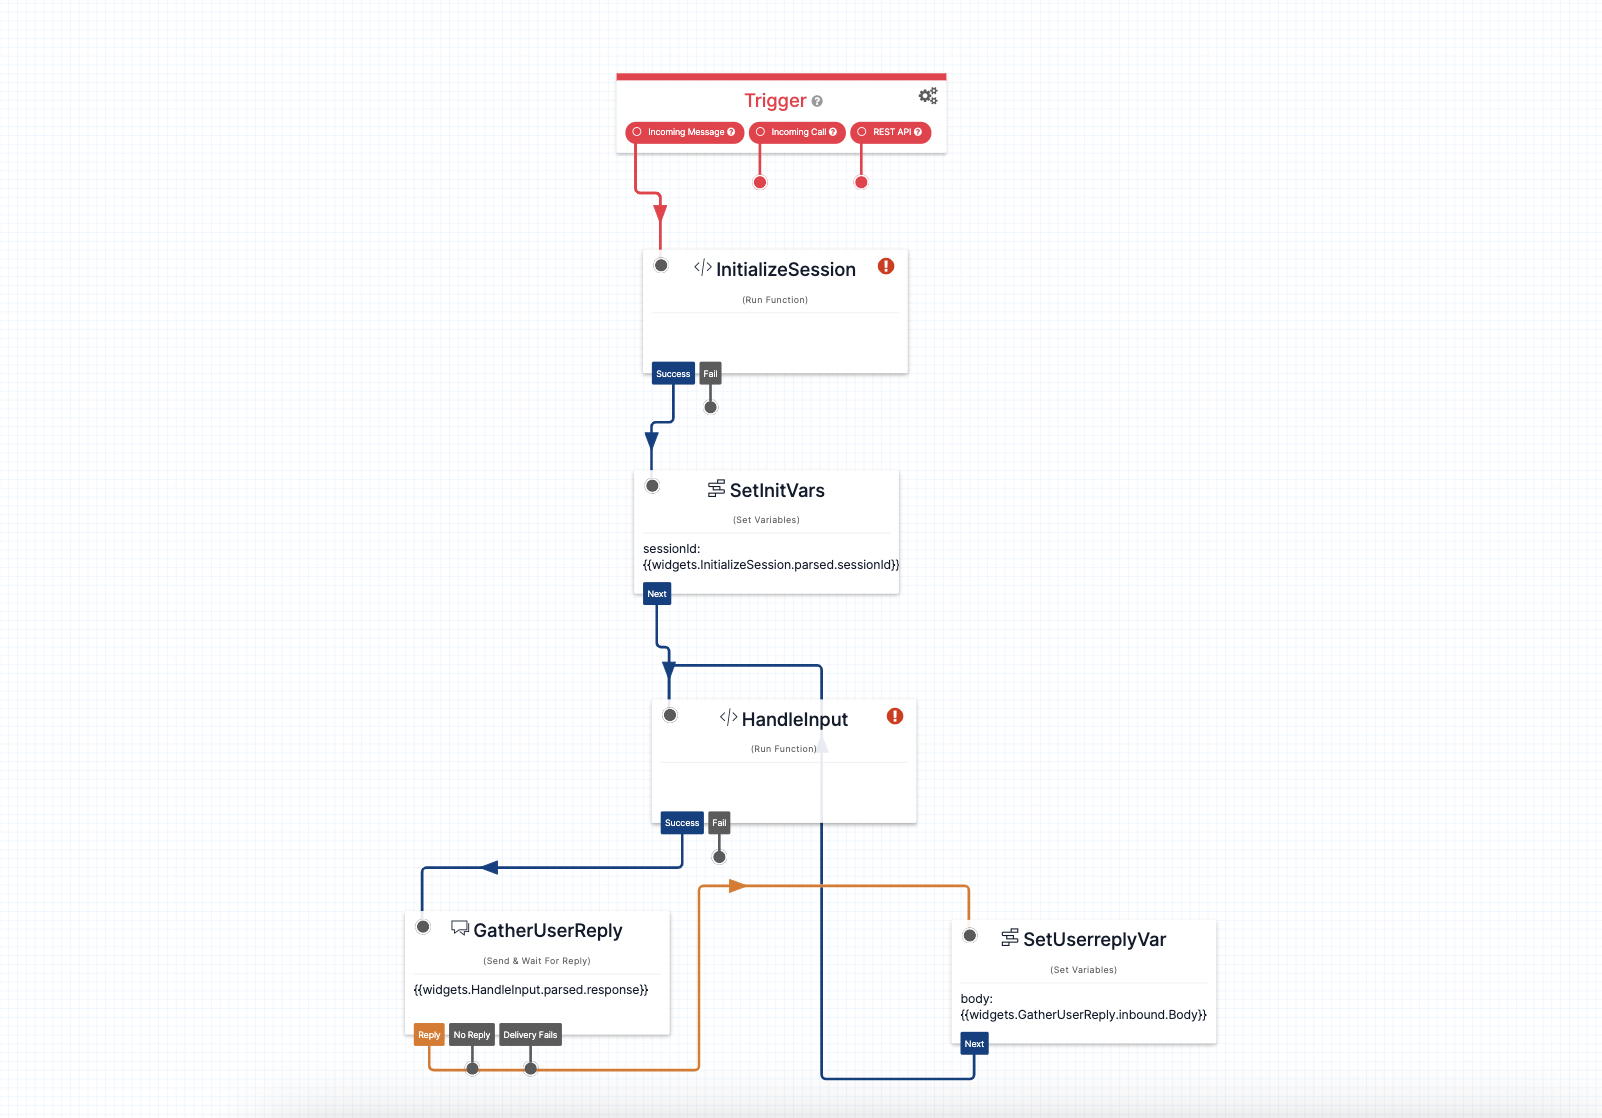
- First, click on the trigger Widget on the top of the flow and copy the Webhook URL (we will need it in a while).
- As you can see, two of our widgets (
InitializeSessionandHandleInput) require our attention. - Click on the
InitializeSessionwidget and at the dialog that will open on the right side provide the following input:
a. SERVICE:WatsonBot
b. ENVIRONMENT:dev-environment
c. FUNCTION:/initialize-session
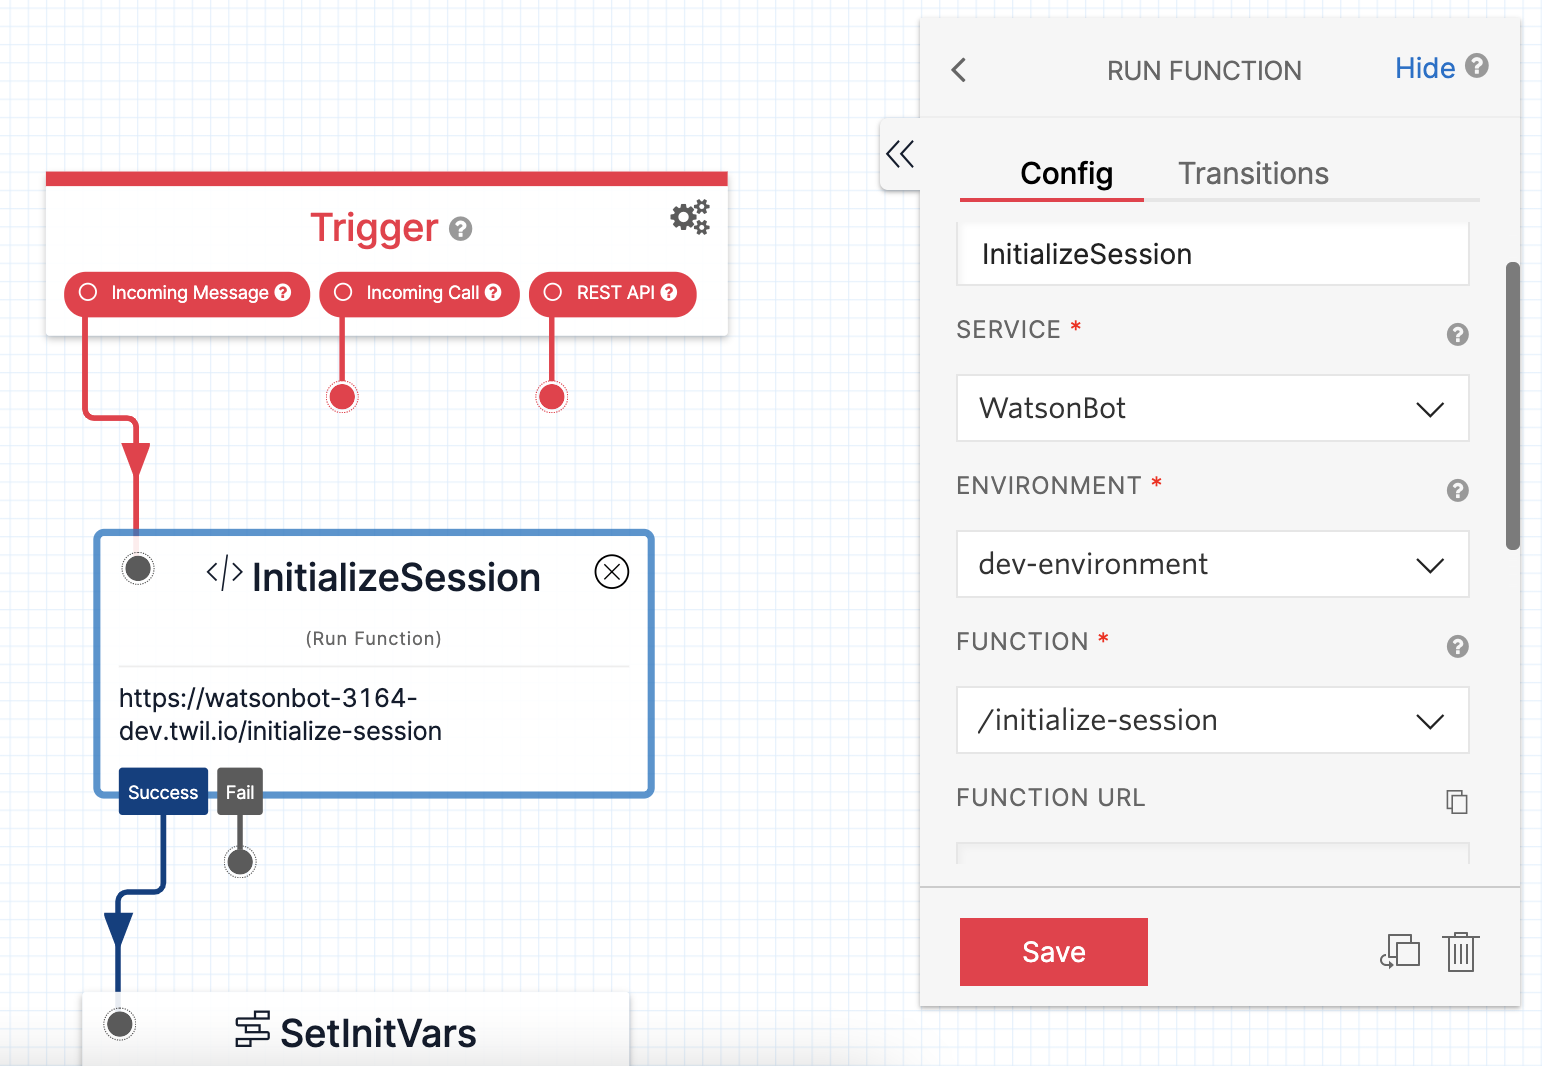
Do the same for the HandleInput widget with the only difference that at the FUNCTION parameter select the /handle-input option.
Finally, “Save” the widgets and press the “Publish” button on the top right corner.
Adjust the Watson Assistant
Remember when we previously mentioned not to close the Watson Assistant page?
We will need it now.
Go to the Watson Assistant, click on the generated Dialog (In this case ‘Watson Blogpost’). In the left menu, click on the Options drop down list and select the Webhooks option.
In the URL field enter your function service domain name and the remaining function:
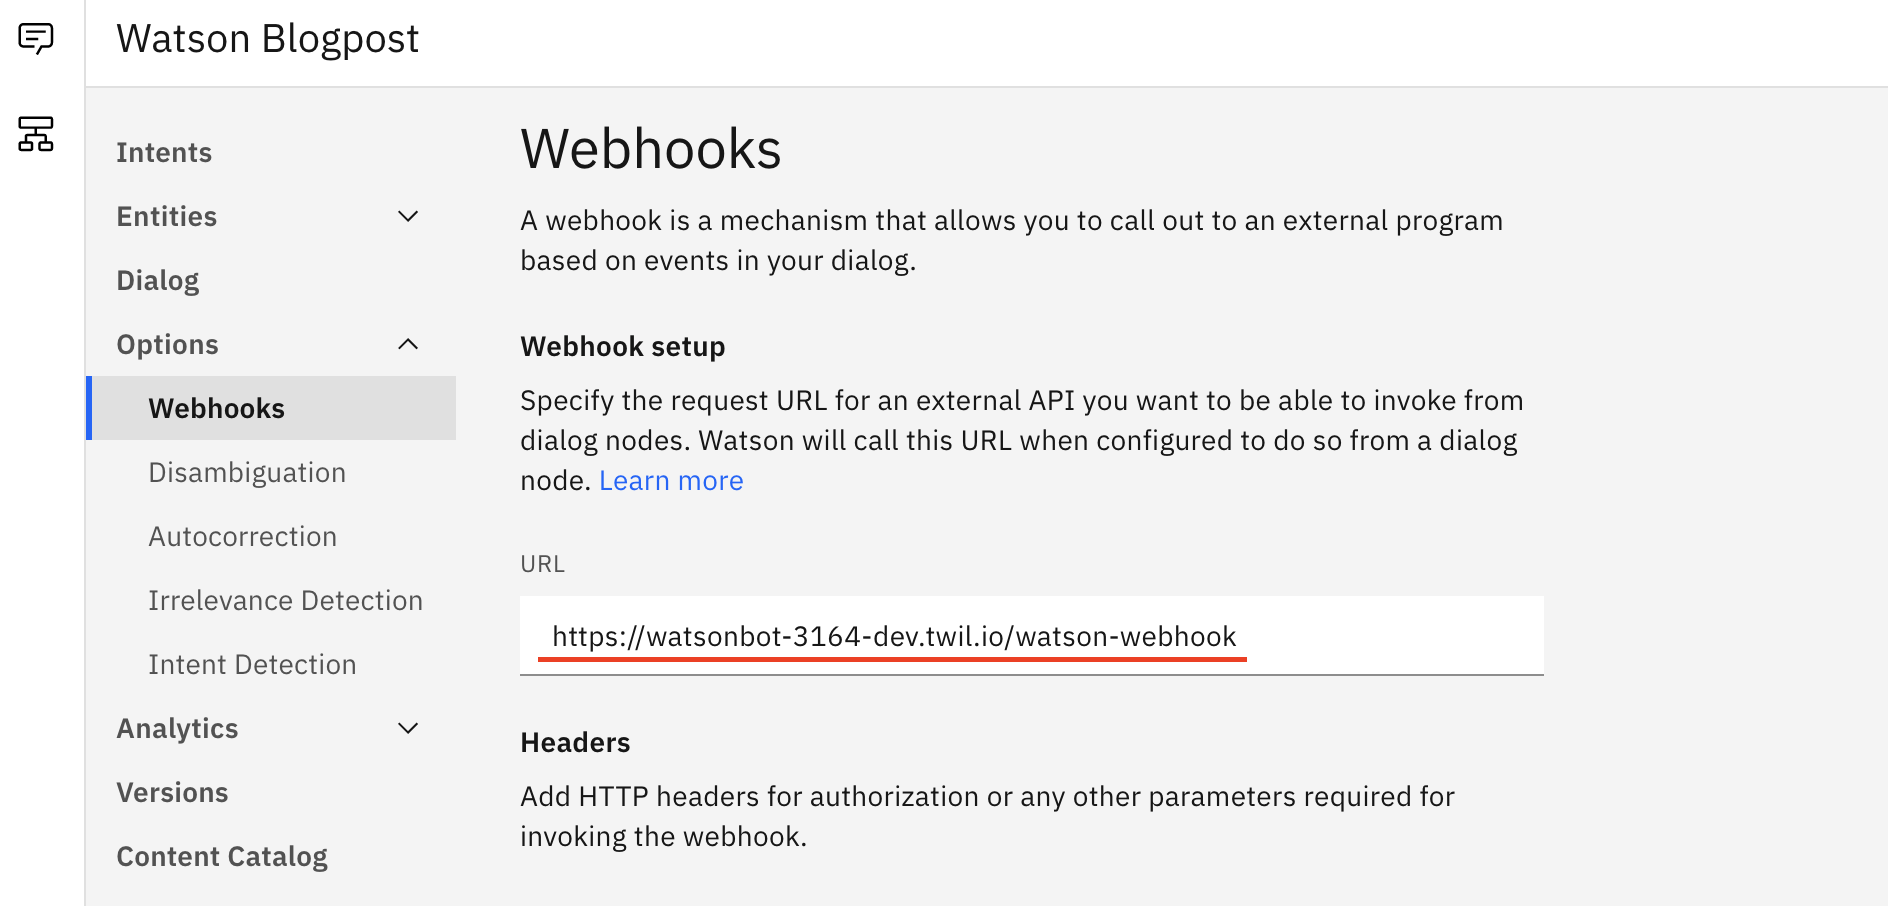
The only thing left for now is to test it.
You do not have to buy an actual WhatsApp number in order to test your flow.
Twilio provides a sandbox number for testing purposes.
You can find it in your Twilio console here.
The only thing left is to connect your WhatsApp sandbox to the Twilio Studio flow that we created above.
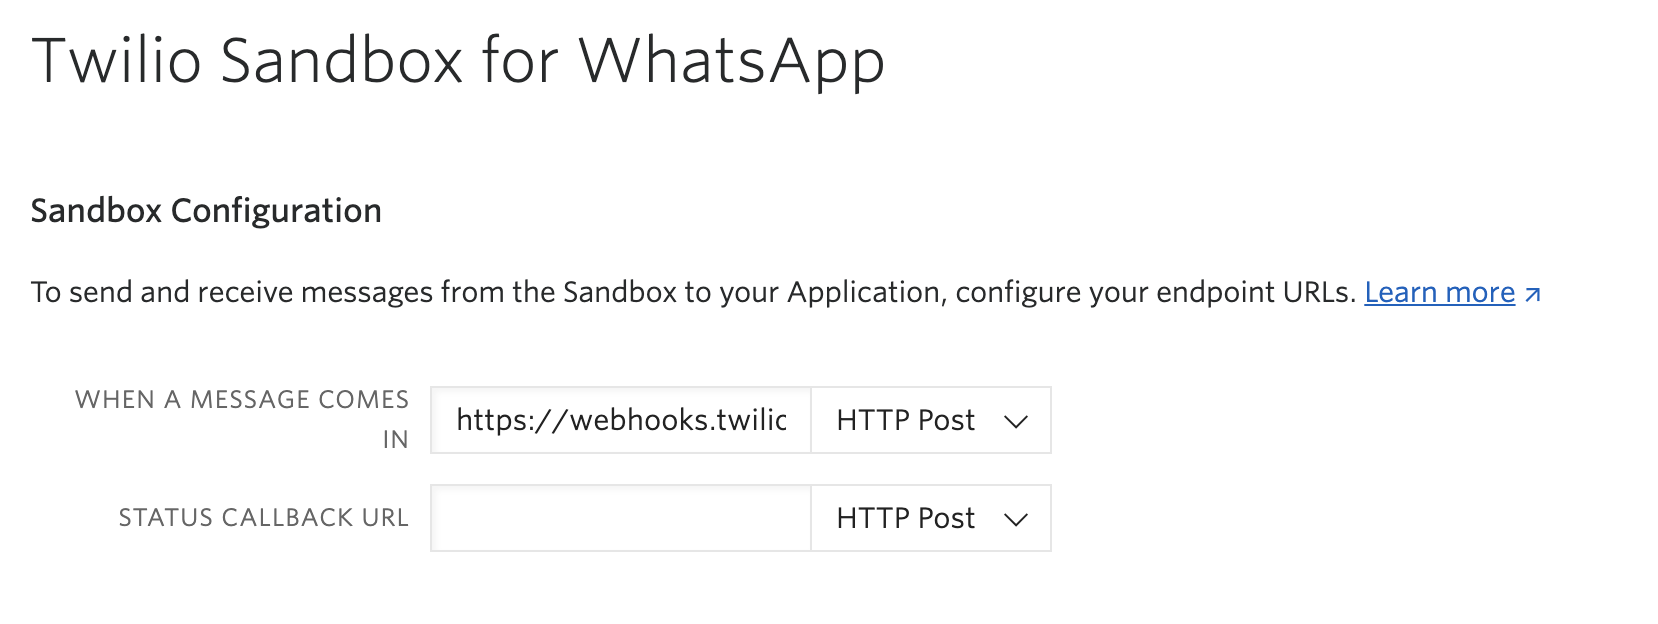
Paste the Webhook URL (that we copied in the previous paragraph from the Studio Flow) at the “WHEN A MESSAGE COMES IN” field, and press the “Save” button at the bottom of the page.
Now you’re all set and ready to test out your new Whatsapp bot! Go ahead and send a message to the number found in the WhatsApp sandbox and let the bot help you satisfy your culinary cravings!
Epilogue: Integrating Twilio with IBM Watson
Twilio’s focus on programmability gives you the option to integrate a variety of different services, tools and APIs in one seamless flow. We hope we were able to help you come up with ways Twilio can help you come up with solutions to your current use cases.
If you are still not convinced with the power of Twilio combined with IBM Watson, feel free to watch the recording of our Integration Breakfast webinar where a similar case is presented and analysed:
Additionally you can check out tutorials about WhatsApp such as https://www.twilio.com/blog/using-whatsapp-quick-reply-buttons-for-more-engaging-customer-experiences that will help you improve the customer experience even more with the use of quick reply buttons.
And as always, we from Twilio can't wait to see what you build!
Stratos Tziallas is a Solutions engineer on the Twilio DACH team. He is dedicated to finding solutions and elevating Twilio customers to the next level of cloud communications. He created this post because he and his wife can never decide what to have for dinner. He can be reached at stziallas [at] twilio.com
Ted Gieschen is a Munich based solutions engineer in the DACH region who is passionate about helping customers find elegant technical solutions to their business problems. Due to his background in NLP, he was curious about building an integration between Twilio and IBM Watson which is why he got involved in this project (...that and his love of of Donuts 🍩). Feel free to reach out to him at tgieschen [at] twilio.com

.png/_jcr_content/renditions/compressed-800.webp)
Related Resources
Twilio Docs
From APIs to SDKs to sample apps
API reference documentation, SDKs, helper libraries, quickstarts, and tutorials for your language and platform.
Resource Center
The latest ebooks, industry reports, and webinars
Learn from customer engagement experts to improve your own communication.
Ahoy
Twilio's developer community hub
Best practices, code samples, and inspiration to build communications and digital engagement experiences.