Server Push in 5 Easy Steps with Flask, React and Twilio Sync
Time to read:
December 11, 2020
Written by
Reviewed by
This post is part of Twilio’s archive and may contain outdated information. We’re always building something new, so be sure to check out our latest posts for the most up-to-date insights.

When considering a server push solution for your web application, you will likely evaluate WebSocket, HTTP long-polling, Server-Sent Events and maybe even Socket.IO. In this tutorial I want to introduce you to yet another option that you may not know: Twilio Sync. Sync is a cloud synchronization service that works across browsers and mobile devices and that it is incredibly easy to integrate with your application.
To learn how Twilio Sync works, we are going to add server push capability to a small web application that has a React front end and a Python and Flask back end. We’ll get the job done in just five easy steps!
Note that “server push” in this context refers to technologies that allow web servers to initiate an exchange with clients and “push” events, notifications or data to them. Do not confuse this with “HTTP/2 Server Push”, which is a completely different technology and not the subject of this article.
Tutorial requirements
To follow this tutorial you need the following components:
- Python 3.6 or newer. If your operating system does not provide a Python interpreter, you can go to python.org to download an installer.
- A Twilio account. If you are new to Twilio create a free account now. You can review the features and limitations of a free Twilio account.
- Basic familiarity with React and Flask.
An example application
Before we delve into Twilio Sync, we’ll create a basic application that will serve as a base on which we can implement a server push feature.
The React front end
Below you can see the main and only component of the React front end:
The project maintains a list of to-do items in the todos state variable, and just renders the list to the web page.
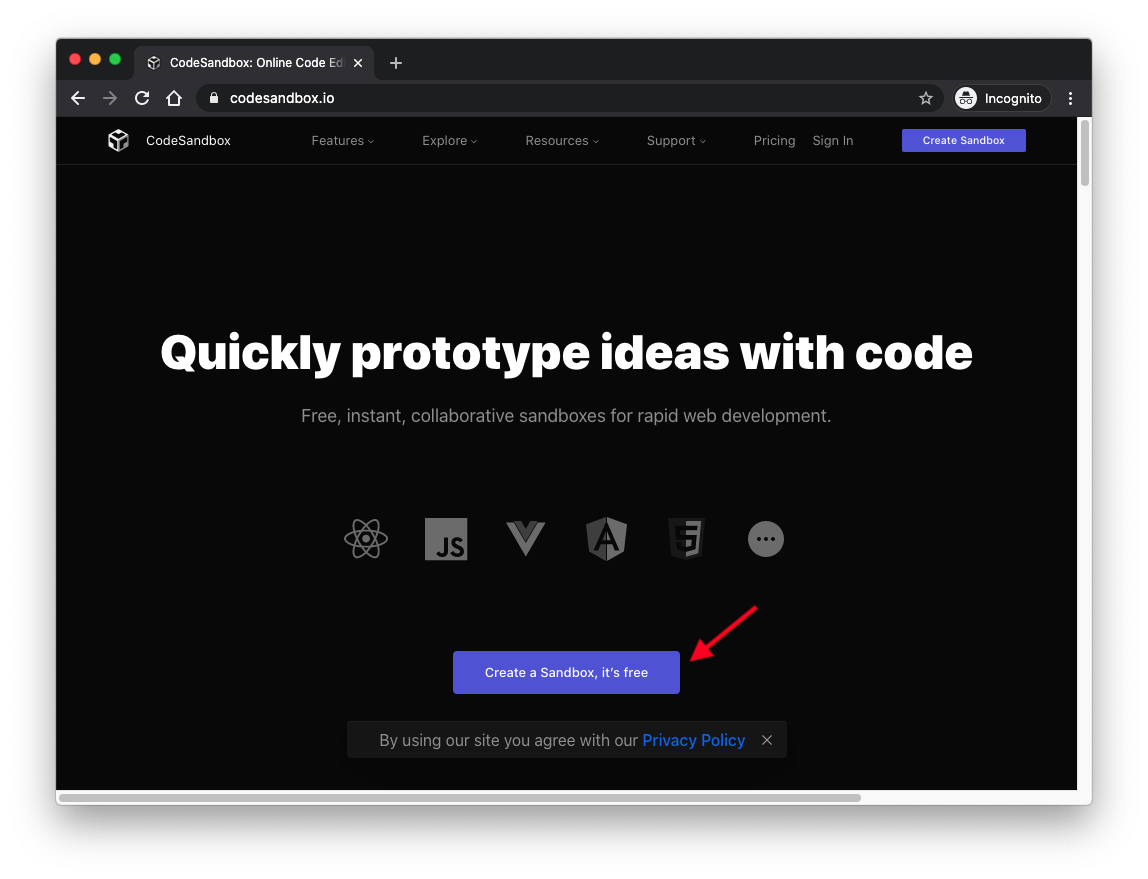
The most convenient way to create a running version of this application is to run it on a sandbox at CodeSandbox, the online coding editor and IDE. Open your web browser and navigate to https://codesandbox.io, and you’ll be immediately be offered to create a sandbox, without the need to login or create an account:
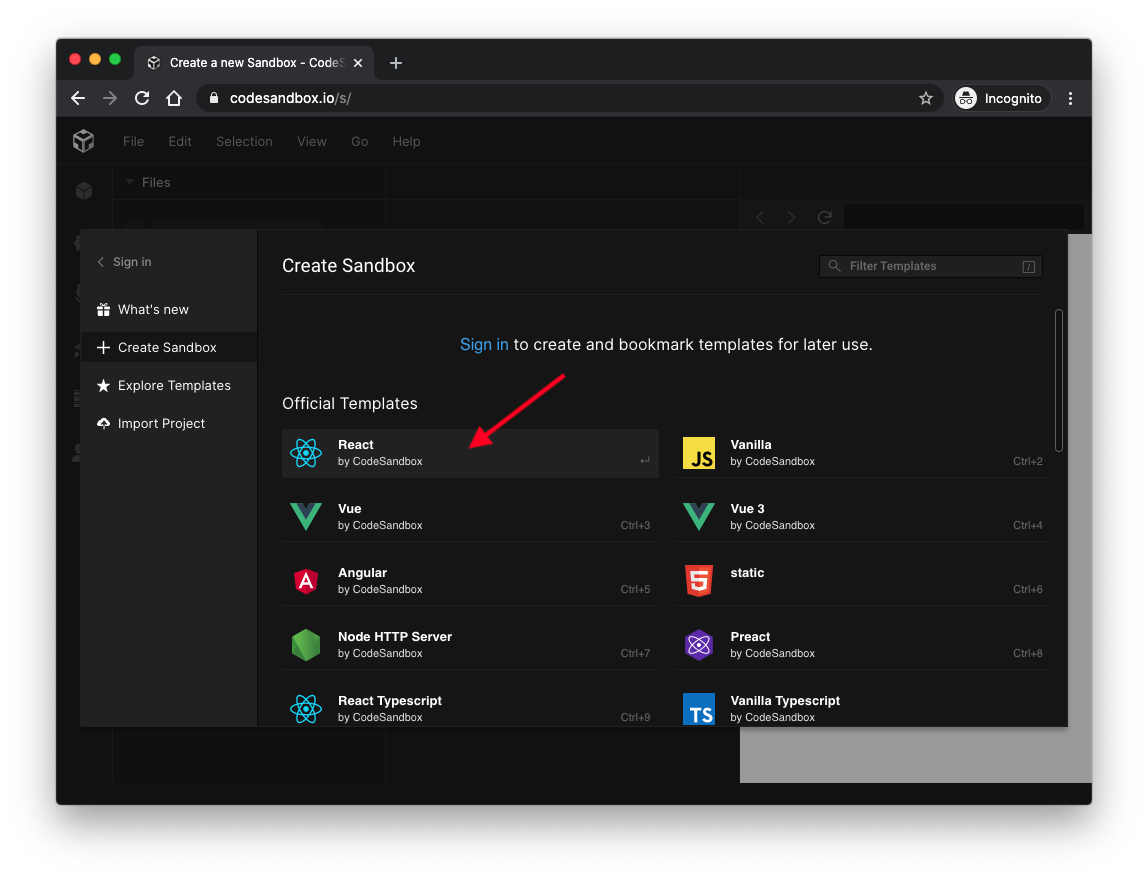
You will then be asked to select a template to use to bootstrap your sandbox. Pick the React template:
You will now have a starter React project ready to be worked on. Take the front end code shown above and paste it into the App.js file, replacing the original contents. Give CodeSandbox a couple of seconds to parse and compile the code, and then you should see the application running on the right portion of the window:
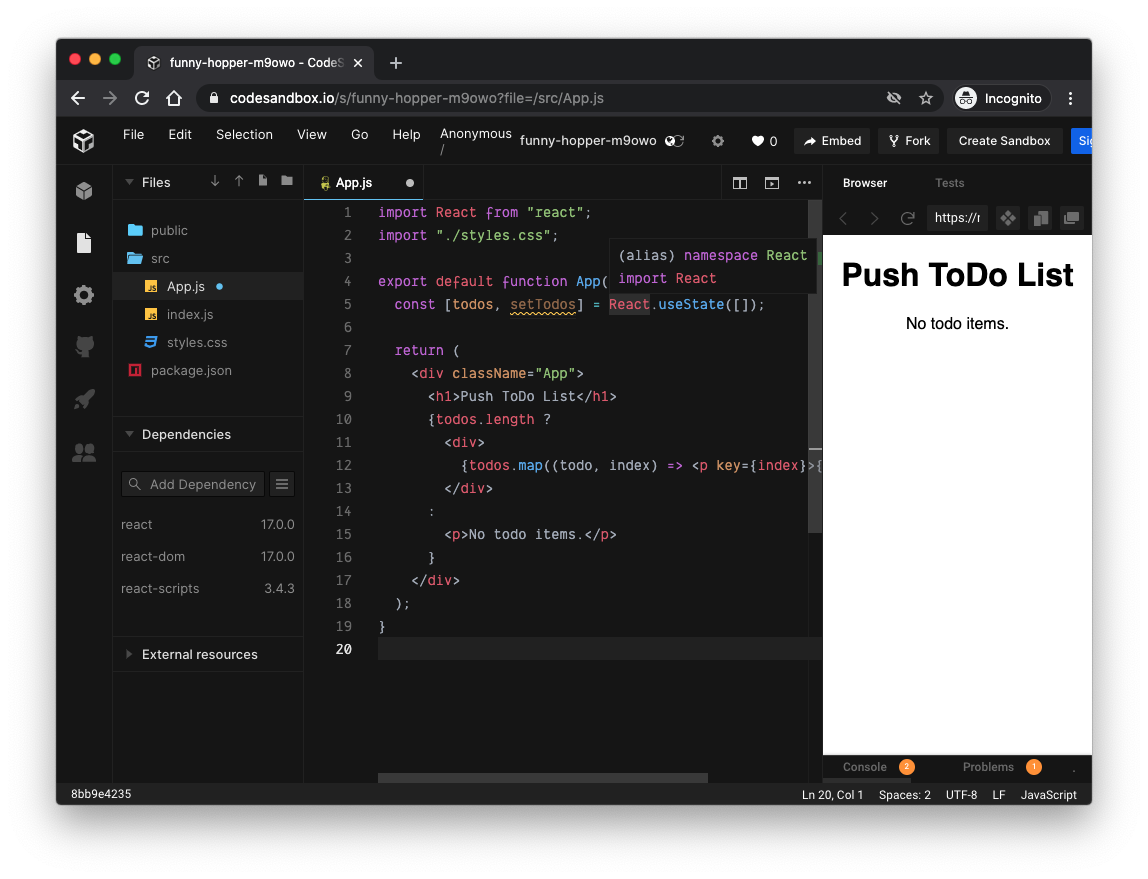
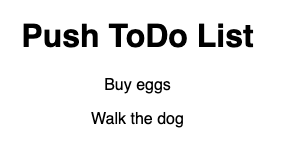
The application will show a “No to-do items” message because it is initialized without any contents. If you want to see how it will look when items are added, you can temporarily introduce some items manually, by editing line 5 of App.js as follows:
Any items you add to the list that initializes the todos state variable will be rendered by the application.
We will be using the Twilio Sync JavaScript SDK, so let’s add that to the project as a dependency. On the bottom half of the left sidebar you will see the current dependencies of the project. Type twilio-sync in the “Add dependency” field and press Enter to incorporate this library into the project.

Awesome! We now have a functioning front end to which we’ll add push notifications for new list items.
If you have problems building this project, this link will take you to a working copy of the project that you can use for troubleshooting.
The Flask back end
Because the front end application is so small we really have no need to implement any back end functionality, so for now our Flask back end is going to be a skeleton application without any routes. We will, however, need to add a back end route as part of adding Twilio Sync.
Open a terminal window and create a directory where you’ll project will live:
Then create and activate a Python virtual environment and install our project dependencies:
Copy the following Flask application into a file named app.py:
As mentioned above, this is just a starter application that creates a Flask application instance and adds support for Cross-Origin Resource Sharing requests (CORS), so that the front end can make calls into it.
To complete the Flask server set up, add a .flaskenv file with the following contents:
The .flaskenv file provides configuration for the flask command. The FLASK_APP variable configures the main application script, while the FLASK_ENV variable sets a development environment, which activates Flask’s debug mode.
At this point you should be able to start the Flask application with the flask run command:
Leave the Flask application running. One of the nice features of debug mode is that the server automatically restarts when the source code changes.
Server Push in 5 Steps
Okay, now we are ready to add a server push feature to this application, so that we can notify the front end application when we want new items added to our to-do list.
For your reference, these are the five steps that we need to carry out to complete this project:
- Generate access tokens
- Connect to a Sync object
- Access historic data
- Subscribe to updates
- Push updates
Let’s get started!
Step 1: Generate access tokens
The client-side library for Twilio Sync authenticates with a short-lived access token. The token must be generated in a server, where there is secure access to the Twilio credentials for your account.
In this first step we are going to implement a /token route for the back end the React application can use to request an access token. To be able to generate access tokens, the back end needs access to four different authentication credentials.
- Account SID
- API Key SID
- API Key Secret
- Sync Service SID
To push updates from the server, there is a fifth credential value that we need to configure:
- Auth Token
I will show you in a moment how to retrieve these five values from your Twilio account, but first create a file with the name .env where we are going to write all of them:
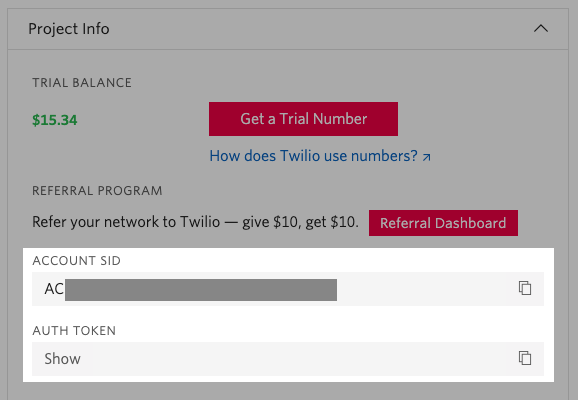
You can obtain the Account SID and Auth Token values for your account from the Twilio console. You can use the “Copy” buttons to transfer them to the .env file via the clipboard.
The Twilio Sync Service ID appears in the “Sync” dashboard. You can also access this page by clicking on the “All Products & Services” icon on the left sidebar, and then scrolling down to “Sync”.
In the Sync section of the console, click on the “Services” menu. If you’ve never used Sync before, the services list will show a single entry with the name “Default Service”. You can use this entry for this project, or if you prefer you can also create a separate Sync service by clicking on the red plus icon. Regardless of which Sync service you decide to use, select the SID value next to its name, and transfer it to the .env file as the TWILIO_SYNC_SERVICE_SID variable.

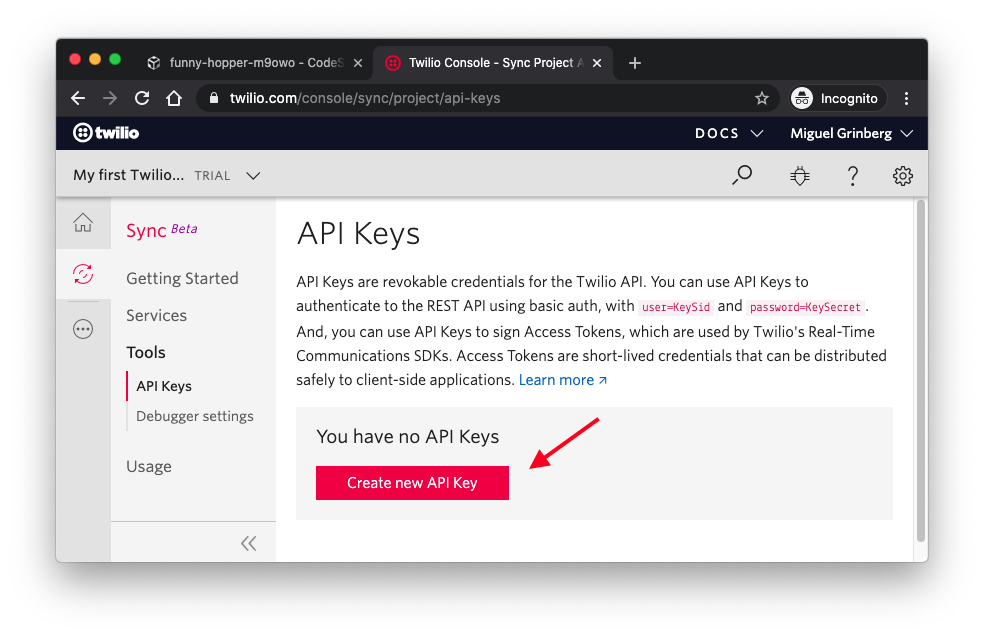
The last two values are the SID and Secret for an API key that you need to create. You can do this from the “Tools” menu of the Sync dashboard, where you’ll find a “Create API Key” button.
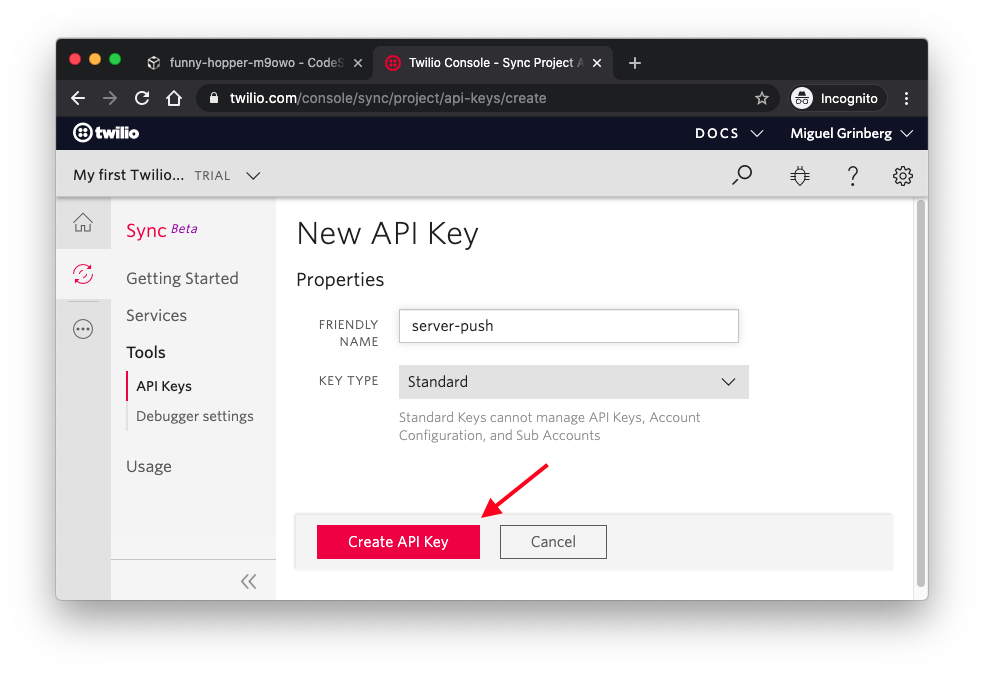
Give the key a name such as server-push and then click the “Create API Key” button.
The next page is going to show your API key information, including the SID and Secret values assigned to it. Copy those to your .env file.
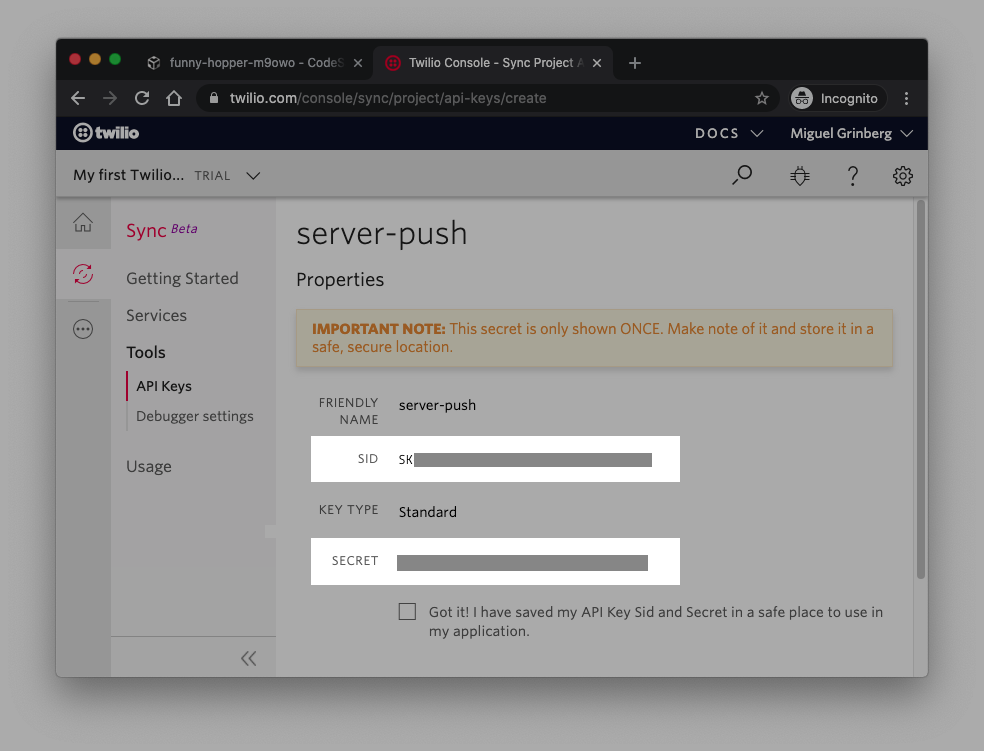
Once you transfer the API key values, check the “Got it!” checkbox and click the “Done” button. The API key secret will not be shown again. If you lose your API secret you will need to generate a new API key.
Very good! Now you have the .env file with all the credentials that are needed. The new version of the app.py file include the access token generation route is shown below:
Note near the top of the file that we’ve added a call to the load_dotenv() function. This function will look for a file named .env and import any variables defined in it into the environment. This will allow us to use the os.environ dictionary from Python to access these values.
The /token route uses the AccessToken class from the Twilio helper library to generate the token. The arguments that this class needs are:
- The Account SID value.
- The API key SID and Secret values.
- A list of grants, which are the permissions that we want this token to give. For this application we are including a grant to use our Twilio Sync service.
- An identity for the user. For this application we are generating a random identifier for the user. In a real application you would use a unique identifier for your user, after verifying the user’s identity.
When you save the updated version of app.py, the Flask web server will detect the change and reload itself.
Step 2: Connect to a Sync object
As a second step we are going to expand the front end application to connect to a sync object that will hold the list of items that we will present in the application. Twilio Sync not only supports push notifications but also provides cloud storage, which is great because we will also be able to retrieve items that were added to the list in the past.
The Sync service supports different types of sync objects, such as maps, lists, message streams and documents. For this application the list object is the one that makes the most sense.
Below is the updated version of the App.js file from our React front end:
To connect to the sync service we’ve added an effect function. In this function we use JavaScript’s fetch() to send a POST request to our back end’s /token route, which is running on the local port 5000. The response from the back is going to be come in JSON format, with the following structure:
Once the response is parsed, we initialize a Sync() client object with the token we received from the back end. With this object, we connect to a sync list with the name todoList. The name that you use for the list is important, because we will refer to the list also by name when we push updates to it from the server. If the provided list name does not exist, a new list object with no elements will be created.
Step 3: Access historic data
Since the Twilio Sync service provides persistence for list objects, we can now get all the elements that are stored for this list and add them to our todos state variable, which will automatically make React display them in the page.
Below you can see the updated effect function including the code to retrieve and add existing list items to the application state.
The getItems() method of the list object returns a paginator object. In this example we are just getting the items that come in the first returned page. The paginator object provides methods to check if additional pages are available. Check the documentation for details.
Step 4: Subscribe to updates
We now have a connection to the sync list, and have obtained any items that have been previously added to it. The final change in the front end is to subscribe to list changes. In this example we are going to listen to the itemAdded event.
Below is the effect function with the itemAdded event handler.
Note that the Sync list objects support other events besides itemAdded. See the complete list in the documentation.
This completes the front end. If you have any issues with it, use this link to access a working version of the project that you can use as a reference.
Step 5: Push updates
For the final step of this project we are going to write some Python code that updates the todoList object that the front end is watching. Whenever an item is added to the list, Twilio Sync will deliver a notification to all the clients that are watching it.
Open a terminal in the project directory where you have the Flask application (leave your first terminal window running the Flask application), and write the following code in a new file called push.py:
This little script uses the Twilio helper library for Python to create a new item in the todoList object. We begin by calling load_dotenv() to bring the Twilio credentials into the environment, and then a client object, which provides access to the Twilio REST APIs.
The sync_service variable loads the Sync service that we selected for this project by its SID value. The todo_list variable then retrieves the list with the name todoList. We finally create a new sync list item on this list, passing the text that was given in the first argument of the command line as contents.
The code that pushes updates to the list can be incorporated into any server-side application, and as you can see in this example, it does not even need to be an actual server connected to the clients that are watching for changes.
Run the script as follows:
As soon as you run the script the item will be added to the list, and all the clients that are actively watching it will receive the itemAdded notification.
Conclusion
I hope this was a quick and useful introduction to working with the Twilio Sync service. There are a number of ways to expand the project in this tutorial that you may want to work on your own to learn more about the Sync service:
- Implement other sync list events such as
itemRemovedanditemUpdated. - Use a different type of object such as a map.
- Use the Sync JavaScript SDK to also make changes to the list, which should trigger notifications to other connected clients.
- Implement the Time-to-Live (TTL) feature to auto-delete items or entire sync objects after certain time has passed.
- Use Webhooks to receive notifications in the server.
I can’t wait to see what you build with Sync!
Miguel Grinberg is a Python Developer for Technical Content at Twilio. Reach out to him at mgrinberg [at] twilio [dot] com if you have a cool Python project you’d like to share on this blog!

Related Resources
Twilio Docs
From APIs to SDKs to sample apps
API reference documentation, SDKs, helper libraries, quickstarts, and tutorials for your language and platform.
Resource Center
The latest ebooks, industry reports, and webinars
Learn from customer engagement experts to improve your own communication.
Ahoy
Twilio's developer community hub
Best practices, code samples, and inspiration to build communications and digital engagement experiences.