Deploy Your Twilio Webhooks to Replit
Time to read:
February 23, 2023
Written by
Reviewed by

If you have been following tutorials on this blog, you probably know that Twilio uses the webhook pattern in many products. This pattern requires your application to expose a web server that listens on a publicly accessible URL that Twilio invokes at the proper times to notify you of an event. In most tutorials, we show you how to run the webhook on your own computer, and temporarily make it public through development tools such as ngrok. But what happens if you need to keep your webhook online for several hours or days, either for a longer testing period or for production use? Running a web server on your own computer then is not a viable solution.
In this tutorial, you will learn how to deploy a web server that hosts a Twilio webhook on Replit, a developer-friendly hosting platform with a free tier. I will show you how to deploy a Python webhook server, but the techniques are applicable to any programming language.
Requirements
To follow this tutorial you will need the following:
- A free or paid Twilio account. If you are new to Twilio, create a free account now.
- A free or paid Replit account. Create a free account here.
- A smartphone that can send and receive SMS (to test the deployed example application).
An Example SMS Bot
In this article you are going to learn how to deploy a little SMS bot to Replit. I’m not going to go over the implementation of the bot in this article, but if you are interested to learn more about it, this project is featured in detail in another tutorial of mine.
Ready to get this bot up and running on Replit? Let’s get started!
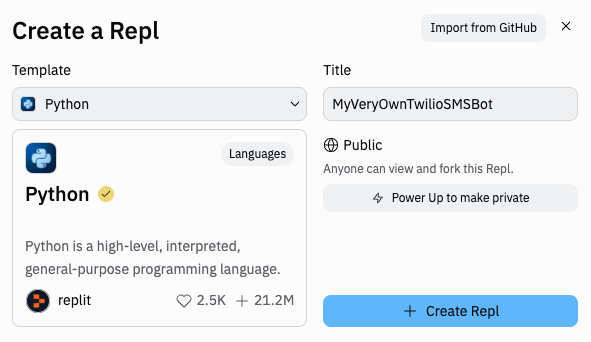
Log in to your Replit dashboard, and hit the “Create” button in the top-left corner, right below your username and avatar. Type or select Python in the “Template” drop-down. The “Title” field will suggest a randomly generated name for your project. You can accept it or change it to a name that you like better. Click “Create Repl” to initialize your project.
Note that if you are using the free tier of Replit you can only create public projects. You can upgrade to a paid account to create private projects.
The newly created project will have a sidebar on the left showing a single project file called main.py, plus two package management files. The main content area of the page has two sections: a code editor on the left and a tabbed panel with console and shell on the right.
This project uses the Twilio Helper Library for Python, so you are going to add it to the project now. Click on the “Shell” tab in the right side panel to access a bash prompt for your project. Type the following command to install the Twilio library:
The Python template from Replit uses the poetry package manager. If you prefer to use pip, you can run pip install twilio, which also works.
The bot is implemented in a single Python file, which you can see below. Copy and paste this code to the main.py file that is open on the code editor, replacing all of its original contents.
Note the host=’0.0.0.0’ setting given in the last line. Replit requires web servers to listen on the public network interface, which is achieved by passing a 0.0.0.0 listening IP address. Most web frameworks listen on localhost or 127.0.0.1 during development, but unfortunately this is not supported by Replit.
The bot is now complete! Click the green “Run” button at the top of the page to start it. After a few seconds, Replit will detect that you are running a web server and will split the right side pane in two, moving the console and shell tabs to the bottom, and adding a browser panel in the top half.
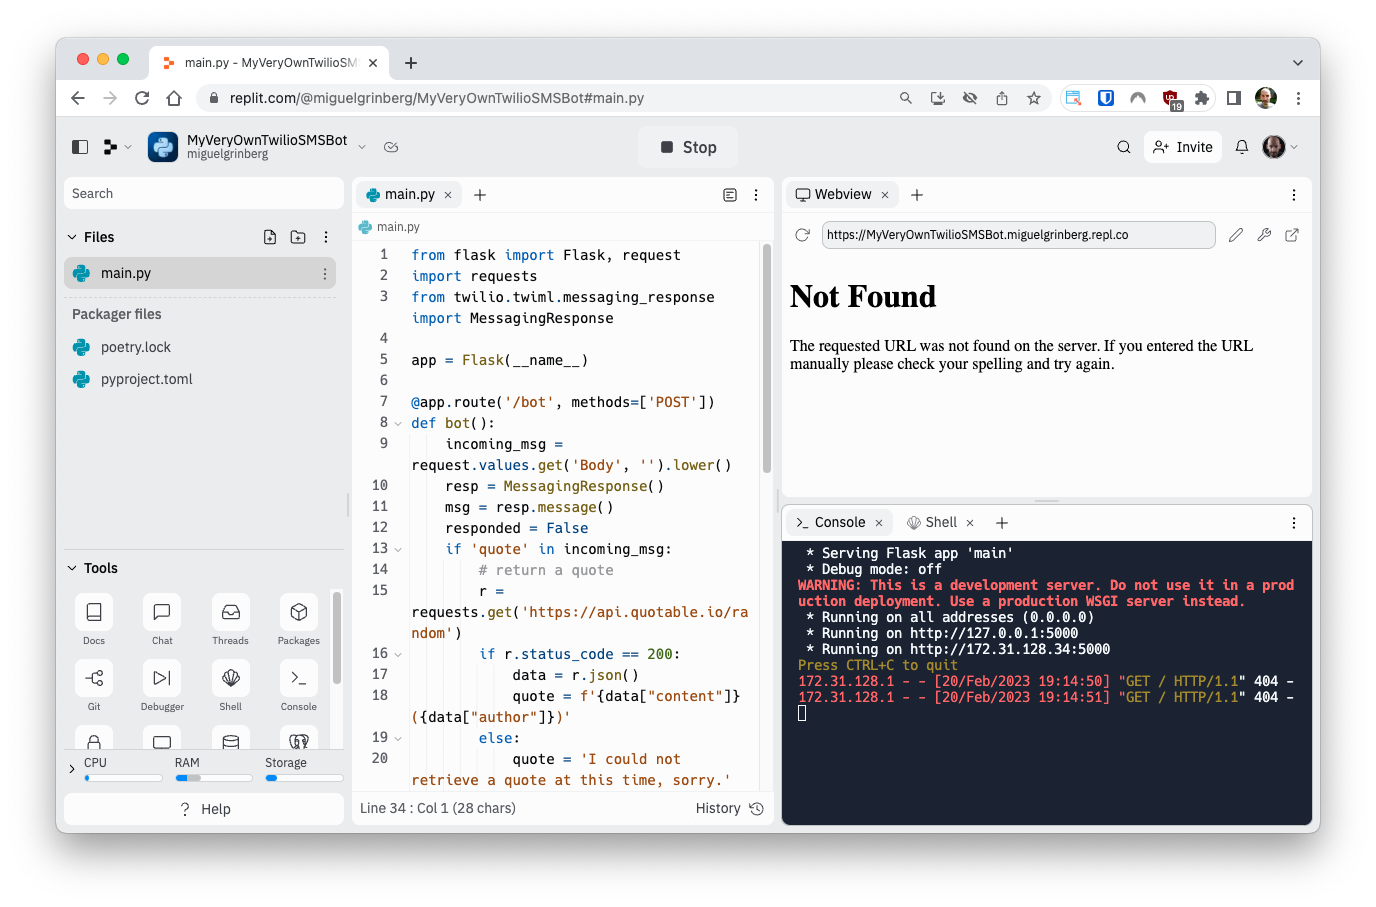
The bot is now running, but there is a concerning “Not Found” error in the browser panel. This error is normal for this application, which only deploys a Twilio webhook on the /bot URL. Replit tries to display the root URL of the application, not knowing that there isn’t one defined. You can safely ignore this error.
What is important, however, is the web address that is shown in the address bar of the browser panel, because this is the public URL of your just deployed web server. Take note of this address, as you will need it in a moment.
Running the Twilio bot
In the previous section, you unceremoniously started a web server that contains a Twilio SMS bot, implemented as a webhook. To be able to use the bot, its webhook needs to be associated with a Twilio phone number.
Buying a Twilio phone number
If you already have a phone number in your Twilio account, you can proceed to the following section. Read on if you need to acquire a phone number.
Open the Twilio Console in your web browser and visit the Phone Numbers section to buy a phone number. Select your country on the Buy a Number screen. You will also want to check SMS in the capabilities field. If you’d like to request a number from your region, you can enter your area code in the "Number" field.
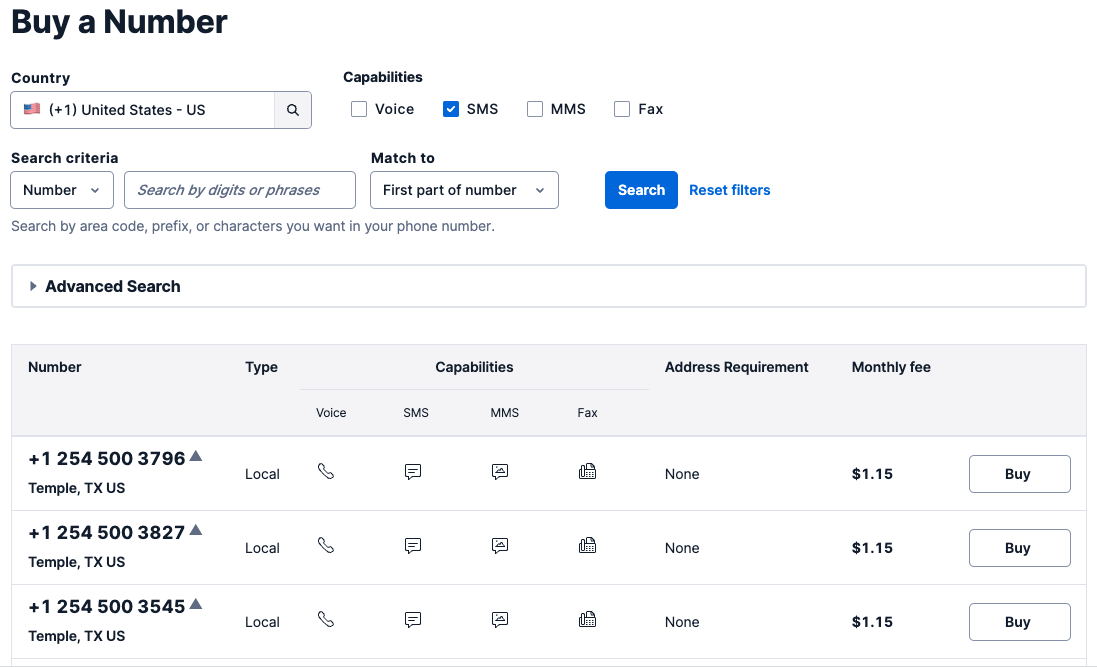
Click the "Search" button to see what numbers are available, and then click “Buy” for the number that you like from the results. After you confirm your purchase, click the “Close” button.
The documentation provides more details about the phone number buying process.
Configuring the webhook URL
From the Phone Numbers section of the Twilio Console, find the phone number that you want to use for this project and select it to enter its configuration page.
Scroll down to the “Messaging” section. In the “A message comes in” field, you’ll now enter the URL of the deployed bot webhook. This URL is composed of the Replit URL that you see in the browser’s address bar with the path to the webhook, which is /bot, added at the end. In general the format of the URL is going to be https://<project-name>.<username>.repl.co/bot. Enter this URL in the field as shown below:

Make sure the request method is set to HTTP POST, and then click the “Save” button at the bottom to record these configuration changes.
Chat with your bot!
That’s it! Whenever Twilio receives an SMS message on the number associated with your account, it will send a request to the bot’s endpoint running on Replit.
To try this out, grab your cell phone and send a text to your Twilio number. If you are using a free Twilio account, you will have to verify your personal phone number before you can send text messages to your Twilio number.
This cute little bot can provide famous quotes and cat pictures based on what you ask. Below you can see an example interaction I had with this bot:

Production deployment
You have made fantastic progress, but there is one more thing I would like to show you. The Python web server that you are running is based on the Flask web framework, and is currently running as a development server. On top of that, the webhook does not implement standard security measures. To have a proper production deployment, there are two changes that need to be made:
- Secure the webhook by verifying the Twilio signature in all invocations.
- Replace the Flask development web server with a production web server such as Gunicorn.
Signature verification is a topic that is well covered in a dedicated tutorial. This is important to ensure that all calls that are made to the webhook endpoint legitimately originate with Twilio.
I will show you here how to implement the second measure. To switch to Gunicorn, start by clicking the “Stop” button at the top of the page to stop the Flask development web server.
Next, go back to the “Shell” tab and install Gunicorn:
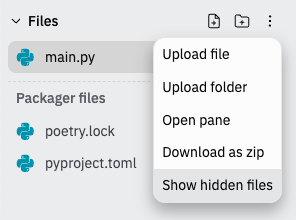
The final step is a bit obscure. All Replit projects have a hidden file called .replit that contains the project’s configuration. To be able to access this file, find the three-dot menu to the right of the “Files” heading in the sidebar and click on it to open the menu. From this menu select “Show hidden files”.
A few more files should now be visible in the left sidebar, and among them you should have one named .replit. Click on this file to open it in the code editor.
There are two changes that you need to make in this file. Near the top, change the value of the run variable to the following:
This is the command that starts the Gunicorn web server. The next change is a few lines below. Find a line that reads [interpreter]. This line starts a section of configuration, with a few indented lines following right below. You need to comment out the entire section, so that Replit does not use a Python interpreter to start the application, and instead runs the gunicorn command defined above. To comment out the interpreter block of lines, add a # character at the start of each line. The commented out section should look more or less like this:
That’s it! Now click the green “Run” button again to restart the project, this time with the Gunicorn web server. Make sure the bot is still working by sending more text messages to your Twilio phone number.
Your Replit project might be put to sleep after some time of inactivity. If a request arrives when the project is dormant, Replit will immediately restart it. A request that triggers a project restart will take a couple of extra seconds to respond due to the time it takes to bring the application back online.
Conclusion
I hope you found this tutorial useful. If you decide to continue using Replit for your webhooks, consider upgrading to a paid account, which will give you access to private projects, better performance and some other benefits.
Do you use another deployment platform for your Twilio applications? I’d love to know which!
Miguel Grinberg is a Principal Software Engineer for Technical Content at Twilio. Reach out to him at mgrinberg [at] twilio [dot] com if you have a cool project you’d like to share on this blog!

Related Resources
Twilio Docs
From APIs to SDKs to sample apps
API reference documentation, SDKs, helper libraries, quickstarts, and tutorials for your language and platform.
Resource Center
The latest ebooks, industry reports, and webinars
Learn from customer engagement experts to improve your own communication.
Ahoy
Twilio's developer community hub
Best practices, code samples, and inspiration to build communications and digital engagement experiences.