How to Get Started With Docker and Laravel
Time to read:
May 21, 2021
Written by
Reviewed by
You've recently released an app only to find that, within a pretty short period of time, it's all the rage. People can't get enough of it. As a result, requests grow so rapidly that the development team starts talking about "scaling up".
Once upon a time, this would have meant paying for a more powerful server (vertical scaling). However, the rise of containers in recent years means that it is now possible to rapidly—and relatively cost-effectively—add more containers and scale your application horizontally.
Doing so gives you two key advantages. First, you don't have to incur additional costs for a more powerful server. Second, you can scale your application up—and down—based on current customer demand.
In this article, I will show you how to use Docker with a Laravel project. This is the first step in building an application that can be scaled accordingly to handle both surges and dips in application usage.
Apache will be used as the webserver, and PostgreSQL will provide the database engine. The application to be built will display famous quotes made by renowned historians.
Prerequisites
To follow along with this tutorial you will need:
- A basic understanding of PHP and Laravel.
- Understanding of several basic Docker terms such as container, image, network, and service. Jeff Hale wrote a brilliant series that explains these terms, feel free to go through it if any of this looks unfamiliar.
- Docker Desktop
Getting started
To get started, create a new directory named laravel_docker
Because we have different components of our application that need to communicate among themselves, we will use Docker Compose to define our services. Given that, in the root of the laravel_docker directory, create a new file called docker-compose.yml.
This file will hold all the configuration for the containers to be built in our application's configuration from how the containers are to be built to the networks and volumes accessible to the containers.
In docker-compose.yml, add the following.
The version refers to the schema version and the services will define the list of containers our application stack will consist of. Services are really just “containers in production.”
In the following sections, we'll describe the containers for our database, Apache web server and PHP.
Build the database container
In docker-compose.yml, update the services entry as follows:
container_name sets the name of the container when it runs, rather than letting Docker Compose generate it automatically.
image lets Docker know what blueprint we want to build the container from, in this case, we specify postgres because we want to use PostgreSQL as the database engine.
The environment key specifies a list of environment variables, such as the name of the default database and password. Because we did not specify a username, the database username will be "postgres".
Using the ports key, we map a port on our local development machine to a port in the container so that we can connect to the database using a GUI tool. The port specified on the left of the colon is the port on the computer. The port specified on the right is the port in the container.
Note: If you have a PostgreSQL instance running or port 4306 is otherwise occupied you can specify a different port on your computer.
Next, we declare a volume using the volume key. According to the Docker documentation:
Volumes are the preferred mechanism for persisting data generated by and used by Docker containers
We declare a volume, in this case, so that our database won't be lost when the containers are destroyed or rebuilt.
Build the PHP and Apache container
Unlike the database container, we need to specify some additional instructions to set up our PHP/Apache container. To do this, we will build the PHP container from a Dockerfile. In the root directory laravel_docker, create a directory named php. Then, in laravel_docker/php, create a file named Dockerfile.
Note: this file has no extension.
In laravel_docker/php/Dockerfile, add the following.
The official PHP docker image provides a variation that comes with the Apache server. By specifying this in the FROM instruction, our base container comes with Apache installed.
In addition to scaffolding a container from the PHP image, we do the following:
- Install the PHP extensions Laravel depends on.
- Set the working directory of the container to /var/www/laravel_docker
- Install Composer
Next, update docker-compose.yml as follows:
The php-apache container is defined differently in docker-compose.yml than the database container. Instead of specifying an image, we specify a build context. This way, when the docker-compose command is run, the Dockerfile declared in the php directory will be used to build the container.
Next, port 8080 on the local development machine is mapped to port 80 in the container, just as we did for the database container. Port 80 is used because the virtual host configuration specified in ./apache/default.conf listens on this port.
We declare a volume, again, to persist the data generated by the container. In this case, our Laravel application will be created in the /var/www/laravel_docker directory of the php-apache container. However, it will be persisted in the src directory in the project directory on the local development machine.
An additional volume is declared to link the virtual host configuration for our application with the 000-default.conf host which Apache enables by default. This saves us the stress of disabling the default configuration, enabling ours, and reloading the apache server every time a container is built or rebuilt.
After that, we introduce a new configuration key: depends_on. This lets Docker know that we want the database container to be built first before the php-apache container.
Create the src directory in the root directory of the project.
When we scaffold our Laravel project from the php-apache container, the project files will be persisted here. Then, create a directory named apache. In it, create a file called default.conf.
Add the following to apache/default.conf.
With this in place, we can finally build our containers. To do so, run the following command.
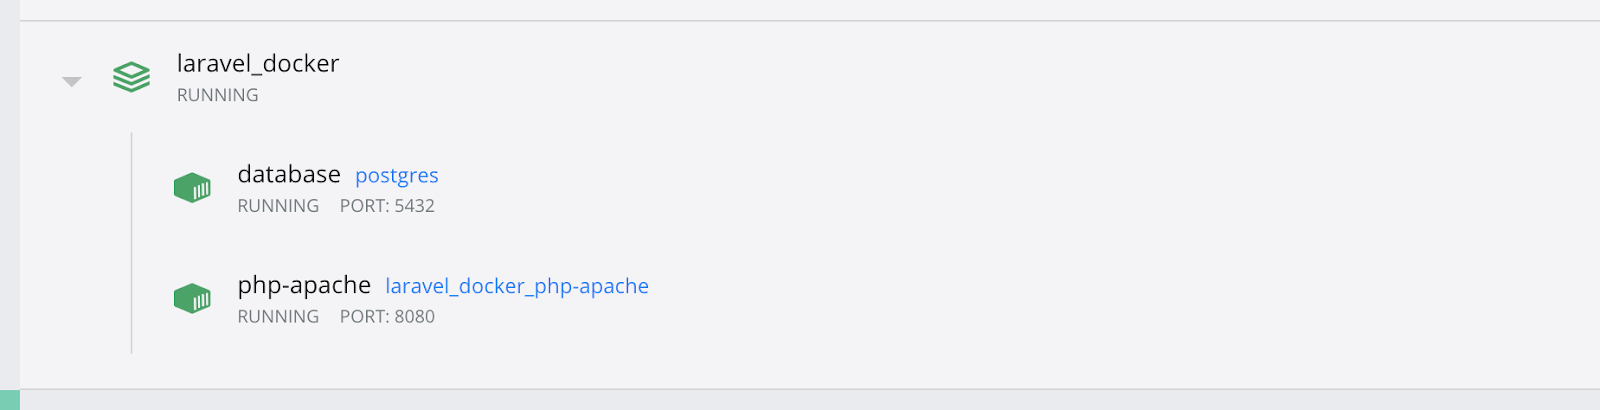
If you open your Docker Desktop application, you should see your newly created container as shown in the screenshot below.
Set up the Laravel application
To set up the Laravel application, initiate a container in the php-apache container with the command below.
This opens a CLI in the php-apache container. Create the Laravel application using the following command.
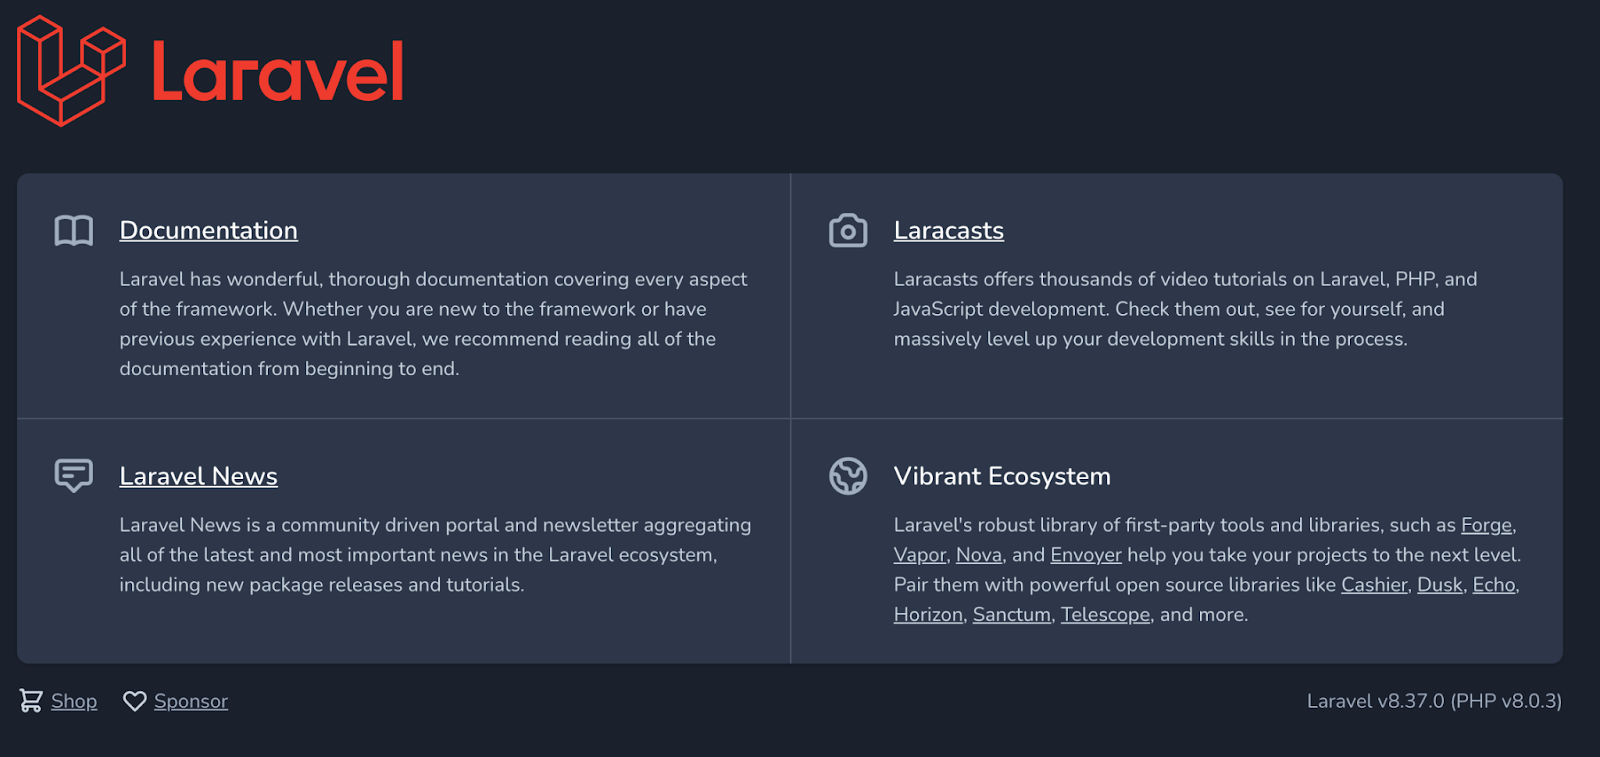
Once this is completed, navigate to http://localhost:8080/ which should display the default Laravel welcome page.
Also, if you look in the src directory, you will see that the Laravel project files have been added there too.
In src/.env, edit the database parameters to match the following.
Build the application
We are building a quotes application so let's create the model for it. In your php-apache container run the following command:
The -f argument lets artisan know we want to create a factory for the quote. In the same way -m is for a migration, and -s is for the database seeder.
In src/database/migrations/YYYY_MM_DD_HHMMSS_create_quotes_table.php, update the up function to match the following.
Next, open src/database/seeders/QuoteSeeder.php and add the following to the run function.
This creates a quote from the QuoteFactory 50 times, saving it to the database each time.
Note: Don't forget to add this import:
In src/database/seeders/DatabaseSeeder.php, add the following to the run function.
This runs the QuoteSeeder when the db:seed command is run. Next, in src/database/factories/QuoteFactory.php, add the following to the definition function.
To run your migrations and seed the database, run the following command in your php-apache container.
To see what has been added to the database, open a command-line to the database container with the following command.
Next log in to your PostgreSQL service with the following command.
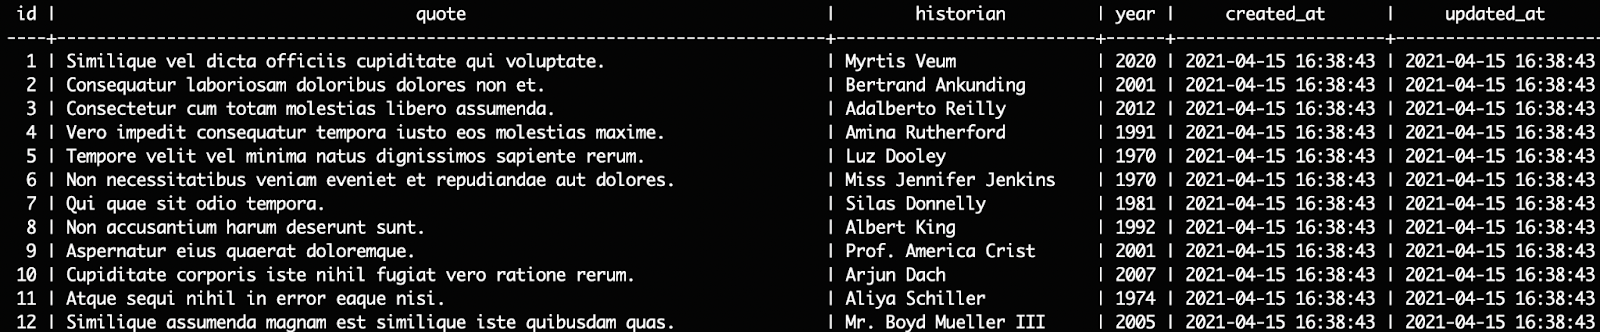
Next, run an SQL query to get all the items in the quotes table
The output should be similar to the screenshot below.
With that in place, create a controller to handle requests for quotes using the following command.
Open src/app/Http/Controllers/QuoteController.php and update it to match the following:
In the index function, we retrieve all the quotes from the database and pass them to the view ( quotes/index.blade.php) to be rendered accordingly. At the moment the view doesn't exist, so let's create it, by running the commands below.
Open src/resources/views/quotes/index.blade.php and add the following.
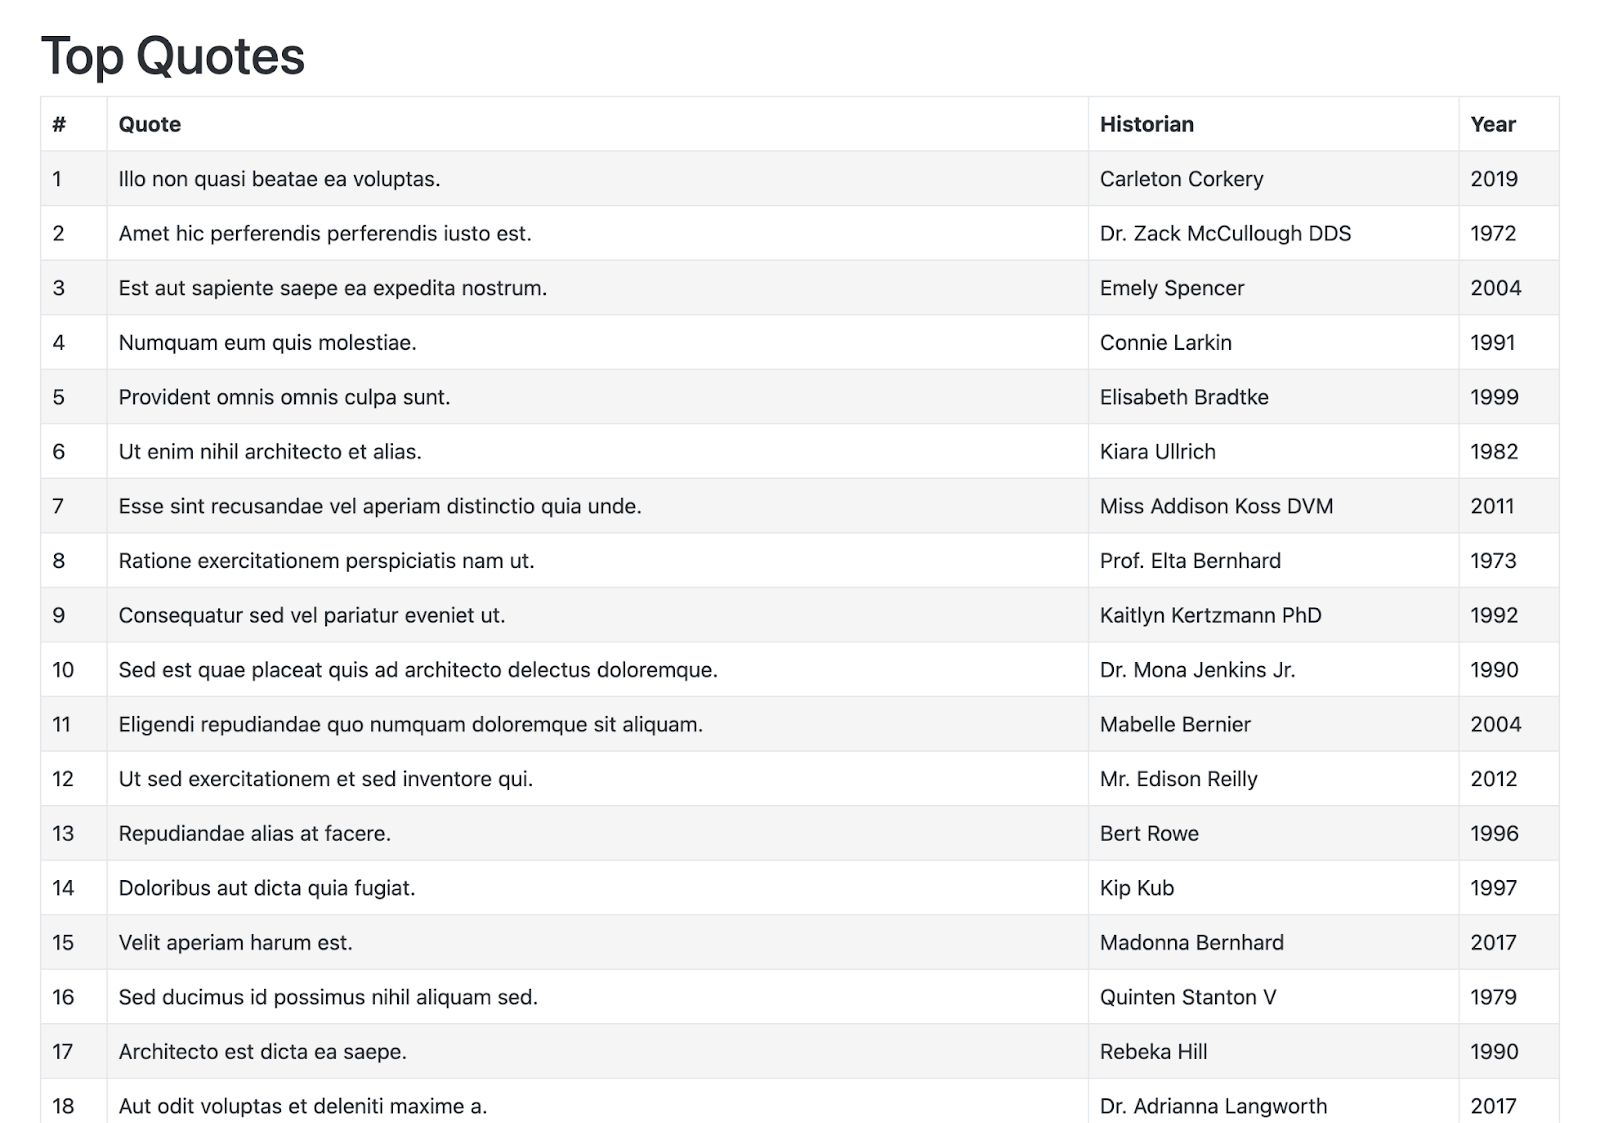
In this template, we use Bootstrap to style the table of quotes. Then we use a foreach loop directive to loop through the quotes received from the QuoteController and display the quote, historian, and year accordingly.
Finally, update the routing to load the quotes on the index page. To do this open src/routes/web.php and update the route declaration there to match the following.
By doing this the index function in the QuoteController will be called when the index page is visited instead of returning the welcome page.
Test the changes
To test the changes, navigate to http://localhost:8080/ where you should see the page render similar to the screenshot below.
Tear it all down
Earlier, we created and built our containers using the docker-compose up -d --build command. For some reasons, such as low hard disk space or redundant applications, you might want to clean up your systems. Docker already made a provision for that. Run the following command to stop and remove the containers and all associated networks:
You will see the following output:

Scaling the application
It is possible that one instance of a service may not be enough to sufficiently handle all the traffic to the application. For times like these, Docker supports scaling of services i.e., creating multiple instances of a service, by using the --scale flag.
As an example, we'll scale up our php-apache service. To do this, open docker-compose.yml. In it, we'll make two changes. The first is to remove the container name configuration. This is because the container name should be unique, if we try to create multiple services with the same name Docker will throw an error.
Similarly, we'll modify the service's port configuration so that Docker can automatically assign a port to each newly created service. Just like the container name, two services cannot be bound to the same port.
To make these changes, update the php-apache service configuration to match the following.
With the configuration updated, let's create 10 instances of our php-apache service by running the following command.
Once this is completed, you will see something similar to the screenshot below printed to the terminal.
To test that everything is working, run `docker-compose ps`. You should see output similar to the example below.
That's how to get started with Docker and Laravel
Not only were we able to build containers from images and Dockerfiles, but we were also able to make them communicate with one another, allowing us to run our Laravel application and database in separate containers.
This is the first step in building an application stack that is horizontally scalable. By taking advantage of container orchestration infrastructure, containers can be created/destroyed to meet the number of requests being handled by the server. If you'd like to learn more, check out Deep Dive into Laravel Development with Docker.
The entire codebase for this tutorial is available here on GitHub. Feel free to explore further. Happy coding!
Oluyemi is a tech enthusiast with a background in Telecommunication Engineering. With a keen interest to solve day-to-day problems encountered by users, he ventured into programming and has since directed his problem-solving skills at building software for both web and mobile.
A full-stack software engineer with a passion for sharing knowledge, Oluyemi has published a good number of technical articles and content on several blogs on the internet. Being tech-savvy, his hobbies include trying out new programming languages and frameworks.
- Twitter: https://twitter.com/yemiwebby
- GitHub: https://github.com/yemiwebby
- Website: https://yemiwebby.com.ng/

Related Resources
Twilio Docs
From APIs to SDKs to sample apps
API reference documentation, SDKs, helper libraries, quickstarts, and tutorials for your language and platform.
Resource Center
The latest ebooks, industry reports, and webinars
Learn from customer engagement experts to improve your own communication.
Ahoy
Twilio's developer community hub
Best practices, code samples, and inspiration to build communications and digital engagement experiences.