How to Set Up Environment Variables in IntelliJ IDEA
Time to read:
November 06, 2021
Written by
Reviewed by
In this article, you will learn how to navigate the Java IntelliJ IDEA to configure environment variables necessary for your project.
Tutorial Requirements
- Java Development Kit (JDK) version 8 or newer.
- IntelliJ IDEA Community Edition for convenient and fast Java project development work. The community edition is sufficient for this tutorial.
Start a new Java project in IntelliJ IDEA
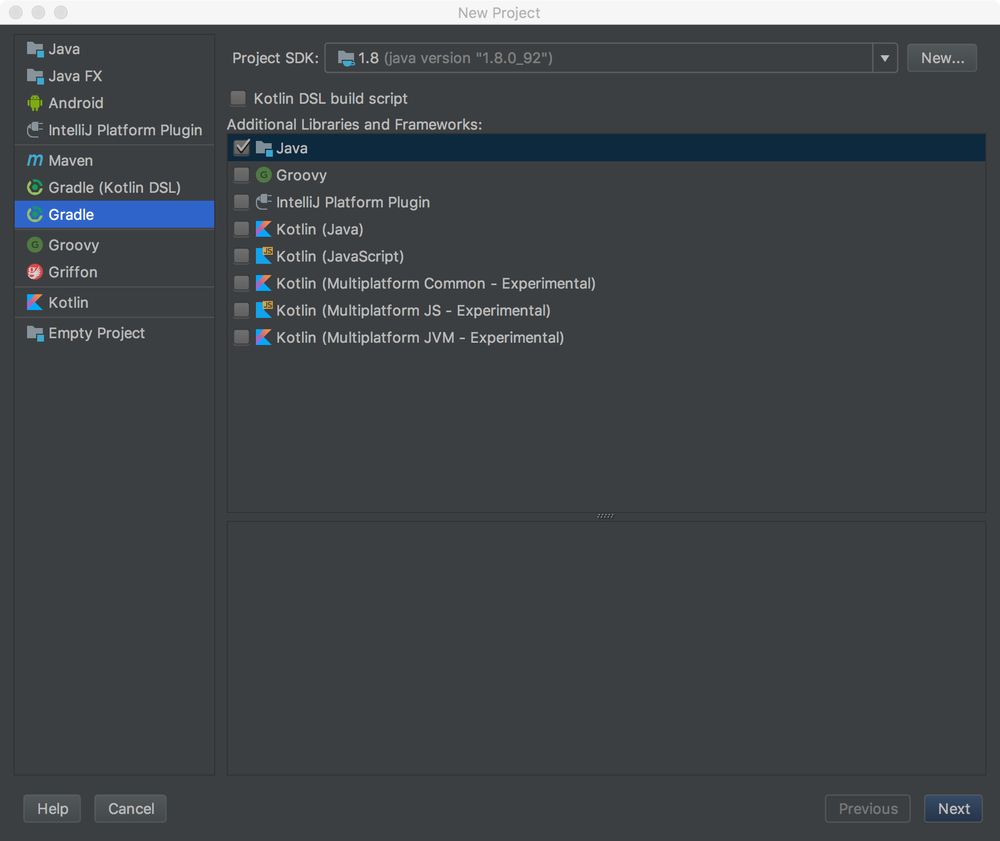
Open IntelliJ IDEA and click on Create New Project.
Choose Gradle on the left hand side, check Java in the box on the right hand side, and click Next.
Give your project a name such as "sms_variables" and click the Finish button.
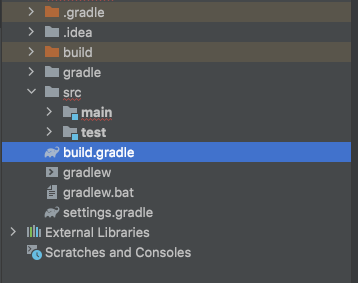
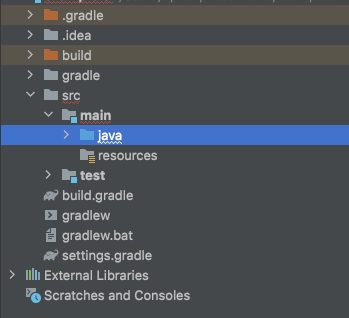
After the project setup is complete and the build has succeeded, your project directory structure should look like the following image:
Add environment variables in intelliJ IDEA
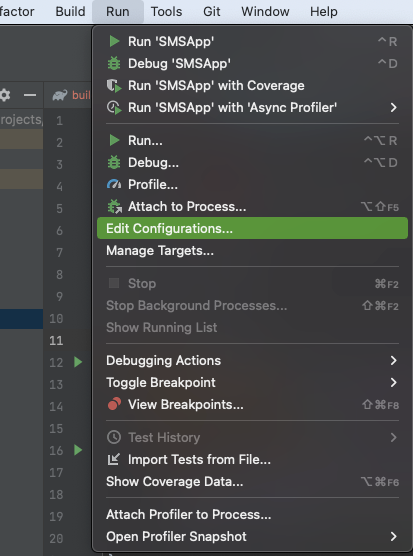
Locate the Run tab at the top of the IntelliJ IDEA console and select Edit Configurations… in the dropdown as seen below:
Another window displaying the "Run/Debug Configurations" will pop up with the details regarding the project.
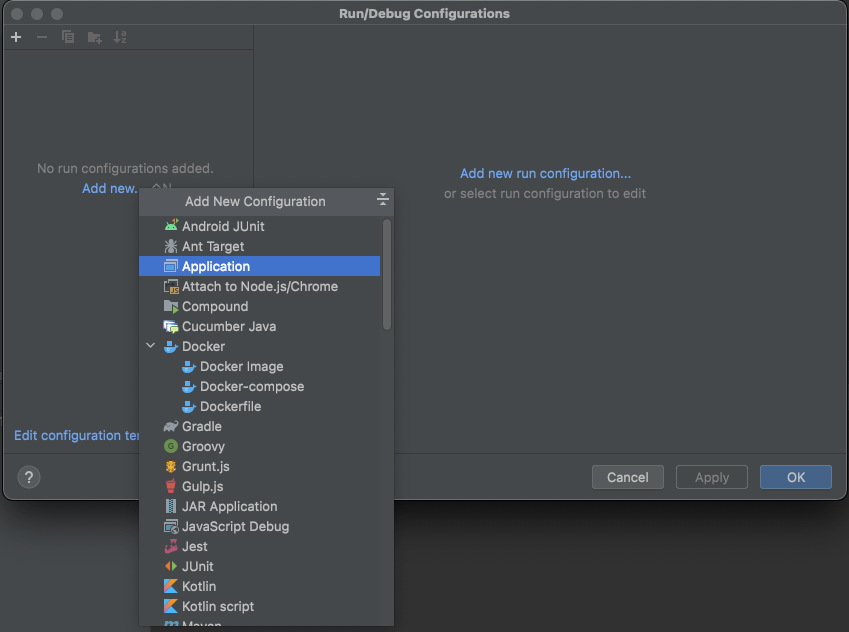
Create an Application named "SMSApp". In the Environment variables section as seen below, copy and paste the following, replacing the values with your own. Be sure to separate the variables with semicolons:

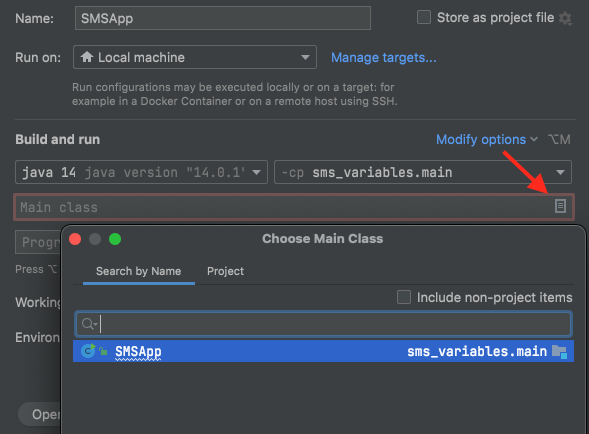
Specify a module by clicking on the box to view the options in the dropdown. Select "java 14" or your latest installed Java module. In order to compile the project, you must also set the module to classify the location of classes and packages. Select the filename with the .main extension as seen below. In this tutorial, your main file might be named "sms_variables".
Notice the main class is empty because it has not been defined yet.
Click on the Apply button then OK once finished.
Create a Java class
Expand the main subfolder under the src folder at the root of the project directory. Notice the empty java folder.
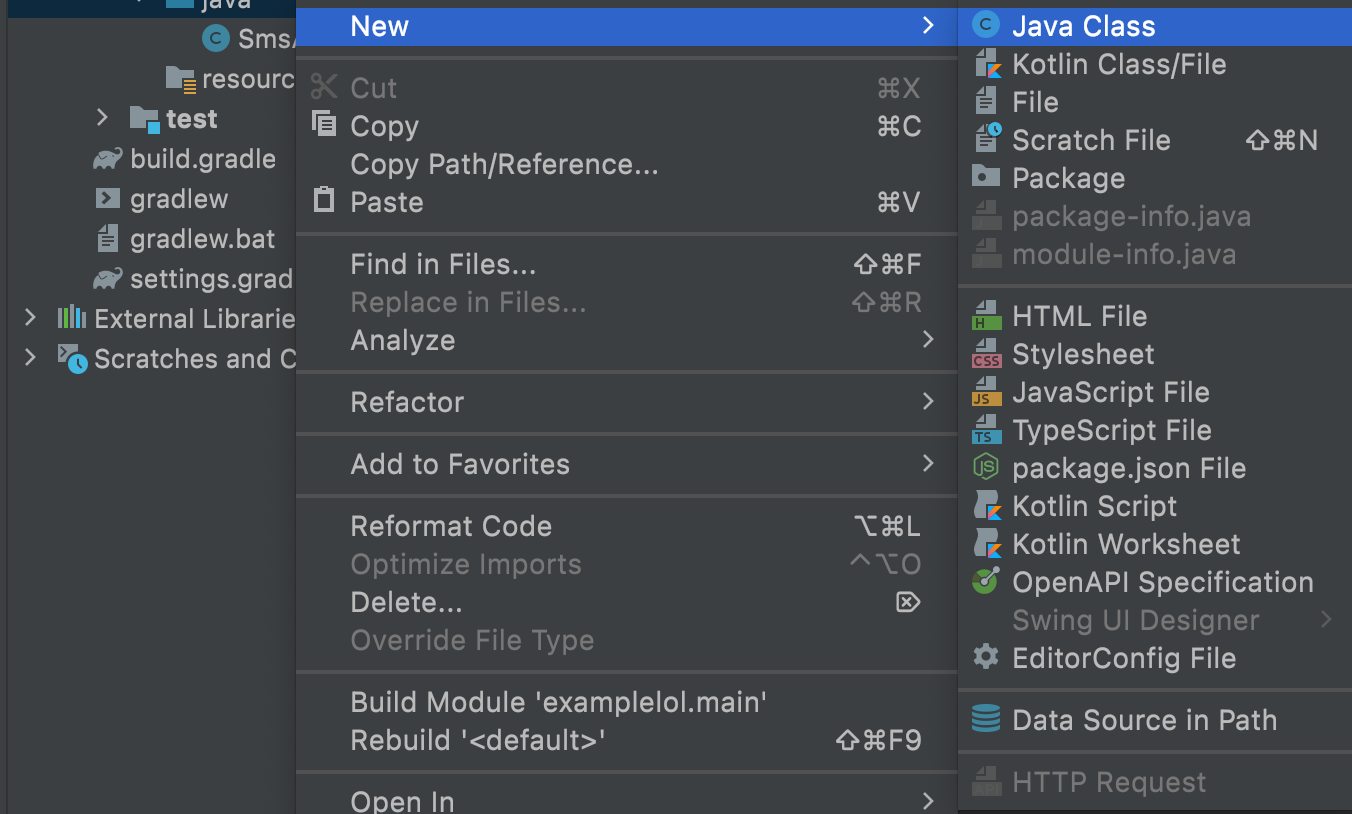
Right click on the Java folder and click on the New option, then select Java Class as seen in the image below. Clicking this option will prompt you to give the class a name. Go ahead and name it "SMSApp".
Delete the existing template code in the newly created file and then copy and paste the following code:
To make sure the environment variables were set correctly, the program will print out the values on the command line after running.
Save the file and go back to edit the configuration file to apply the environment variables to the newly created class.
Select the rectangle icon in the Main class section and select the SMSApp class as seen below:
Click on the Apply button then OK once finished.
Run the Java application with configured environment variables
Right click on the SMSApp file in the project directory and find the option to Run SMSApp.main()'. Wait a few seconds for the project to build and compile. When running, the Run window in the IntelliJ IDEA console should look something like this:
And there you have it! You successfully configured your environment variables to the project. Be sure to remove the print statements if you choose to build upon this project.
What's next for Java projects?
Now that you know how to navigate the IDE and configure variables, you can start working with the Twilio APIs and add API keys to your future Java projects. Check out some of these other articles for some inspiration:
- Send an SMS With Spark and Java
- Send an SMS with a Click of a Button with Java
- Start a Ghost Writing Career for Halloween with OpenAI's GPT-3 Engine and Java
- How to Set Envionment Variables
Let me know what you build by reaching out to me over email!
Diane Phan is a software developer on the Developer Voices team. She loves to help programmers tackle difficult challenges that might prevent them from bringing their projects to life. She can be reached at dphan [at] twilio.com or LinkedIn.


Related Resources
Twilio Docs
From APIs to SDKs to sample apps
API reference documentation, SDKs, helper libraries, quickstarts, and tutorials for your language and platform.
Resource Center
The latest ebooks, industry reports, and webinars
Learn from customer engagement experts to improve your own communication.
Ahoy
Twilio's developer community hub
Best practices, code samples, and inspiration to build communications and digital engagement experiences.