Build a Weather Chatbot with Twilio SMS, Python, and Flask
Time to read:
June 30, 2022
Written by
Reviewed by

Weather apps are extremely helpful in a world where weather is becoming increasingly unpredictable. After all, even though you might be able to look out the window and see whether it's raining or not, you might not know what the temperature or UV index is without checking a website or app.
In this tutorial, you will learn how to build a little chatbot that can tell you the weather in your area or where you are planning to be, as well as remind you what you might want to bring along with you if you go outside.
Let's get started!
Prerequisites
- A free Twilio account. (If you register here, you'll receive $10 in Twilio credit when you upgrade to a paid account!)
- Python 3.6 or newer
- ngrok installed and set up on your machine. (Learn more about using ngrok in 2022 here.)
- A phone that can receive SMS
Set up a virtual environment and install dependencies
To start, open a new terminal window and navigate to where you would like to set up your project. Once you have done this, run the following commands to set up a new directory called weather-bot and change into the directory:
Next, you'll need to create a Python virtual environment where you can install the dependencies for this project. If you are working in a Mac or Unix environment, run the following commands:
If you are working in a Windows environment, run the commands below instead:
For this project, you will be using the following Python modules:
- Flask, to create the web application
- python-dotenv, to import environment variables
- Twilio Python helper library, to work with the Twilio SMS API
Run the following command in your terminal to install these modules in your virtual environment:
Configure a Twilio phone number
Next, you will need to configure a Twilio phone number with SMS capabilities for your chatbot to use.
If you do not already have a Twilio phone number that you want to use for this project, go to the Phone Numbers section in the Twilio Console and click the Buy a number button. On the Buy a Number screen, select your country and make sure SMS is selected in the capabilities field.

Then, click the Search button, and when you see a number you like, click the Buy button to purchase it. Once you do this, you'll have your own Twilio phone number!
Get a Weatherstack API key
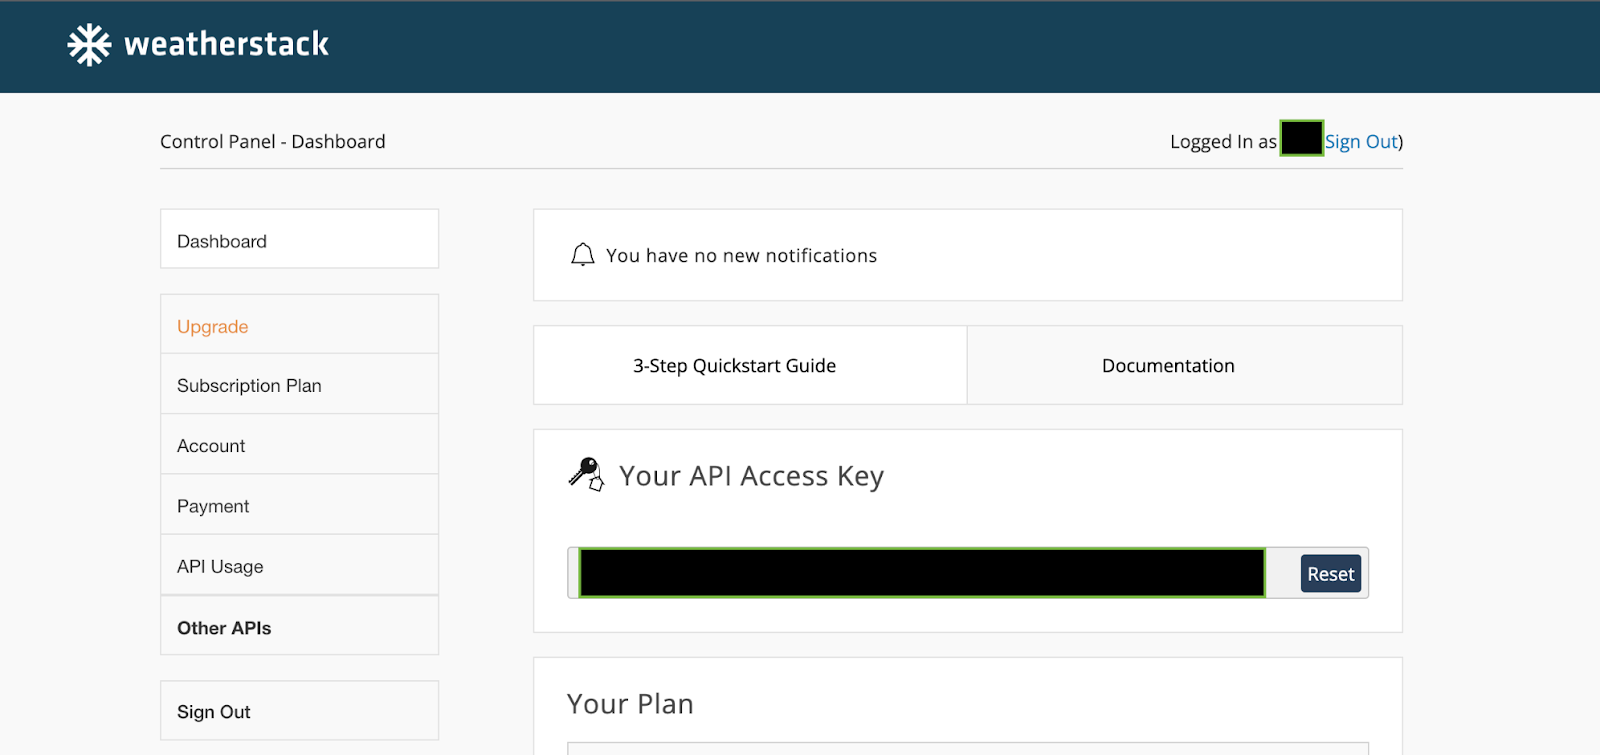
Now that you have your phone number, it's time to get an API key so you can use the Weatherstack API to get information about weather around the world. Navigate to their website and sign up for a free account to start using the API.
Once you sign up, you will see your API key on your dashboard.
Inside your weather-bot directory, create a new file called .env. This is where you will store the environment variables for your project. In the file, paste in the following placeholder:
Then replace the placeholder value with the Weatherstack API key you just created.
It’s very important to keep these private credentials secure and out of version control, so if you are using Git, create a .gitignore file at the root of your project. Here you can list the files and directories that you want git to ignore from being tracked or committed. Open .gitignore in your code editor and add the .env file, as shown below:
Create a Flask service for the bot's logic
Now it's time to build the main part of the project.
This Flask service will only have one endpoint: /weather. When a user sends their location in an SMS message to your Twilio phone number, a function called weather() will call the Weatherstack API to find out the weather for that location, and then offer some helpful advice about what to bring if there is precipitation (rain, snow, drizzle, hail, etc), if the temperature is low, or if the UV index is high.
Create a new file in the weather-bot directory called app.py. In the file, add the following code:
With this code, you've created the outline of your application, importing the required modules at the top of the file, loading the environment variable, and then creating a new Flask application with the /weather endpoint.
Inside the weather() function, the first thing you will need to do is get the user's location from their text message. The Weatherstack API allows users to use the query parameter to pass in location information in a variety of ways — by location name, zip code, coordinates, or IP address. In our application, we can take this information from the incoming SMS message, and then include it in our parameters dict, along with the API key and the units of measure in which we would like to display the data.
Once you have the params ready, you can call the Weatherstack API to get weather data for the user's location. From the response, you can pull out the relevant data you would like to display to the user. In this example, we are using location, temperature, description, precipitation, and UV index data.
Once you have the data, you can use it to offer advice to the user and append those messages to the response that will be sent in the return SMS. In this example, if there is precipitation, we remind the user to bring an umbrella. If it is cold outside (less than 45 degrees Fahrenheit), then we remind them to wear a coat. And if the UV index is higher than 2, we tell the user to wear some sunscreen to protect themselves from the sun. Once the weather data and advice messages have been formatted nicely, we return the message to the user as an SMS message.
Now that you know what this code should achieve, update the weather() function with the following code:
Now that you have the code you need, it's time to run the Flask server. Return to the command line and run the following command:
This will start the server on port 5000 on your local machine. To make this service reachable online, we can use ngrok to create a URL that forwards requests to our localhost:5000.
Open a new terminal window and start ngrok with the following command:
The output from ngrok will be similar to the following:
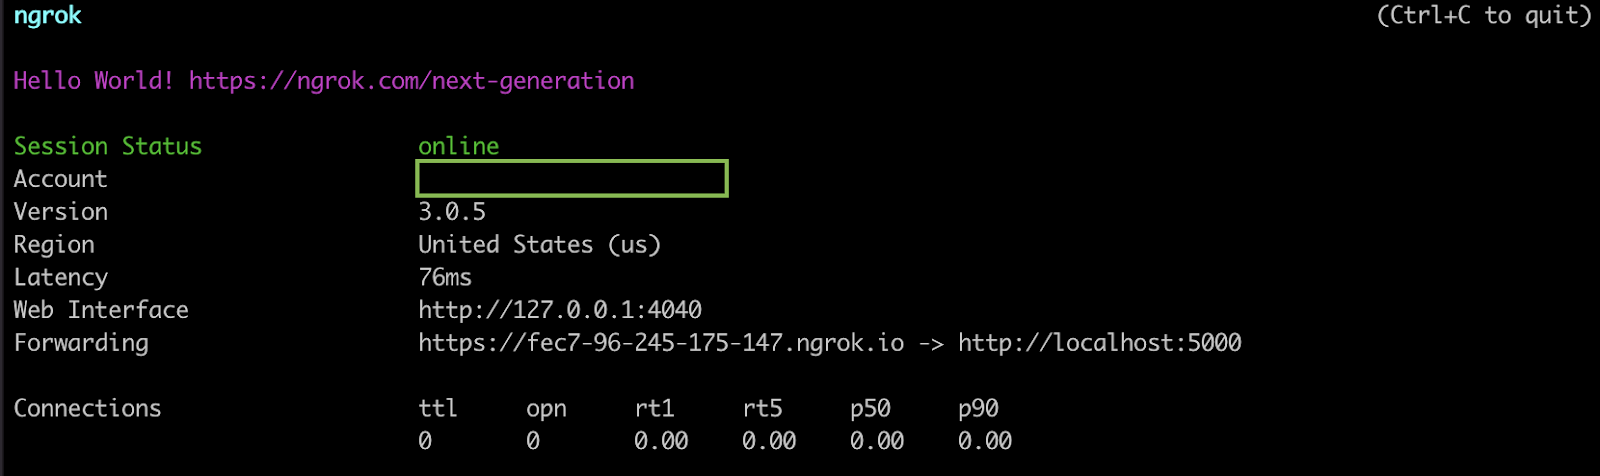
Take note of the URL next to Forwarding — you will need it in order to configure a webhook that will let your bot respond to SMS messages.
Configure the webhook and test the bot
Return to the Phone Numbers section of the Twilio Console and scroll down to the Messaging section. Copy the forwarding URL from ngrok, and paste it into the Webhook field under A MESSAGE COMES IN. Then, add /weather to the end of this URL, since /weather is the endpoint for our chatbot. Make sure the request method is set to HTTP POST.
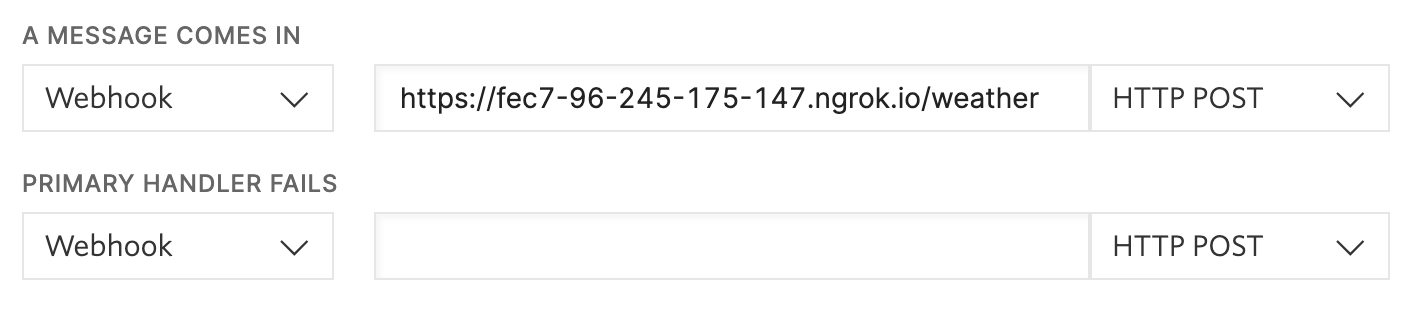
Click the Save button to save your changes. Now, every time someone sends a text message to your Twilio number, your weather bot will receive the request at the /weather endpoint and be able to use the location information in the incoming message to fetch weather data and return information and advice to the user.
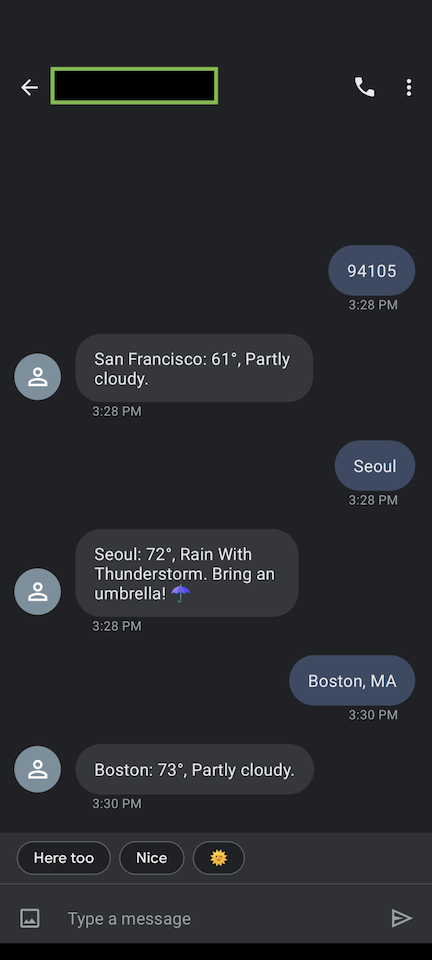
Try it out! Text your city name, zip code, or coordinates to your Twilio phone number, and see what the weather is around you. You can even try it out with other cities around the world.
What's next for building a weather bot?
Now that you have built this SMS weather bot, you can customize or expand on it with other data or add even more weather-related advice to share with the user. Additionally, if you are interested in upgrading your Weatherstack API access, you can even get historical and forecast data that may be interesting to include in your weather bot application.
I can't wait to see what you build!
Mia Adjei is a Software Engineer for Technical Content at Twilio. They love to help developers build out new project ideas and discover aha moments. Mia can be reached at madjei [at] twilio.com.
Related Posts
-
 How to Send SMS without a Phone Number using C# .NET and an Alphanumeric Sender IDNiels Swimberghe Matthew Gilliard
 -
 What's new in the Twilio helper library for ASP.NET (v5.73.0 - April 2022)Niels Swimberghe
 -
 Add users & messages to new Twilio Conversation with Google Cloud Functions and C#Zach Snoek
Related Resources
Twilio Docs
From APIs to SDKs to sample apps
API reference documentation, SDKs, helper libraries, quickstarts, and tutorials for your language and platform.
Resource Center
The latest ebooks, industry reports, and webinars
Learn from customer engagement experts to improve your own communication.
Ahoy
Twilio's developer community hub
Best practices, code samples, and inspiration to build communications and digital engagement experiences.