Build a COVID-19 Alert Subscription System with Vue.js, Node.js, Twilio Programmable SMS and Twilio SendGrid
Time to read:
September 29, 2020
Written by
Reviewed by
This post is part of Twilio’s archive and may contain outdated information. We’re always building something new, so be sure to check out our latest posts for the most up-to-date insights.

One of the most important instruments in dealing with the spread of COVID-19 is having complete and accurate information about hygiene, the nature of the disease, and most importantly, the spread of the disease in different locations.
In this tutorial, you will learn how to use Twilio’s Programmable SMS and Twilio SendGrid to build a COVID-19 Alert Subscription System for providing accurate information to subscribed users.
Once finished, you will have developed a system that:
- Allows users to subscribe to COVID-19 SMS and email alerts.
- Allows an admin to broadcast COVID-19 updates to subscribers based on their selected location.
- Sends SMS notifications to users in the subscribed area.
- Sends email notifications to users in the subscribed area.
Project Requirements
In order to go through this tutorial, you will need the tools and technologies listed below:
- Node.js installed on your system
- Basic knowledge of JavaScript and Node.js
- Basic knowledge of Vue.js
- A Twilio Account (you can get started with one here)
- A SendGrid Account (get started with a new account here)
Setting up the Backend Service
Express API Setup
To begin, you will need to set up the project for the application. Two sub-projects will be required in building the complete application: an Express.js project for the backend API, and a Vue.js project for the client-facing application.
Create a folder with the name covid-alerts at any preferred location on your system. This is the project folder that will hold the two sub-projects. Inside the folder, create a new folder named backend for the Express.js project.
In your command prompt, navigate to the root of the backend folder, and then run the following command to initialize the folder as a Node.js project:
The -y flag is added to skip the interactive process of the npm init command and instead, scaffold a barebones package.json file. You’ll also need the following packages:
- express: The express package for conveniently creating Node.js APIs
- body-parser: The standard Node.js body parsing middleware
- cors: Node.js package for enabling and configuring CORS with various options
- dotenv: To make use of environment variables
- twilio: The Node.js package for working with the Twilio API for messaging
- @sendgrid/mail: The Node.js package for working with the Twilio SendGrid Email API
You can install these all at once by running the following command at the root of the backend folder:
Handling Environment Variables
This project will make use of Twilio’s APIs for SMS and email and thus you will be working with API keys and other sensitive authentication data. You don’t want such data in plain text within your code. One of the industry-standard ways to handle this is to have every piece of sensitive data declared as an environment variable. This is why you installed the dotenv package.
The first step is to create a .env file at the root of the backend project. This file will hold all the environment variable declarations.
Create the file and enter the following:
The PORT environment variable represents the port on which the application will run.
Now, create a file called server.js at the root of the backend project, this will be the entry point of the application. Paste the following code in the file:
In the code above, the dotenv package is imported and the config function is called to initiate the package in the application.
A new express instance is created and assigned to a variable called app. A port variable is declared to use either the value in the environment variable PORT or the default, 3000.
Finally, the listen method is called on app to listen on the declared port variable.
Run this code by running the following command at the root of the backend project:
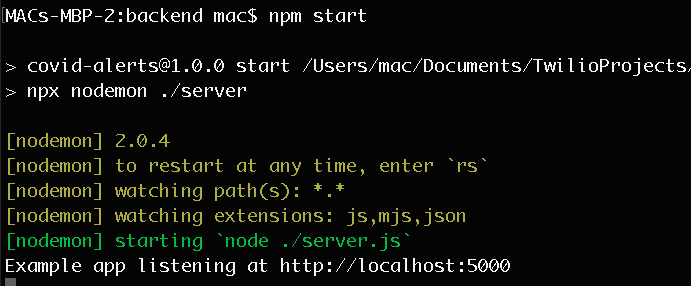
This will boot up the application and you will see the string Example app listening at http://localhost:5000 displayed on your console.

Note that the application uses the value 5000 declared in the .env file instead of using the default 3000 set in code. This confirms that the environment variables are being accessed correctly.
Setting Up nodemon for Application Sestart
Every time changes are made to the application, the server will need to be restarted by pressing Ctrl + C to stop it and then running the command node server.js to boot it back up. This can quickly become laborious. To automate this process, install the nodemon package as a development dependency with the following command:
Once the installation is complete, replace the test script in package.json with the start script shown below:
The start script uses npx to invoke the nodemon package installed at the project-level to run server.js.
Now stop your server and restart it using npm start and watch it for file changes. You will see a display on your CLI similar to the one below:
Setting up the Database
Data persistence is required in the application to store entities like user subscriptions and for this, you will use MongoDB. However, to avoid the overhead of setting up a working MongoDB instance just for the purpose of a demo application, the in-memory version of the database system will be used.
The Node.js mongodb-memory-server package will be used to set up the in-memory version of MongoDB. Stop the server (Ctrl + C) and run the following command to install the required packages:
Once the installation is complete, the next step is to create a database service module. First, create a file called data.js at the root of the backend project. This file will contain some seed data for the database. Paste the following code into data.js:
In the above file, an array of location objects is created and exported. This array will be used to create a MongoDB collection later on to seed the database. A collection in MongoDB is a group of documents similar to how a table is a series of rows in a relational database. A MongoDB document is very similar to a JSON object. Each location object consists of an id and a name.
Next, create a file called database.js also in the backend directory, which will serve as the database service module. Enter the following code into database.js:
The next step is to create a method that starts up and returns a reference to the database, this method will be named startDatabase(). Below the existing code, add the following:
The startDatabase() function gets the MongoDB connection string and uses it to create a new connection to the MongoDB database. If the database variable is still null, it’s set to the database instance by calling connection.db() and then seeded with our Locations data from data.js into a locations collection within the database. Finally, the function returns the database instance.
The next method, stopDatabase() will stop the running database instance:
Now, export both of these methods:
Creating the Messaging Service
Getting API credentials for Twilio SMS
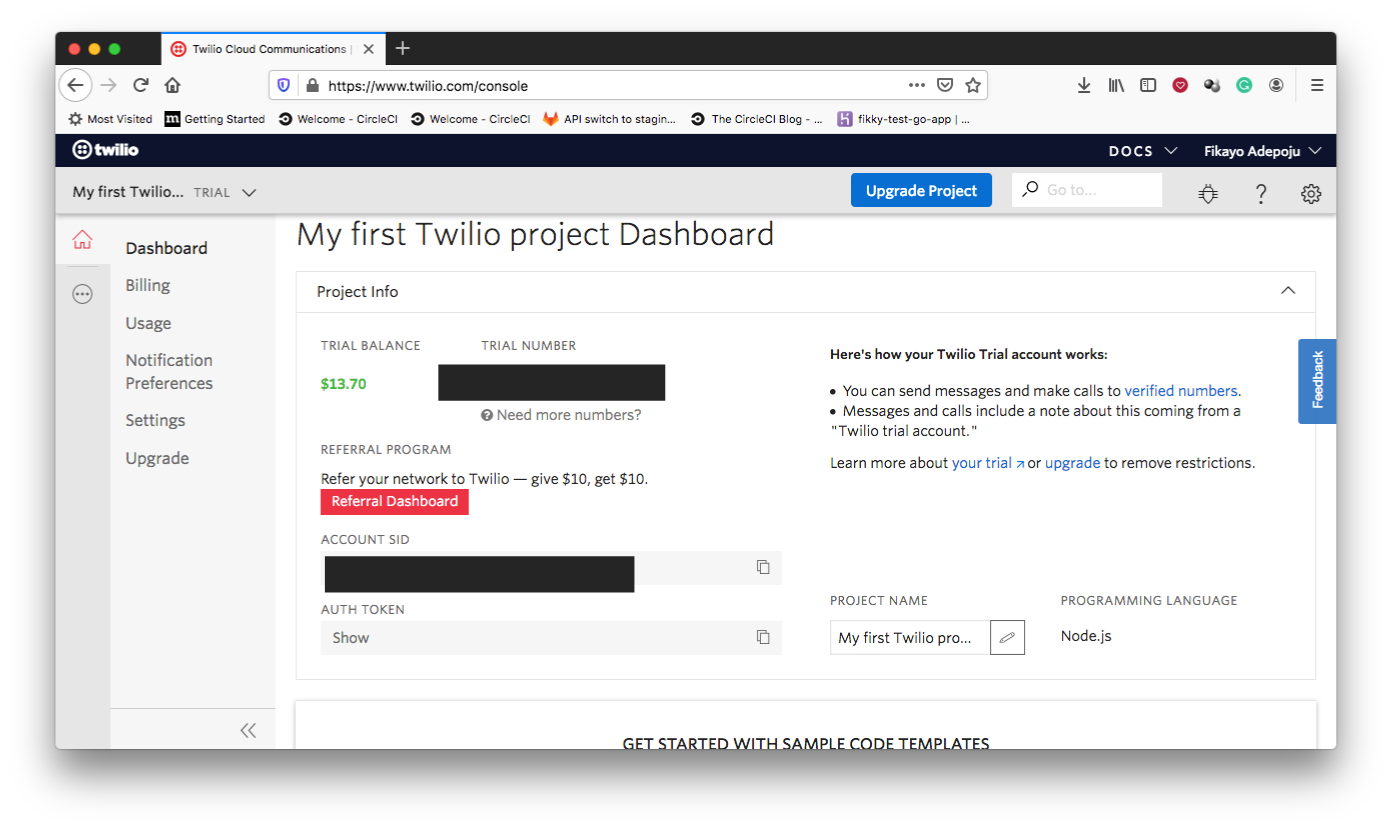
To use the Twilio Programmable SMS API, you will need the following from your Twilio Console:
- Account SID: Can be found at Settings > General
- Twilio Auth Token: Can be found and revealed at API Credentials section on the Settings > General page (Use the LIVE credentials to get actual results)
- Twilio Number: This is your Twilio assigned number and can be seen/requested on your Twilio console dashboard
Note: If your account is in trial mode, you will only be able to send SMS to verified numbers.
Once you have your credentials, declare them in your .env file as follows:
Getting API keys for Twilio SendGrid
In order to use the Twilio SendGrid API to send emails, you will need the following values from your SendGrid account dashboard:
- SendGrid API Key: If you haven’t generated an API key, you can generate one at Settings > API Keys (https://app.sendgrid.com/settings/api_keys). For security reasons, you can only see this key once which is the time it was generated.
- SendGrid verified email: SendGrid only allows emails to be sent from verified email addresses, by default, your account email is verified. You can verify send emails at Settings > Sender Authentication
Add these values to your .env file:
Connecting to the Twilio APIs
Create a file called messaging.js at the root of the backend project. This file will be the messaging module for the application. First, add the following lines to set up the twilio and @sendgrid/mail packages for use in the application:
In the code above, a client variable is set up using the twilio package along with your Twilio credentials. This client will then be able to have authenticated interactions with the Twilio API using your account.
The messaging module will declare and export four (4) specialized functions. Underneath the existing code, create an object to hold these functions:
TwilioService will later be exported from the module file so the rest of the application can have access to these functions. The next step is to create these functions. Below the existing code, declare the sendMessage() function:
The sendMessage() function sends an SMS to a specified recipient. It receives the phone number of the recipient and the message to be sent as arguments and uses the client to create and send the message. It then returns the response.
The next function to declare is the sendMail() function. This function sends an email to a specified recipient or list of recipients. Add this function below sendMessage():
The sendMail() function takes in a standard Twilio SendGrid messaging object as its argument, sets the from property of the object to your Twilio-verified sender email and sends the message by calling the send method on sgMail. Then, the response is returned.
After sendMail(), you’ll declare the buildAlertMessage() function. This function constructs an SMS to be sent to a recipient. It receives an object containing the total number of new, confirmed, and discharged COVID-19 cases along with the number of deaths, and builds a readable message body which is then returned.
Add this function by adding the following code below the existing code:
The last function to be declared in this module is the buildAlertMail() function. This function is similar to the buildAlertMessage(), except while it takes in the same argument it builds and returns an HTML email body:
With all functions declared, export TwilioService from the file by adding the following line below the existing code:
Creating the API Endpoints
Now it’s time to bring all that has been built together into a working application. The first step is to refactor server.js to import and setup all the required modules. Refactor server.js by adding the highlighted lines of code:
The next step is to set up some middleware. Middleware are functions that you can run within the application’s request-response cycle. To set up the body-parser and cors middleware, add the following code to server.js just after the line const port = process.env.PORT || 3000;:
With these middleware functions, the application can receive urlencoded and json data in requests made to it. Also, clients can access the API without being denied by CORS.
Next, set up the database instance by adding a custom middleware below the line app.use(cors()); in server.js:
dbSetup() first checks if there is already an instance of the database attached to the req object. If not, it creates a new database instance by calling startDatabase(), which was imported from the database module. This new instance is then set as the value of a custom db property on the req object.
Now, create an endpoint for the root of the API by adding the code below the line app.use(dbSetup);:
Thanks to nodemon, all the changes that have been made have been picked up and the server’s most current version is running at port 5000.
Open up your browser and navigate to http://localhost:5000, you will see a screen similar to the one below:

The backend is looking good. Time to add more useful endpoints.
Adding API Endpoints
Create an Endpoint to Fetch Locations
The client application will need to fetch a list of all locations to which users can subscribe for COVID-19 alerts, thus, an endpoint is needed for that. Create a new endpoint /locations by adding the following code below the code block for the root (/) endpoint in server.js:
Create an Endpoint to Fetch Subscriptions
The client application will also require an endpoint to fetch all subscriptions by users of the application. Add a new endpoint /subscriptions just below the code block for the /locations endpoint:
The endpoint returns an array of subscriptions from a subscriptions collection within the database which is where all subscriptions will be stored.
Create an Endpoint to Subscribe to COVID-19 Alerts
Users of the application will need to subscribe to COVID-19 alerts. Add the following code just below the /subscriptions endpoint.
In the code above, a new endpoint /save-subscription is created and for now it only contains a try...catch block with the catch block logging and returning a 500 server error. try...catch is used here because write operations will be made to the database so it's important to catch and handle any errors during the process appropriately.
The first step in saving a subscription is to check if the user has already subscribed. If true, a message is sent to the client indicating that the requesting user has already subscribed. If the user doesn’t have a subscription, a new subscription record is created for the user in the subscriptions collection of the database.
To query the database in order to check if the requesting user already has a subscription, add the following lines of code inside the try block as shown below:
The lines added above fetch subscriptions tied to the user’s phone number and the result is then casted into an array.
The next step is to perform the duplicate check and take necessary action based on the result. Add the following lines below the subscription fetch code just added as shown below:
If the subscriptions array is empty, a new subscription record is created, otherwise a message is sent back to the client indicating that the requesting user has already subscribed.
Create an Endpoint to Send COVID-19 Alerts
Finally, the application needs to be able to send alerts to subscribers. Add this endpoint just below the /save-subscription endpoint:
In the code above, a /send-alerts endpoint is created. This endpoint receives a location property in it’s request to which it will send SMS and email alerts. The first task in this endpoint is to get all subscriptions for the requested location:
Next, you’ll need to create an array to contain all the SMS requests that need to be sent (based on the fetched subscriptions). Update the endpoint to reflect this addition:
The messaging_requests variable is an array of promises that is built by creating a request for each of the fetched subscriptions.
Next, you need to construct a similar array for the email broadcasts:
Finally, add the following code block in order to send the SMS messages and emails to subscribers:
In the code above, Promise.all() sends the SMS requests contained in messaging_requests.
Then, an email messaging object, mailObject, is created with the following properties:
- to: An array of the emails to send alerts to, in this case
subscriber_mails - subject: The subject of the email
- html: The HTML body of the email to be sent. This is built by calling the
buildAlertMailof the messaging module with the request body passed as its argument. The request body is expected to contain the data to build the HTML as defined in thebuildAlertMailfunction
The sendMail() function is then called with mailObject as its only argument. Then, a success message is returned to the client. Below is the full code block for the /send-alerts endpoint:
Testing the Endpoints
Using Postman, you can test the endpoints of the API. Postman is a collaboration platform for API development that helps developers to easily test APIs. You can download the appropriate Postman desktop software here and install it by double-clicking the installer and following the setup wizard. Once you have Postman set up, open it and begin testing your endpoints as described below:
Testing: /locations
To test the /locations endpoint, ensure that the request method dropdown is set to GET in the main window and enter the following URL into the address bar: http://localhost:5000/locations. Now click the Send to send the request. This should return an array of locations as shown below:
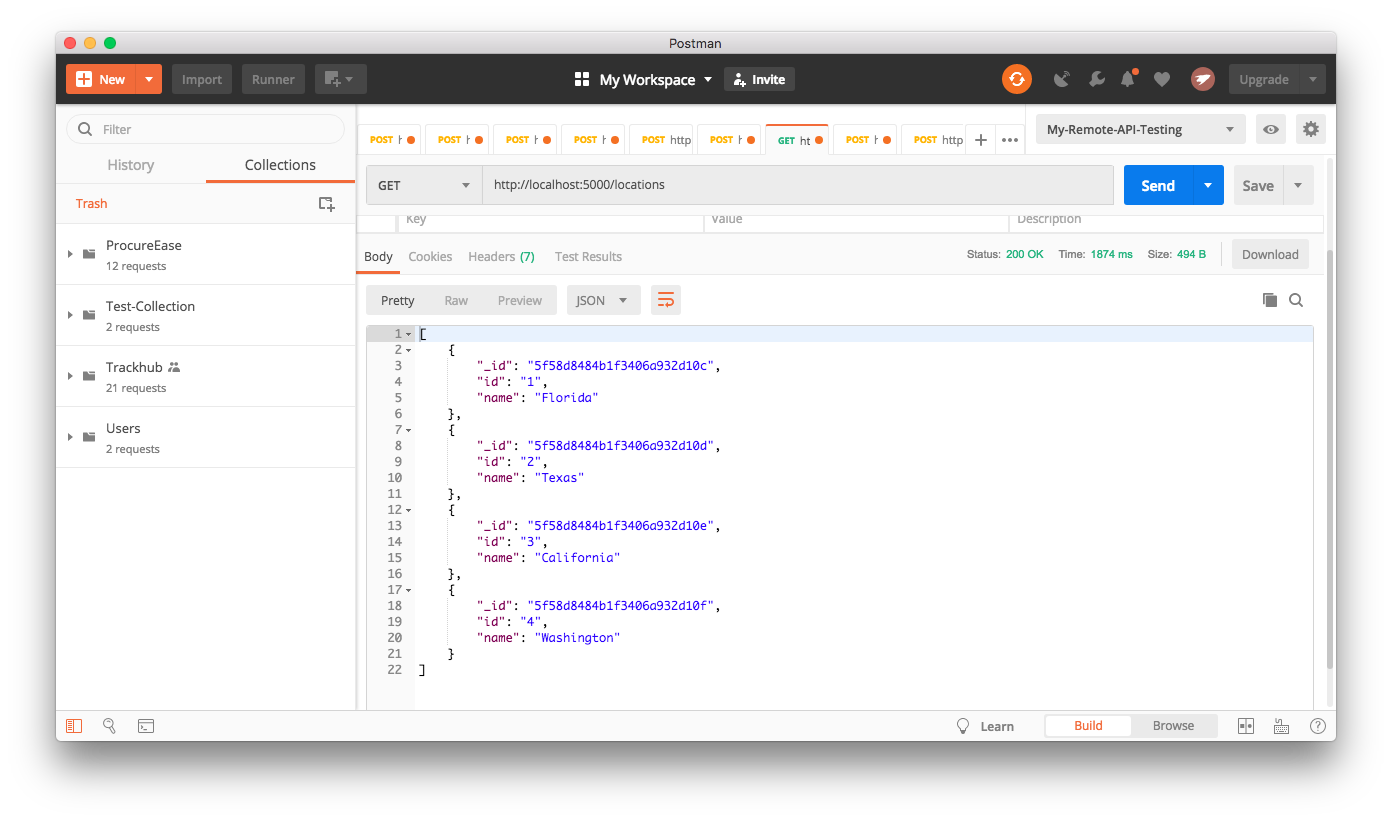
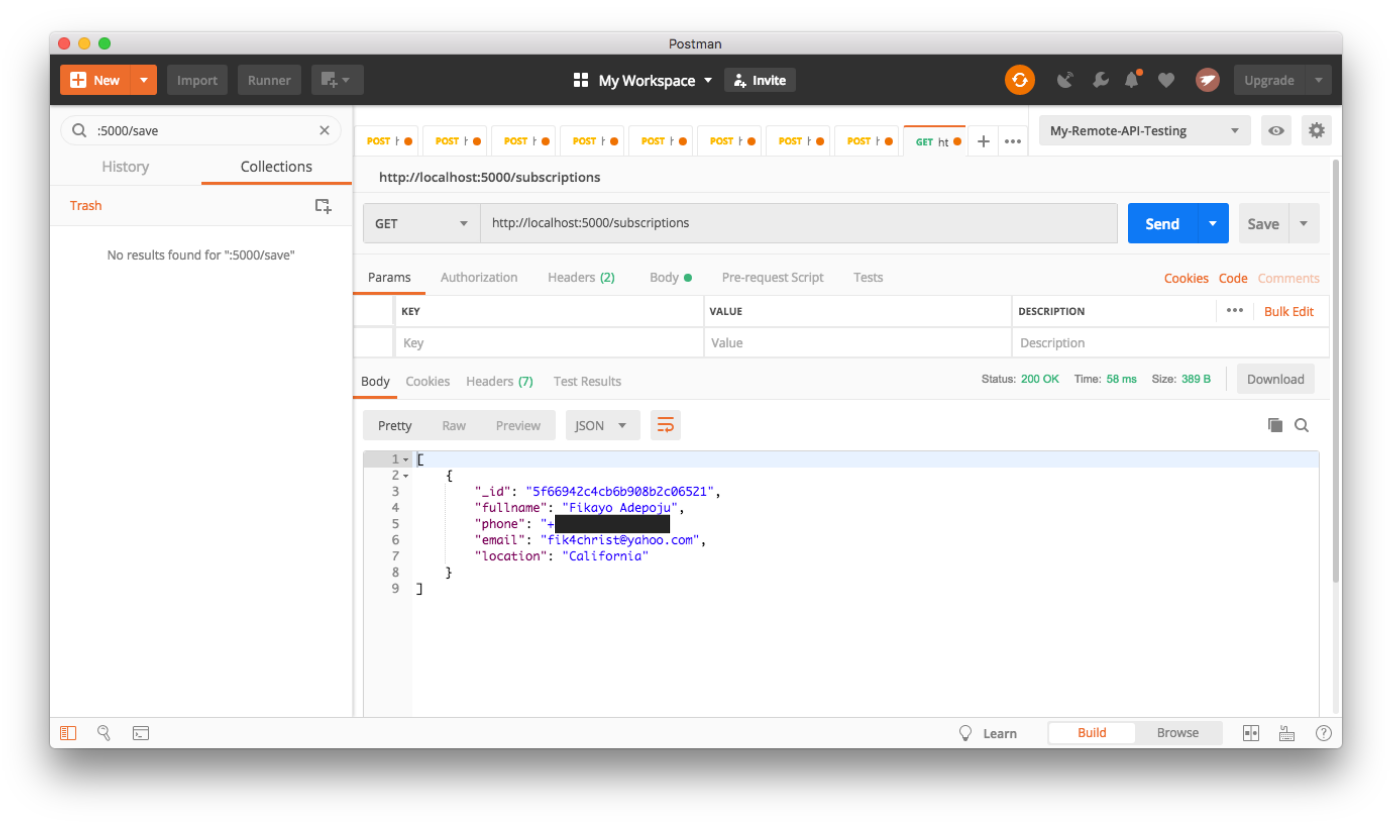
Notice the results come with two different identifiers, id and _id in each location object. The id property is what is set in the data.js file while _id is a special identifier auto-generated by MongoDB for each document record. This is the document identifier.
Testing: /save-subscription
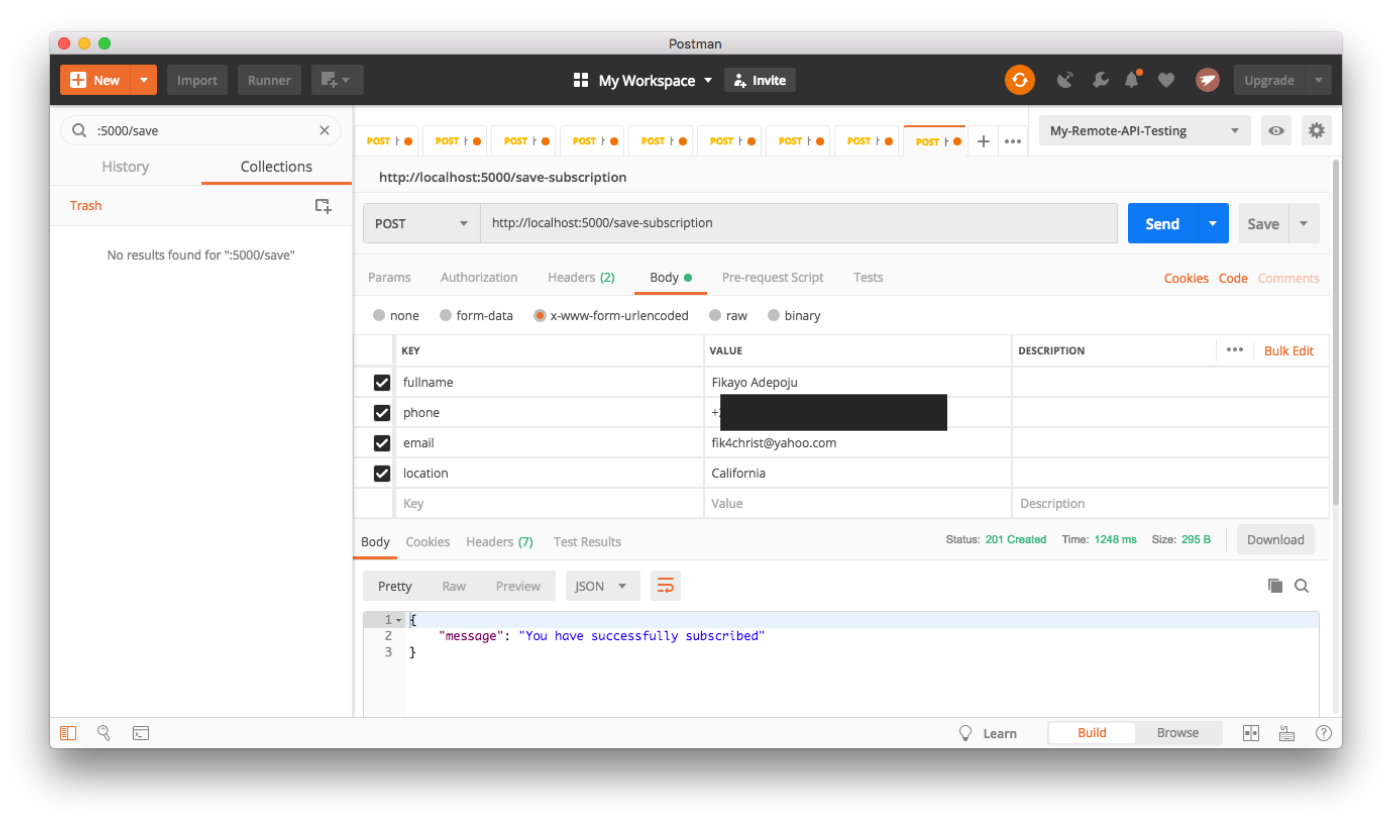
Next, test the /save-subscription endpoint. This endpoint only takes POST requests so ensure that the request method dropdown is set to POST. Next, enter the following URL into the address bar : http://localhost:5000/save-subscription. The request needs to send the following parameters:
- fullname: Full name of the subscribing user
- email: The email address where the subscriber will like to receive alerts, this must be a valid email
- phone: The phone number where the subscriber will like to receive alerts, the phone number should be prefixed with the plus (+) sign and country code
- location: The location of interest to receive alerts about COVID. Use one of the location names in our data.js file as the value for this
To add the request data, click on the Body tab just below the address bar, then select the x-www-form-urlencoded option under which you will find a set of KEY:VALUE text field pairs. In the KEY, enter the name of the request property and its appropriate value in the VALUE side. Do this for all properties listed above as shown below, this should return a success message indicating that you have subscribed successfully:
Testing: /subscriptions
The next endpoint to test is the /subscriptions endpoint. Ensure that the request method dropdown is set to GET in the main window and enter the following URL into the address bar: http://localhost:5000/subscriptions. Now click the Send to send the request. This should return an array of subscriptions as shown below:
Testing: /send-alerts
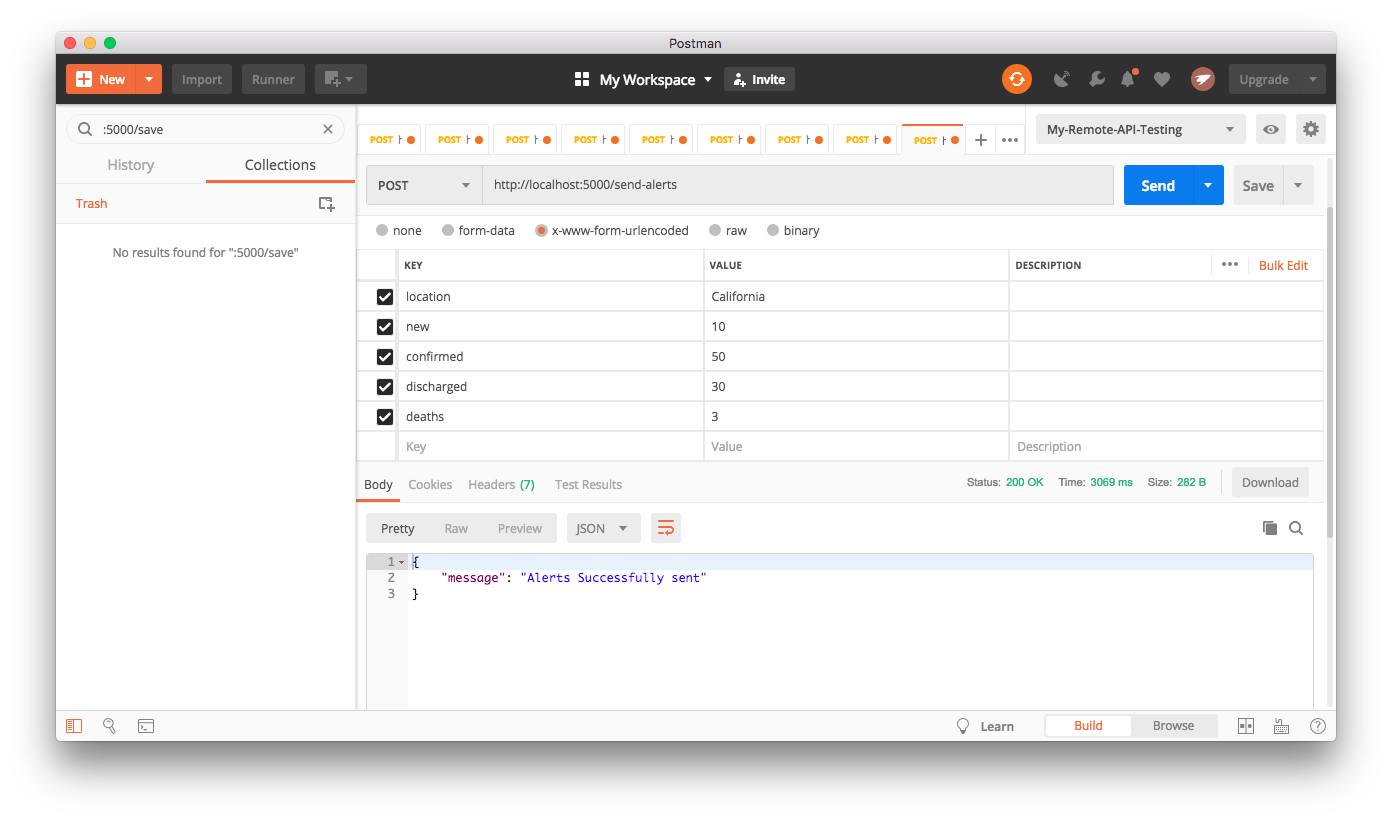
Lastly, test the /send-alerts endpoint. This endpoint only takes POST requests so ensure that the request method dropdown is set to POST. Next, enter the following URL into the address bar : http://localhost:5000/send-alerts. The request needs to send the following parameters:
- location: The subscribed location to broadcast this alert e.g. California (if you subscribed with California above)
- new: Total number of new COVID cases in the specified location e.g. 10
- confirmed: Total number of confirmed COVID cases in the specified location e.g. 50
- discharged: Total number of discharged COVID patients in the specified location e.g. 30
- deaths: Total number of deaths arising from COVID so far in the specified location e.g. 3
To add the request data, click on the Body tab just below the address bar, then select the x-www-form-urlencoded option under which you will find a set of KEY:VALUE text field pairs. In the KEY, enter the name of the request property and its appropriate value in the VALUE side. Do this for all properties listed above as shown below, this should return a success message indicating that the alerts have been successfully sent:
Building the Application Frontend
Installing the Vue CLI tool
To begin setting up and building the frontend project, you will need the latest version of the Vue CLI tool. If you don’t have it installed on your system already, run the following command at any location on your system to install it:
However, if you already have the CLI tool installed, run the following command to update it to the latest version:
You will need Vue CLI version 4.x. Run the following command to check your Vue CLI version:
Now check the Vue CLI version again, you should now have a 4.x version.
Once the installation is complete, you can move on to the next step.
Scaffolding a New Frontend Application with the Vue CLI
Now that the backend service is complete, it’s time to build the user-facing application where users can subscribe and admins can send alerts.
At the root of the parent project folder (/covid-alerts) use the Vue.js CLI to scaffold a new client application by running the following command in a new command prompt tab or window:
This will kickstart the interactive project scaffolding process.
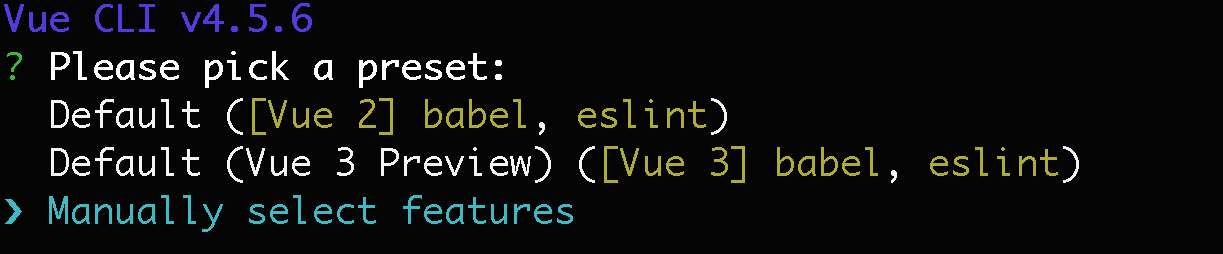
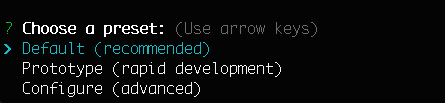
The first screen prompts you to select a preset for the project. There are three (3) options:
- Default ([Vue 2] babel, eslint) : A barebones Vue 2 template with
babelandeslintinstalled - Default (Vue 3 Preview) ([Vue 3] babel, eslint) : A barebones Vue 3 template with
babelandeslintinstalled - Manually select features: An interactive feature selection option that allows you to select the features you want in the application.
Select the Manually Select features option as shown below:
When you select this option, another prompt appears with a list of all features of which you can choose for the application you are about to scaffold.
Start by deselecting all currently selected features (features with the green circle next to them) by using the arrow keys to scroll down to the feature and pressing the spacebar. You should then have a clean list as shown below:
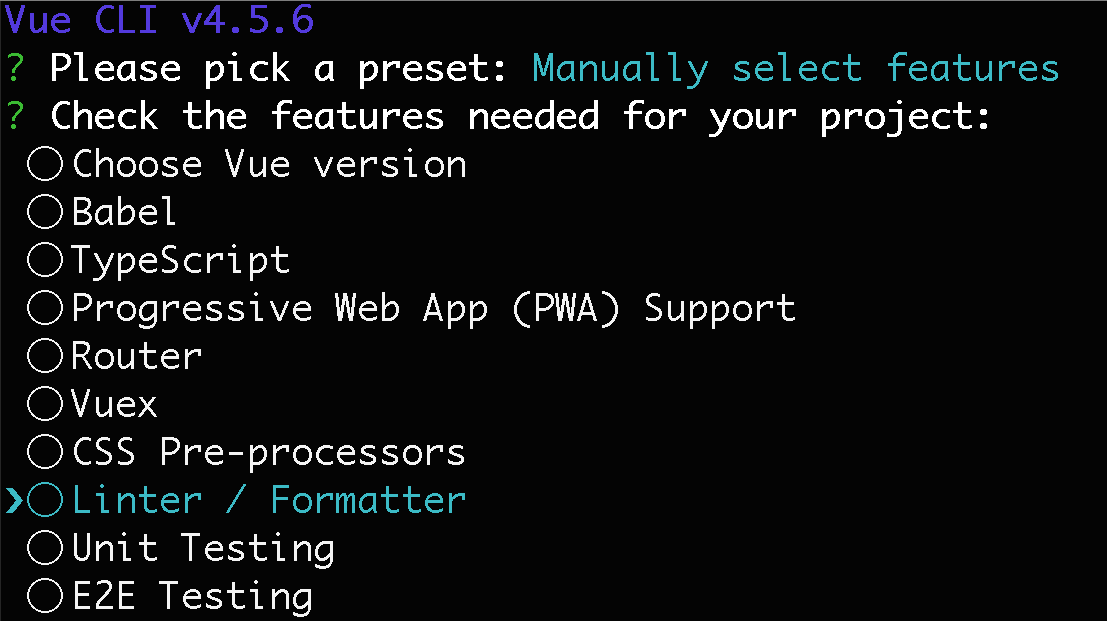
For this exercise, you will be selecting the following options:
- Choose Vue version: So as to choose whether to use Vue 2 or the new Vue 3
- Babel: For transpiling our ES6 and Vue code files into Javascript that the browser can understand
- Router: To install and set up the vue-router in the application so as to have multiple pages
Use the arrow keys to move to each option and select it by pressing the spacebar key on your keyboard. You CLI should now look like the one below:

The next prompt asks you to choose the version of Vue.js that you will use for the project. Version 2.x is selected by default and this is the option you should go with as version 3.x is still in beta.
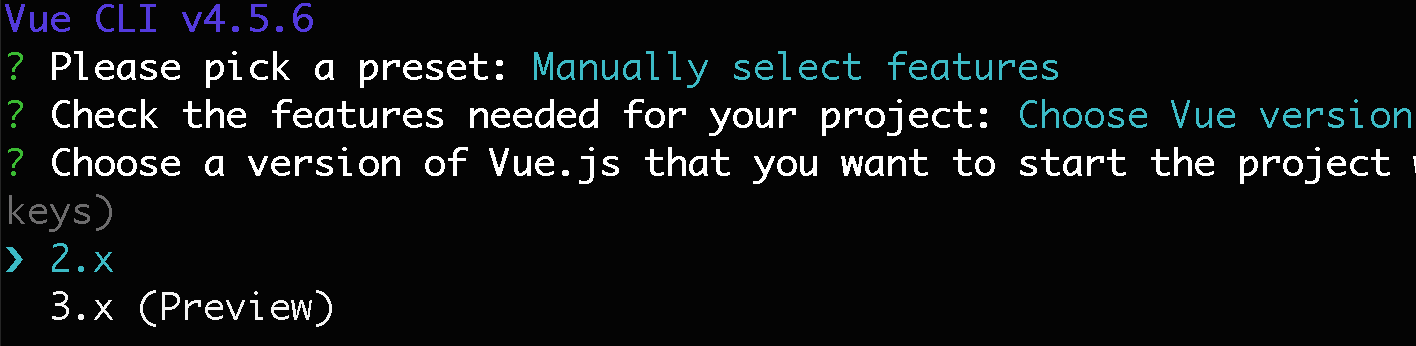
Hit Enter to confirm your selection.
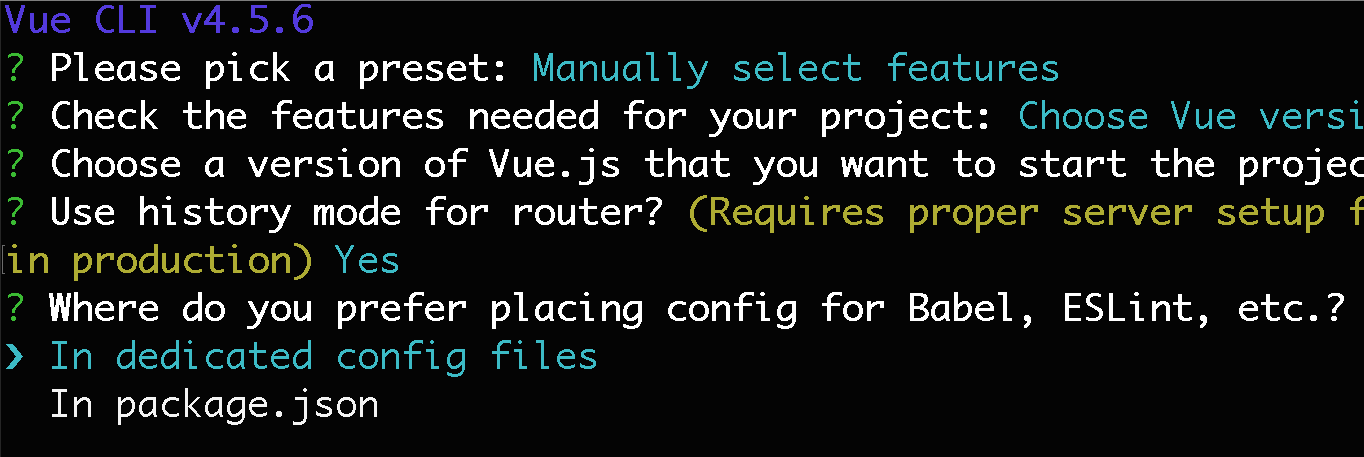
The next prompt asks if you want to use the history mode for the router, confirm this by typing Y and hitting the Enter key:

The following question asks where you would like to store your configurations, select the option In dedicated config files and hit Enter:
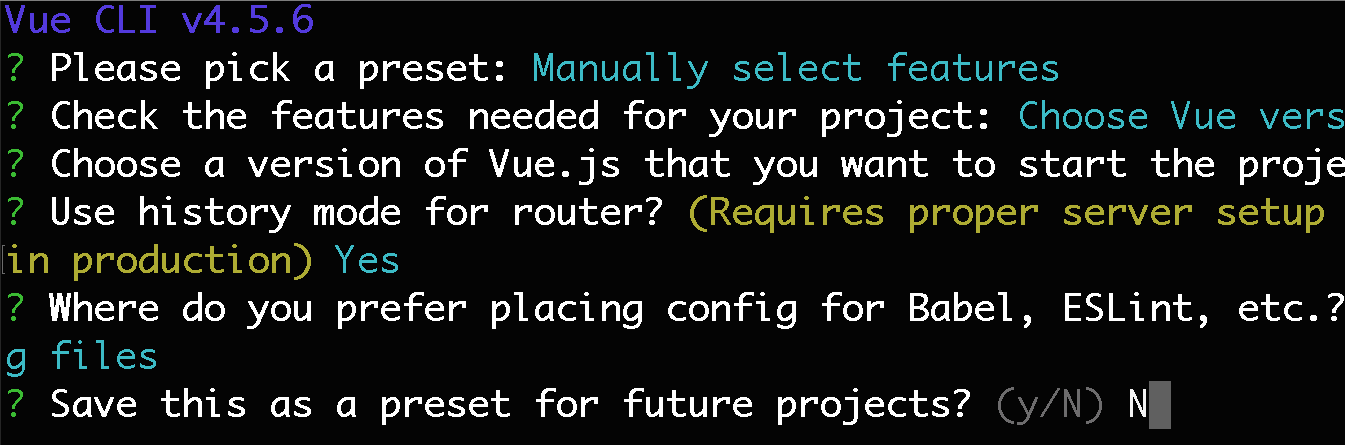
Lastly, you’re asked if you want to save all your options for this project scaffold as a preset for future projects, type N and hit the Enter key for the CLI tool to begin scaffolding the application:
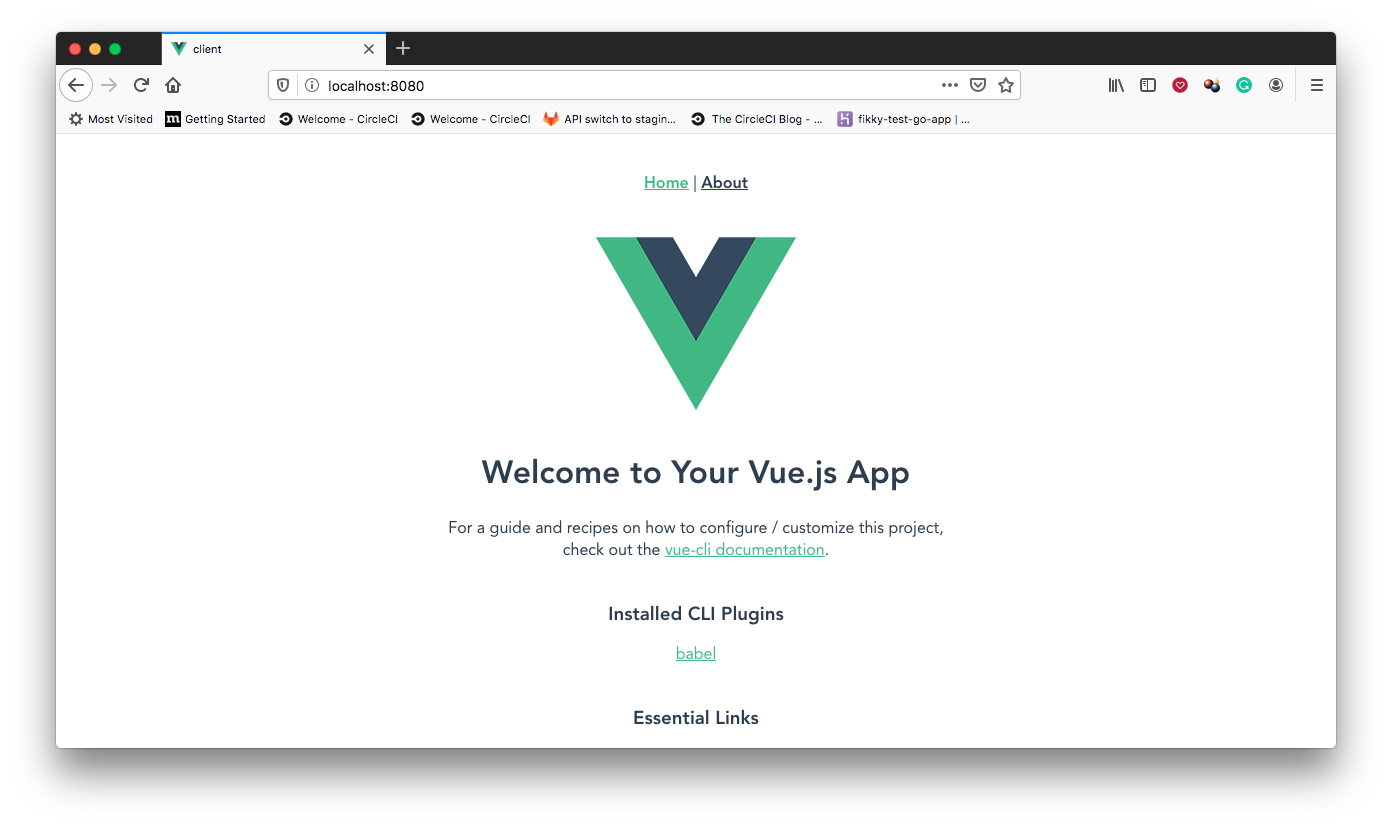
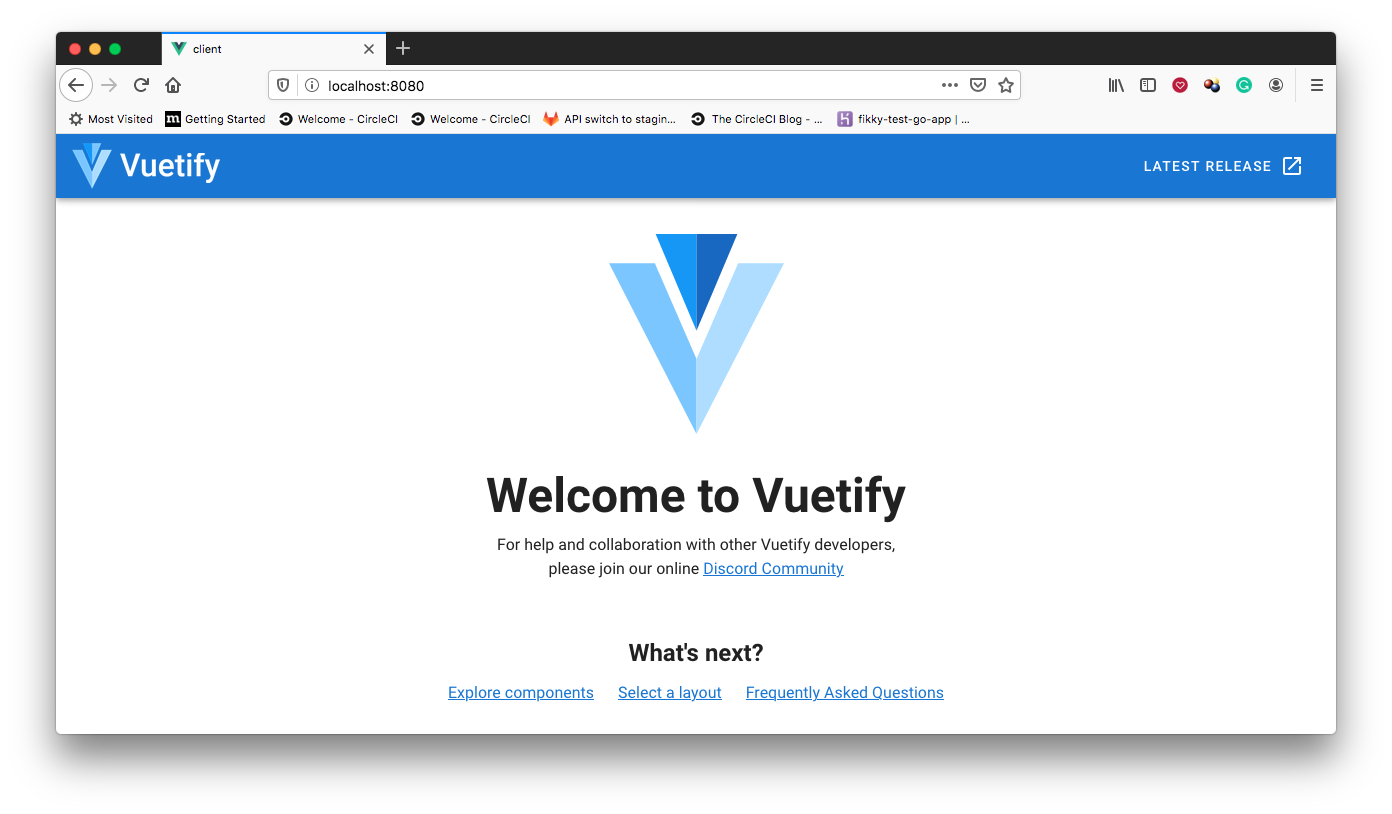
Once the scaffolding process is done, navigate to the root of the application and run the app using the following commands:
This should boot up the local server for the client application, which can be viewed in your browser at http://localhost:8080. You will see a screen similar to the one below:
Installing Vuetify as the Project UI Library
The scaffolded Vue.js project comes with loads of helpful features, however, in terms of common UI components like alerts, styled form controls, notification toasters etc. there is little to work with.
Vuetify is a very popular UI library for Vue.js and it comes with a whole suite of components that make UI development easy. To add Vuetify to the client project, run the following command at its roott.
You may be prompted at a point along the installation process to select a preset, select the Default option and hit Enter to continue the installation.
Once this command has run successfully, the CLI tool will show you a list of files that have changed, you don’t need to worry about these.You will also be asked to commit or stash changes, you can ignore this for now.
You may have noticed from the command prompt running your frontend application that the app has crashed due to some errors arising from the vuetify installation process. In this case, simply stop the server by pressing Ctrl+C, then restart the server by once again running npm run serve. This might take a while to boot up. Once the server is back up, the homepage of the application will now look something like this:
Creating the Subscriptions Page
The landing page of the application will be the page where users can subscribe for COVID-19 alerts. First, create a file called values.js inside client/src and enter the following code:
The purpose of this file is to store commonly used values instead of repeating them throughout the code. This allows you to change these values easily. The address to the API is defined here with the api_url property.
Next, locate the file src/App.vue and delete the provided code. Repopulate this file by adding the template code below:
In the template above, Vuetify's `v-app` component is used as the main component container. `v-app-bar` is then used to create a toolbar at the top of the page with the application title `COVID Alerts Subscription System`.
Below the app bar, Vuetify's `v-main` is used to wrap the page content, which is populated by the `router-view` component. `router-view` is a standard vue-router component that represents the outlet through which vue-router feeds the pages in the pages folder when navigating.
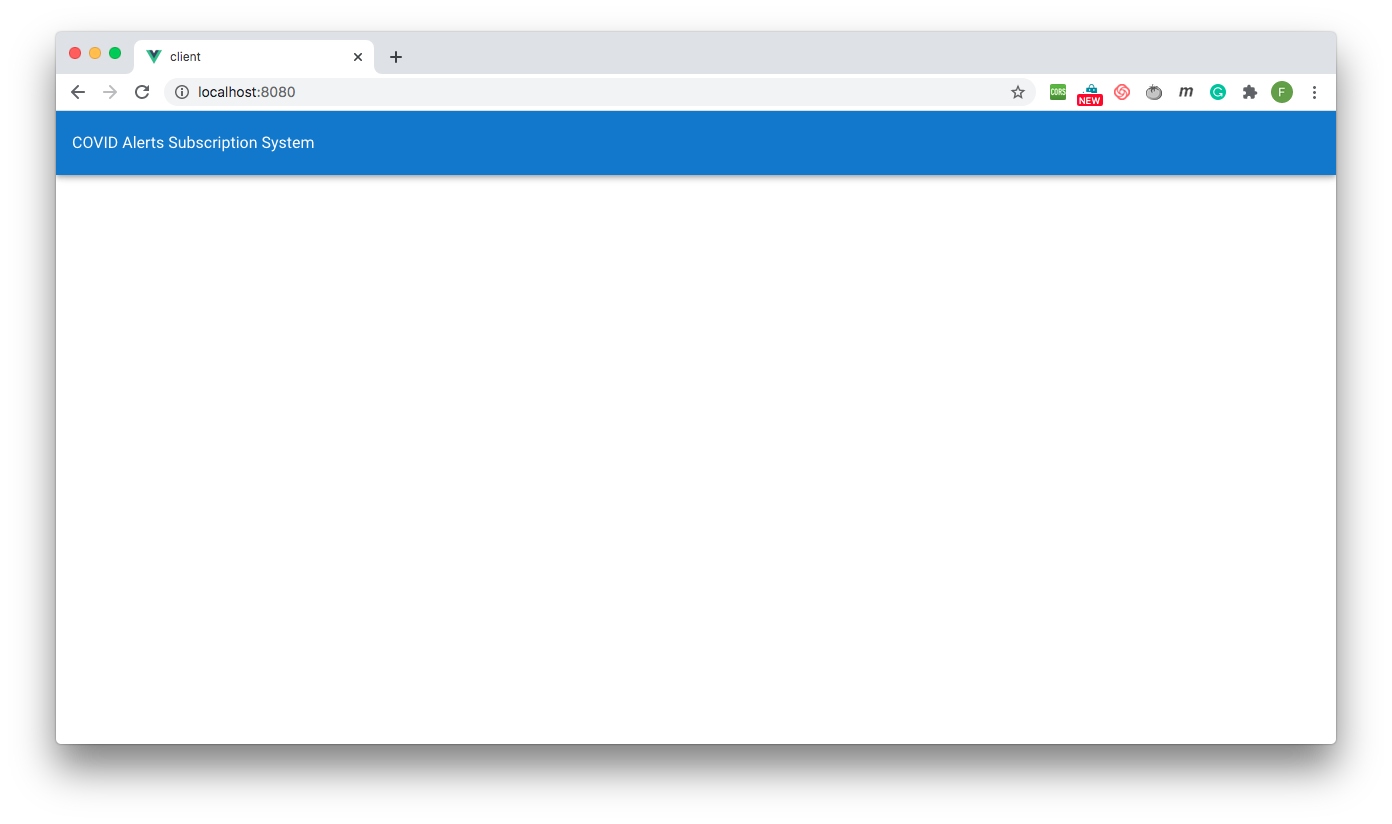
To complete this file, below the `template` component's closing tag, add the following block of code:
The code above exports the Vue.js component with the name App. You will now have the screen shown below:
Next, locate the file src/views/Home.vue and delete the provided code. Replace it with the following:
In the template above, Vuetify is used to create a container, a row, and a column within the row. Vuetify uses a grid system for its layout design and the column above spans 12 units for very small screens, 8 units for small screens and 4 units for medium screens.
The column is where you will put the user subscription form.
Replace the Hey, Content text with the form code as shown below:
The page will need to show notifications for both successful and failed subscription operations. For this, Vuetify’s v-snackbar component will be used in the template. Below the v-row closing tag add the following block of code:
As you may have noticed, a couple of dynamic variables are being used in the template. These variables need to be defined in the component configuration object. To begin, add the following block of JavaScript code below the template component.
In the script above, the axios library and the values modules are imported. The Vue component configuration object is then exported from the file with the name home. This exported configuration object must accomplish four things:
- Define the dynamic data properties used in the template
- Load the available locations from the backend immediately the page loads
- Define the event handler for the
Subscribebutton - Define a function to display a notification message
To implement the first task, add the data property to the configuration object as shown below:
In the data property, the following properties are defined:
- subscriptionForm: this is the object that will hold all values in the form
- locations: The array of locations to be fetched from the backend API
- loading: Used to disable the submit button when the API call is ongoing
- showNotification: boolean that controls the visibility of the notification snackbar
- notificationMessage: Message to be displayed in the notification
- notificationColor: background color of the notification (green for success, red for error)
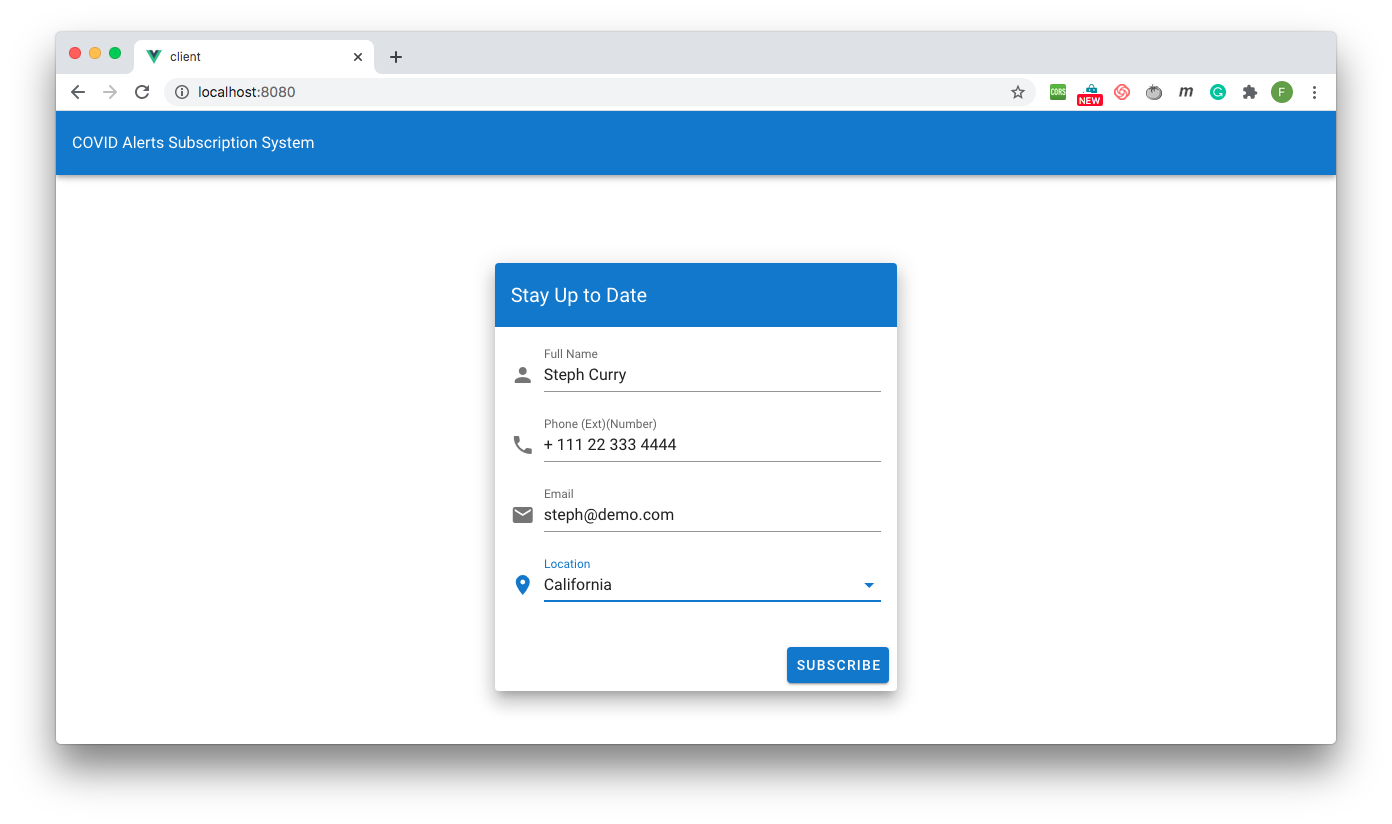
With this code in place, the app’s landing page will look like the screen below:
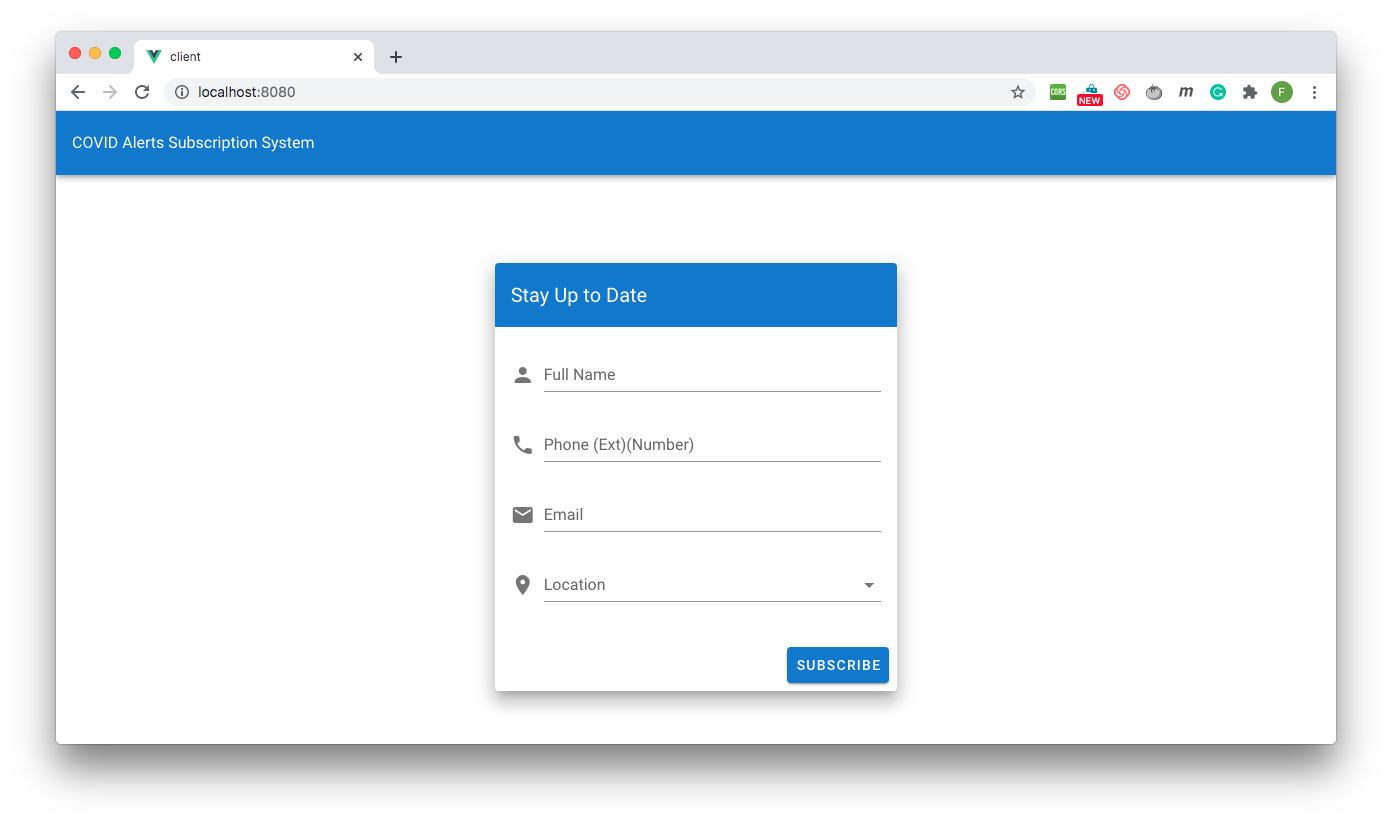
The landing page now displays a form with which users can subscribe to alerts.
The next task is to load locations from the backend API once the component is created. To achieve this, the Vue.js created lifecycle hook will be used.
Below the data property declaration, add the highlighted lines of code for the created hook.
The next task is to add functions that will handle the form submission and display the returned notification. Component functions are contained in a methods property on the configuration object. Below the created hook declaration, add the methods object:
In the methods object above, two functions are defined:
- subscribe: This is called when the
Subscribebutton is clicked. It checks to see if all the fields in the form have been filled, then sends aPOSTrequest to the backend API (the /save-subscription endpoint) usingaxios. Based on the response, a notification is displayed by calling thedisplayNotificationfunction. - displayNotification: This is a utility function for the page that simply sets the display message and color of the notification and also makes the snackbar visible
Creating the Admin Page
The next task is to create the admin page. Delete the file About.vue located inside src/views and create a new file called Admin.vue in the same location. Paste the following code inside Admin.vue:
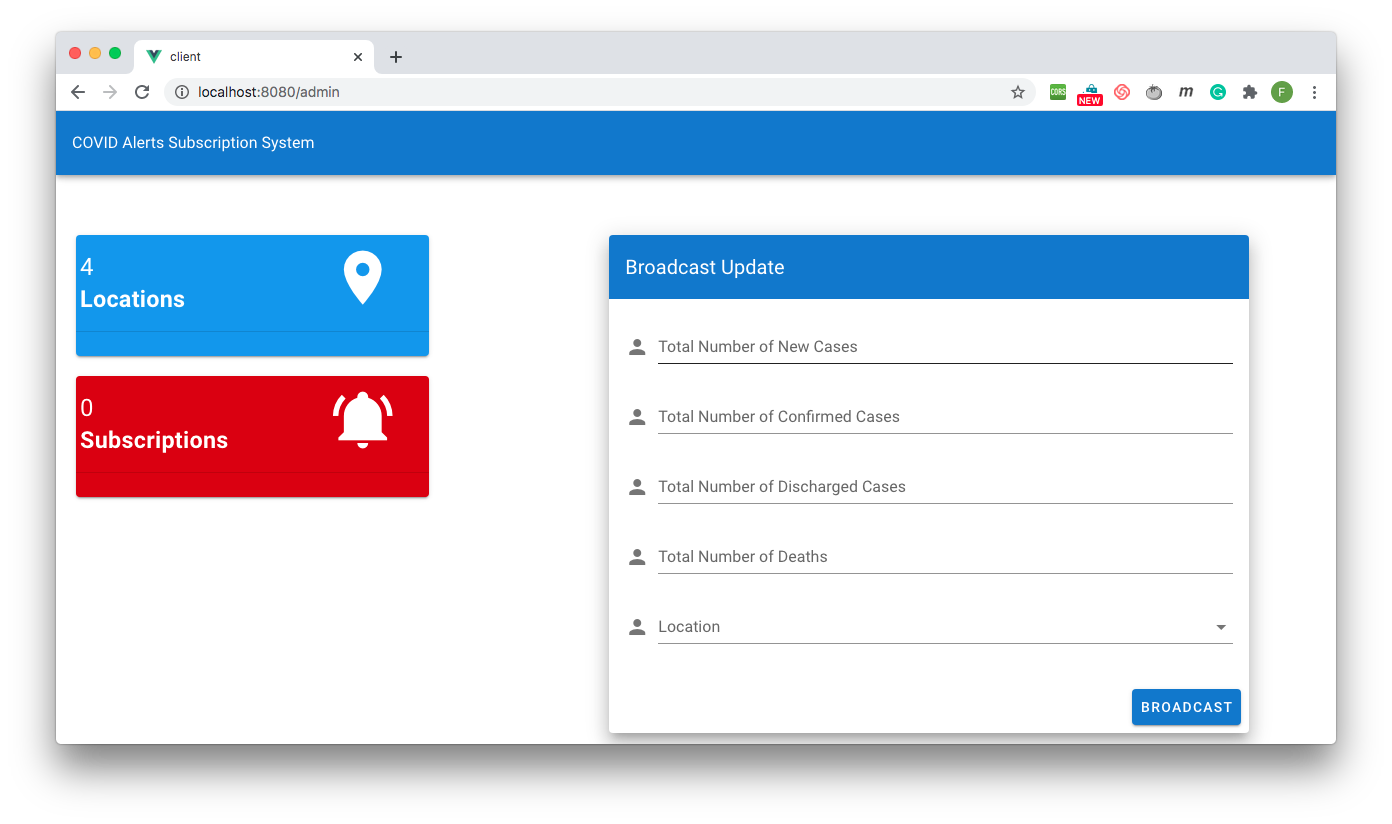
In the template above, two equal width columns are created. The first column will contain dashboard widgets that display the number of locations currently in the system and the total number of subscriptions by users.
Inside the first column, replace the text Dashboard Widgets with the following code:
Next, add the form the admin will use to send alerts by replacing the text Alert Form in the second column with the following block of code:
This form has fields for new, discharged, and confirmed COVID cases and also the number of deaths. A location dropdown is also created using an array of locations retrieved from the API.
This page component will also need to display notifications similar to the subscription page. Add the snackbar component shown below under the v-layout closing tag:
Now that the template is all set up, it’s time to build the component configuration object for the admin page.
To begin, add the following block of Javascript below the template component.
In the script above, the axios library and the values modules are first imported. The Vue.js component configuration object is then exported from the file with the name admin. Like earlier, this configuration object is responsible for a number of tasks:
- Define the dynamic data properties used in the template
- Load the available locations and subscriptions from the backend immediately the page loads
- Define the event handler for the
Broadcastbutton - Define a function to display a notification message
To implement the first task, add the data property to the configuration object as shown below:
In the data property, the following properties are defined:
- alertsForm: this is the object that will hold all values in the form
- locations: The array of locations to be fetched from the backend API
- subscriptions: The array of subscriptions to be fetched from the backend API
- loading: Used to disable the submit button when the API call is ongoing
- showNotification: boolean that controls the visibility of the notification snackbar
- notificationMessage: Message to be displayed in the notification
- notificationColor: background color of the notification (green for success, red for error)
The next task is to load the locations and subscriptions data from the backend API. Using the created hook, add the following lines of code below the data declaration as shown below:
Then, add the functions for form submission and displaying the notifications. To do this, below the created hook declaration, add the following methods object:
In the methods object above, two functions are defined:
- sendAlerts: This is called when the
Broadcastbutton is clicked. It checks to see if all the fields in the form have been filled out, then sends aPOSTrequest to the backend API (the /send-alerts endpoint) usingaxios. Based on the response, a notification is displayed by calling thedisplayNotificationfunction. - displayNotification: This is a utility function for the page that simply sets the display message and color of the notification and also makes the snackbar visible
To wrap things up, some little styling is needed on this page. Below the script tag, add the following style tag:
The full admin page code is shown below:
Creating a Route for the Admin Page
You now need to add a route for the admin page. Routes are located in the file src/router/index.js. Each route is represented as a route object within a routes array. In this file, replace the code that looks like this:
With the route code for the admin page:
In your browser, navigate to the page http://localhost:8080/admin. You will see a screen similar to the one below:
Testing the Application
Great work! Now it’s time to test the complete application from end to end. Remember to start the backend server before you start testing! In your browser, navigate to the app’s homepage and fill out the subscription form with an active email and phone number, then select the location to which you want to subscribe:
You should see a notification pop up once the subscription is successful.
Now navigate to the admin page and enter some dummy data for each field, and select the same location that you just subscribed to.

Hit the Broadcast button to submit the form.
Once a success message is received, you will receive an SMS message at the number you subscribed with in addition to an email at the email address you subscribed with (check the spam folder if you cannot find it in your inbox). Once again, if you’re on a trial account, you must verify a number before it can receive an SMS.
Conclusion
Information is a powerful tool in flattening the COVID-19 curve in our communities and the world at large and in this tutorial, you have been able to successfully build a system capable of getting information to people to keep them alert to the spread of COVID-19 in their respective locations.
By building this system, you have also learned how to:
- Use Twilio Node to send SMS
- Use Node.js and Twilio SendGrid to Send a Mail
Next Steps
To go further, you can expand this application by doing any of the following:
- Adding an authentication layer for Admin users on the client (checkout Twilio Verify)
- Group the number of subscriptions per location and display it on the admin dashboard
- Send alerts via Whatsapp (checkout Twilio API for Whatsapp)
Fikayo Adepoju is a full stack web and mobile developer with 10+ years experience. Currently, he works as a full-time technical content creator writing technical articles for various blogs and creating video courses. Because of his passion for teaching and helping developers, Fikayo hopes to continue as a full time technical author.
Articles: https://github.com/coderonfleek/articles-by-fikayo
Twitter: https://twitter.com/coderonfleek

Related Resources
Twilio Docs
From APIs to SDKs to sample apps
API reference documentation, SDKs, helper libraries, quickstarts, and tutorials for your language and platform.
Resource Center
The latest ebooks, industry reports, and webinars
Learn from customer engagement experts to improve your own communication.
Ahoy
Twilio's developer community hub
Best practices, code samples, and inspiration to build communications and digital engagement experiences.