How to Create a RESTful API in PHP With SlimPHP 4 and MySQL
Time to read:
December 14, 2021
Written by
Reviewed by
For those times when all you need is a simple solution that enables you to write quick, yet powerful applications, Slim is a great contender amongst the myriad of available PHP frameworks.
At its core, Slim is a microframework designed to receive HTTP requests, route the requests to the relevant controllers, and return the corresponding HTTP responses.
Slim’s minimalist environment makes it ideal for the development of both microservices and APIs that consume, repurpose, or publish data.
In this tutorial, you’re going to learn how to create a RESTful API using Slim 4, PHP, and MySQL.
Prerequisites
To complete this tutorial you will need the following:
Let's create the API!
To begin, you need to create the project’s root directory, named customers-api. You can do this in your editor/IDE or by running the following commands.
Now, let’s create two more directories named src and public inside the project's root directory. src will contain another directory, named Models, and inside of that, there will be a file named Db.php. Then public will have an index.php file, which will contain the application's middleware and routes for the API. To achieve all of this, run the following command in the terminal in the project's root directory.
Install the dependencies
Having created the project directory structure and switched to it, we now need to install the required dependencies. To do this, run the following command in the project's root directory.
Provision the database
Next, using your preferred database tool (such as MySQL's command-line tool or the database tool in PhpStorm) run the SQL below to provision the database schema with the required tables, and two dummy records containing name, email, and phone fields for each person.
To begin, create a new database named customers_api by running the command below.
Now, use the MySQL command below to confirm that the database has been created.
You’ll need to create a table inside the customers_api database and to do this, type the command below into the terminal.
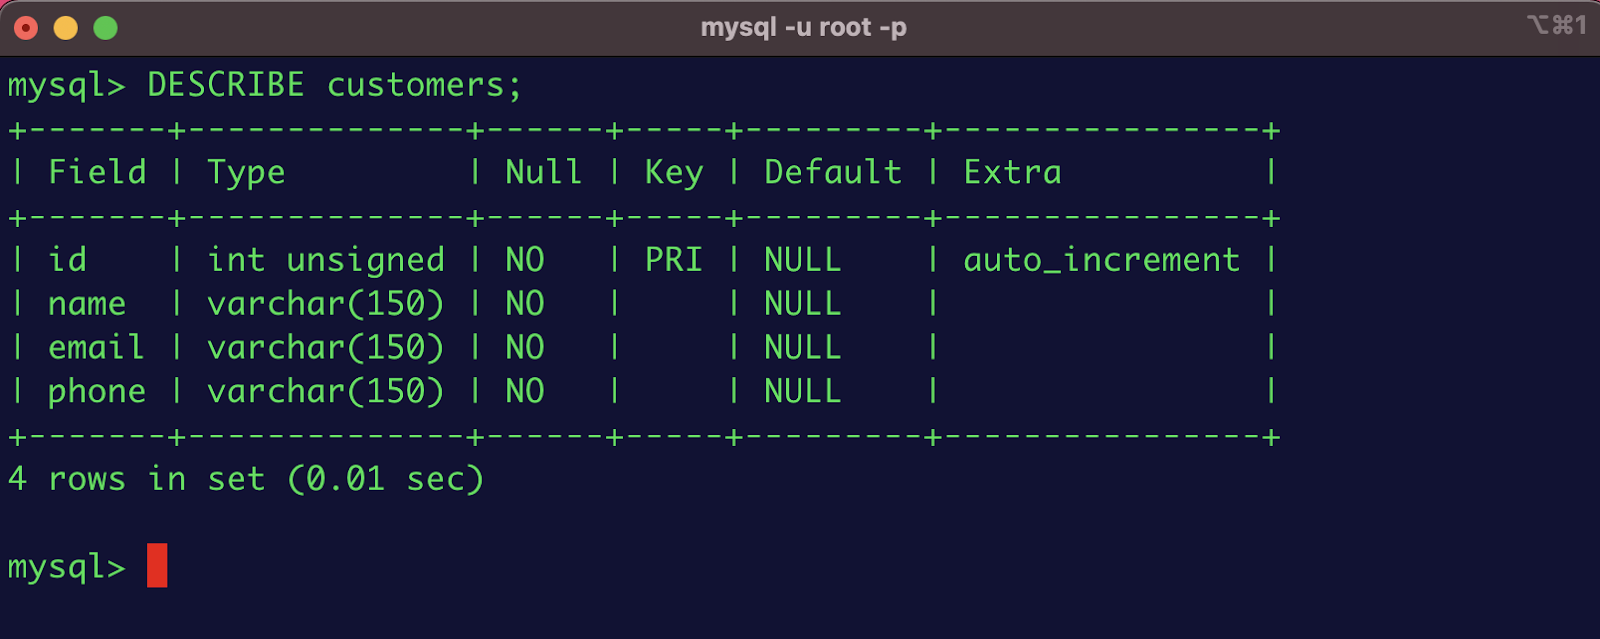
Once inside the customers_api database, create a table named customers, with the following code.
This creates a table with four columns, the customer’s id (which auto-increments), name, email and phone. Let’s test it has worked by typing the following SQL command in the terminal.
You should have the following result.
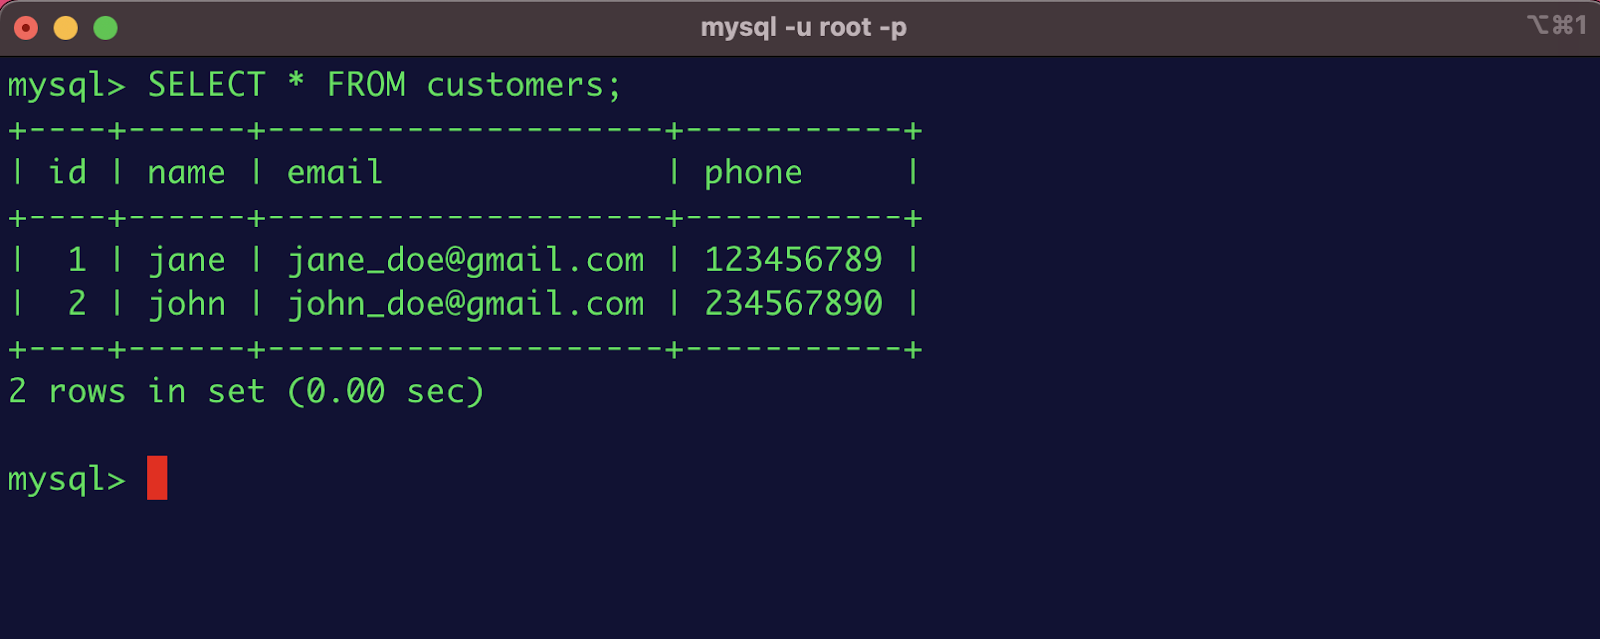
So, let’s add some sample records to the customers’ table. Copy and paste the following code into the terminal.
Now test the records have been added by typing out the following commands in the terminal.
You should have an output similar to the one below.
Create and run the Slim application
To accomplish this, copy the code below and paste it into public/index.php.
In a Slim application, each route invokes a callback function that returns an HTTP response object. The code above begins by bringing in all the PSR-7 components that the app needs. It then instantiates the app and attaches three middleware classes to it.
The Slim middleware architecture is derived from the PSR-15 middleware interface. This is a series of concentric layers that encircle the core application, such that the last middleware added will be the first to be executed.
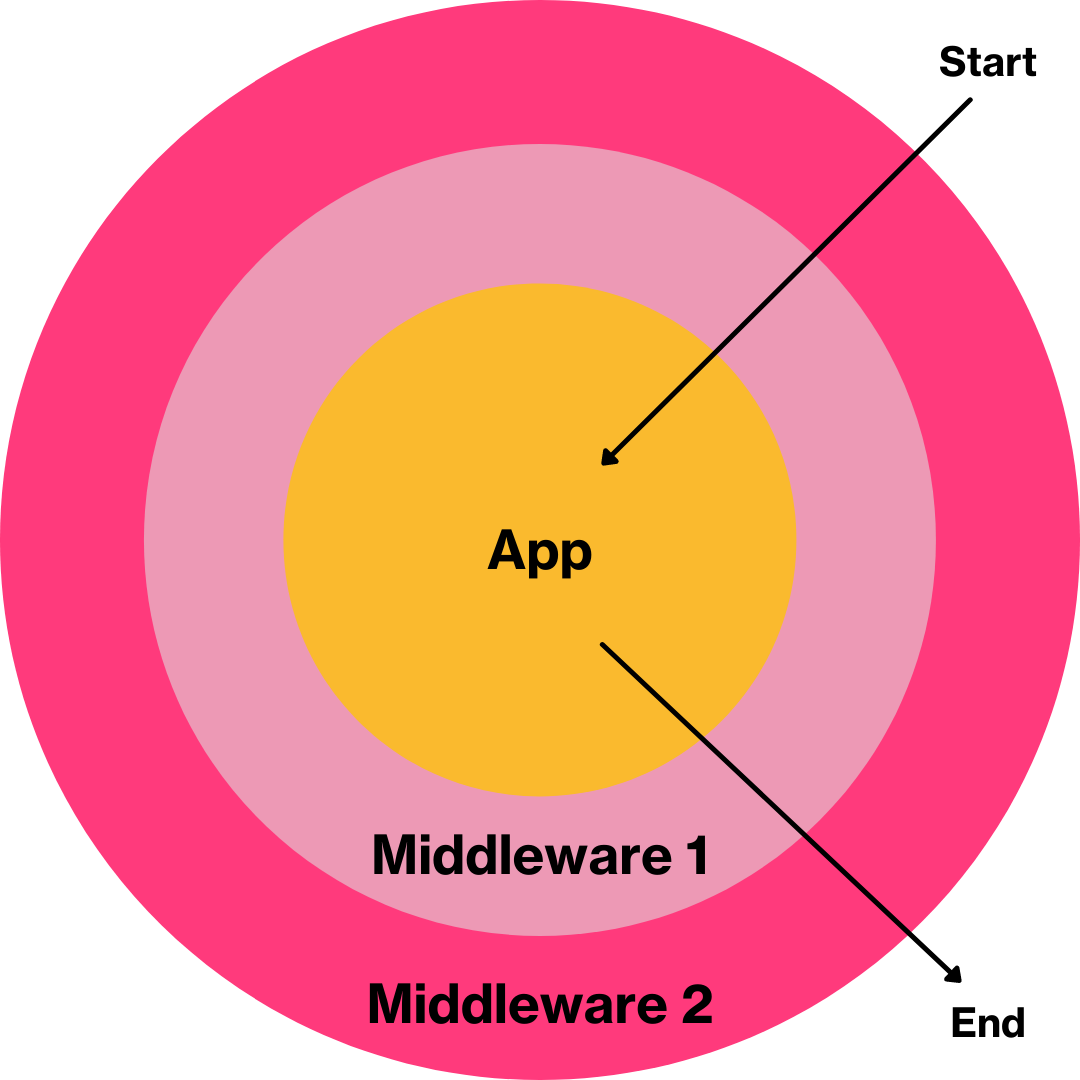
This concentric architecture means that when the Slim application is started, the request object passes through a series of middleware classes, or layers, working from the outside inward. The request enters the outermost middleware, then moves on to the next outermost middleware, continuing until it reaches the application.
For this reason, to catch any errors in the application, you call $app->addErrorMiddleware(true, true, true) last, otherwise any errors thrown from the other middlewares will not be caught.
Once the request object reaches the Slim application, the relevant route is dispatched, resulting in a response object exiting the concentric layers from the inside out. When the object passes the outermost middleware, it is turned into a raw HTTP response and then returned to the client.
Check that the application works
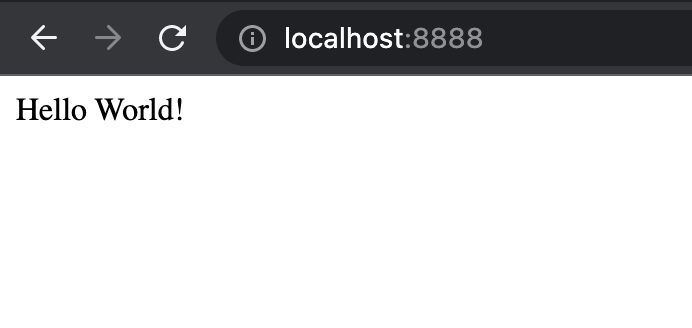
To check that the application works, first start it running, using PHP's built-in web server, on port 8888, by running the command below.
Then, open your browser and enter http://localhost:8888/ into the URL panel. You should have a similar output to the screenshot below.
Create the database connection
To do this, you’ll first need to add a PSR-4 autoloader, by copying and pasting the following code into composer.json.
Now, regenerate Composer's autoloader, by running the command below from the project's top-level directory.
Next, you need to navigate to the src/Models/db.php file and paste the following code into it. Then, you need to update the values for $host, $user, $pass, and $dbname to match those in your database.
Create the routes for the HTTP requests
To do this, open public/index.php and include the use statements listed below.
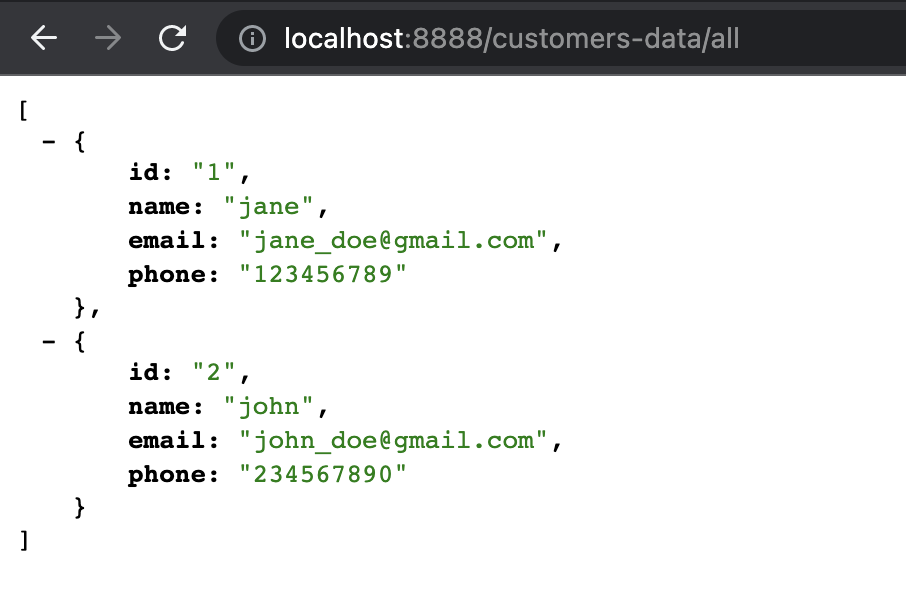
Next, you need to create a route to fetch all the data from the database. To do that, copy and paste the code below towards the end of public/index.php, after the get request, but before the $app->run();
Here we begin by telling the application to perform a get request on /customers-data/all, this will then invoke a call back routine that returns a PSR-7 response object.
To test the application, first, make sure MySQL is running and then use PHP's built-in webserver, by copying and pasting the following command in the terminal.
With the application running, open http://localhost:8888/customers-data/all in your browser, where you should see a similar output to the one in the image below.
Now we need to create a route for a POST request. However, Slim's implementation of PSR-7 does not support the sending of data in a JSON format, instead, they provide a BodyParsingMiddleware that handles this task. To do this, add the code below to public/index.php, placing it just after the call to AppFactory::create();.
Now, let's create the POST request, by copying and pasting the following code into public/index.php.
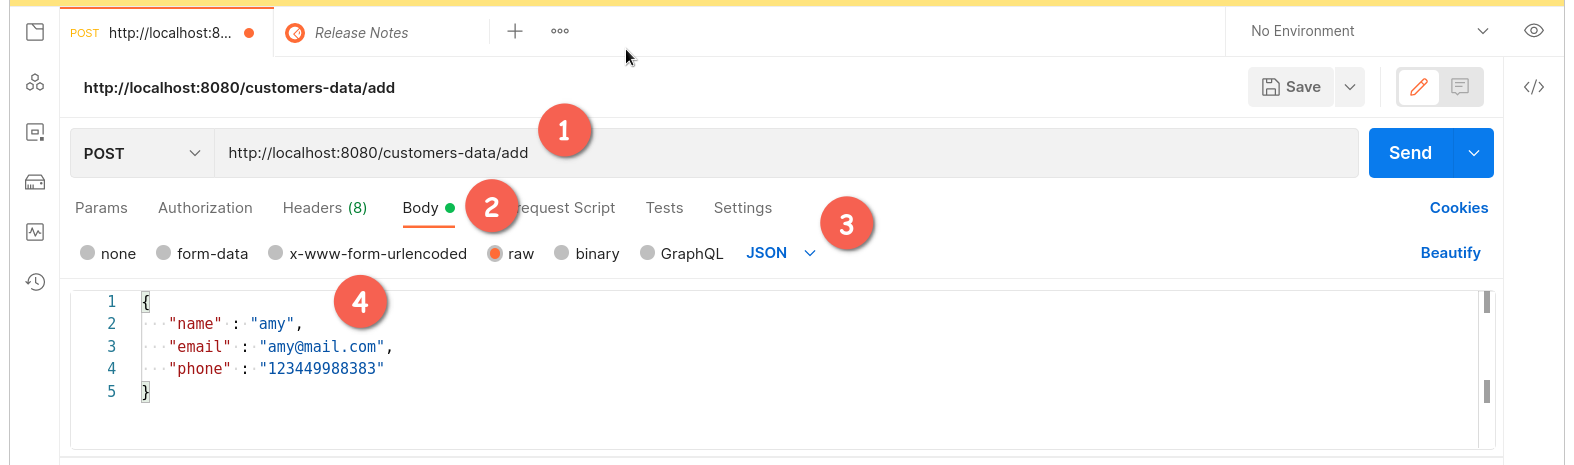
Now, in Postman, create a new POST request, then:
- Set the URL to http://localhost:8888/customers-data/add.
And under the Body tab:
- Set the encoding-type to "raw"
- Set the Content-Type to JSON
- Paste the JSON below into the request's body field.
Have a look at the screenshot below if you're not sure what to do.
With the request configured, click Send to make the request. To confirm that a new entry has been created, head back to your browser and refresh it. You should see output similar to the example below.

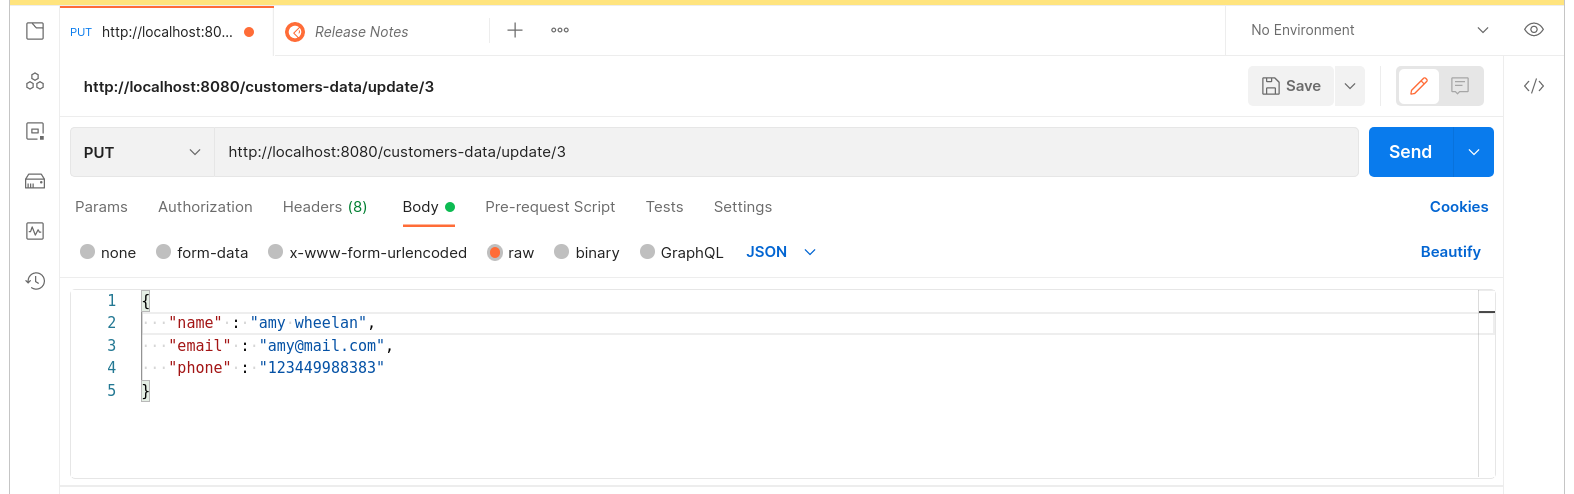
Next, we’ll amend the customer whom we just added, by adding her last name. To do that, copy and paste the following route into public/index.php.
To test it, create a PUT request with the following details:
URL | |
Body | { "name" : "amy wheelan", "email" : "amy@mail.com", "phone" : "123449988383" } |
Encoding-Type | raw |
Content-Type | JSON |
As with the previous request, have a look at the screenshot below if you're not sure what to do.
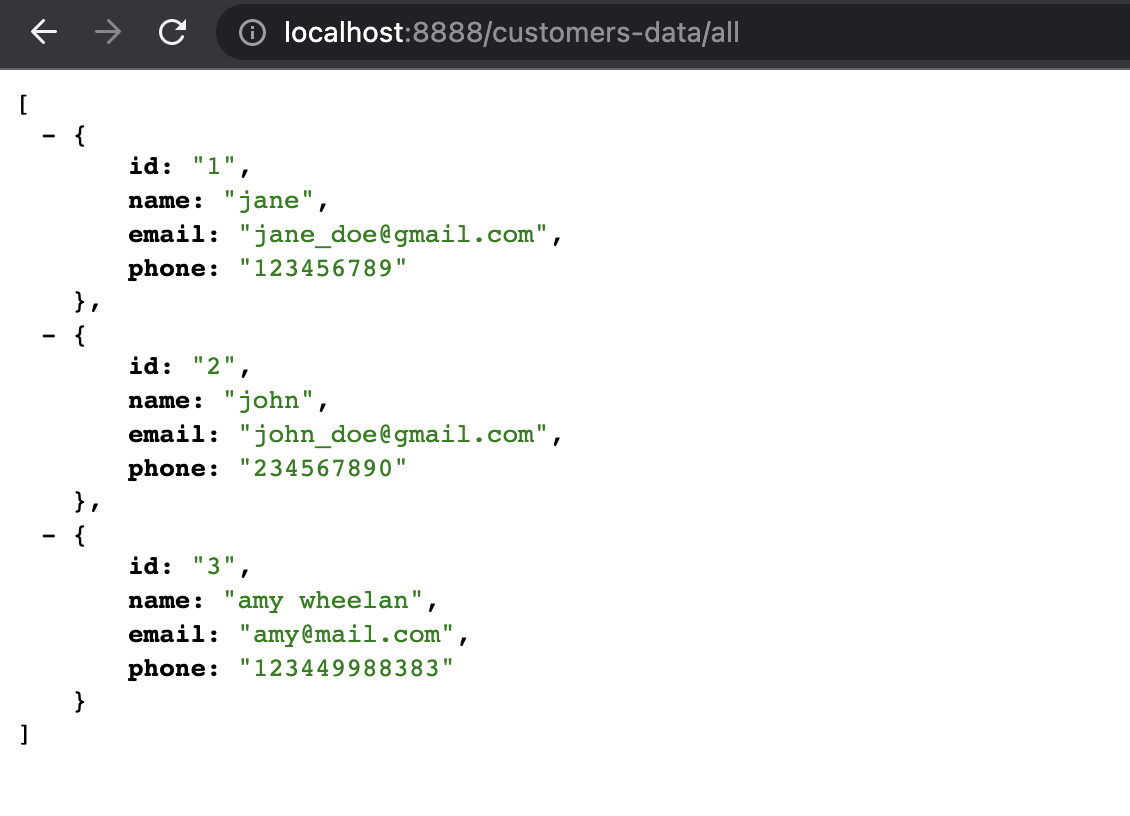
If you navigate to your localhost, you should have something that looks like the following.
To finish, let’s delete the last entry. Add the code below to the public/index.php file.
To test it, make a DELETE request in Postman with the URL http://localhost:8888/customers-data/delete/3. No other settings need to be set. After doing so, if you reload the page one more time in your browser, you’ll find that the last entry has gone.
You have now successfully created a RESTful API using the Slim 4 framework
Have fun building something awesome!
Ijeoma Nelson is a former Deloitte software and cloud engineer. She discovered a hidden passion for programming after winning Startup Weekend Silicon Valley. These days she can be found planning her travel adventures for 2022 whilst building cool stuff with code. You can reach her via LinkedIn or Twitter.

Related Resources
Twilio Docs
From APIs to SDKs to sample apps
API reference documentation, SDKs, helper libraries, quickstarts, and tutorials for your language and platform.
Resource Center
The latest ebooks, industry reports, and webinars
Learn from customer engagement experts to improve your own communication.
Ahoy
Twilio's developer community hub
Best practices, code samples, and inspiration to build communications and digital engagement experiences.