A Privacy-First Web Analytics Solution with Twilio Segment
Time to read:
September 05, 2022
Written by
Reviewed by

If you own or manage a website, you likely spend a decent amount of time trying to identify the patterns and trends in how visitors interact and engage with your site. This information is invaluable when trying to improve user experience and attract more visitors. Web analytics services such as the popular Google Analytics make it easy for website administrators to collect large amounts of information about visitors in real time, just by adding a <script> tag to the site’s HTML.
The problem is that in their quest to provide more and more information, analytics tools have become too invasive, installing their cookies on users’ devices with the purpose of tracking browsing habits and preferences, and even following users as they move through different websites. This has become such a problem that in many parts of the world there are now regulations to protect the online privacy of users. In the European Union, the GDPR law only allows websites to track online activity of its visitors or use their personal information for non-essential purposes after the user provides explicit consent. You can probably guess that this is why the web is now plagued with those annoying cookie prompts.
In this article, I’m going to discuss how to implement a completely private and anonymous web analytics solution, made possible by the flexibility of the Twilio Segment platform. This solution does not rely on personal identifiable information (PII) and does not attempt to track visitors, so there is no requirement to obtain consent from the user to use it. You can use this solution on its own, or as part of a larger analytics implementation for the subset of your visitors that do not provide consent for data sharing.
Brief introduction to Twilio Segment
Twilio Segment is a developer-friendly platform that connects a data source with one or more destinations.
A source emits events to Segment. There are several event types, but in the context of this article the focus is going to be on the Page event, which records a page view from a user.
When Segment receives an event from a source, it immediately forwards it to all the destinations that are connected to that source. Segment maintains integrations with a large number of third-party services, which can be used as destinations. The list of integrations includes Google Analytics, Mixpanel, and many more analytics services.
In the context of web analytics, the source is your website, which can generate page views and other events. Events can be created in the browser, through Segment’s analytics.js library, or in your server, through the libraries for Python, Node.js, Java, .NET, Go, PHP, and others.
Using Segment to collect the events generated with your website gives you full control over the data associated with each event, allowing you to include as much or as little information as you want.
The remaining sections of this article will show you how to set up a small, yet complete example solution that will allow you to experiment with privacy-first web analytics, all from the comfort of your web browser and without having to install anything on your computer. As part of this tutorial you will configure an example React application to capture anonymous page traffic, which is then processed in a Node.js back end and forwarded to the analytics tool of your choice. Ready? Let’s get started!
Tutorial requirements
To work on this tutorial you will need the following:
- A Segment account. Sign up for a free Segment account if you don’t have one yet.
- A Twilio account. You can get a free Twilio account if you don’t have one yet.
- An account with a third-party analytics service with an existing Segment integration. Good choices are Mixpanel and Google Analytics.
Creating a Segment Source
All Segment flows start from a source. For a web analytics solution, there are two categories of sources that apply:
- Website: This is where you can find the JavaScript source, which receives events from the analytics.js library that runs in the browser.
- Server: This is where the Segment libraries for server-side programming languages are located.
While the browser-based option is the most convenient to log web traffic, the solution presented in this article submits page view events from the server. Generating events in the server will make it possible to have full control over what data is shared, and as a side benefit there will be no need to load a third-party analytics library in the front end, making your site load faster for the client.
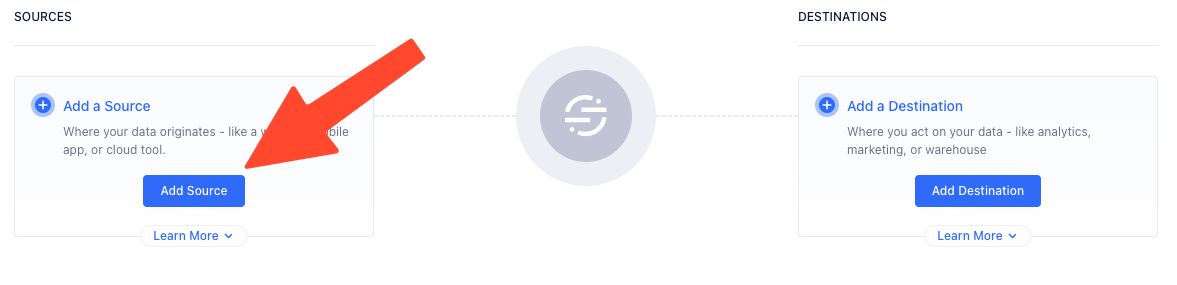
As a first step, you will now create a Node.js source. Log in to your Segment account, select “Connections” on the left side, and then click the “Add Source” button.
Type Node in the search box, select the “Node.js” source from the list, and then click the “Next” button.
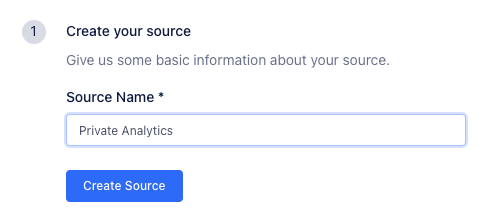
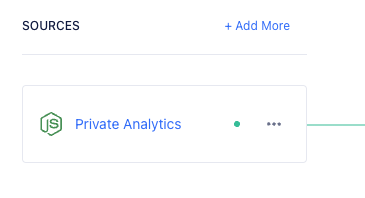
In the next screen, enter a name for the new source (for example, Private Analytics) and click “Create Source”.
After a short wait, you will see the write key that is associated with your new source. You will need this key later. For now, click the “Copy” button, and then paste your key into an empty text editor window, from where you can retrieve it later.
To complete the creation of the source, click the “Next” button once again, and then click “Done”. Your dashboard should now look like this:
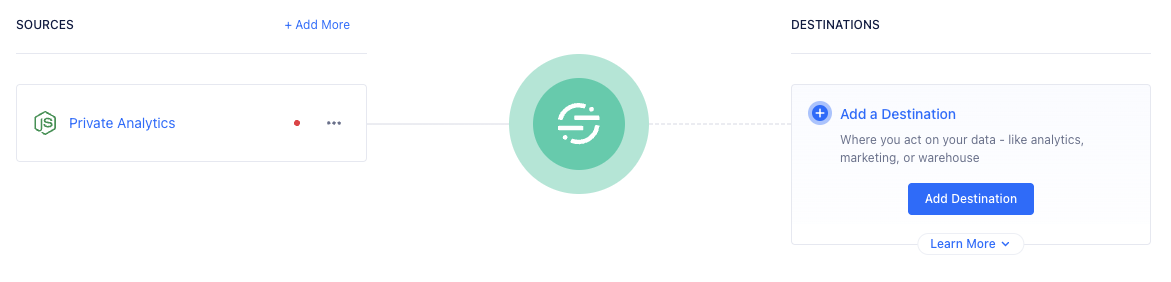
The red dot that appears in the source indicates that no events have been received yet. As soon as events start flowing the dot will turn green.
Recording web traffic with Node.js
As discussed above, the task of submitting page view events to Segment will be carried out in the server. For this tutorial, the endpoint in charge of this work will be defined in a Twilio serverless function using JavaScript. In a real application, the endpoint would be added to the existing back end.
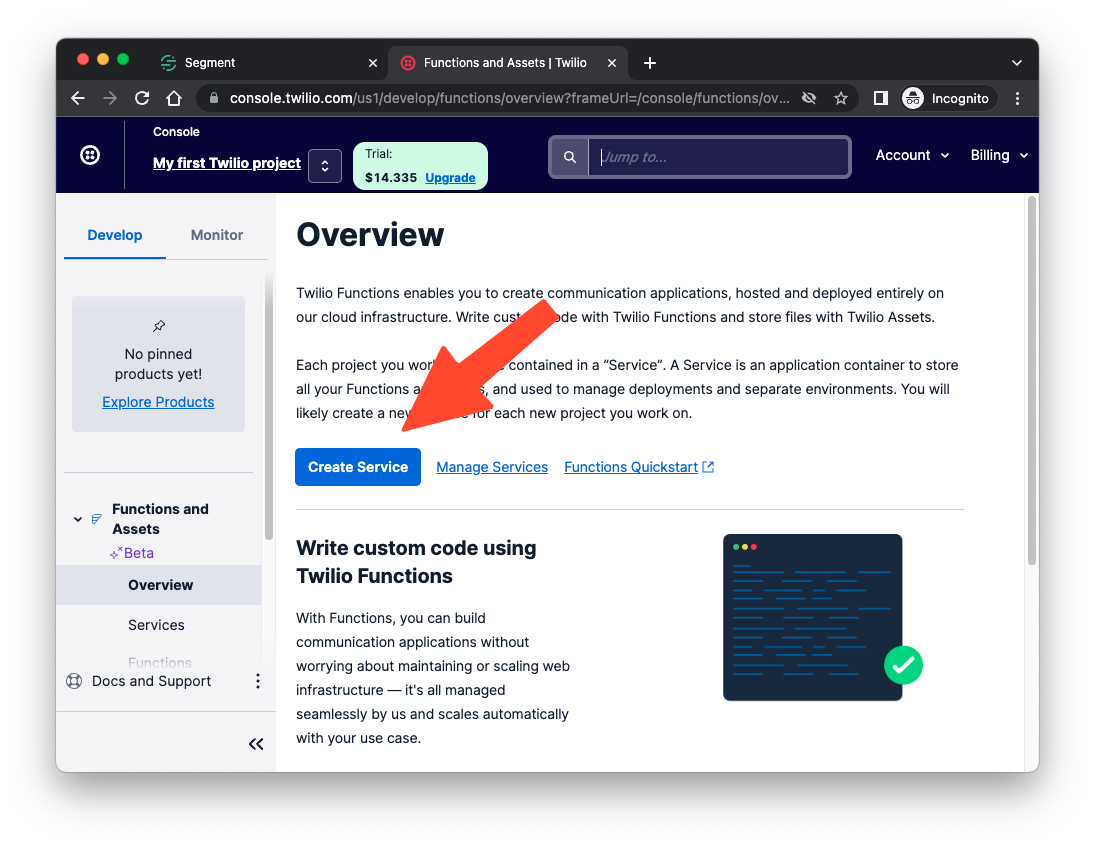
Open a new browser tab and navigate to the Twilio Console. In the “Jump to” search box, type functions, and then select the “Functions” link from the search results. You should now be in the Functions Overview page. Click on the “Create Service” button.
You will need to provide a name for the new service, such as private-analytics. Click the “Next” button, and you will be redirected to an interactive function editor.
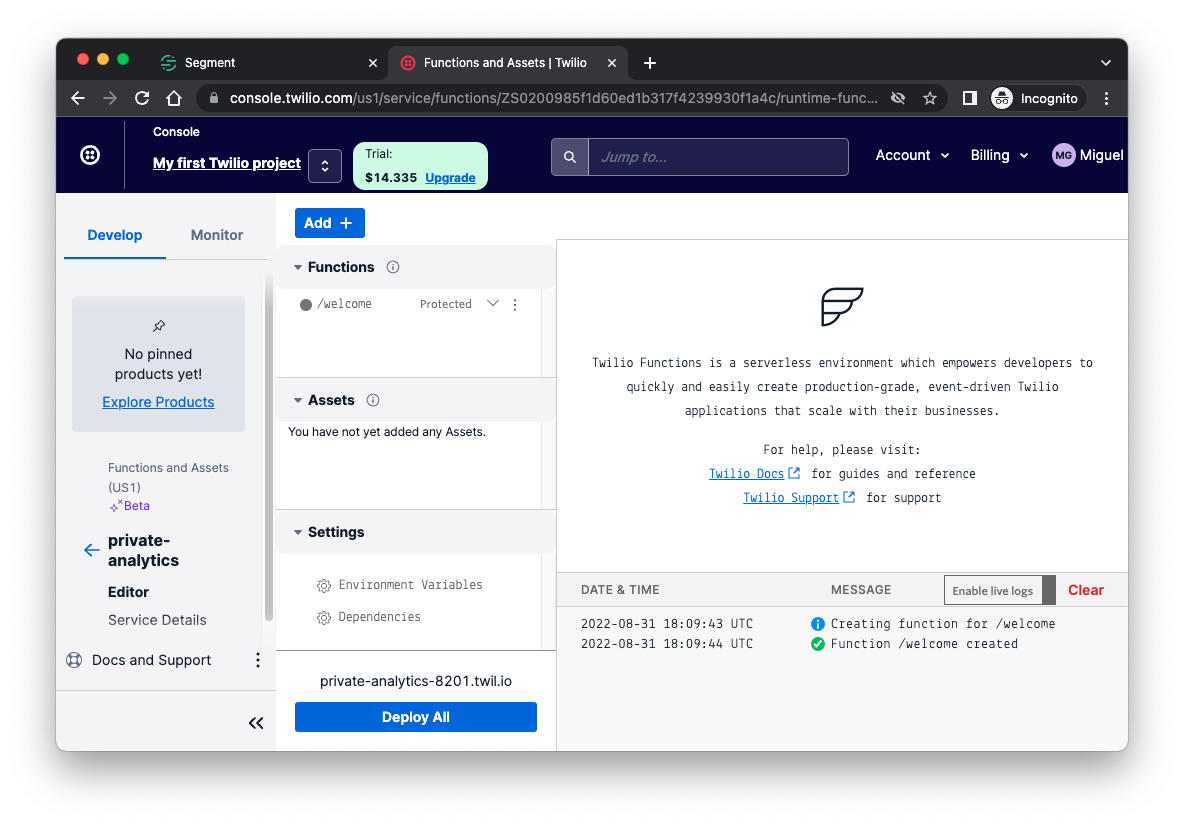
Under the Twilio Serverless platform, a Service is a container for a collection of functions and a collection of static assets. New services created in the Twilio Console are initialized with a single function, associated with the /welcome path. Locate this function in the “Functions” section and click on it to open its source code in the editor.
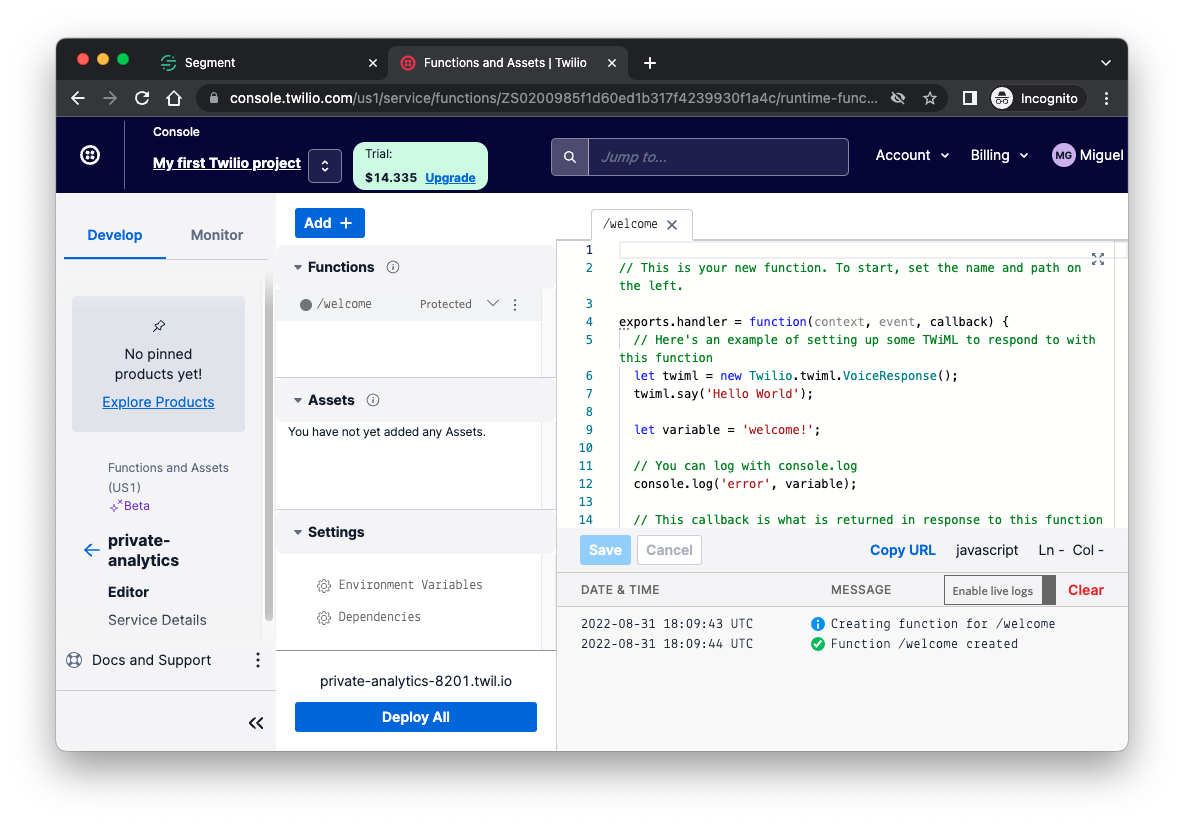
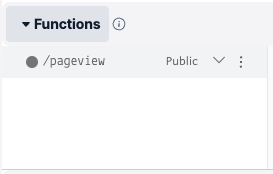
Open the kebab (three vertical dots) menu to the right of the /welcome function and select “Rename”. Type /pageview as the new function path (don’t forget the leading slash) and press Enter. Then click on the “Protected” legend and change the selection to “Public”. This will enable the function to be invoked from outside the Twilio ecosystem.
Delete all the default code from the text editor and paste the following code in its place:
Click the “Save” button to store the code changes.
The first two lines initialize the Segment library. The second line has a reference to a SEGMENT_WRITE_KEY environment variable, which corresponds to the write key assigned to the Segment source. You will soon add this environment variable to the service.
The pageView() function makes a call to Segment to record a page view. The function takes a list of arguments, all of which are optional:
url: The full URL of the viewed page.path: The path portion of the viewed URL.search: The query string portion of the viewed URL.title: The title of the viewed page.referrer: The referrer URL, or in other words, the URL of the previously viewed page.userAgent: The user agent string reported by the user’s browser.userId: An anonymized user identifier.
The function makes a call to the page() function from Segment, passing all the above arguments according to the format described in the Node.js documentation for the function. You may notice that the properties object is passed on its own, and again as a page attribute of the context object. This is necessary because depending on the Segment integrations used the data may be retrieved from either one of these two locations.
The page() function from the Segment library uses a callback style. In this example, pageView() creates a Promise wrapper for the callback-based function, so that the caller of pageView() can use await instead of a callback.
Below pageView(), a second, unnamed function is defined. This function is declared as the default export from the module. In the Twilio Serverless platform, this is the entry point of the function, which will execute whenever the URL associated with the function is invoked. The context and event arguments provide the function with lots of useful information about the request that triggered the function. The callback argument is a function that needs to be called to indicate that the function has completed.
The function creates a Response object and configures CORS headers, so that the React example application you will work with later can make calls.
This function is going to be deployed openly on the Internet, so as a security measure, the value of the X-Token header is checked against an ACCESS_TOKEN environment variable. If the caller does not provide this header or if the token given does not match the environment variable, then the request is aborted with an access error.
If the token is correct, then the pageView() function is called to submit the page view event to Segment, with all of its arguments extracted from the event object, which Twilio Serverless populates with the JSON data provided by the caller as payload.
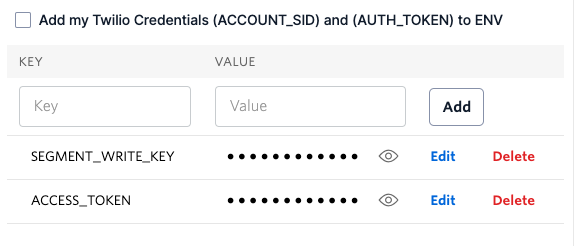
Environment variables
There are two environment variables needed by the serverless function, one for the Segment source’s write key and the other for the access token. In the “Settings” section of the service, click on “Environment Variables” to open the variable configuration page.
Enter SEGMENT_WRITE_KEY as the key, and paste your Segment’s source write key as the value. Press the “Add” button to save the variable. Then add a second variable with key ACCESS_TOKEN. For the value of this variable, type any sequence of characters that you’d like to use as authentication and click “Add” once again.
The “Add my Twilio Credentials” checkbox can be unchecked, since this function does not need to authenticate to the Twilio API. Below you can see how the environment variable configuration should look like.
Dependencies
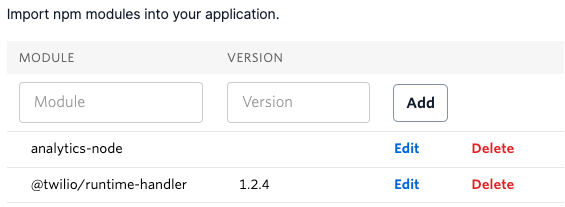
To be able to run, this function needs the analytics-node library from Segment to be installed. Click on “Dependencies” right below “Environment Variables” to configure this library.
Enter analytics-node in the “Module” field, leave the “Version” field blank to request the latest version. Click the “Add” button to save this dependency. Then as a second dependency enter @twilio/runtime-handler. For this dependency, Twilio requires an explicit version given. You can enter version 1.2.4, or if you prefer, the most recent version listed in the documentation.
At this point the function is complete and can be deployed. For this, click the “Deploy All” button. As soon as the deployment finishes, some transitive dependencies will be added.
Testing the function
Before moving on to the front end portion of this tutorial, you will ensure that the function is working properly with a test request.
Open a terminal window and type the following command to call the function:
This command sends a POST request to the function, reporting a made-up page view from a user abc123 on a page with a /test path. The command has two placeholders for which you need to provide your own information. First, replace <<ACCESS_TOKEN>> with the access token that you have stored in the function’s environment. If this token is missing or does not match, then the function will abort with a 401 status code, indicating access was denied.
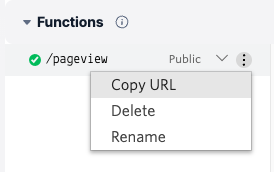
The second placeholder is <<FUNCTION_URL>>. To find the public URL of your function, click the kebab menu for the function once again. Select “Copy URL” to transfer the URL of this function to the clipboard, from where you can paste it into the command.
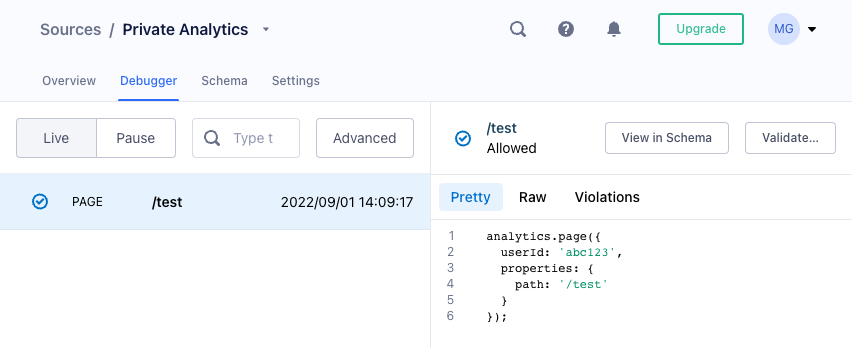
Execute the command in your terminal to trigger a test page view event. Here is an example run so that you can see what the output should look like:
The important part in the output is the 200 status code in the first line of the output, which indicates that the request completed successfully. As stated above, a 401 status code would indicate that the access token is missing or incorrect. You are welcome to test the error condition by removing or changing the token part of the above command.
After you have at least one successful request sent, go back to the Segment dashboard, and ensure that the red dot next to your source is now green, indicating that the source is now receiving events.
Then click on your source, and select the “Debugger” tab. Here you will see all received events, and by selecting any of them you can inspect the data that came with it.
In the next section, you are going to modify a small React application to submit a request that is similar to the test request above each time the user navigates to a different page.
Capturing React page navigation events
For this part of the tutorial, you are going to work with the example React application featured in the React-Router Tutorial. A complete version of the application from this tutorial is available for you to use on CodeSandbox. Click here to open the project.
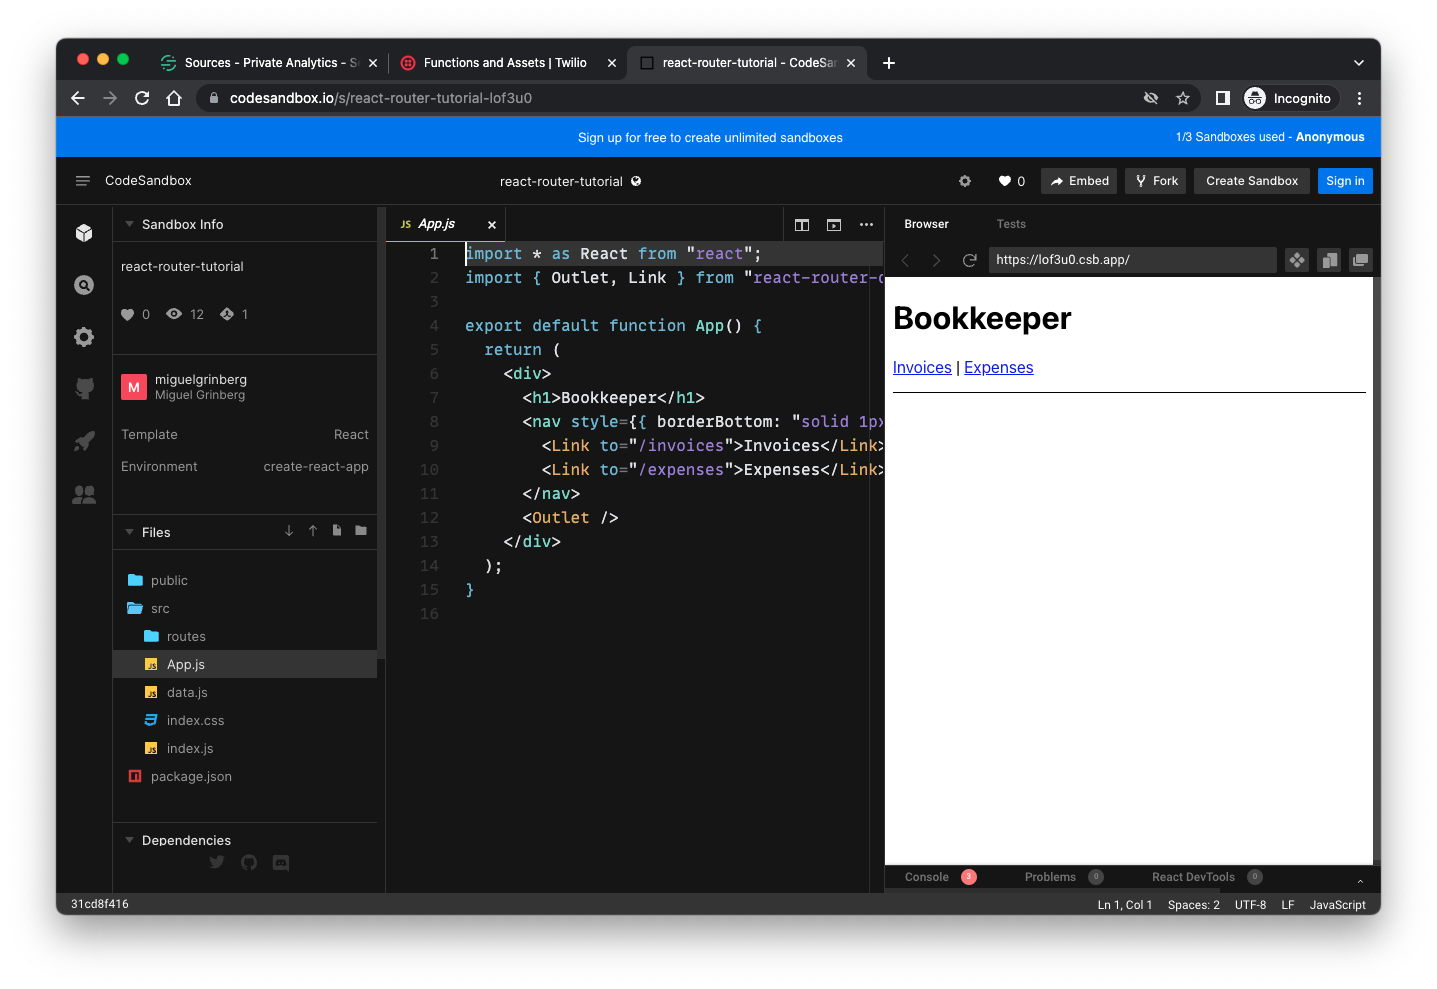
You can try the application out in the preview panel on the right. Note how the URL in the preview’s address bar changes as you navigate through the different pages of the test application.
Configuring the page view function
The first change you are going to make to this application is to configure access to the /pageview function.
Click the “New File” icon to the right of the “Files” heading to create a new file in the top-level directory of the project. Name the file .env (a dot followed by env).

The new .env file should now be open in the text edition portion of the CodeSandbox user interface. Define two environment variables for the React application as follows:
As before, replace <<FUNCTION_URL>> and <<ACCESS_TOKEN>> with the actual function URL and the access token that you configured on the serverless function. Save the .env file to add this variable to the application.
Intercepting page navigation
To be able to send requests when the React page changes, it is necessary to add a mechanism by which the application has a chance to run some custom code whenever the user performs an action that involves page navigation. When working with React, this can be conveniently done by adding an effect function inside a custom hook.
Hover the mouse over the src folder and click on the “New File” link to its right. Name the new file usePageTracking.js.
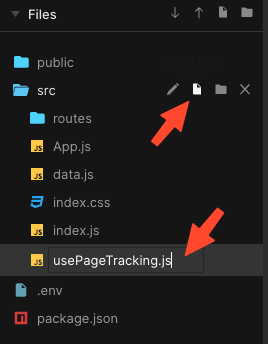
The new file should now be open in the code editor. Paste the following contents on this file.
The usePageTracking() hook function defines an effect function that depends on React-Router’s location object. This means that each time the location changes the effect function will trigger.
The function uses fetch() to send a POST request to the serverless /pageview function to record the navigation event. The previously configured environment variables are used for the URL and access token.
The request submits the path, search, and url, obtained directly from the location object. It also submits the referrer URL, which is kept in a global variable initialized to the global referrer, and kept updated as the user navigates through client-side routes. This implementation does not submit the title argument, because the React application leaves the same title set for all of its pages.
The userId global variable defined at the top creates a completely anonymous user identity, which makes it possible to associate all the pages visited during a session, without compromising the privacy of the user. Note that this is not a persistent user identifier. When the user refreshes the page in the browser a different identifier will be generated.
A last argument that is implicitly sent is the browser’s user agent. The fetch() call will add this on its own, and the /pageview function will extract it from the User-Agent header of the incoming request.
The hook needs to be included in the App component to become effective. Open the App.js file, and the new highlighted lines in the code listing below.
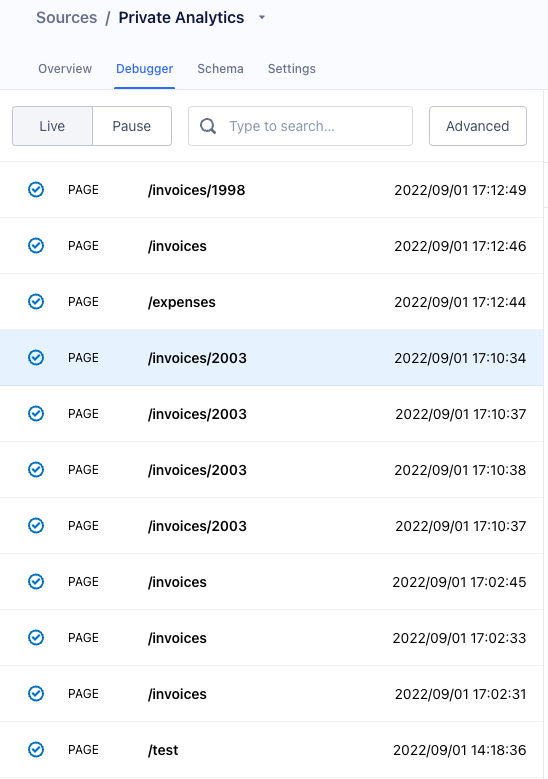
The application should automatically reload after you save your changes. Now each time you navigate to a different page, the effect function will run and record a page view. To confirm that this is working, navigate through the application a few times, and then go back to the Segment source’s debugger tab to see all the page view events sent from React.
There is only one step left to have a complete analytics solution. In the next section you will configure a destination to receive these page view events, so that you can generate some charts and tables.
Adding analytics destinations
To be able to visualize all this traffic that is now flowing into Segment, you need to connect the source to one or more destinations. In the Connections dashboard of your Segment account, click the “Add Destination” button, and then click the “Analytics” tab to see what options are available.
For tracking page views, the Mixpanel and Google Analytics 4 destinations are both good options to try. You may also find it useful to send traffic data to a generic data warehouse.
Before you continue, make sure you have an account with a chosen analytics service.
Choose one of the available destinations and click the “Next” button to continue.

In the next screen, you need to associate the new destination with a source. Select the “Node.js Server” source and click “Next”.
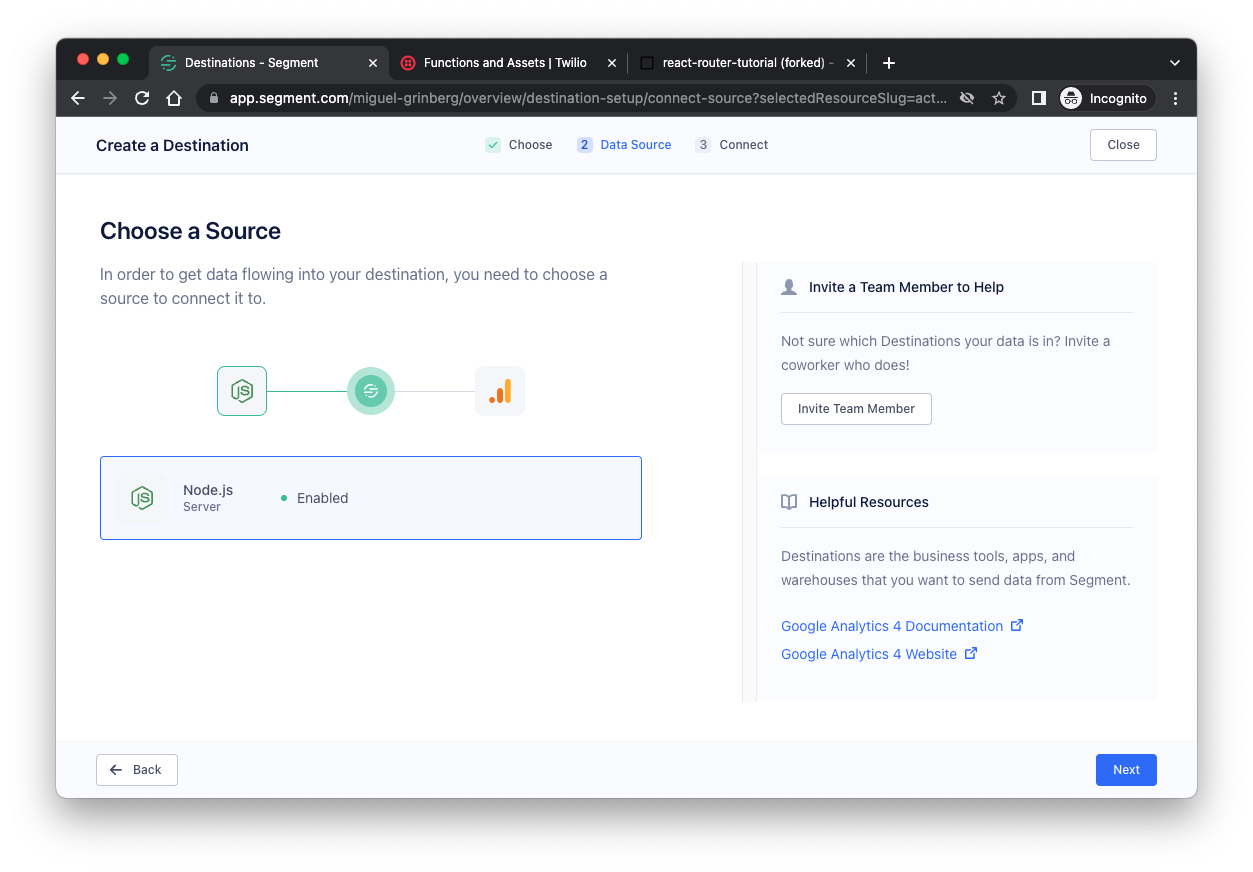
The next configuration screen will ask you to name the new destination. In the screenshot below, the GA4 destination is given the name GA4 Private Analytics, but you are free to use your own preferred name.
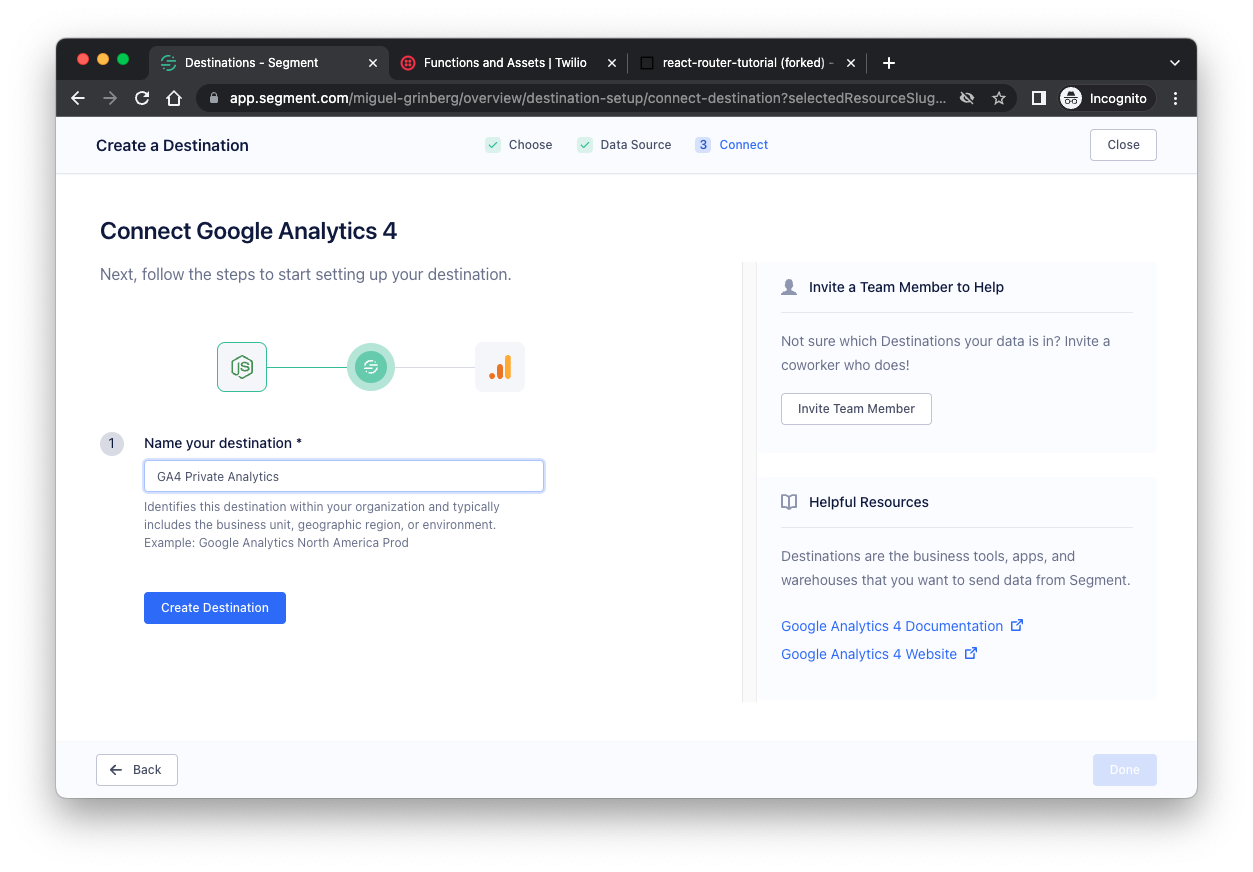
Some destinations may prompt you to provide additional information. Provide any information that is requested and then click the “Create Destination” button.
Depending on the destination, you may see one more configuration screen that will give you the option to enable the destination. Do so if asked. Move through any remaining configuration screens by clicking “Next”, and then end the process by clicking the “Done” button.
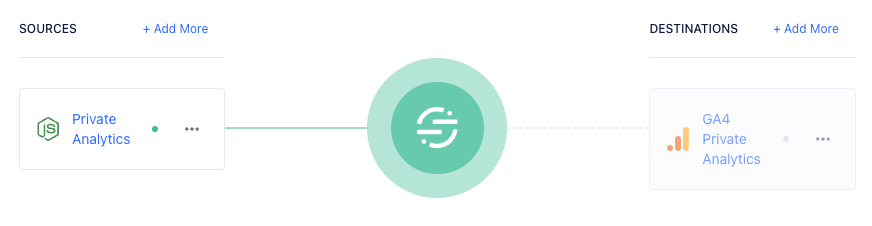
You should now have the source connection to the destination. If you enabled the destination during its creation, then there is nothing more to do. If you were not asked to enable it, then the destination will be in a disabled state, possibly because authentication information still needs to be provided.
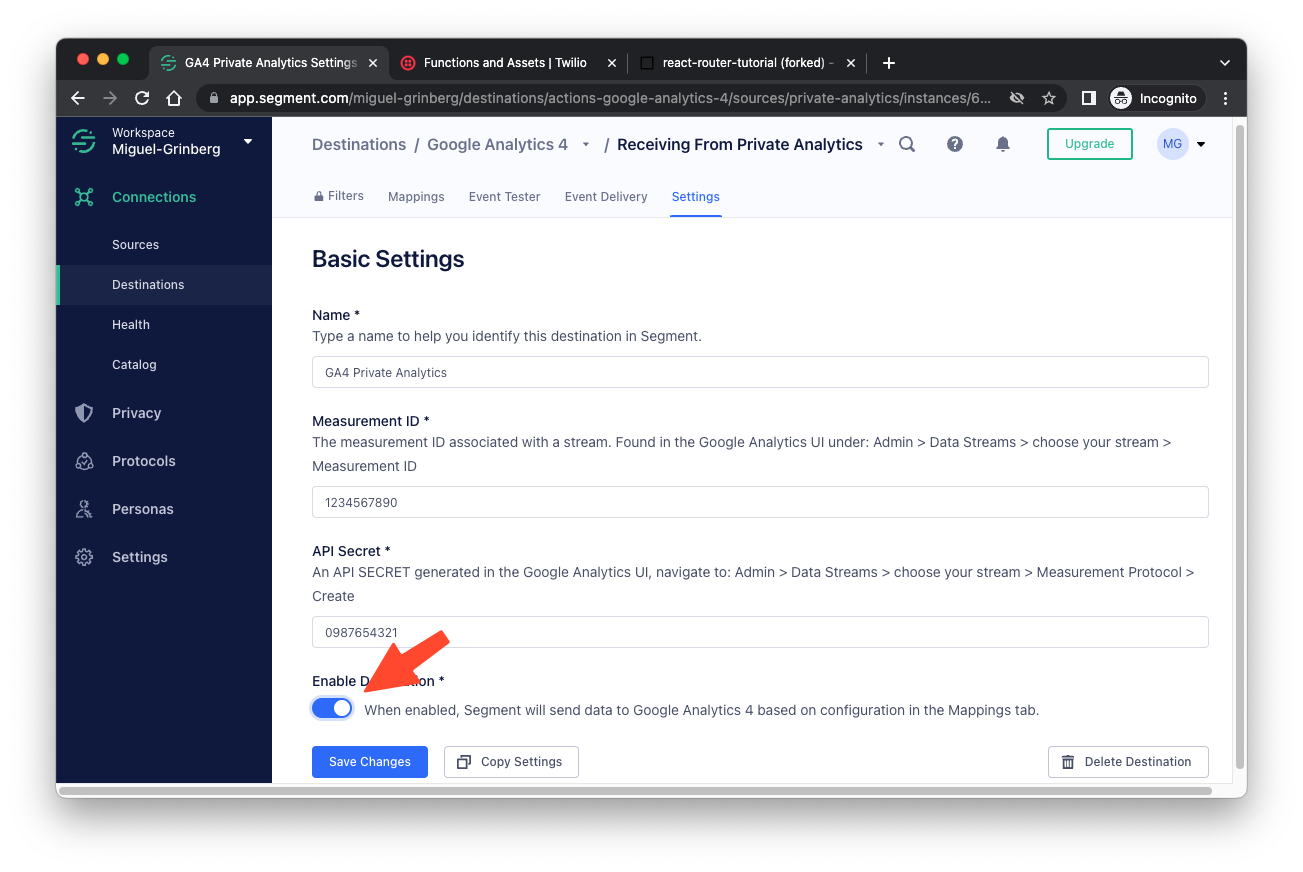
If the destination is currently disabled, click on it to open its settings page. In this page you will need to provide authentication details to allow Segment to forward events. Be sure to provide any items that are marked as required.
- For Mixpanel, you need the Project Token assigned to your project in the Mixpanel interface.
- For Google Analytics, you need the Measurement ID and the Secret Key assigned to your account.
- For Amplitude, you need the API and Secret Keys assigned to your account.
At the bottom of the settings page you may see a switch to enable the destination. This switch can only be operated once all the required settings are entered. Make sure you enable the destination before clicking the “Save Changes” button.
Congratulations! Now you have a complete system configured, and any page view events reported by the React application to the serverless function will make their way into your chosen analytics service. You can test this by navigating through the pages of the application running on the CodeSandbox site, and observing how these page view events appear on the analytics service a few seconds after.
But this is too private!
After playing with this solution, you may find that the amount of information that flows through the system is fairly limited. The /pageview serverless function forwards page URLs and referrers, along with the user agent of the user’s browser, but nothing more.
Depending on your particular case and the level of data sharing consent you have from each user, you may have more information available that you would like to introduce in the system. The flexibility offered by the Segment platform makes it possible to include additional information, and configure how this information is then forwarded to your analytics destination.
To see what information your destination can accept, go to your “Connections” dashboard and click on the destination. Then at the top of the screen, click on the “Mappings” tab.
Many of the destinations automatically set up default mapping. If you don’t have any, click on “New Mapping” and create a new mapping for a page view event. If you already have a mapping for page events, then click on its menu and select “Edit Mapping”.

The mapping configuration will show you all the possible items of information that can be forwarded to the destination, and where in the data payload of the Page event from Segment each item is expected to be by default.
Feel free to add any additional information you’d like by including it in the payload submitted by the /pageview function, but remember that if you are going to include personal information such as the user’s IP address, consent must be obtained first, according to GDPR and similar regulations currently in effect.
Conclusion
I hope this little tutorial helped you appreciate the power and flexibility of the Segment platform, in particular with regards to protecting the privacy of your users and their personal data.
I can’t wait to see how you incorporate Segment into your project!
Miguel Grinberg is a Principal Software Engineer for Technical Content at Twilio. Reach out to him at mgrinberg [at] twilio [dot] com if you have a cool project you’d like to share on this blog!


Related Resources
Twilio Docs
From APIs to SDKs to sample apps
API reference documentation, SDKs, helper libraries, quickstarts, and tutorials for your language and platform.
Resource Center
The latest ebooks, industry reports, and webinars
Learn from customer engagement experts to improve your own communication.
Ahoy
Twilio's developer community hub
Best practices, code samples, and inspiration to build communications and digital engagement experiences.