Sending SMS the Low-Code Way with Airtable, Twilio Programmable SMS, and n8n
Time to read:
October 07, 2020
Written by
Reviewed by

Keeping your customers updated is one of the key ingredients of a successful business. This can be done in various ways; one of the most popular is through SMS messages.
It’s often thought that there is no easy way to quickly send SMS messages to thousands of your users without writing code if their information is stored in a database like MongoDB, Postgres, or even Airtable.
But what if there is a solution that makes the process very easy? Even if you’re not a developer you can quickly get started with this solution with just a few clicks!
Low code, no-code platforms are changing the way we are building software. They are making it easy to quickly build apps faster. With n8n you can build any automated workflow for your use case.
n8n is a fair-code licensed tool that helps you automate tasks, sync data between various sources, and react to events using a visual workflow editor. You can select from more than 180 nodes to build an automated workflow.
Twilio Programmable SMS provides APIs developers can use to easily integrate SMS into their applications. Twilio’s global infrastructure delivers more than 66 billion messages a year.
Airtable provides “the power of a database with the familiarity of a spreadsheet”. With a variety of views, extensions, and integrations, you and your collaborators can see your data in a form that makes sense to you and work with it in a workflow that’s natural and interactive.
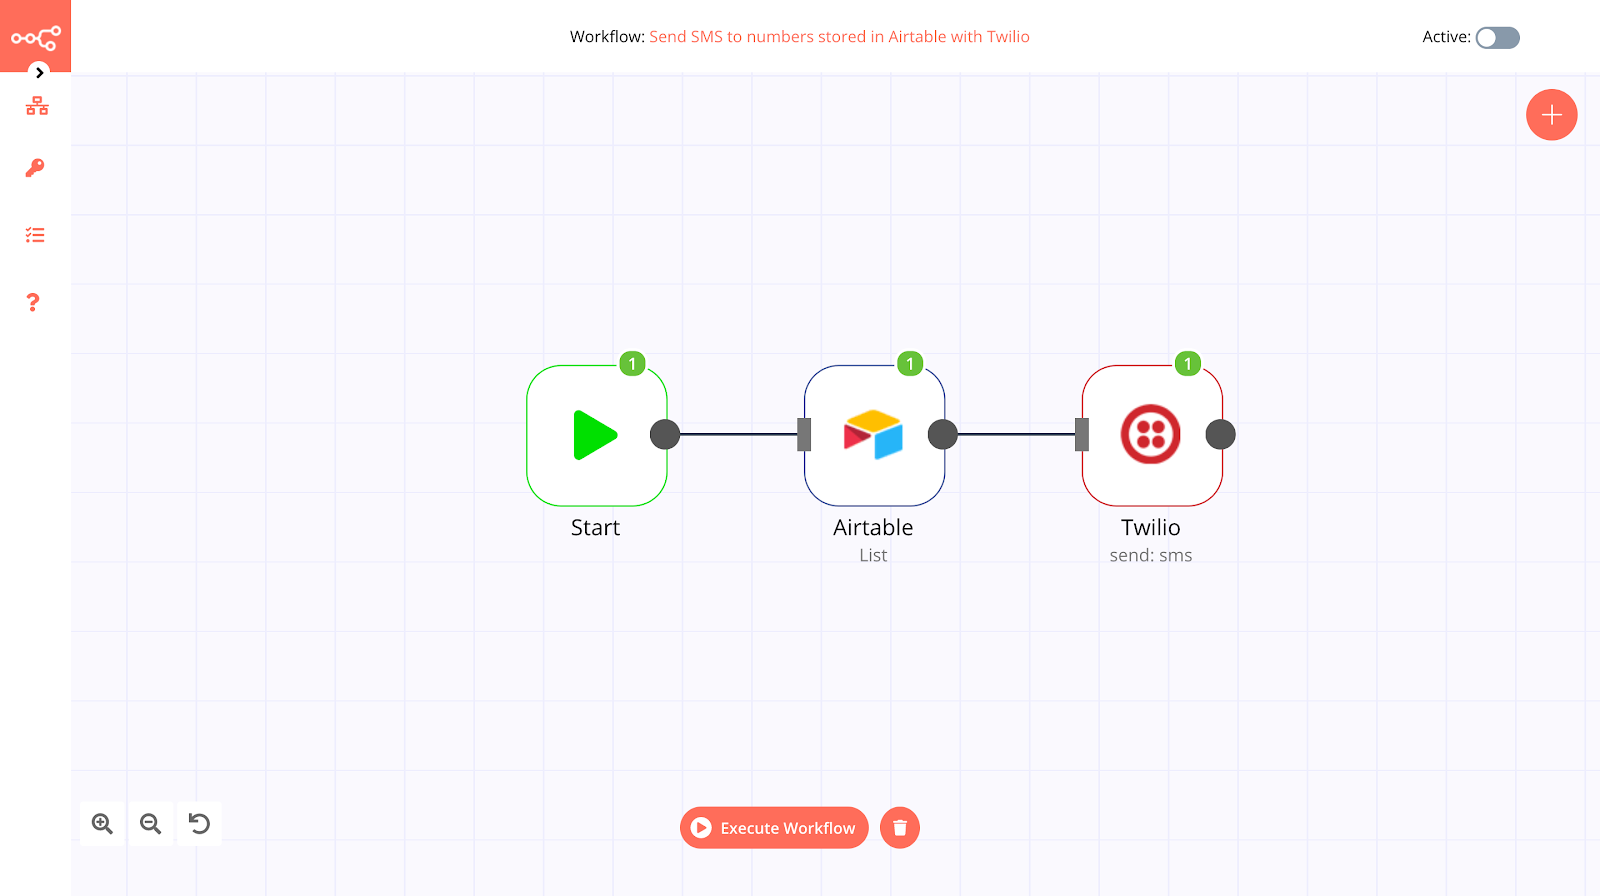
In this tutorial you will build a workflow to send SMS messages to your customers without writing a single line of code! You’ll get customer information, like name and phone number, from Airtable using the Airtable node in n8n. You’ll use the Twilio node in n8n to send the SMS to these customers.
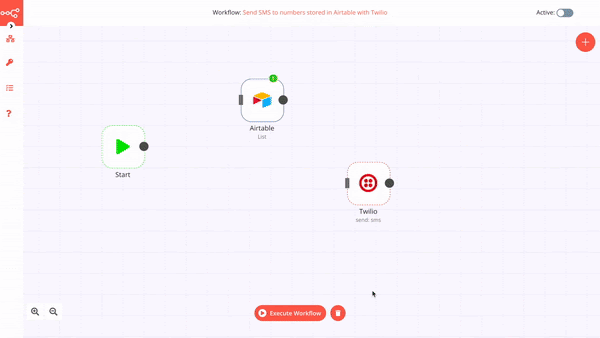
Here’s how the completed workflow looks:
Prerequisites
Before you begin this tutorial please:
- Install Node.js. The Node.js installation also includes npm, which you’ll use to install n8n.
- Create an Airtable account
- Create a Twilio trial account. Sign up with this link to receive a $10 credit when you upgrade to a full account.
Getting a Twilio phone number
Get started by registering a virtual phone number project. To get a virtual number you will need to have an account on Twilio. If you haven’t already, sign-up for an account and login with this newly created account.
Create a project called customer-sms. To complete the project creation step, you’ll need to verify your email address and your phone number.
Copy the Account SID and the Auth Token from the dashboard. You’ll need this later in your workflow.
Once you’ve verified your email address and , the next step is to get a phone number. For this tutorial, you’ll use the trial number Twilio generously provides.
Click the Get a Trial Number button on the customer-sms project dashboard home page and follow the instructions to reserve your trial phone number. You can choose either the number automatically assigned to you or select a different one. The important thing here to note is that the number you’re choosing should have SMS capabilities.
Note: You can only send SMS to verified numbers with a Twilio trial account. The number you verified when you created your trial account is a verified number
Install n8n
You can install n8n with npm using the following command-line instruction:
You can also run n8n using Docker.
Once you have installed n8n you can start it by executing the following command-line instruction:
You can access the n8n workflow editor with your browser at http://localhost:5678 or you can type “o” in the terminal to open the workflow editor.
A completed version of this workflow is available on n8n.io, in case you'd like to skim through it. Please note that you will still need to configure credentials for Airtable and Twilio and add the credentials to the associated nodes.
Getting customer information from Airtable
Airtable is a spreadsheet-database hybrid. It has features of a database applied to a spreadsheet.
In this tutorial, you will first have to create a table in Airtable with the columns Name and Number. You can check this table for reference: Customer Data.
Sign in to your Airtable account and click Add a base. Select the Start from scratch option from the dropdown list. Enter “Customer Data” to rename your base. By default, Airtable creates the Name, Notes, and Attachments columns for you. Right-click on the Notes column and select the Delete field option. Similarly, delete the Attachments column and the Status column. Click the + button and enter “Number” as the column name.
To learn more about how to create tables in Airtable you should read the official guide.
You’ll need some data in your base to build and test the n8n workflow. Create three records by adding different values for the Name field, such as your nicknames, and enter your registered phone number in the Number field for each record. Enter your number in E.164 format.
You will use the Airtable node in n8n to fetch the customer information and pass it on to the Twilio node. For that you’ll need your Airtable API key. Follow the instructions in the n8n Docs for Airtable to obtain the key from your Airtable account.
In the n8n workflow editor, click the + button and under the Regular section select Airtable. The node editor window should open to the Parameters panel.
Find the Airtable API field in the Credentials section and click the field to open the dropdown list. Select “-Create New-” from the dropdown list. The Create New Credentials: "Airtable API" window should open.
In the Credentials Name field, enter “airtable-api”.
Insert the Airtable API key into the API Key field. Click Create to save the credentials.
There are various operations you can perform with the Airtable node. You can read, append, update, list, and delete the data in the table. In the Operation field, select “List” from the dropdown menu; this will list all the data in the table.
Get the value for the Application ID field by going to https://airtable.com/api. Select the base in you created earlier for storing customer information. Copy and paste the ID for the base into the Application ID field in the Airtable node. Enter the name of the table in the Table field; it will be “Table 1” unless you’ve changed it.
Click Execute Node to run this node and get the information from Airtable.
Here’s an animated screenshot showing the above steps:
You can go ahead and close the Twilio node window by clicking the X (Close) button at the upper right corner of the window.
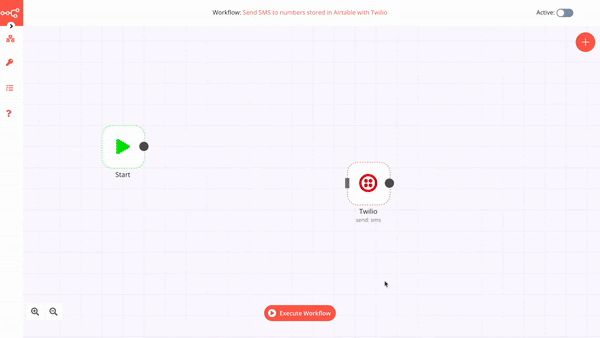
Creating the Twilio node
n8n has a Twilio node which can be used to send SMS and WhatsApp messages. To add the Twilio node to the workflow, click the + button. From the Regular panel, select the Twilio node. The node properties window should open.
Locate the Twilio API field in the Credentials section. Add your Twilio API credentials to the node by selecting “-Create New-” from the dropdown menu.
In the Credentials Name field, enter “twilio-trial-account”. Insert your Twilio Account SID and Auth Token from the Twilio dashboard into the Account SID and Auth Token fields in the Credential Data section. Click the Create button to save the credentials.
You have to specify the phone number from which you want to send the SMS, as well as the phone number of the receiver. In the From field, insert the trial phone number that you selected in the Twilio dashboard. In the To field, enter your registered phone number. Enter a message of your choice in the Message field.
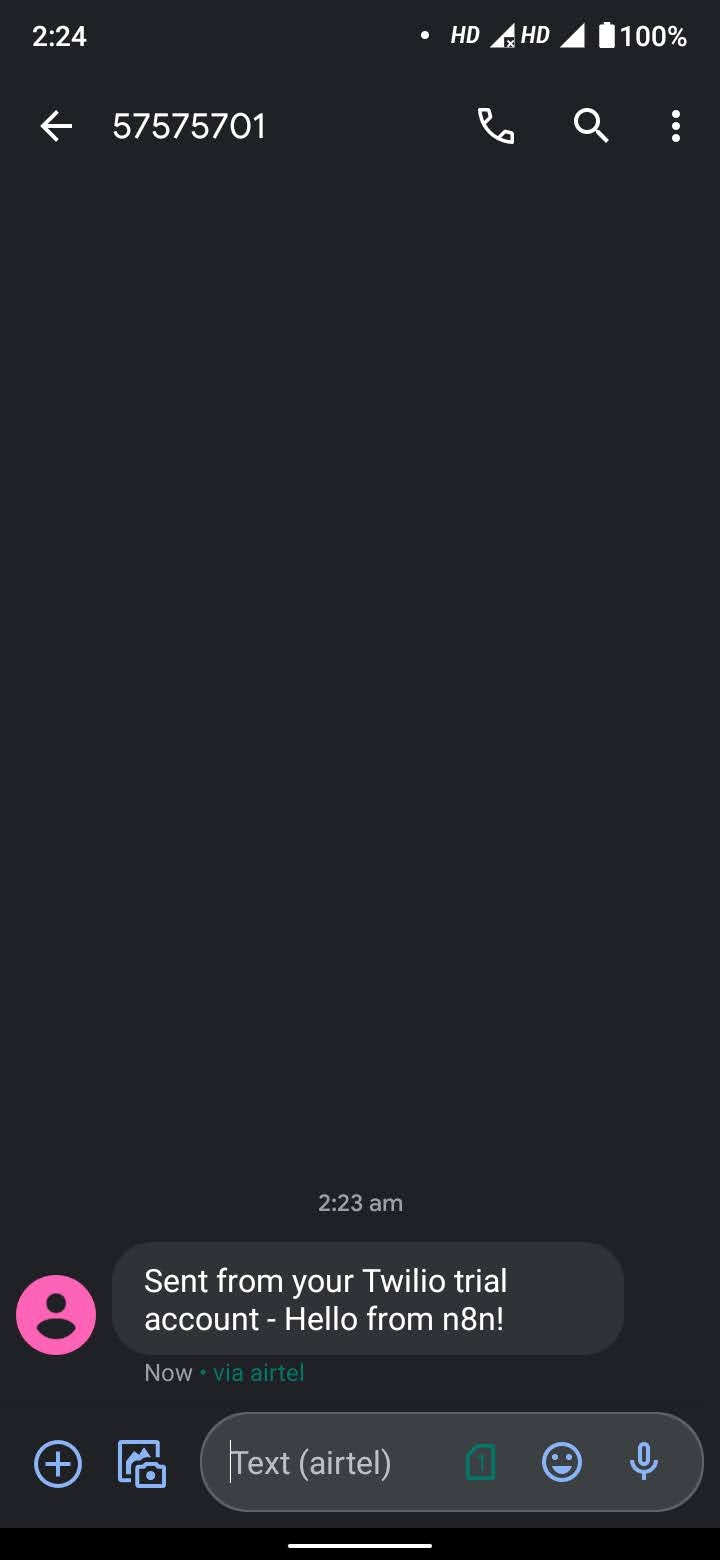
Click Execute Node. On successful execution, you will get an SMS!
Note: You can only send SMS messages to verified phone numbers if you’re using a Twilio trial phone number.
Congratulations, you have learned how to send an SMS with n8n!
You can go ahead and close the Twilio node window by clicking the X (Close) button at the upper right corner of the window.
Here’s an animated screenshot of the steps mentioned above:
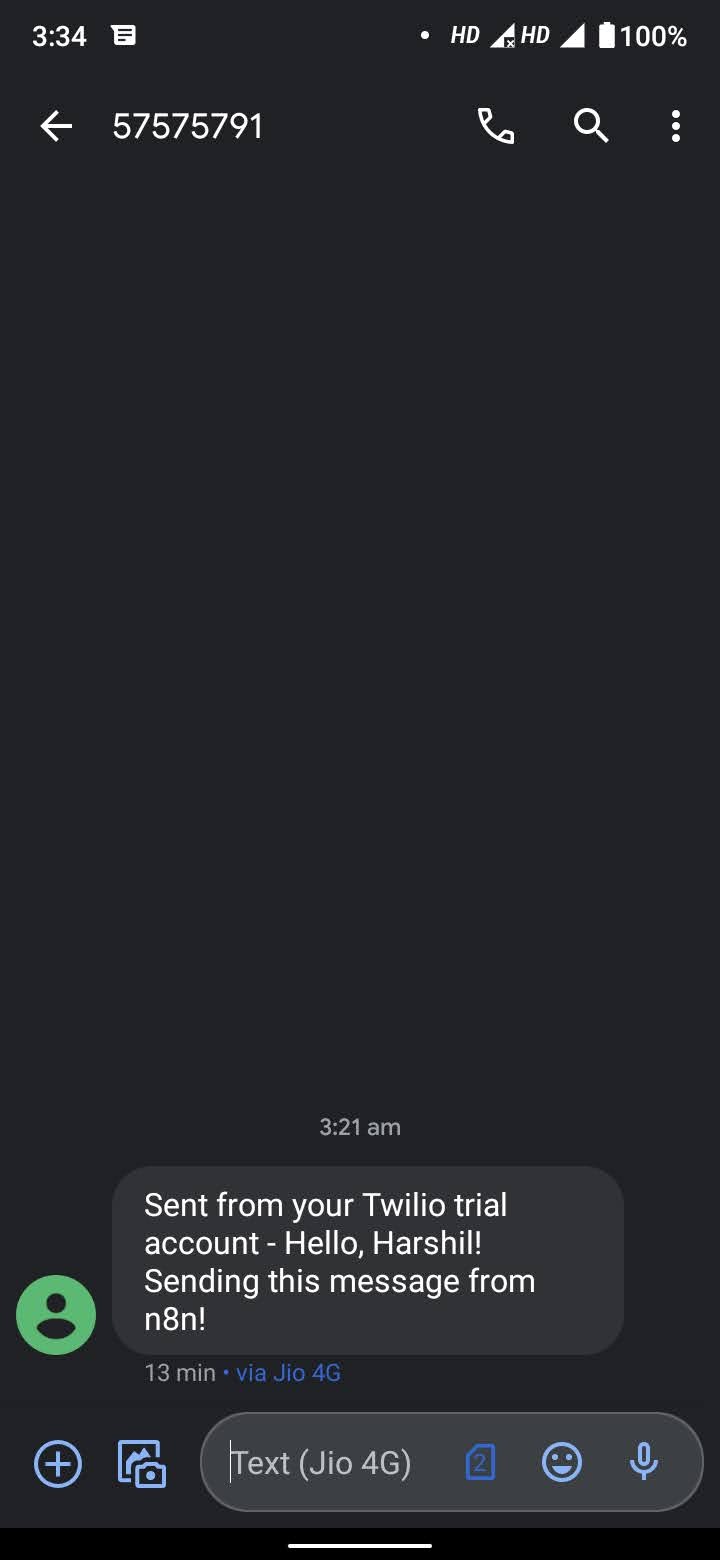
The text message you recieve should look something like this:
Connecting the dots
You now have two nodes, each executing successfully. The next step is to make the customer information, name and phone number, stored in Airtable accessible in the Twilio node.
The Start node is the default node and begins the workflow. If it isn’t already connected to the Airtable node, draw a connector between the two nodes by dragging from the circle on the right side of the Start node to the rectangle on the left side of the Airtable node.
Be sure the Airtable node is connected to the Twilio node. If it isn’t, repeat the process for connecting nodes.
After the Start node initiates the workflow the Airtable node will fetch the customer information and forward it to the Twilio node.
To configure the Twilio node to process the incoming data, double-click on the node to open its properties window.
Click the gears icon to the right of the To field. Select “Add Expression” from the dropdown list. The Edit Expression window will open.
Delete the phone number you previously entered from the Expression field.
In the Variable Selector panel, make the following selections:
Nodes > Airtable > Output Data > JSON > fields > Number
You should see the following in the Expression field:
{{$node["Airtable"].json["fields"]["Number"]}}
The Result field should show the registered phone number, in E.164 format, that you entered in your Customer Data Airtable base.
Close the Edit Expression window by clicking the X button at the upper right corner of the window.
To test the workflow you can send the following message:
Hello, <name>!
Sending this message from n8n!
The <name> placeholder will be replaced by the actual values from your Customer Data Airtable base.
Click the gears icon next to the Message field and select “Add Expression” from the dropdown list. Copy and paste the above message into the Expression field of the Edit Expression window.
To get the value from the Name column in your Customer Data Airtable base, highlight “<name>” in the text you just pasted into the Expression field, then make the following selections in the Variable Selector section:
Nodes > Airtable > Output Data > JSON > fields > Name
Delete “<name>” from the Expression field. It should now look like this:
Hello, {{$node["Airtable"].json["fields"]["Name"]}}!
Sending this message from n8n!
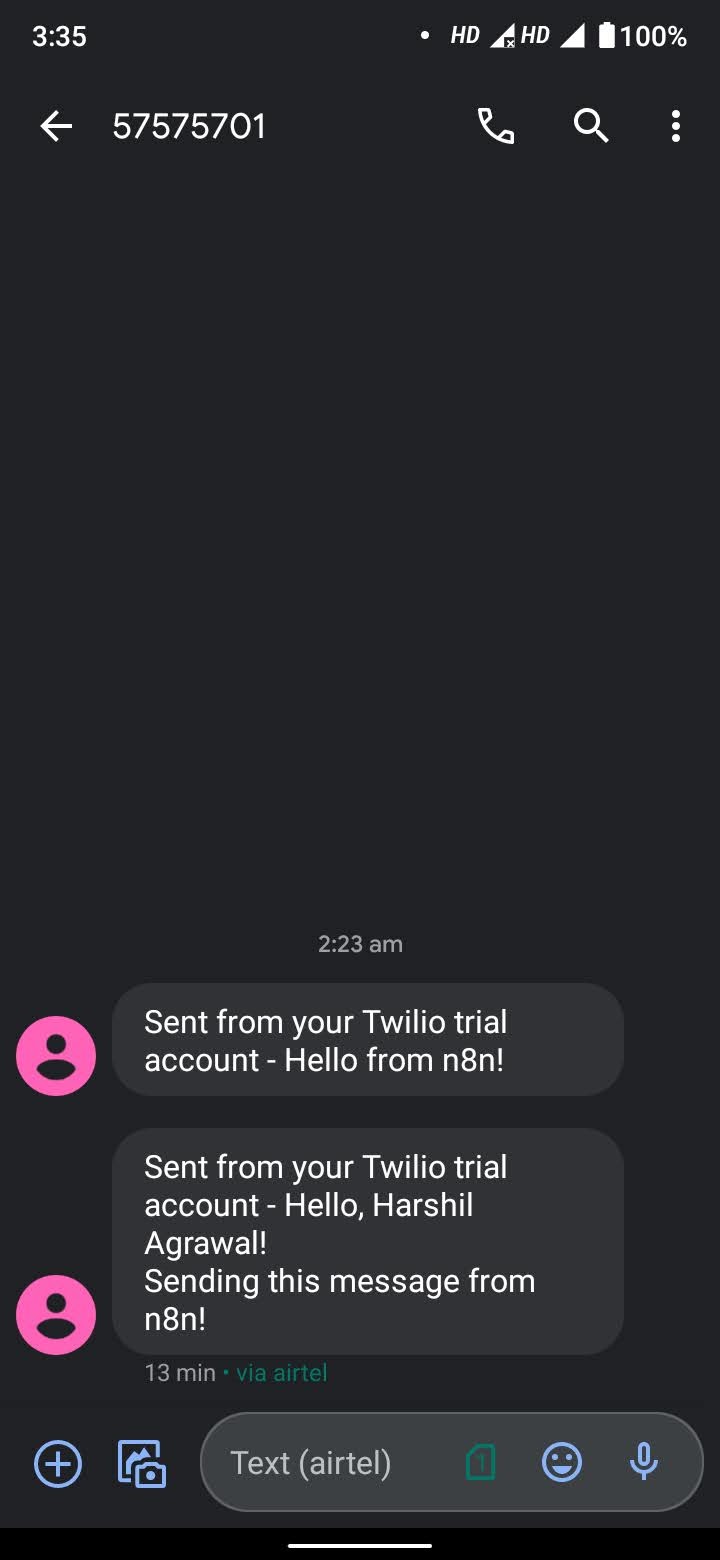
The Result field should look something like the following, where the value you entered in the first record of your Customer Data Airtable base would appear instead of “myself”:
Hello, myself!
Sending this message from n8n!
Close the Edit Expression window by clicking the X button. Then close the Twilio node properties window by clicking its X button.
Here’s an animated screenshot showing the above steps:
Testing the completed workflow
To see the workflow in action, execute the workflow. In the n8n workflow editor, click Execute Workflow.
Shortly thereafter you should receive a series of three SMS messages to your registered phone number in quick succession. They’ll vary according to the different values you entered in the Name field of your Customer Data Airtable base.
Congratulations, you built a workflow without writing a single line of code!
If you need to debug your workflow, try executing the nodes individually in order from left to right. Errors will show up in the Results panel and you can use the information provided to track down typos and other problems.
If you like this solution you can upgrade your Twilio account and begin sending SMS messages to other phone numbers. But before you do, check out the best practices for sending SMS messages in the Additional Resources section below.
Summary
In this tutorial you learned how to build a simple workflow with n8n. You learned how to get data from an Airtable base using an n8n node and an Airtable API key, and you saw how to send SMS messages with an Airtable Twilio node and the Twilio Programmable SMS service.
Potential enhancements
You can extend this workflow further. Maybe you store information in a different database than Airtable. n8n has nodes for various databases like MongoDB, QuestDB, and even a node for Google Sheets. You can use these nodes to get information from those sources.
You can even extend this workflow by adding a trigger node, which will execute the workflow whenever an event is fired, such as when your Twilio phone number receives a text message. The possibilities are endless!
Additional resources
Consult the following resources for more in-depth information about the topics discussed in this tutorial:
n8n Integrations – n8n works with a breathtaking array of applications and web resources. Check out the list.
n8n Docs – For more tutorials and reference information, check out the canonical documentation.
n8n Community – You can find peer-to-peer support and Q&A here. Join, participate, and learn.
n8n Workflows – Why reinvent the wheel? n8n has an extensive library of workflows ready for you to download and use.
Best Practices for Messaging Services – If you are considering sending SMS messages in a serious way, Twilio has an extensive guide to how to do it right and reliably. Essential reading for application architects.
How to Work with your Free Twilio Trial Account – There are plenty of Twilio SMS features you can try out with a trial account.
Harshil Agrawal is a JavaScript developer who enjoys experimenting with different technologies. He is a Mozilla Representative, an MLH Coach, and an Auth0 Ambassador, and he loves contributing to open source and building communities. He can be reached via email, Twitter, or GitHub. He’d be excited to check out what you’ve built using n8n! In case you’ve run into an issue while following the tutorial, feel free to reach out to him on Twitter or ask for help on the n8n forum 💙
Updated 2020-10-08


Related Resources
Twilio Docs
From APIs to SDKs to sample apps
API reference documentation, SDKs, helper libraries, quickstarts, and tutorials for your language and platform.
Resource Center
The latest ebooks, industry reports, and webinars
Learn from customer engagement experts to improve your own communication.
Ahoy
Twilio's developer community hub
Best practices, code samples, and inspiration to build communications and digital engagement experiences.