How to Build SMS Notification Applications with JavaScript and the Serverless Framework
Time to read:
September 29, 2017
Written by
This post is part of Twilio’s archive and may contain outdated information. We’re always building something new, so be sure to check out our latest posts for the most up-to-date insights.
Who loves dogs? I do! So much that I wanted to build a spam-resistent text notification website using the Serverless Framework on AWS, Twilio, Google Recaptcha, and Node.js (just so I could make you look at my puppy photos). Building this project should be free or only cost a few pennies. When you’re ready, let’s walkthrough how to build your own Serverless application and integrate it with multiple APIs to enrich the functionality.
The first thing we’ll need to do is to gather our dependencies and API credentials. We will use Git, Node.js, and npm for this project. Follow this guide to setup Node and npm.
Setting Up AWS, Twilio, and Google Recaptcha Accounts
Start by installing The Serverless Framework by running the command npm install serverless -g in your terminal (or command prompt window). Let’s setup an AWS account if you don’t already have one. This entire process should be free – you also don’t need to sign up for any support plans when registering your account. After that we’ll configure our AWS credentials using this guide. Be aware that the Serverless Framework is currently fairly permission-hungry. So you will want to set it up with API keys that have administrator permissions for your account.
Time to get Google recaptcha credentials. The application uses the Recaptcha V2 with the “I’m not a robot” checkbox” and verification. You can sign up for Recaptcha V2 with a Google account here. During the signup process for Recaptcha V2 make sure to:
- Include
amazonaws.comin the list of domains. This will allow your recaptcha to load on an AWS static website which we’ll be deploying. - Copy down the recaptcha
data-sitekeyandsecretvalues somewhere you can reference. We’ll be adding those to a configuration file in a moment.
Finally, create a Twilio account if you don’t already have one. The first time you create an account you’ll need to verify the phone number you’ll be using with the account but in exchange you’ll be getting a few dollars worth of trial credits to use with this application. When you’re done signing up and verifying the account make sure to copy down the “ACCOUNT SID” and “AUTH TOKEN” values from the API Credentials section of the Account Settings page and put them somewhere you can reference them, if you lose them you can reference them at any time in the Twilio Console. You’ll also want to create a Twilio phone number and copy that down for later too.
With this setup out of the way we can move on to creating our Serverless service!
Deploying Your First Serverless Application
Start by cloning my GitHub repository for the project with this command:
git clone https://github.com/fernando-mc/serverless-node-text-message-app
In the newly cloned repo, open up the serverless.yml file. Replace the default values in the environment section with your newly acquired Twilio and Google Recaptcha values. Also keep in mind that you’ll put your Twilio number in this file, not your personal cell. When you’re done, make sure to save the file. Obligatory warning: Don’t commit your API credentials to your source code. There are better ways to manage API keys than this, but they fall a bit out of the scope of this demo!
After that, run npm install from the top level folder of the cloned project to install the project dependencies.This will install the Twilio helper, the request package and a Serverless Plugin called serverless-finch. If you notice any errors during this process I’d suggest also running npm update.
Now with all of our dependencies installed and our code setup, let’s deploy our Serverless API using serverless deploy. Be sure to copy down the value that is returned in the console for the API gateway endpoint. It should look something like this:
https://qw324asdasd.execute-api.us-east-1.amazonaws.com/dev/api/sendSms
You can easily test your endpoint with Postman. Just like the photo below, make sure to change the request type to POST, change the Body to raw JSON and enter in valid JSON like {“data”:”stuff”} to the body input section before pressing send.
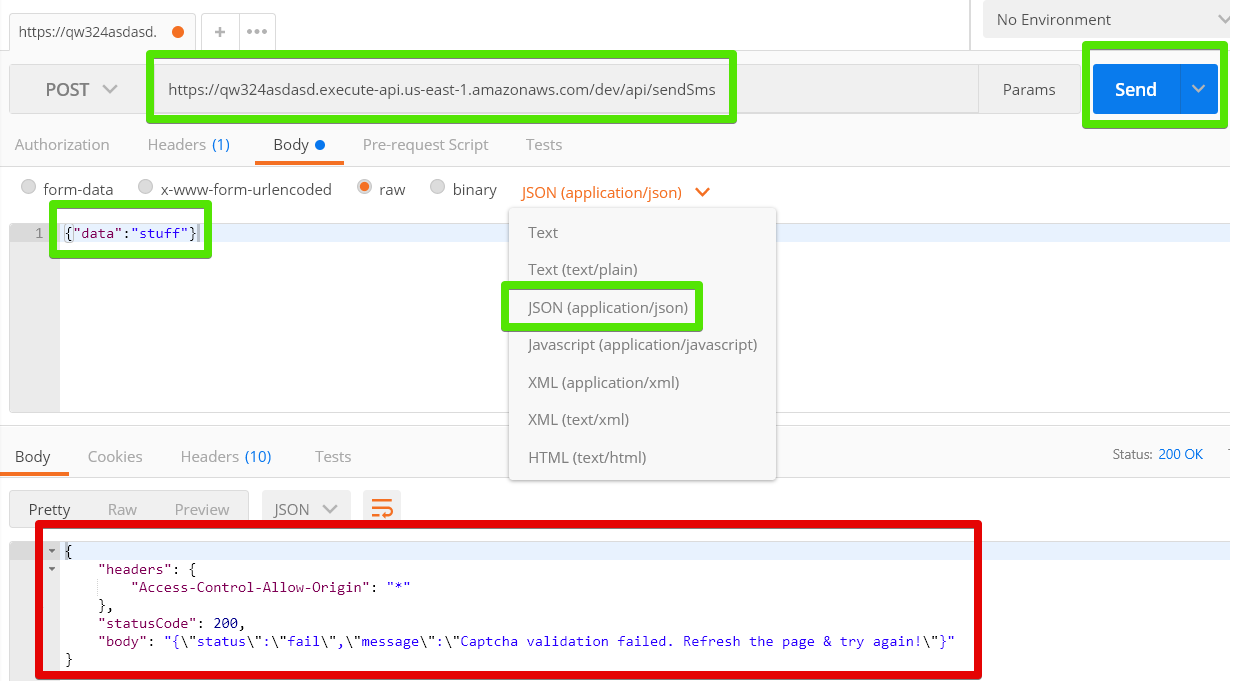
In a Unix environment you can also use
curl: curl -X POST -d '{"data":"stuff"}' https://qw324asdasd.execute-api.us-east-1.amazonaws.com/dev/api/sendSms
Your response should look like this:
That’s actually good news! It means the function created by the Serverless Framework is validating the inputs of the POST request and saying ‘NOPE!’ because we didn’t provide it with a legitimate Recaptcha token. We’ll fix that up in a moment with our static site.
Let’s pause here and look at what we’re actually doing with the serverless deploy command we used a minute ago. Here are the basics:
- The serverless.yml file is translated into an AWS CloudFormation stack and is used to describe and create our required infrastructure including:
- An AWS API Gateway Endpoint
- A Node.js AWS Lambda Function (Which we’ll look at more in a second)
- When the infrastructure is created, it returns a success message to us and outputs the API endpoint for us to use.
-
If you look at our serverless.yml file under the
functionssection, you’ll see that we’re describing the details of the function and the ‘events’ that will trigger it. The Lambda function code itself is in the handler.js file. - When deployed, the API Gateway endpoint creates a publicly-accessible API endpoint that we tested by sending a POST request against it.
Adding Google Recaptcha to Your Serverless Application
Let’s look at the abridged version of how the handler.js file validates things coming in through the API gateway.
But with all of this deployed, how are we actually going to use this in an application? Well you can use this API endpoint in basically any website. Because we created our Recaptcha to be used with the domain amazonaws.com, we’ll be taking advantage of AWS’ static site hosting.
Creating a Static Site using the Serverless-Finch Plugin
To speed up this process we’ll use two things: a pre-built static website template included in the client/dist/ folder in the cloned code, and the serverless-finch Serverless Framework plugin which we’ll use to deploy our static site!
First, we need to prep our static site for deployment. Open up the index file at client/dist/index.html with a text editor and make two changes:
- Replace the
YOUR_RECAPTCHA_SITE_KEYtext with thedata-sitekeyvalue from the Google Recaptcha step earlier. This will have the static site load your specific Google Recaptcha for validation. (This value is different from thesecretvalue we also copied down and put into serverless.yml). - Change the
YOUR_API_ENDPOINT_URLtext to the endpoint url that you copied down from the deployment process. This will make your static site post the the API endpoint you just deployed.
After making these changes and saving the index.html file, open the serverless.yml file and replace the final configuration value of your-unique-bucketname-here with a unique S3 bucketname to deploy your application in. This value has to be unique because S3 buckets are globally unique. So I’d suggest something like fernandos-node-text-message-app-20170701 to make sure you don’t run into any name conflicts. Save the serverless.yml file when you’re done.
Now let’s use serverless-finch plugin to deploy our static site with the serverless client deploy command. This will deploy the contents of our client/dist/ folder as a static site in an S3 bucket on AWS. When the process is completed, it should output the location of our deployed project – copy that down into your browser and take a look!
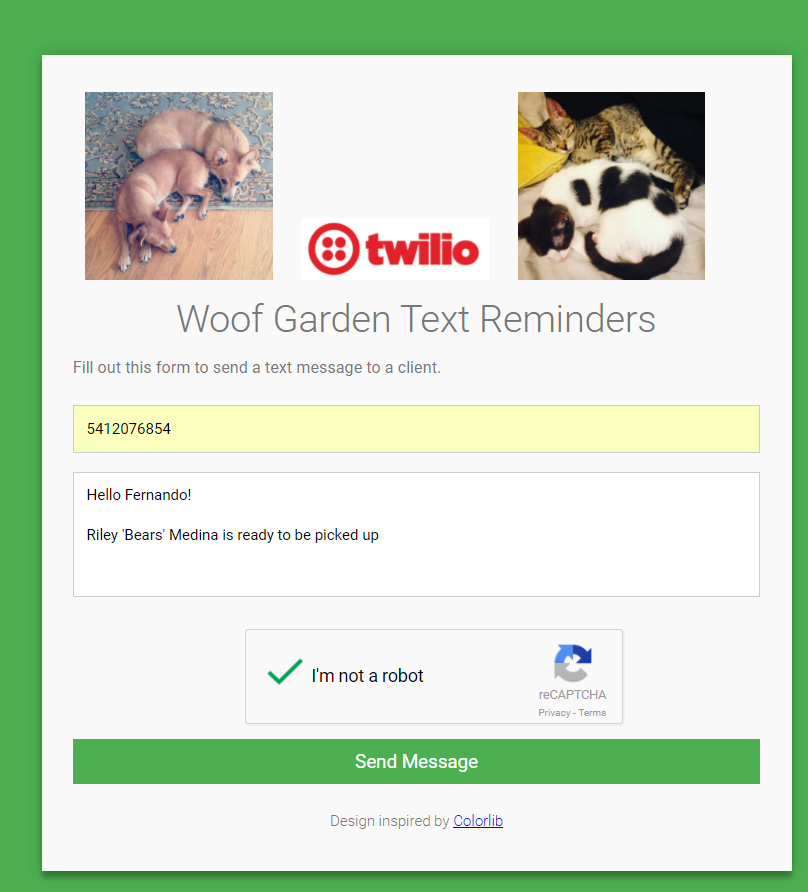
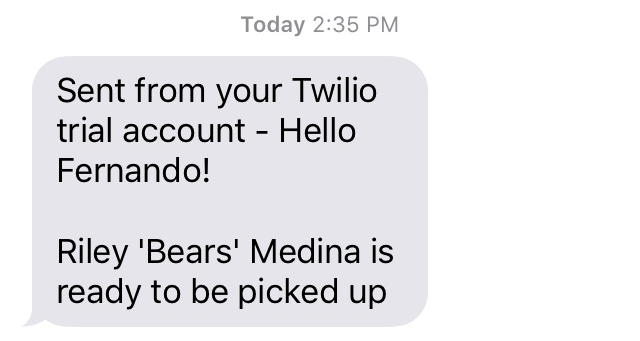
By default the page is the ‘Woof Garden’. This is a fictional business I use as an excuse to decorate most of my demo applications with pictures of my pets. To use the application enter the phone number you used to create your Twilio Account (your personal cell number). This is because the trial Twilio account limits you to only send to that verified number when you’re testing it out. You’ll also need to enter in your message and successfully pass the recaptcha before you can send your message. Once you succeed, you’ll see this text message arrive on your cell!
Testing and Debugging Serverless Apps
Now it’s hard to plan for every use case and possible quirk that might happen in this process. So here’s a few tools you might want to try when debugging applications like this.
- Chrome Network Tab – The Chrome network tab can show you what’s happening with your requests if you run into any issues while creating this applications this is usually the first place to check for request failures and errors.
- Postman – This is a great tool to help you test your API endpoints to see if they’re returning the data you expect from a given request. I use it when I get stuck creating a new Serverless API.
- CloudWatch Logs – If you see 400/500 errors in your API requests it’s possible there is actually an upstream server-side issue that is reported as a 405. This can happen if you have bugs in your Lambda function that aren’t handled properly. For this I’d suggest reviewing the CloudWatch logs for your functions in the AWS console. That will show you the stack traces and additional details of failures and help to debug the issue.
And that’s it! We’ve just deployed our first serverless application! This project can be modified to become an email contact form, SMS messenger application, or a variety of other things. The best part is that with this sort of architecture you can pay tiny fractions of a cent (or nothing) for each use and take advantage of the savings and security of static sites.
If you enjoyed this post, check out other tutorials and related information on my blog.
You can also learn more about Serverless topics from my Pluralsight courses.
Also feel free to reach out to me on Twitter via @fmc_sea.
Related Resources
Twilio Docs
From APIs to SDKs to sample apps
API reference documentation, SDKs, helper libraries, quickstarts, and tutorials for your language and platform.
Resource Center
The latest ebooks, industry reports, and webinars
Learn from customer engagement experts to improve your own communication.
Ahoy
Twilio's developer community hub
Best practices, code samples, and inspiration to build communications and digital engagement experiences.