How to Receive WhatsApp Messages in JavaScript Using Express
Time to read:
April 22, 2021
Written by
Reviewed by

The WhatsApp Business API from Twilio is a powerful, yet easy to use service that allows you to communicate with your users on the popular messaging app. In this tutorial you are going to learn how to create a JavaScript application that can receive and handle WhatsApp messages.

Prerequisites
To get started with this tutorial, you’ll need the following:
- Node.js installed on your machine
- A free Twilio account (sign up with this link and we’ll both get $10 in free credit when you upgrade your account)
- A smartphone with an active WhatsApp account, to test the project.
The Twilio WhatsApp sandbox
Twilio provides a WhatsApp sandbox, where you can easily develop and test your application. Once your application is complete you can request production access for your Twilio phone number, which requires approval by WhatsApp.
In this section you are going to connect your smartphone to the sandbox. From your Twilio Console, select Messaging, then click on “Try it Out”. Choose the WhatsApp section on the left hand sidebar. The WhatsApp sandbox page will show you the sandbox number assigned to your account, and a join code.
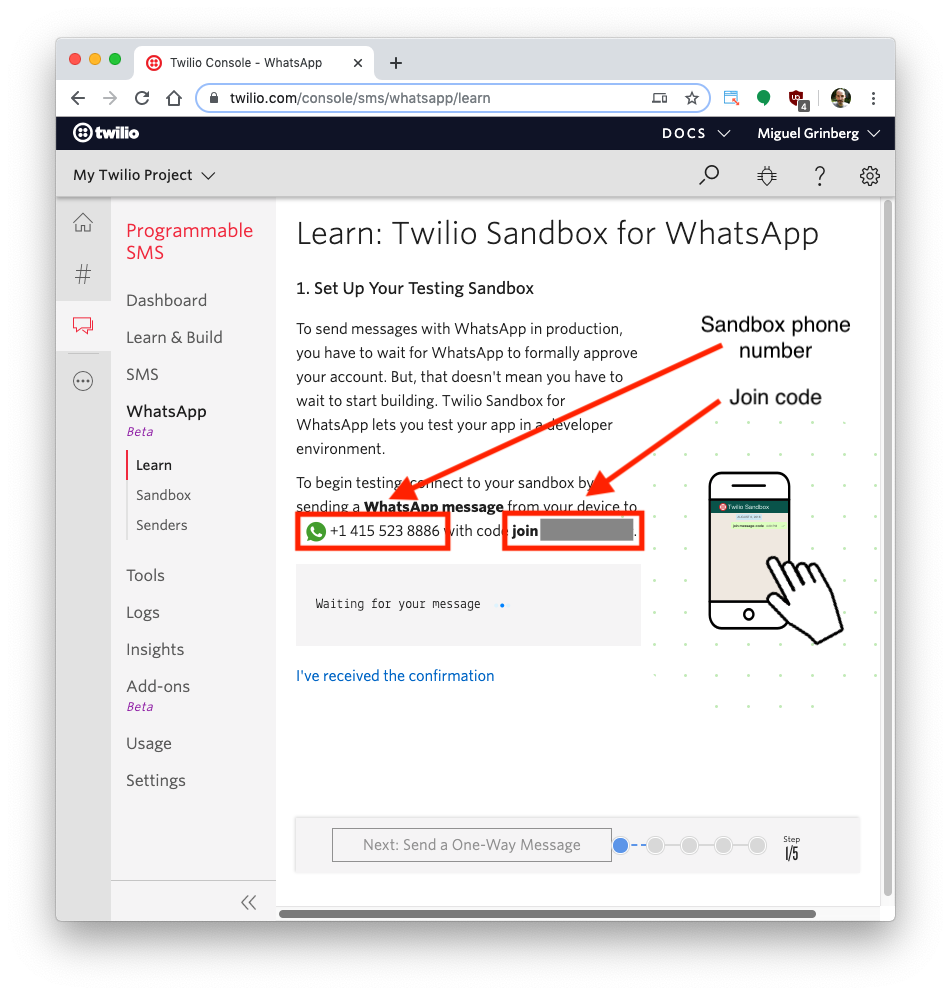
To enable the WhatsApp sandbox for your smartphone, send a WhatsApp message with the given code to the number assigned to your account. The code is going to begin with the word "join", followed by a randomly generated two-word phrase. Shortly after you send the message you should receive a reply from Twilio indicating that your mobile number is connected to the sandbox and can start sending and receiving messages.
If you intend to test your application with additional smartphones, then you must repeat the sandbox registration process with each of them.
Project setup
In this section you are going to set up a brand new Node.js project. To keep things nicely organized, open a terminal or command prompt and create a new directory where the project you are about to create will live:
The command above will scaffold a new Express application in a directory called receive-whatsapp-msg.
Change directory to your new project folder, and install the included dependencies:
Now install the Twilio Node Helper Library:
Start your Express server by running the following command:
This will automatically run your server on PORT 3000.
Start an ngrok tunnel
The problem with the Express server is that it is local, which means that it cannot be accessed over the Internet. Twilio needs to send web requests to this server, so during development, you’ll need to make the local server available on the Internet. To do this, you’ll use ngrok.
In a second terminal window, run the following command:
The ngrok screen should look as follows:
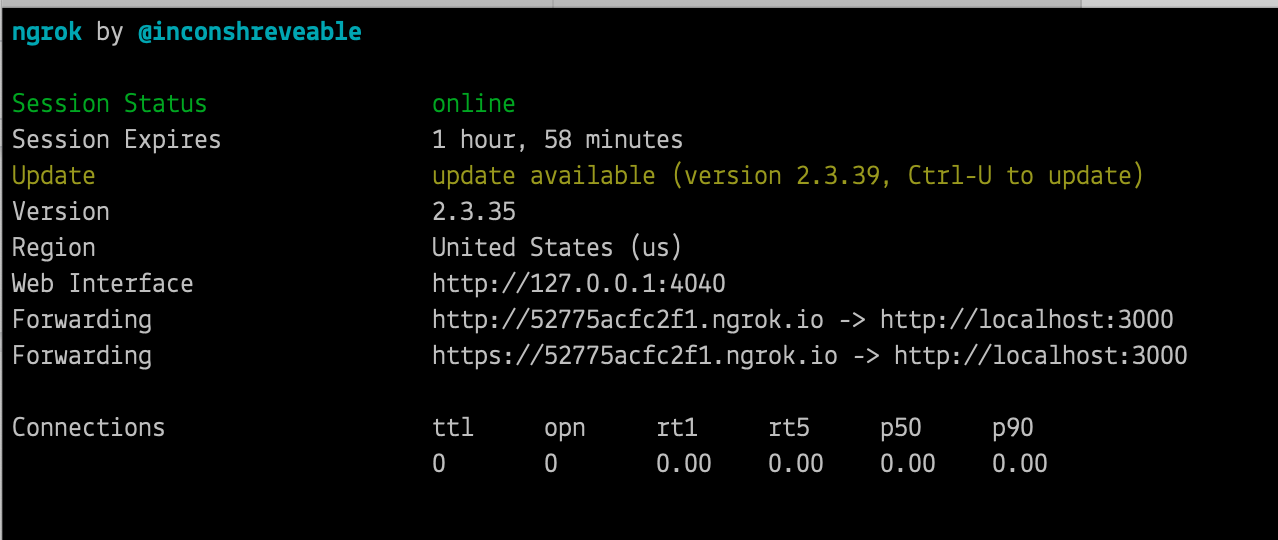
While ngrok is running, you can access the application from anywhere in the world using the temporary forwarding URL shown in the output of the command. All web requests that arrive into the ngrok URL will be forwarded to the Express application by ngrok.
Create a WhatsApp webhook
Twilio uses the concept of webhooks to enable your application to perform custom actions as a result of external events such as receiving a message from a user on WhatsApp. A webhook is an HTTP endpoint that Twilio invokes with information about the event. The response returned to Twilio provides instructions on how to handle the event.
The webhook for an incoming WhatsApp message will include information such as the phone number of the user and the text of the message. In the response, the application can provide a response to send back to the user. The actions that you want Twilio to take in response to an incoming event have to be given in a custom language defined by Twilio that is based on XML and is called TwiML.
Receive WhatsApp messages
Open the file called index.js, located in the routes folder, that was created when you scaffolded your Express app. Paste the following code so that the endpoint logic can extract the information about the incoming WhatsApp message:
When a WhatsApp message is sent to the sandbox, the /message route uses TwiML to build the response that goes back to the user.
Configuring the WhatsApp webhook
To connect the webhook with WhatsApp you need to configure its URL in the Twilio console. Locate the WhatsApp sandbox settings page and edit the “When a message comes in” field with the URL of your webhook. This is going to be the temporary https ngrok URL with "/message" appended at the end. You can see an example below:
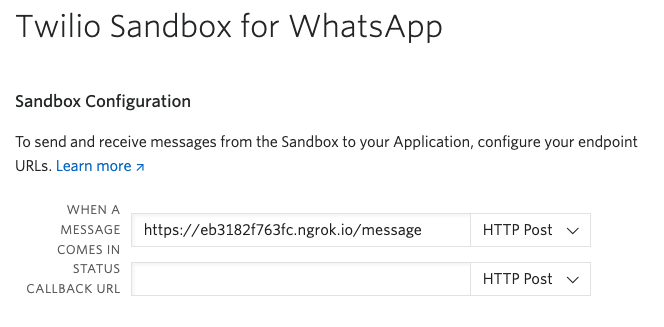
Make sure the dropdown to the right of the URL field is set to “HTTP Post”, and don’t forget to click the Save button at the bottom of the page to record these changes.
Test your WhatsApp messaging service
And now the moment of truth!
Restart your Express server by pressing CTRL + C in the terminal window where it’s running and then running npm start again. Don’t forget to double check that ngrok is still running as well.
If you haven’t used the WhatsApp sandbox recently, you’ll have to send a specific message through the WhatsApp app on your smartphone to the sandbox number before testing your app. Sending this message connects your WhatsApp number to the sandbox, allowing you to test your apps. The connection expires after 72 hours.
Look under the Sandbox Participation heading on the WhatsApp sandbox settings page to find the connection message.
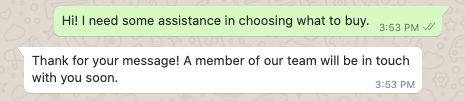
Once connected, send another message to the sandbox number. After a short moment you should see the response from your app.
Next steps
I hope you found this tutorial useful. Now that you learned how to receive and reply to messages on WhatsApp, you may want to take on a slightly more challenging project. If that’s the case, head over to the build a restaurant finder tutorial.
I’d love to see what you build with WhatsApp and Twilio!
Ashley is a JavaScript Editor for the Twilio blog. To work with her and bring your technical stories to Twilio, find her at @ahl389 on Twitter. If you can’t find her there, she’s probably on a patio somewhere having a cup of coffee (or glass of wine, depending on the time).
Related Resources
Twilio Docs
From APIs to SDKs to sample apps
API reference documentation, SDKs, helper libraries, quickstarts, and tutorials for your language and platform.
Resource Center
The latest ebooks, industry reports, and webinars
Learn from customer engagement experts to improve your own communication.
Ahoy
Twilio's developer community hub
Best practices, code samples, and inspiration to build communications and digital engagement experiences.