Book Appointments With Laravel, Twilio and SendGrid
Time to read:
October 01, 2025
Written by
Reviewed by
Book Appointments With Laravel, Twilio, and SendGrid
Booking a personal care appointment, such as a haircut, should be a simple and seamless process. However, in many small businesses, appointments are still handled manually, leading to inefficiencies and errors. From my personal experience, whenever I want to cut my hair, I have to call my barber to book an appointment.
Challenges with the existing system
After observing the appointment process over several visits, I noticed several challenges with the current system:
- Manual bookings: The barber writes down appointments in a notebook, which can lead to misplaced or unreadable records
- Double-booking: Without an automated system, there is a risk of scheduling two clients for the same time slot
- Missed bookings: Bookings can be forgotten or overlooked, leading to frustration for both the barber and customers
- Time consumption: The barber has to take calls while attending to customers, disrupting the service experience
- Payment tracking: Linking booking payments to appointments manually can be cumbersome and prone to errors
In this tutorial, I will show how to build a robust and efficient appointment management and booking system using the powerful capabilities of Laravel, Twilio, and SendGrid.
By combining these technologies, businesses can streamline their appointment scheduling processes, enhance customer communication, and significantly improve their operational efficiency.
I will show my solution to the challenges enumerated above by implementing the following:
- An online booking interface where customers can select available time slots
- The ability to confirm bookings using an identifier like an email or phone number, without requiring account registration
- Ability to accept booking deposit payment. This will not be an actual payment implementation, but the provision of an interface to accept card payments and a backend that simulates the payment. This will provide a starting point for an actual implementation when required.
- Automated notifications via SMS and email to confirm bookings and send reminders
- A secure way for customers to retrieve their bookings using their email or phone number
Application overview
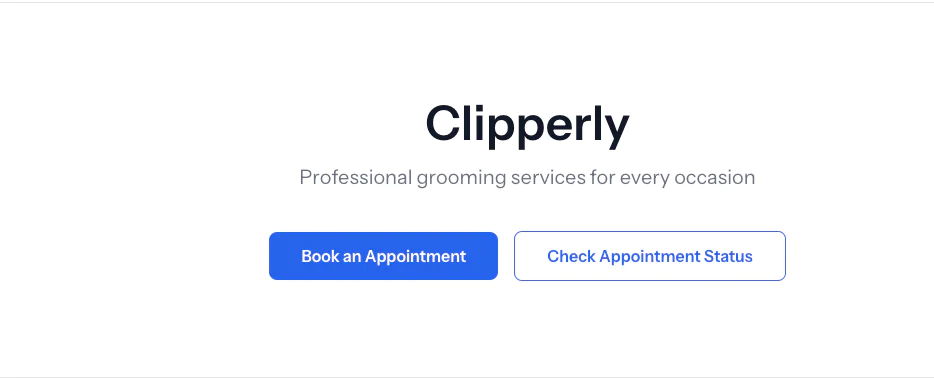
The application will feature a landing page where customers can view the services offered, book appointments, and check their appointment status. The booking page will allow the customer to select a service, as well as the date and time of the appointment.
Email and SMS notifications will be sent to the customer to complete their bookings by clicking on a link to the payment page to confirm their bookings. Finally, administrators will be alerted once a booking has been made and when it is confirmed.
Prerequisites
In order to follow along with this guide, make sure that you have the following installed on your local development machine:
- Docker Desktop (installed and running)
- Composer installed globally
- A Twilio account (either free or paid) and a Twilio phone number: Twilio will be used to send our SMS notifications. If you do not have a Twilio account, you can create a free account
- A SendGrid account as we will be using SendGrid to send email notifications. If you do not have one, you can create a free account.
- A basic familiarity with Laravel and Vue.js
Build the app
Set up the project
This section walks you through setting up the appointment booking application on your local machine. The GitHub repository for this project contains a Laravel application with most of the core functionality already implemented, leaving just a few key areas for you to complete as we progress through the tutorial.
To get started, clone the repository from GitHub and change into the new project directory
Then, create a new environment file by copying the example file provided:
Start the application
Laravel Sail is a lightweight command line interface for managing Laravel's Docker-based development environment. Being a wrapper around Docker Compose, Sail mounts the local, project directory into the container, so that any changes made locally are reflected within the container.
There are two ways to get started, depending on whether you have PHP and Composer installed locally.
If you have PHP and Composer installed on your machine, you can simply run:
This will install the required packages and then you can start Sail with:
If you do not have PHP/Composer installed locally and prefer a fully containerized development environment without installing PHP and Composer on your host machine, you can use Docker Compose directly to handle the initial setup:
After the packages are installed, start the application with:
Generate the application key
Laravel requires an application key for encrypting user sessions and other sensitive data. This key ensures your application's security by providing a unique encryption signature.
Generate it with the following command:
Run the migrations and seeders
We will now run the migrations to create our database tables as well as seeders to populate the database with test data. First, we make sure that the SQLite database file exists, then we run the migration with the --seed flag to populate the data.
Build the frontend assets
Our initial setup is now complete. The last thing we need to do before we attempt to run our application is to build the frontend assets. We do this by running the command below:
You can minimise your keystrokes by creating an alias for Sail as follows:
Our application should now be up and running. At this point, if we test our application by visiting http://127.0.0.1 in our preferred browser, we should see the following:

Configure third-party services
Before we dive into the implementation, let's configure the required third-party services we will be using for this project. They are, as mentioned earlier, Twilio for sending SMS notifications and SendGrid for email notifications.
Retrieve your Twilio credentials
Add the following to your .env file:

You can find your Twilio Account SID, Auth Token, and phone number by logging into your Twilio Console dashboard. Once logged in, navigate to the Account section to locate your Account SID and Auth Token.
For your phone number, go to the Develop tab in the sidebar and click on the Phone numbers, then click on Active numbers, where you’ll see a list of numbers associated with your account.
Copy each value and paste it into your .env file, replacing your_twilio_account_sid with your Account SID, your_twilio_auth_token with your Auth Token, and your_twilio_phone_number with your Twilio phone number.
Retrieve your SendGrid credentials and set up Sender Authentication
To do so, update the following keys in .env:
Then, add the following key to .env.
Make sure that the MAIL_FROM_ADDRESS you use is a verified sender in your SendGrid account. SendGrid requires sender verification to help prevent spam and ensure reliable email delivery. If you attempt to send emails from an unverified address, your messages may be blocked or fail to send.
To verify a sender, log in to your SendGrid dashboard, then navigate to Settings > Sender Authentication section in your and follow the instructions to add and confirm your email address.

After that, to set up SENDGRID_API_KEY in your .env file, log into the SendGrid dashboard. Then, go to Settings > API Keys and click Create API Key.

There, give your key a name, select Full Access for API Key Permissions and click Create & View to generate the API key.

Then, copy the generated API key and paste it into your .env file, replacing your_sendgrid_api_key with the actual key value.

Then, make sure the following is in your config/app.phpat the end of the Application Locale Configuration section.
The booking form interface
Before customers can make appointments, they need an intuitive interface to select services, dates, and times. Our booking form is built using Vue.js with Inertia.js adapter serving as a bridge to the Laravel backend.
The bookingForm() method in our app\Http\Controllers\BookingController.php prepares the data needed for the booking interface and passes the data to the frontend by calling the Inertia::render() function and passing the BookingForm component as the first argument and an array of data as the second argument.
The bookingForm() method performs several important tasks:
- Service loading: Retrieves only active services with the essential information needed for display
- Date generation: Creates a 14-day window of potential booking dates
- Availability filtering: Only includes dates that actually have available time slots
- Data formatting: Provides both machine-readable and human-readable date formats
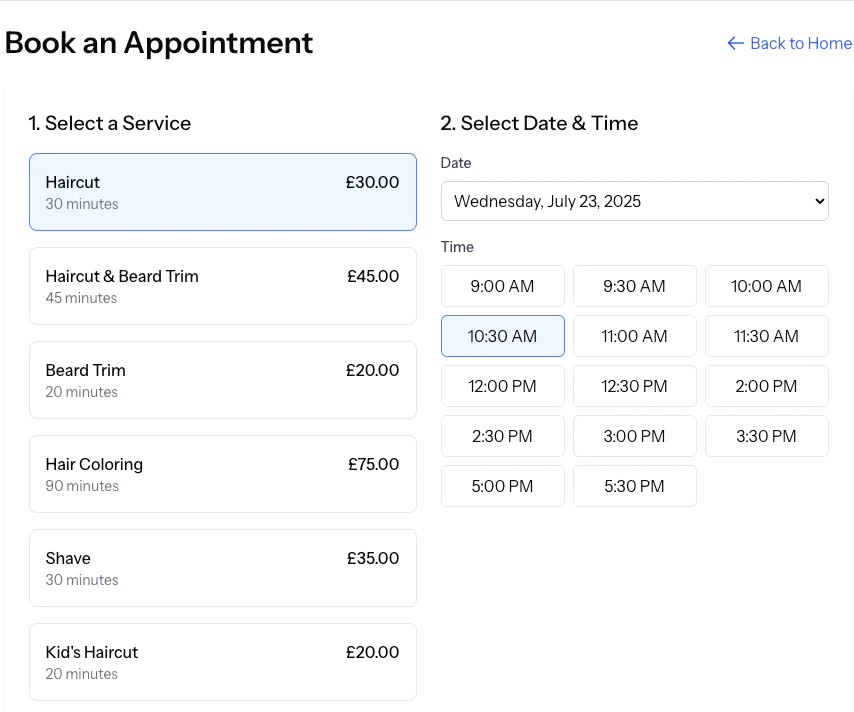
The booking form follows a logical, three-step process that guides users through their appointment booking.
Step 1: Service selection
Users first choose from available services, each displaying the service name, duration, and price. The interface uses visual feedback to show the selected service with blue borders and background highlighting.
Step 2: Date and time selection
Once a service is selected, users can choose from available dates in the next two weeks. When both service and date are selected, the system dynamically loads available time slots via an AJAX call to the "/api/v1/time-slots" endpoint. This ensures users only see genuinely available appointment times.
Step 3: Set the customer's information
The final step collects customer details including name, email, phone number, and optional special requests. Email is marked as required, since it's needed for payment processing and confirmations.

Understanding time slots
In the context of our booking application, "time slots" refer to specific times during the day when a service is available for booking. These are the intervals customers can choose to schedule their appointments.
When a user selects a date on the booking form, the fetchTimeSlots() method in the BookingForm.vue component triggers an AJAX request. This request is sent to the /api/v1/time-slots endpoint, providing the selected date and service Id as parameters to retrieve the available time slots from the server.
Add form submission and validation
The booking form includes client-side validation to ensure all required fields are completed before submission. Specifically, the canSubmit computed property checks that:
- A service has been selected
- A time slot has been chosen
- A customer name and email address are provided
When submitted, the form data is sent to the booking endpoint and, upon success, displays a confirmation modal with the unique booking code.
The booking process flow
The complete booking flow works as follows:
- User visits booking page:
bookingForm()loads services and available dates - User selects service: Date selection is enabled on the form
- User selects date: The application fetches available time slots for that date and service
- User chooses time and enters details: Form validation enables submission
- User submits booking:
storeBooking()processes the request - System creates appointment: Notifications are sent and confirmation displayed
Now that we understand the flow of logic at the user interface level, let's examine the server-side processing that handles these booking requests.
Storing new bookings
In the app/Http/Controllers/BookingController.php file, you'll find a placeholder for the storeBooking() method which we will implement by adding the following code:
Make sure to add the following statements at the top of the class under the namespace line.
The storeBooking() method handles the process of creating a new appointment when a customer submits their booking request. It begins by validating all the submitted information to ensure the service exists, the appointment time is valid, and the customer's details are properly formatted. This validation acts like a quality check to prevent incomplete, incorrect or double bookings from being processed.
Once the data passes validation, the method generates a unique booking code using eight random uppercase letters, which serves as a reference number for the appointment. It also processes the customer's phone number by converting UK mobile numbers that start with '0' into the international format starting with '+44'. With all the information prepared, it creates a new appointment record in the database with a status of 'pending_payment', indicating the customer still needs to complete payment.
After successfully storing the appointment, the method triggers the notification workflow by sending a payment link email to the customer's email address. If the customer provided a phone number, it also sends an SMS notification with booking details. Additionally, it notifies the business administrator about the new booking through a separate notification system. Finally, the method responds with a success message and the booking code, which the frontend displays to confirm the appointment has been received and is awaiting payment.
To create a new appointment, we use the Appointmentmodel class. In our Laravel application, the model is stored in the app/Models folder and it acts as a blueprint that defines how appointment data should be structured and stored.
You will notice that the storeBooking method references several classes to handle different aspects of the booking process. The app/Mail/PaymentLinkMail.php class is responsible for composing and sending payment link emails to customers, while app/Mail/AdminBookingNotification.php handles sending booking notifications to business administrators.
Implement the TwilioService class
The TwilioService class located at app/Services/TwilioService.php acts as a bridge between the application and the Twilio messaging platform, simplifying the process of sending SMS notifications. When initialised, it connects to your Twilio account using credentials stored in your configuration file and sets up the phone number that will appear as the sender of your messages.
The main functionality is handled by the sendSMS() method, which takes a recipient's phone number and message content, then sends the SMS through Twilio's API. Before sending, it automatically formats the phone number to ensure it meets international standards.
Because I am based in the UK, I am formatting the phone number by adding the UK country code (+44) for 10-digit numbers or a '+' prefix for other formats. If the SMS fails to send for any reason, the service logs the error and returns a failure status, allowing the application to handle SMS delivery issues gracefully without crashing the booking process.
In order to use the TwilioService class in our controller, we will need to add it to the constructor of the BookingController so it can be made available to methods of the controller whenever the controller is instantiated.
Add this just below the opening brace of the class:
Once the booking is stored successfully, we send an email to the customer using the PaymentLinkMail Mailable class, passing the Appointment model object $appointment as an argument. This is needed so that the Mailable class can extract all the relevant details about the appointment, as well as know who to send the notification to.
Implement SMS notification for bookings
The method responsible for sending the SMS is the private method sendBookingSMS(). The TwilioService handles the actual SMS delivery through the Twilio API, keeping our controller focused on the business logic rather than the technical details of SMS transmission.
We will implement this by updating the sendBookingSMS() function in the BookingController to match the following:
The sendBookingSMS()receives an Appointment model object and sends the message using the $twilioService object which has been injected into the BookingController’s constructor.
Test the application
To test the booking flow:
- Visit http://127.0.0.1 and click on the Book an Appointment button
- Pick a haircut, then select a date and time
- Fill in the booking form with your details
- Click Book Appointment to book the appointment
If the form submits successfully, a modal will pop-up with a confirmation message which will include the Booking code for reference.


(Optional)
- Click on the payment link
- Enter any random card details and submit
- Verify you received a confirmation email and SMS.
That's how to build an appointment booking app with Laravel, Twilio and SendGrid
By implementing this appointment booking system, we've successfully addressed the challenges of the manual booking processes enumerated above. The system provides automated notifications, prevents double-bookings, and offers a seamless experience for both customers and business owners.
The integration of Laravel with Twilio and SendGrid demonstrates how modern web applications can leverage third-party services to enhance functionality without adding complexity to the core application logic.
This solution can be easily extended to include features like appointment reminders, cancellation handling, calendar integration, and payment processing with real payment gateways.
If you find this project helpful, please consider starring the repository on GitHub.
Finally, I would love to hear your thoughts and feedback, so feel free to share your insights or suggestions to improve on the implementation of the project.
Stephen Popoola is an engineering manager with over two decades of software development experience. Learn more about him at his website stephenpopoola.uk.


Related Resources
Twilio Docs
From APIs to SDKs to sample apps
API reference documentation, SDKs, helper libraries, quickstarts, and tutorials for your language and platform.
Resource Center
The latest ebooks, industry reports, and webinars
Learn from customer engagement experts to improve your own communication.
Ahoy
Twilio's developer community hub
Best practices, code samples, and inspiration to build communications and digital engagement experiences.