How to create a habit tracker with Twilio Functions and Notion
Time to read:
August 29, 2022
Written by
Reviewed by

Notion is a productivity tool that lets you create documents and build systems such as to-do lists and project management boards. It allows you to create databases, which makes it a good choice for building a habit tracker.
However, it can be hard to interact with Notion databases quickly, especially through their mobile app. One solution is to host a habit tracker in Notion and interact with it via SMS.
In this post, you’ll learn how to build a habit tracker with Twilio Functions and the Notion JavaScript SDK. You’ll mark habits as complete, add new habits, and get a daily summary of your habits by texting a Twilio phone number. Here’s what the finished project will look like:
Prerequisites
Before you begin this tutorial, you will need:
- A Twilio account – sign up for a free Twilio account using this link and get a $10 credit when you upgrade
- A Twilio Phone Number
- A Notion account and prior experience using Notion databases
- The Twilio CLI and Twilio Serverless Toolkit installed on your machine
- Node.js v14 or later installed on your machine
- A personal phone number
- A code editor
You should also have some prior experience with JavaScript. In particular, you’ll see async functions, Promises, and ECMAScript 5 array methods in the project code.
You can view the finished project’s source code on GitHub.
Project overview
This project uses a Notion database to track habits and accesses it via Notion’s JavaScript SDK. It also uses Twilio Functions to receive incoming SMS messages and TwiML to respond to messages.
The habit tracker accepts three commands via SMS:
log <habit name>: marks a habit as complete for today’s dateadd <habit name: adds a new habit to the databasesummary: lists all habits and indicates which ones have been completed today
Below is an overview of the different services you’ll be using in this tutorial and how they fit into the project. Feel free to skip past this section if you’re already familiar with them.
Notion SDK
The Notion SDK is a JavaScript client for the Notion API. It provides a simple way of interacting with your Notion workspace and lets you call any of Notion’s API endpoints. In this tutorial, you’ll use the SDK for common actions such as querying a database, creating a page, and updating a database’s properties.
Twilio Functions and TwiML
Twilio Functions is a serverless environment for Node.js programs, and it allows you to quickly host autoscaling and secure code. You’ll get up and running with Twilio Functions using the Twilio CLI and the Serverless Toolkit, which allows you to develop and deploy Functions locally. A Function is a JavaScript function that gets invoked in response to an HTTP request.
Your Twilio Phone Number will get configured to call a Function as a webhook when it receives a message; the Function will then parse the command and call the Notion SDK to modify the habit tracker database appropriately.
Lastly, the Function will send a response with TwiML (the Twilio Markup Language). TwiML is a set of XML instructions that tells Twilio how to handle incoming SMS messages and voice calls. You’ll use the Node.js helper library that comes with functions to create the TwiML.
Now that you have an understanding of the project and the tools you’ll be using, it’s time to get started!
Create the habit tracker database in Notion
Instead of creating a habit tracker database from scratch, you’ll start from Notion’s habit tracker template.
First, ensure that you’re logged into Notion, then click Duplicate template on the template page to create a habit tracker database in your Notion workspace.
After duplicating the template, you should see a page with the database:
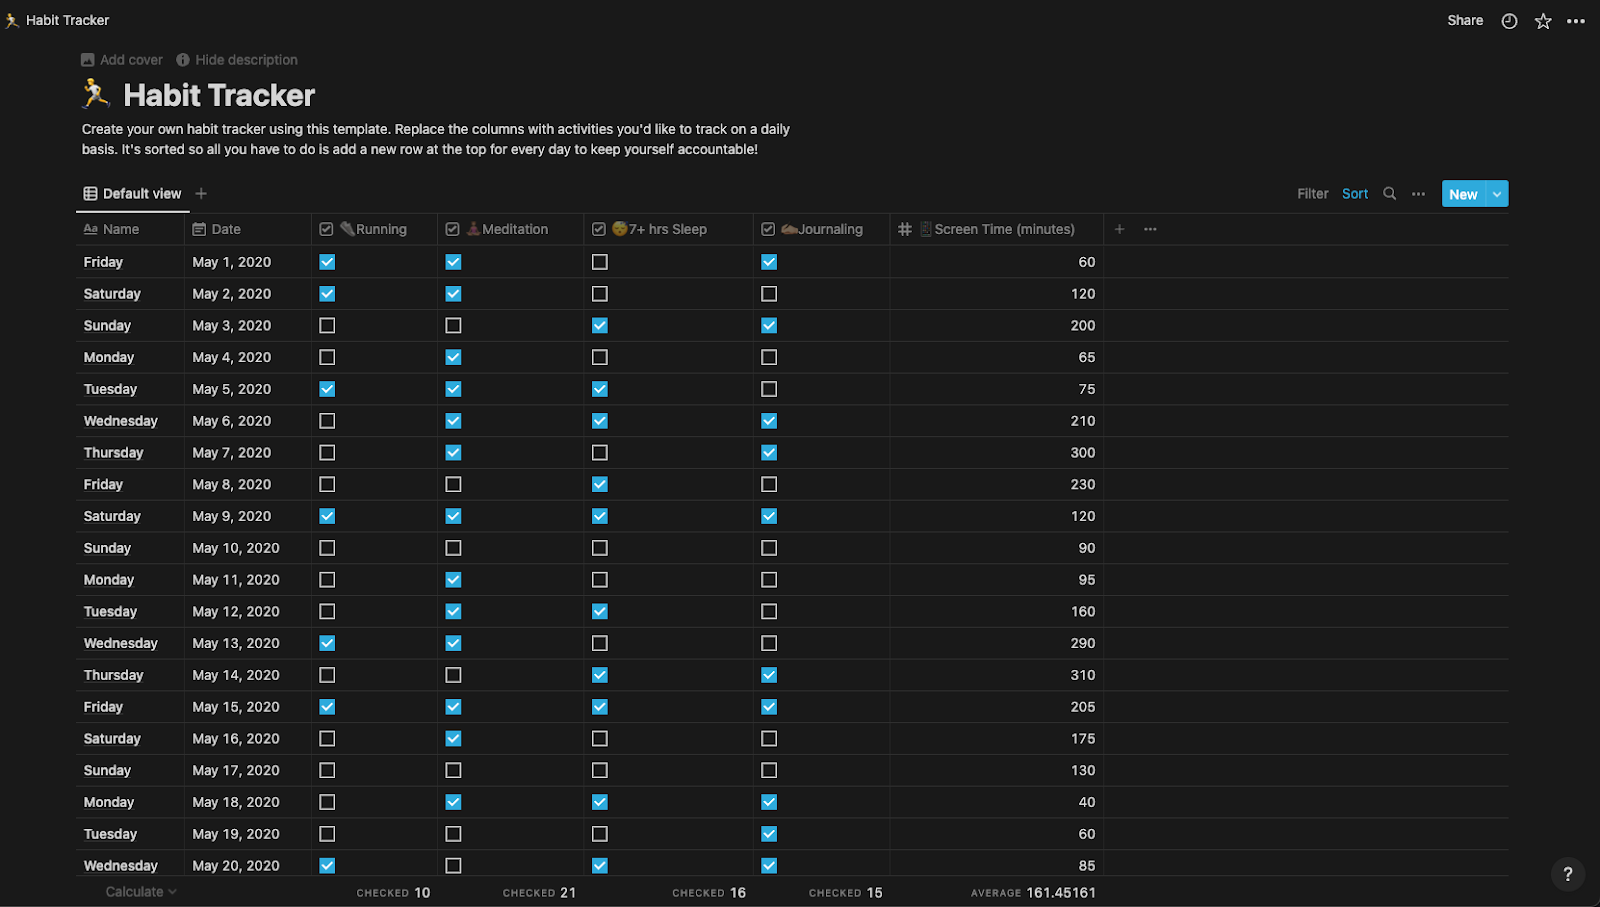
This is a fairly simple database: each date has one entry identified by the Name and Date properties. Habits are represented by checkbox properties; if a habit is checked, then it’s been completed for that day, otherwise, it’s incomplete.
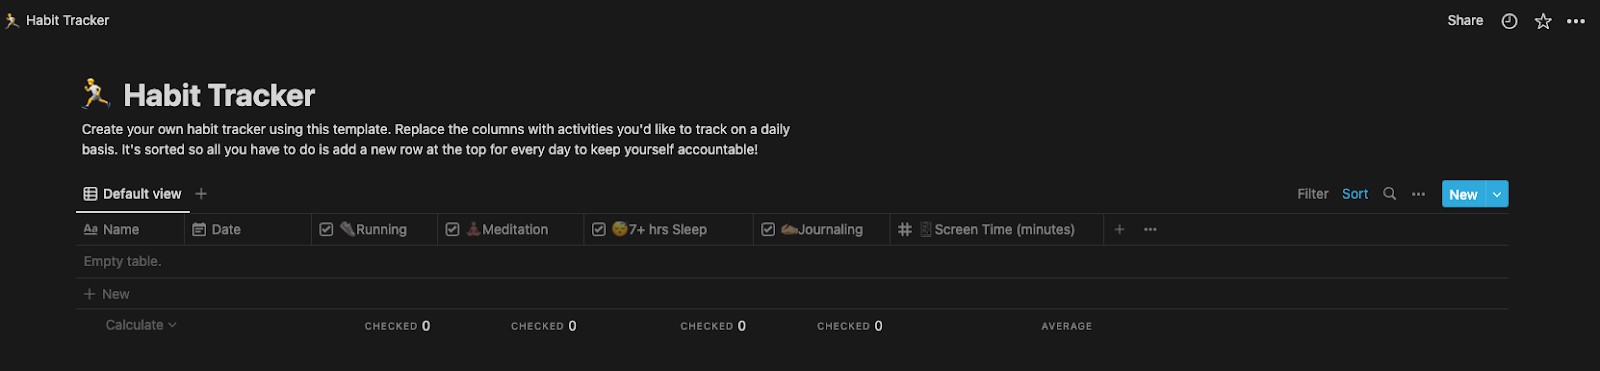
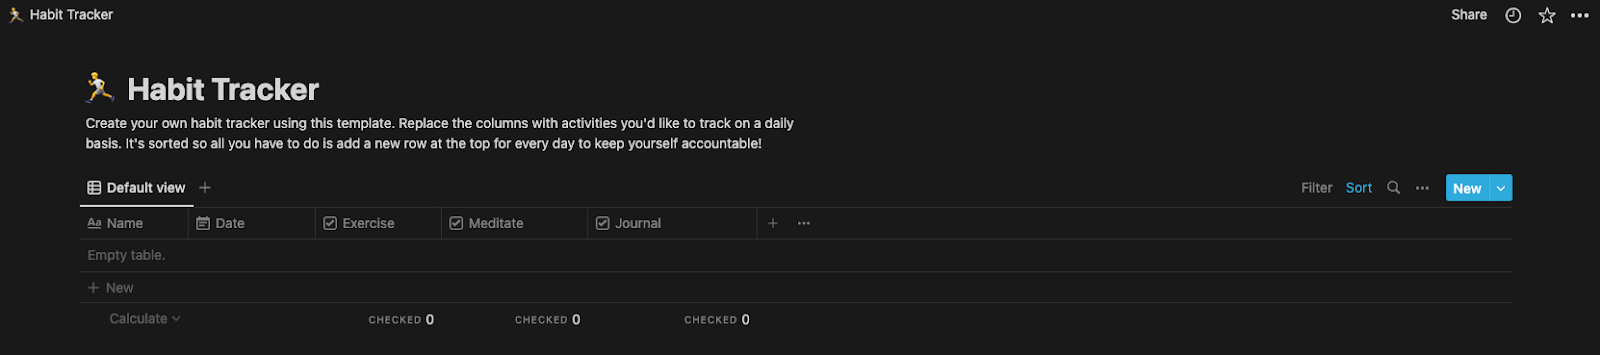
Next, delete all the rows to clean things up. You can select all the rows with the cmd/ctrl + a shortcut and delete them with backspace. This should leave you with an empty database:
For simplicity, you’ll modify the habits so that you’re left with three: Exercise, Meditate, and Journal. Delete the ✍🏼Journaling and 📱Screen Time (minutes) properties by clicking their name and then Delete property in the menu that appears:
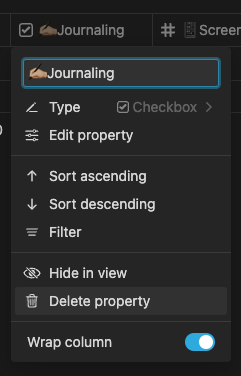
You can rename the remaining three properties by clicking the other property names and editing the title in the same menu. Rename the properties to remove the emojis.
Your cleaned-up database should now look like this:
While you’re on this page, you’ll want to note the database ID, which you’ll need when accessing the database with the SDK. If you’re not using Notion in a browser, click Share in the upper-right of the page, click Copy link, then go to the address in your browser.
The 32-character database ID is the part of the URL before the start of any query parameters (if you have a workspace name configured, you’ll see that in the URL before the database ID): https://www.notion.so/<workspace name if configured>/<database ID>.
Create the Twilio Serverless project
With your database set up, it’s time to create your local Twilio Serverless project with the Twilio CLI and Serverless Toolkit. Run the following command to scaffold a project with the name habit-tracker:
serverless:init creates a file structure that the Serverless Toolkit requires, configuration files, template Functions, and other files needed for your Function. Open the habit-tracker directory in your code editor and observe the following structure (some files omitted for brevity):
The project items that this tutorial is most concerned with are assets, functions, and .env.
assets
This directory contains static files, such as HTML files and images, that are not functions but should be accessible to Functions. For this project, you’ll add JavaScript modules to this directory that will be requireded in a Function. You can learn more about assets in the documentation.
.env
Environment variables accessible to Functions at runtime are added to the .env file. You can learn more about the behavior of certain environment variables in the documentation.
functions
The functions directory contains Functions – JavaScript files that handle incoming HTTP requests.
The path to each function is determined by the directory structure: for example, the reply.protected.js function is available at /sms/reply.
Each Function file exports a handler function which gets called when the Function receives a request. The handler receives three arguments: context, event, and callback.
context
The context object contains information about the current execution environment such as environment variables stored in the .env file.
event
This argument has the HTTP GET or POST parameters passed to the Function. This project will use the Function as an SMS webhook, so in this case, event also contains data such as the sender’s phone number and the text content of the SMS.
callback
The callback function must be called when your code is finished to terminate the execution of the function and emit responses.
You can learn more about the handler function in the documentation.
Set up the Notion SDK
Before you can access Notion through the SDK, you need to create a Notion integration and install the JavaScript client locally.
A Notion integration gives your program access to certain capabilities within your workspace. To access pages with the API, pages must be shared with the integration (similar to how you would share a page with another email address).
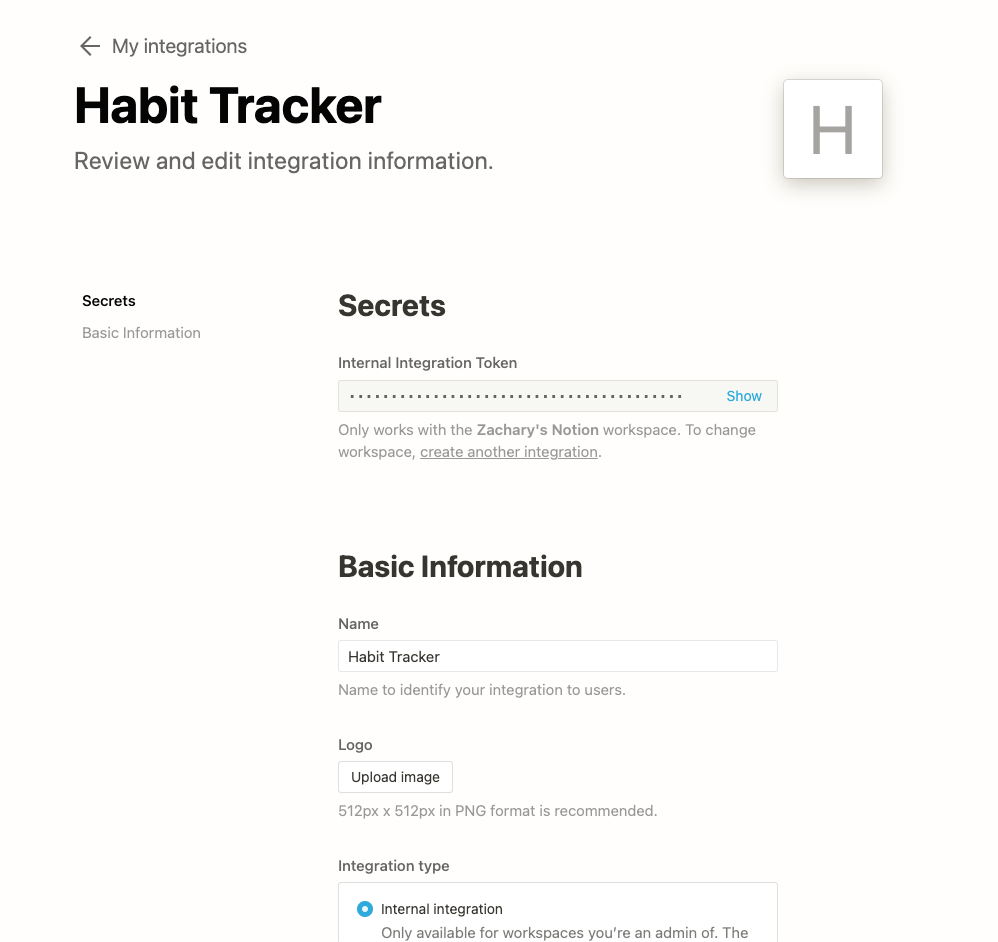
In this case, you’ll share the habit tracker database that you created earlier with your integration. You’ll then use the integration’s Internal Integration Token with the SDK to authorize requests.
Create the Notion integration
To create an integration for your habit tracker:
- Navigate to your Notion Integrations
- Click New integration
- Enter “Habit Tracker” in the Name field
- Ensure the appropriate workspace is selected for Associated workspace
- For Content Capabilities, ensure Read content, Update content, and Insert content are selected
- Click Submit
This should create your integration and take you to the integrations detail page:
Next, you’ll need to share your habit tracker with your integration. Navigate back to your database and:
- Click Share in the upper right corner
- In the text field, search for your “Habit Tracker” integration and click it
- Click Invite
You should now see your integration appear below:

Set up the Notion SDK
Now you’ll need to install the Notion SDK package. In the root of your project directory, run the following command:
Lastly, add your integration’s Internal Integration Token and database ID to your .env file:
Set up the SMS webhook Function
Next, you’ll add the initial code to your Function; this is the code that responds to an incoming text message. Remove the boilerplate code from functions/sms/reply.protected.js and add the following:
Note that the code has TODO's where you’ll access Notion.
The first thing this code does is import the Notion SDK client. Then, within the handler function, it initializes the NotionClient with the NOTION_AUTH_TOKEN environment variable you added in the previous section. The next lines set up the MessagingResponse object to build the TwiML response and get the command from the incoming message.
Recall that the habit tracker accepts three commands: log <habit name>, add <habit name>, and summary. The switch handles each command, gets the habit name when appropriate, and sets the response text.
Finally, the handler function sets the TwiML response and terminates the execution of the Function by calling the callback.
Implement the Notion helper functions
Next, you’ll implement the helper functions that the main webhook Function calls in response to a command; these get called where the TODO's are now. Each helper function will correspond to one of our three commands:
logHabitwill log a habit in response tolog <habit name>addHabitwill add a habit in response toadd <habit name>summarywill return a summary of the current day’s habits in response tosummary
First, create a file called notion.private.js in the assets folder for these functions.
Implement logHabit
Add the following code to assets/notion.private.js:
This code first queries the database with client.database.query for a page whose Date property is equal to the current day. If there is a page for the current day, it calls client.pages.update and marks the page’s checkbox property as true for the habit that is passed in.
If there isn’t a page for the current day, the function creates a new page with client.pages.create and sets its Name property (i.e., the page’s title) to the day of the week (e.g., “Friday”). It also sets the Date property to the current date and toggles the checkbox property for the passed in habit.
Note that the caller of this function will pass in the Notion client, databaseId, and habit. The first two parameters come from the Function’s environment variables and the habit is retrieved from the message body.
Implement addHabit
After your logHabit implementation, add this addHabit function:
Then, add addHabit to the exports:
This code calls client.databases.update to add a new checkbox property whose name is the value of habit to the database. Note that you don’t need to specify the other existing properties.
Implement summary
Finally, add the following code after the addHabit function:
Then, add getDailySummary to the exports:
This function returns a habit summary for the current date. It returns an object whose property names are the habit tracker’s habits and whose values are true or false.
It first queries the database for an entry for the current date and retrieves the database with client.databases.retrieve. The databaseResponse is used to map habit property IDs to their names for easy lookup later on.
If there’s no entry for today, it returns early and creates a summary object with false for each habit. If a page for today exists, it gets the habit property information with client.pages.properties.retrieve and constructs and returns the summary object.
Complete the webhook Function implementation
Now that you’ve implemented the Notion helper functions, it’s time to wire everything together and call them in the Function handler. Replace the TODO comments with the appropriate functions in the switch statement:
Recall that the private.js extension makes assets/notion.private.js a private asset. The runtime will rename private assets, so you need to require the path provided by Runtime.getAssets() instead. You can learn more about importing private assets in the documentation.
Set up the SMS webhook to call the Function
With the Function fully implemented, it’s time to set up your Twilio Phone Number’s webhook to call the Function when a text message is received.
The Serverless Toolkit comes with ngrok, which you’ll use to make your local Function server publicly available to the Internet. Run the following command to start the Function locally with an ngrok connection:
Once the server starts, copy the ngrok URL for the /sms/reply route listed under Twilio functions available.
Next, you’ll specify the ngrok URL as the webhook URL for your Twilio Phone Number. In the Twilio Console, navigate to your phone number:
- Click Phone Numbers under the Develop tab in the left navigation (if this isn’t available to you in the navigation, you can go to the Numbers page using this link)
- Click Manage
- Click Active numbers and select your number
- Scroll down to the Messaging header
Under A MESSAGE COMES IN, select Webhook, enter the URL, and click Save:

Test the habit tracker locally
That’s it; you’re ready to go! Try texting your Twilio Phone Number with the following commands:
log exerciseadd readsummary
You should see the Notion database updated in real-time in response to the log and add commands.
Next steps
With your habit tracker working locally, a good next step is deploying your code to Twilio Functions. You can learn how to deploy your Twilio Function at Twilio’s documentation.
A great way to learn is to take a project and modify it or add more features. Here are a few ideas of ways you can extend this project:
- Allow multi-word habits
- Respond with a random encouraging message when a habit is logged (e.g., “Way to go!”, “Keep it up!”)
- Add a command to retrieve a weekly habit summary
- Send a reminder to complete a habit if it hasn’t been completed by a certain time each day
- Send a habit summary at the end of the day or a time codified in Notion
- Allow habit tracking at irregular intervals (e.g., habit x is completed daily and habit y is completed weekly)
- Reply with a habit’s streak when it’s logged (e.g., “You’re on an x day streak!”)
- Add better error handling
Conclusion
Congrats – you’ve built a habit tracker with Twilio Functions and Notion! I hope you’ll use this project to build up a habit or reach a goal. Here’s a summary of everything you learned:
- How to create a Twilio Function with the Twilio CLI and Serverless Toolkit
- How to use the Notion SDK to query, retrieve, create, and update a database; create and update a page, and retrieve a database’s properties
- How to receive and respond to incoming SMS messages locally with Twilio Functions and TwiML
Zach is a software engineer based in Washington State. He works with JavaScript and React and enjoys writing about code on his blog. You can get in touch with him on LinkedIn, Twitter, or at me[at]zachsnoek.com.


Related Resources
Twilio Docs
From APIs to SDKs to sample apps
API reference documentation, SDKs, helper libraries, quickstarts, and tutorials for your language and platform.
Resource Center
The latest ebooks, industry reports, and webinars
Learn from customer engagement experts to improve your own communication.
Ahoy
Twilio's developer community hub
Best practices, code samples, and inspiration to build communications and digital engagement experiences.