Automatically Forward Text Messages with No Code Using Twilio Studio
Time to read:
July 06, 2022
Written by
Reviewed by
")
This article explains how to forward any incoming text messages sent to your Twilio phone number to another number automatically using a no-code solution called Twilio Studio.
Twilio Studio allows you to create all kinds of communication apps. Studio works by providing a blank canvas where you can drag and drop configurable widgets that handle different tasks. You can connect these widgets together to create application flows.
Prerequisites
To get started with this tutorial, you’ll need the following:
- A free Twilio account (sign up with this link and get $10 in free credit when you upgrade your account)
- A Twilio phone number
Create a Studio flow
Navigate to the Studio Flows section of your Twilio Console.
To create a new flow, click the blue + button toward the top left of the screen. If you’ve never created a Studio flow before, your button will say Create new Flow.
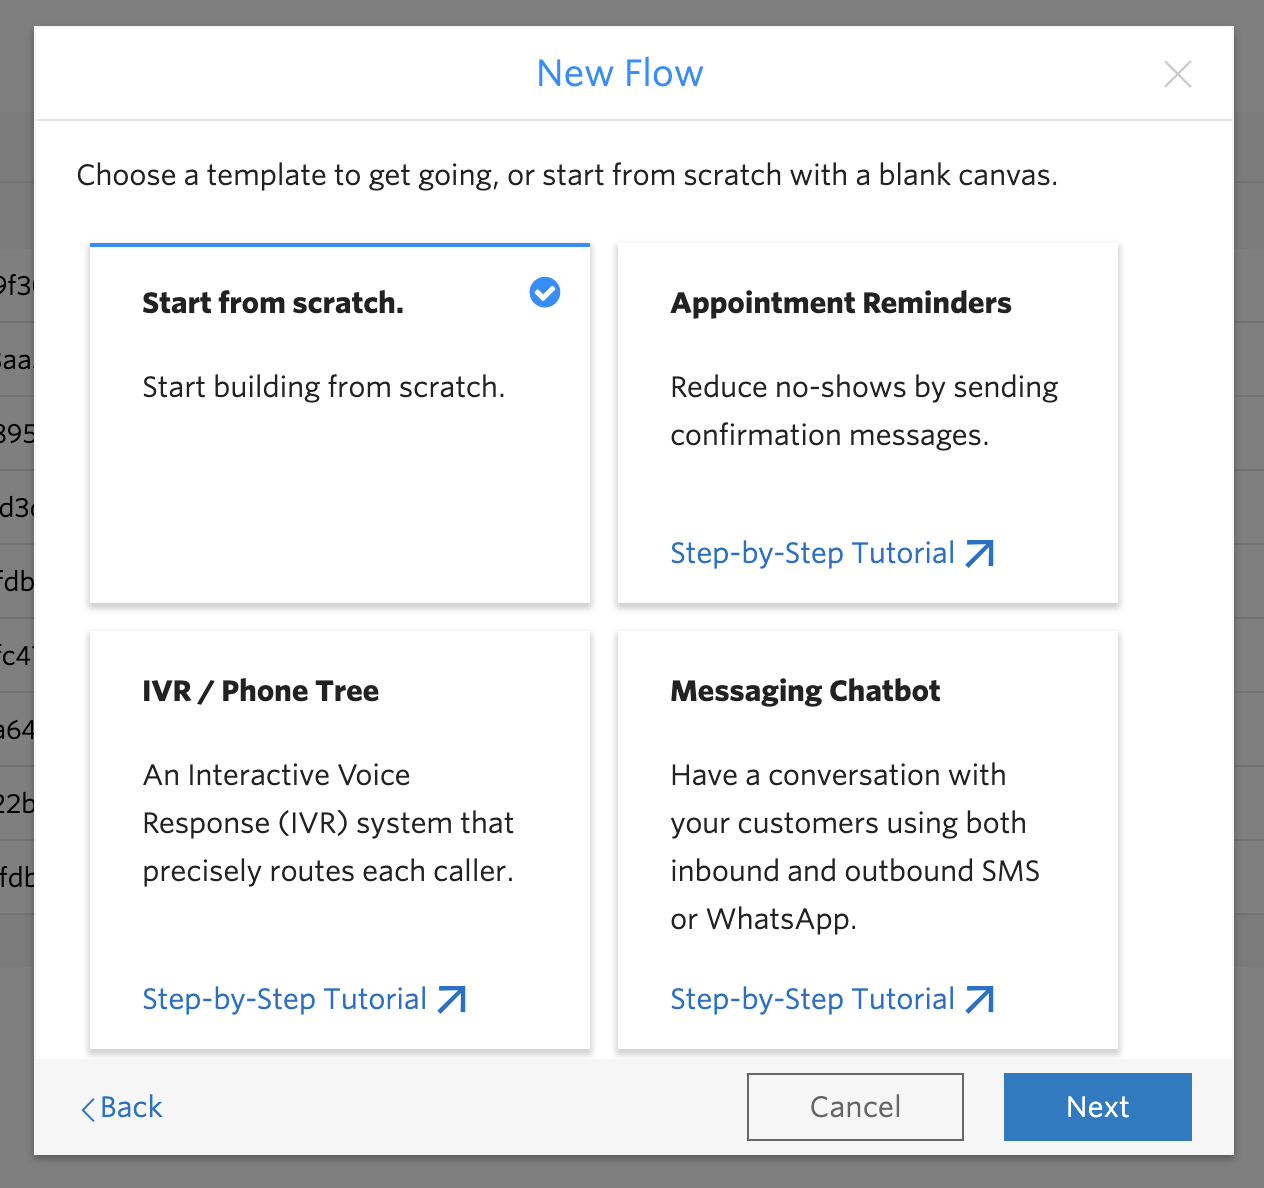
You’ll be prompted to give your flow a name. Type in “auto-forward” or any other name you like, and then hit Next.
Select the Start from scratch option and then click Next again. This will open your new Studio flow canvas.
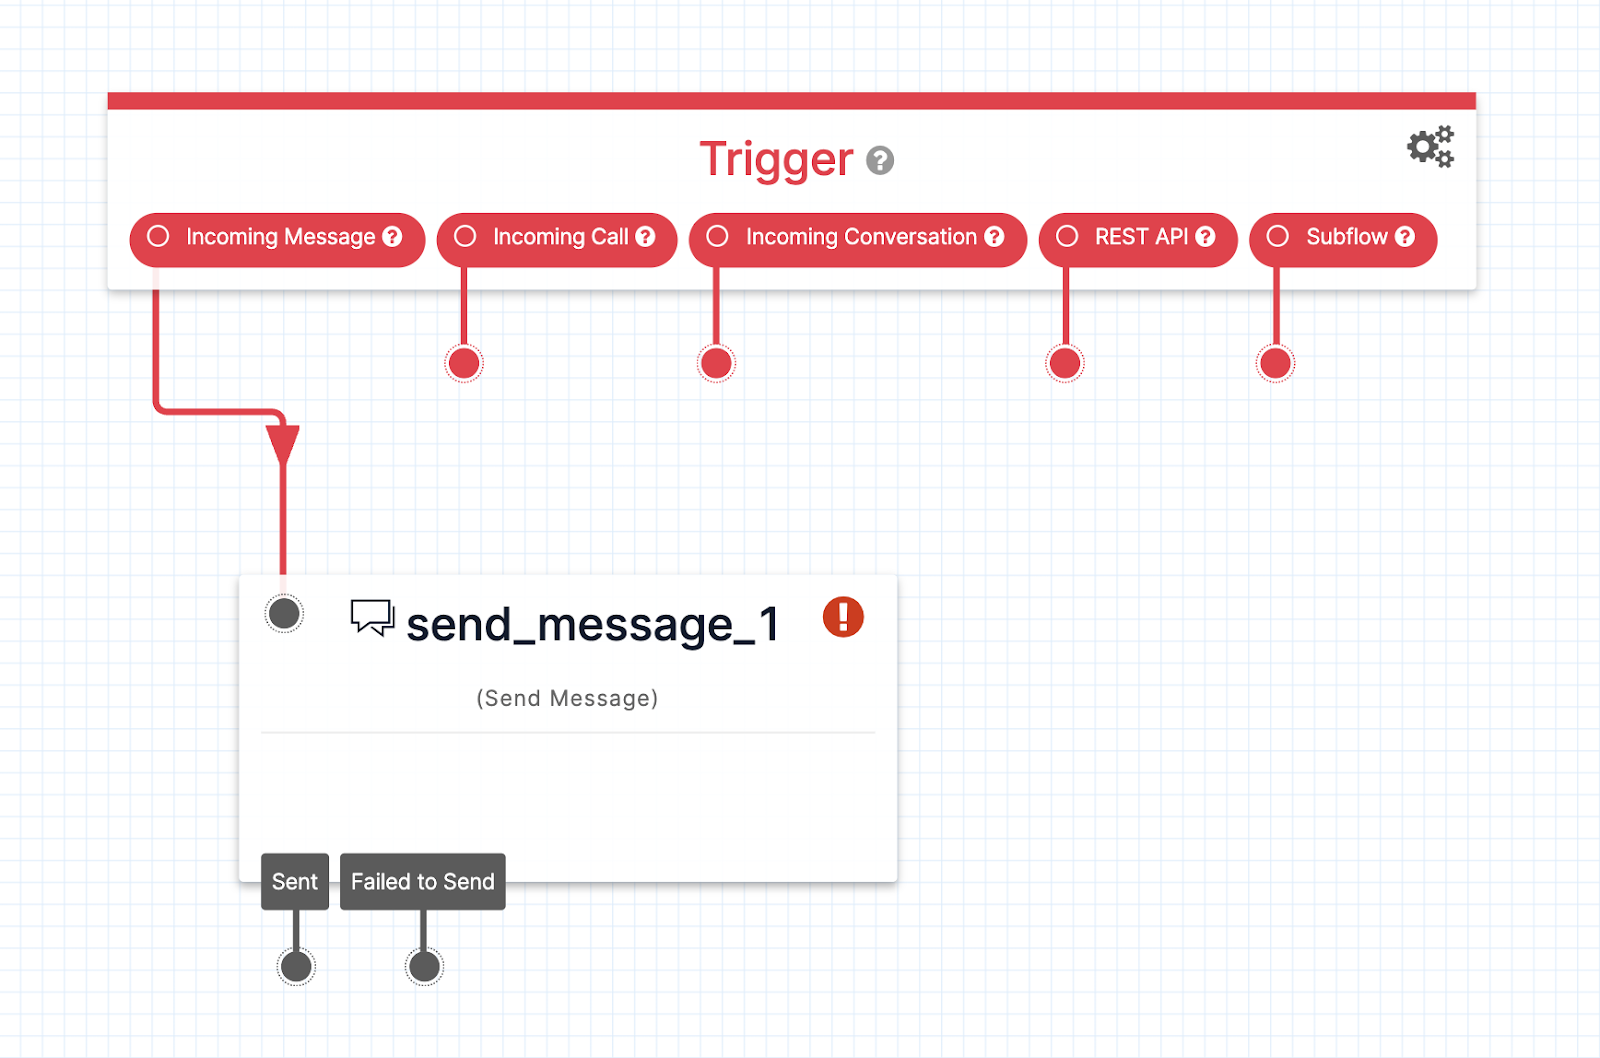
Toward the top of the canvas, you will see a widget called Trigger. The trigger is the action that will cause your Studio flow – your app – to run. There are several possible triggers: an incoming message, an incoming call, an incoming Conversation, an incoming API request, or a subflow.
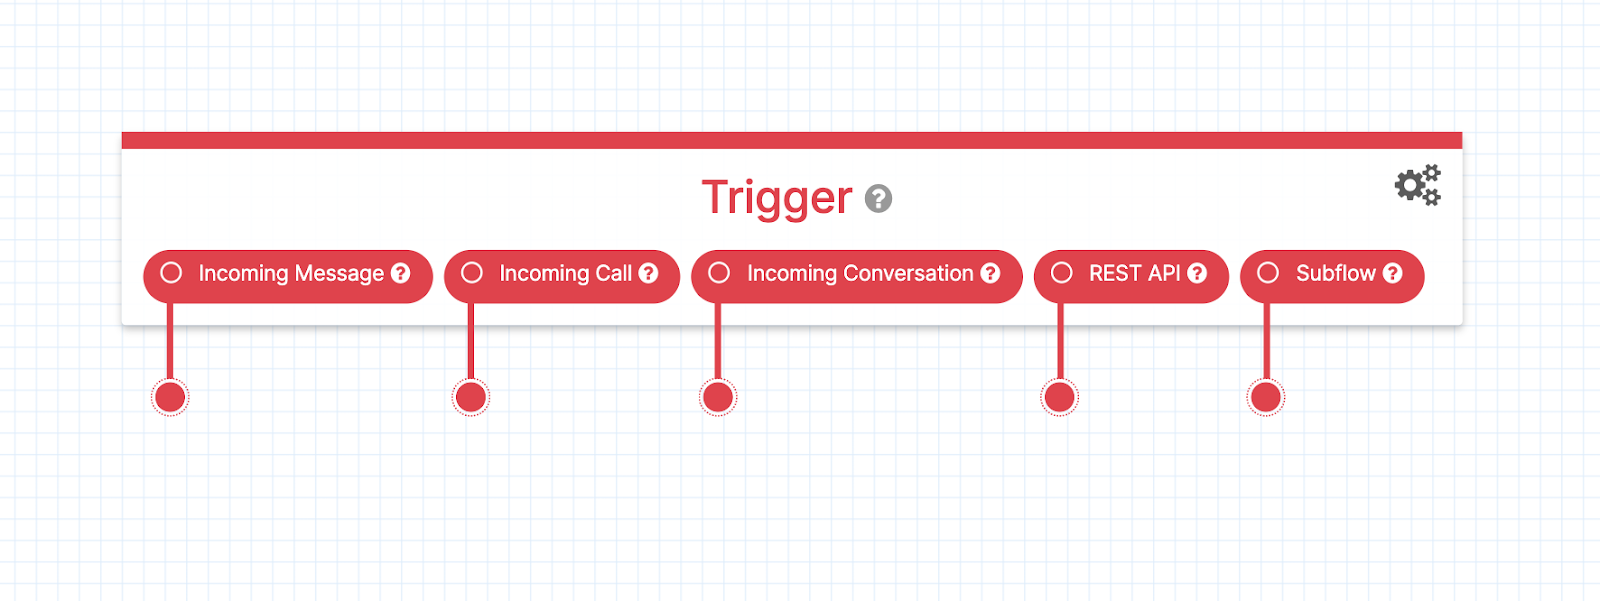
In this case, the Studio flow will be triggered to run when a message comes in.
The red line and dot descending from each of the Trigger options is a connection line. Each widget in a Studio flow has at least one connection line. You can drag the dot at the end of each line to another widget in order to connect them, and string together a flow of actions.
When your Twilio phone number receives an incoming message, it will take the contents of the incoming message and send it in a new message to any number of your choice.
This means you need to add a Send Message widget from the widget library to the canvas, and then drag the Incoming Message connection line to the new Send Message widget.
I’ll show you how to do this now.
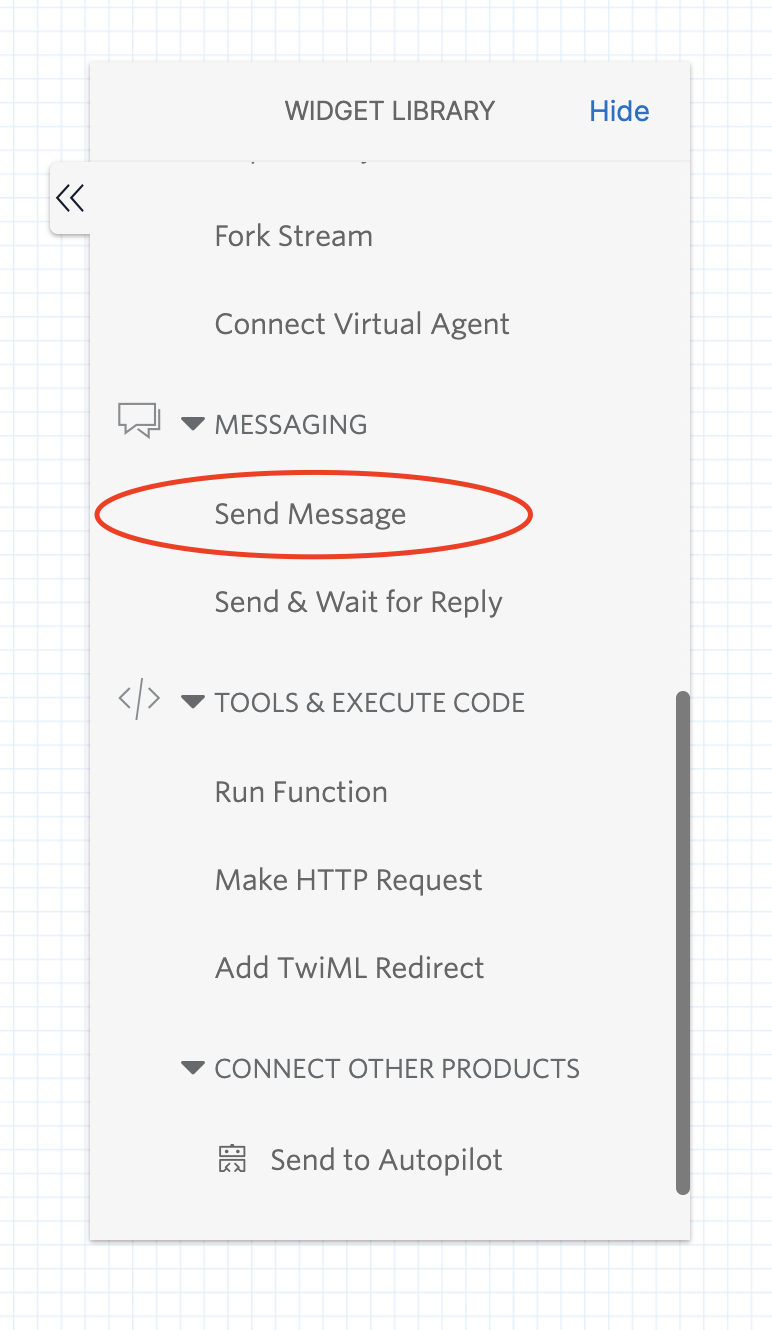
Add the Send Message widget
On the right side of your Studio canvas is a Widget Library. Scroll down in the Widget Library until you see the MESSAGING heading. Under that heading, find Send Message and drag the words to your canvas.
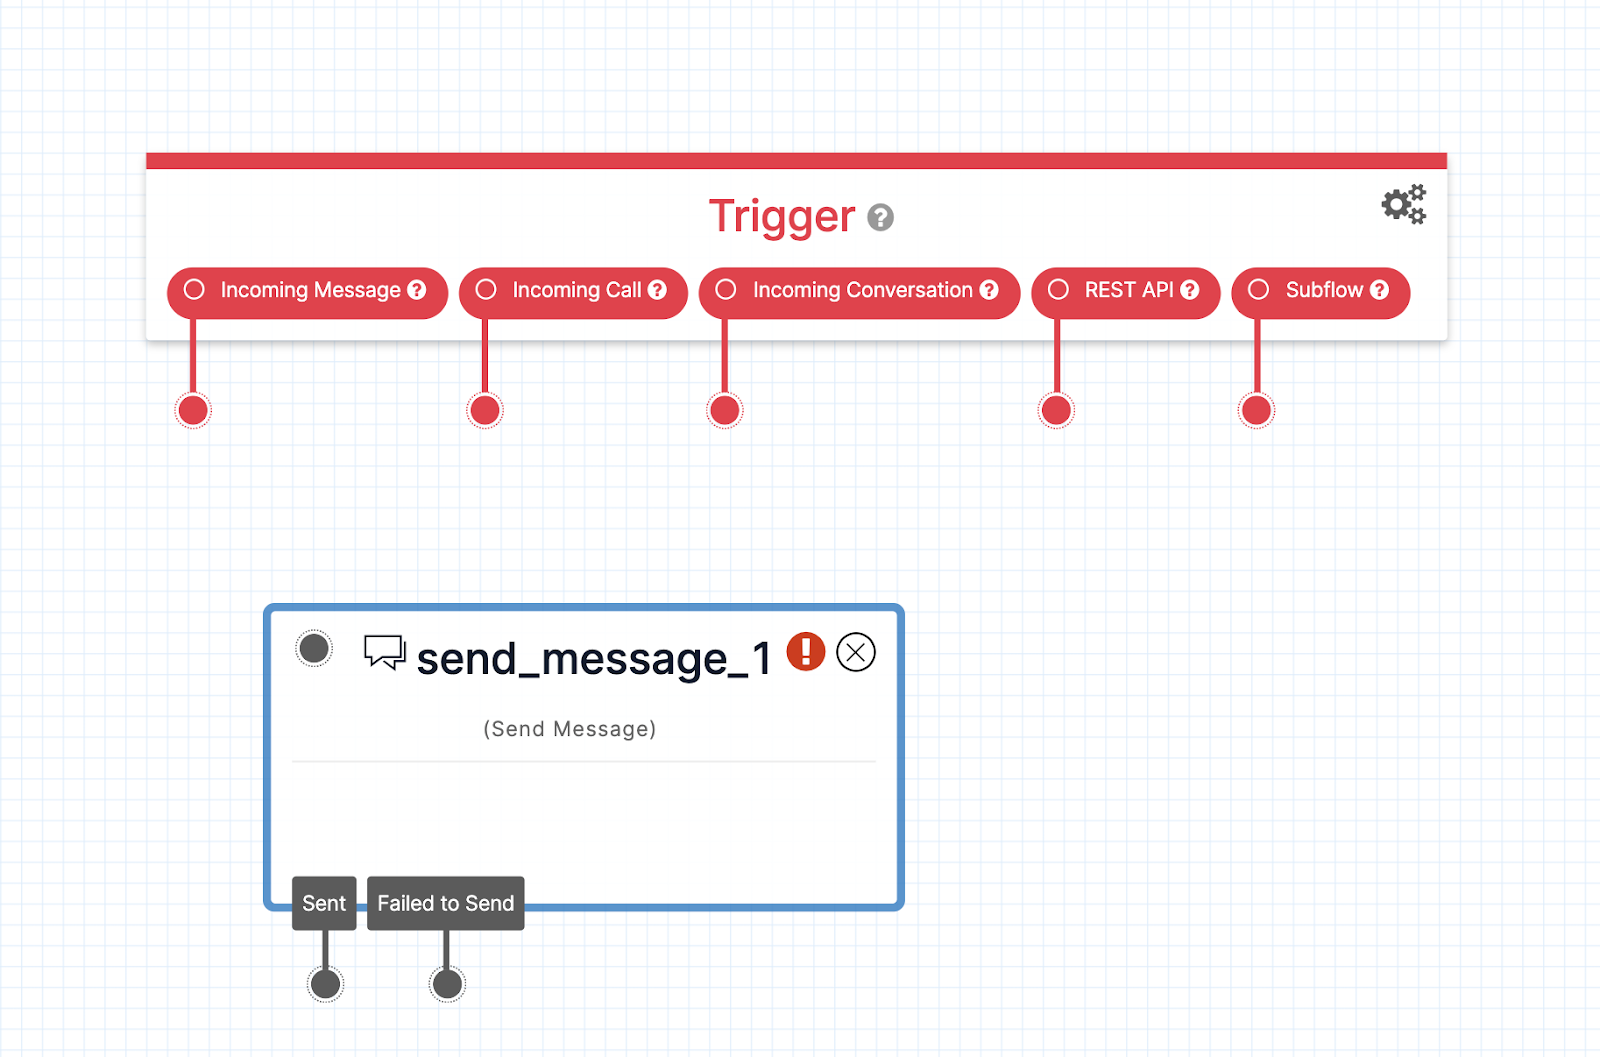
Now that a Send Message widget is added to the screen, you can drag the dot at the end of the Incoming Message connection line to the gray dot in the top-left corner of the Send Message widget.
Configure the Send Message widget
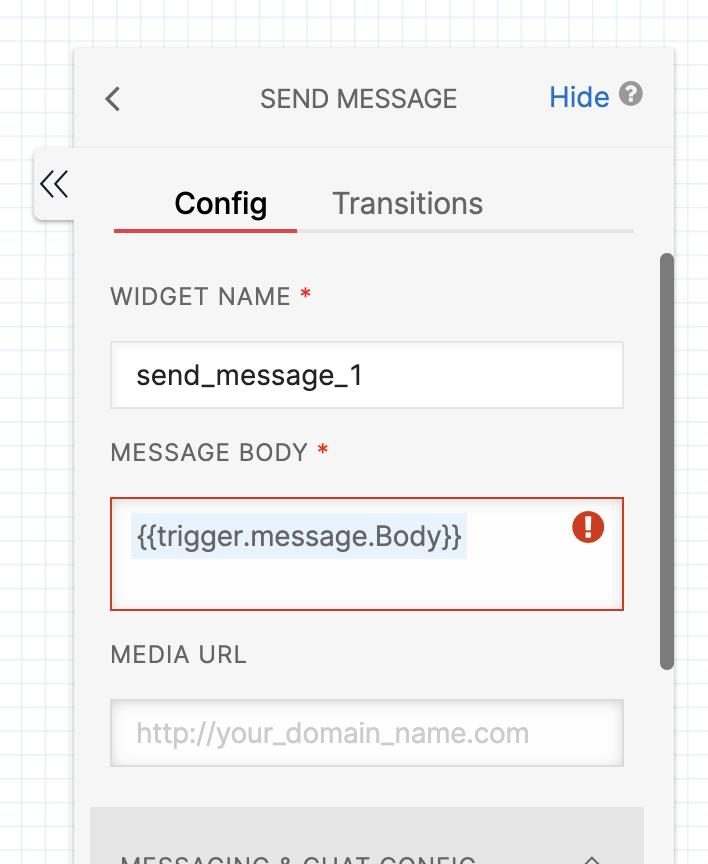
Now that you’ve set up the scaffolding for your app, you need to configure the Send Message widget. To configure it, click on it so it’s highlighted, and then look in the Widget Library to see the widget configuration fields for the widget you’ve clicked on.
Copy the following line and paste it In the MESSAGE BODY field in the configuration section.
This is a piece of code that refers to the body of the incoming message that triggered your Studio flow. This message body will be sent to your desired recipient via this Send Message widget.
Click the gray box labeled MESSAGING & CHAT CONFIG then scroll further down in the configuration area until you see the SEND MESSAGE TO heading. Delete the contents of this field, and replace it with the phone number of your choice. Be sure to use E.164 format for your number, ex. +15551235555.
Click Save at the bottom of the configuration area.
That’s it for widgets! If you’d like to forward this message to any additional phone number, repeat this process with a new Send Message widget for every recipient. Connect the widgets using the previous one’s connection line.
Click Publish at the top of the canvas to save your work and deploy it.
Configure your Twilio phone number
The last step is to attach this Studio flow to your Twilio phone number. Navigate to the active phone numbers section of the Twilio Console.
Find your chosen phone number in the list and click on it to open its configuration page.
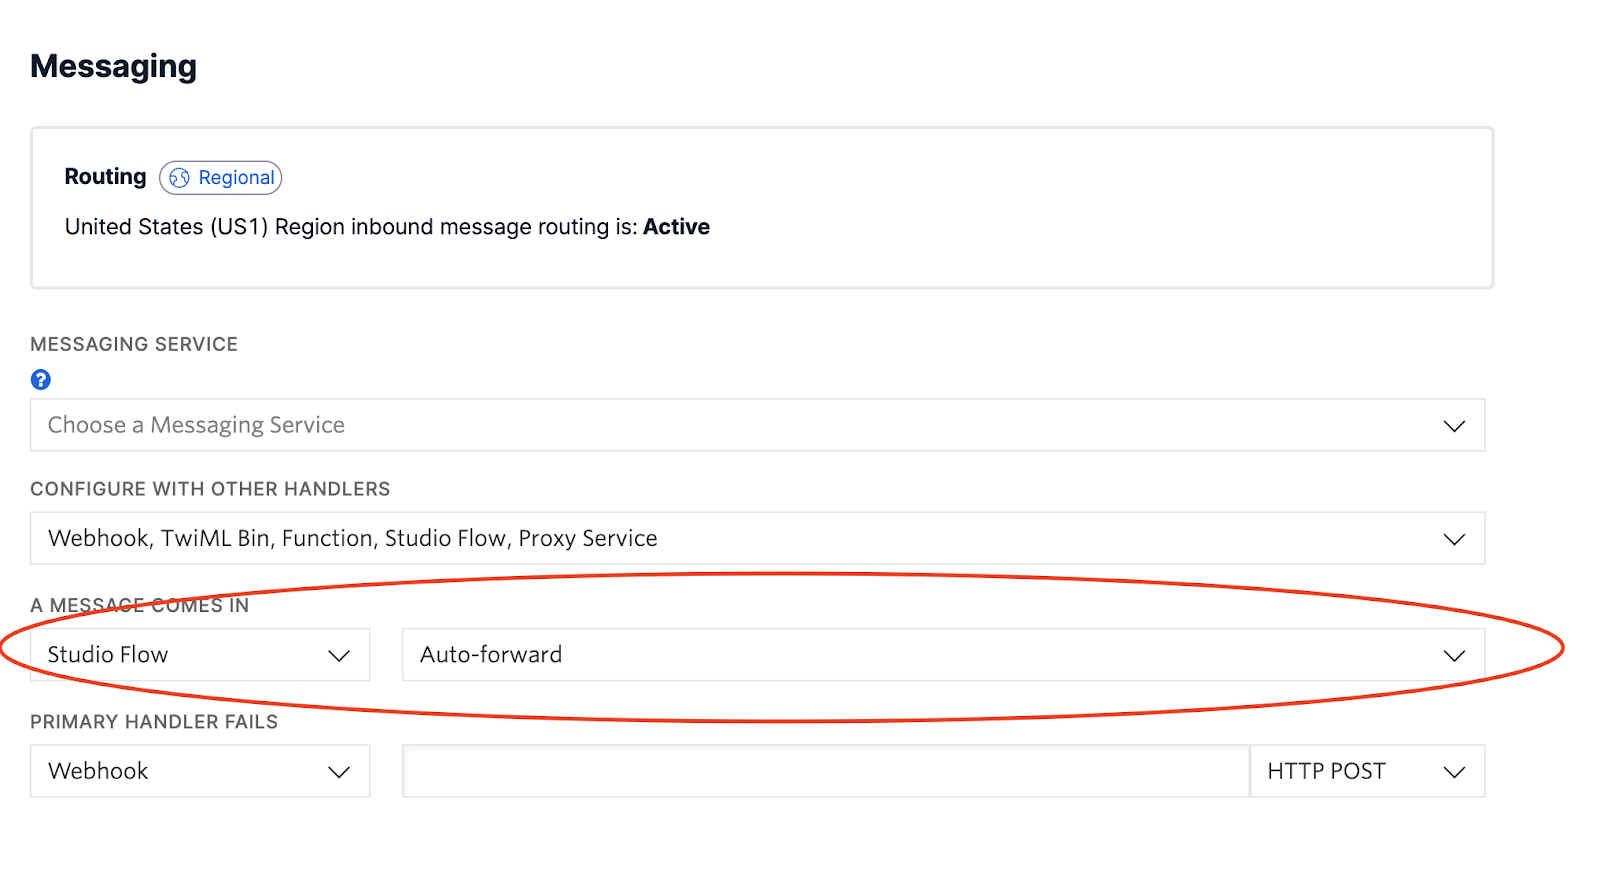
Scroll down until you find the Messaging heading. Under A MESSAGE COMES IN select Studio Flow from the left hand drop down and then select your new flow from the right hand drop down.
Click Save at the bottom of the page.
Congratulations! Any messages sent to your Twilio phone number will now be forwarded to the number of your choosing.
If you enjoyed working with Twilio Studio, you might try using it to verify phone numbers, send reminders, or build a chatbot.
Ashley is a JavaScript Editor for the Twilio blog. To work with her and bring your technical stories to Twilio, find her at @ahl389 on Twitter. If you can’t find her there, she’s probably on a patio somewhere having a cup of coffee (or glass of wine, depending on the time).


Related Resources
Twilio Docs
From APIs to SDKs to sample apps
API reference documentation, SDKs, helper libraries, quickstarts, and tutorials for your language and platform.
Resource Center
The latest ebooks, industry reports, and webinars
Learn from customer engagement experts to improve your own communication.
Ahoy
Twilio's developer community hub
Best practices, code samples, and inspiration to build communications and digital engagement experiences.